You can absolutely grow kumara (sweet potato) in water, and it works best as a two-stage process: first you root the tuber or slips in water, then you transfer them to soil or a full hydroponic setup to produce tubers. Water alone is enough to sprout slips and grow a healthy root system, but if your goal is actual kumara to eat, you'll eventually need nutrients and a growing medium. This guide covers both stages, so you know exactly what you're doing and why at every step. Panikoorka can be grown in water using the same warm, oxygen-rich sprouting approach, then moved into a proper hydroponic or soil setup when the slips are established how to grow panikoorka in water.
How to Grow Kumara in Water: Step-by-Step Guide

Marcus Holloway
19 Jun 2026
Choosing a kumara and getting it ready for water sprouting
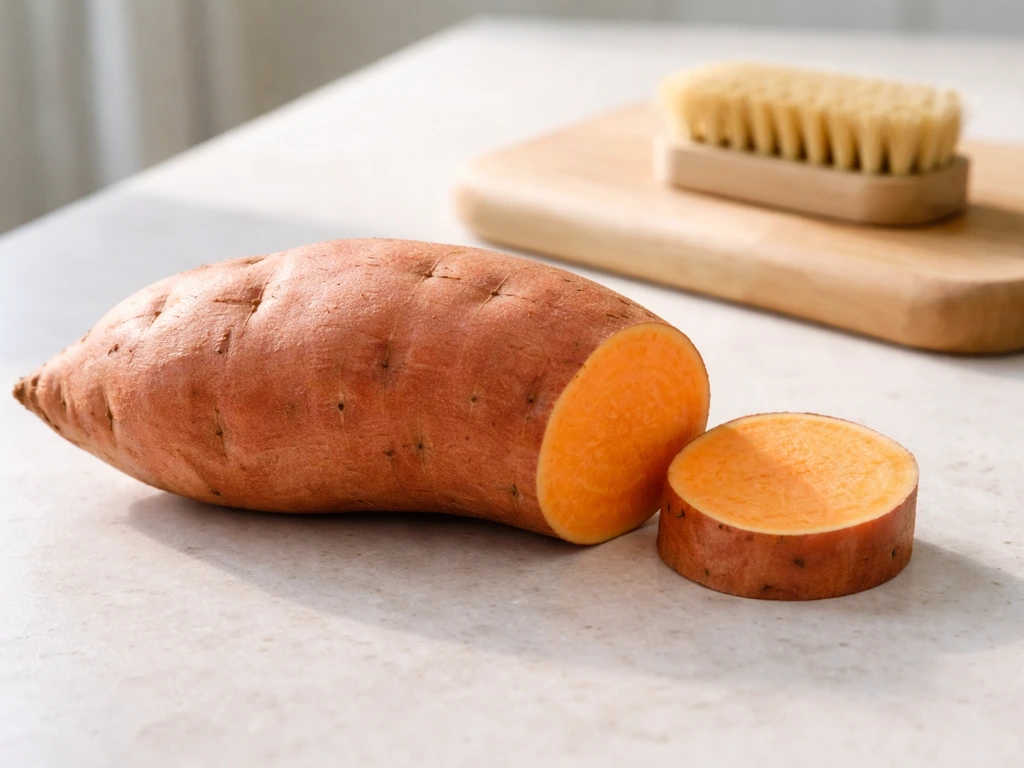
Start with a healthy, firm kumara that shows no signs of rot, soft spots, or scurf (a rough, brownish skin disease that looks like dried dirt but doesn't wash off). If you mean coconut (not kumara), the key is starting with fresh coconut and keeping the water clean and temperature-stable for sprouting how to grow coconut in water.
Scurf is caused by a fungal pathogen that can transfer directly into your water setup and kill your slips before they even get started. If you're sourcing from a farmers market or garden centre, ask specifically for certified disease-free seed roots if you can get them. Supermarket kumara sometimes works fine, but many are treated with a sprouting inhibitor, so your results will be inconsistent.
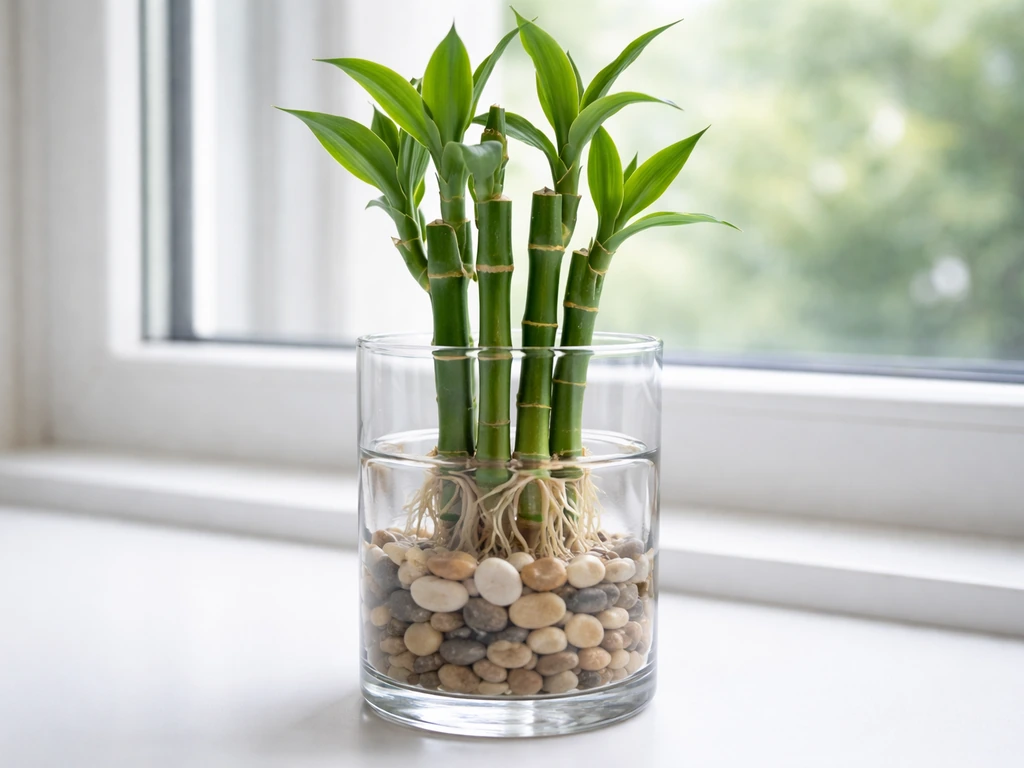
You have two approaches here. The first is to sprout the whole tuber in water, letting slips grow directly from the root. The second is to take cuttings (slips) from an already-sprouted tuber and root those cuttings in water instead. If you want a different plant outcome, you can use a similar water-propagation idea when learning how to grow lucky bamboo in pebbles root those cuttings in water.
Both work, but sprouting the whole tuber first in a warm, humid spot for 2–3 weeks before moving it to water gives you much faster and more reliable slip production. Pre-warming at around 27–29°C (80–85°F) with high humidity (around 85–90%) jumpstarts the process. If you skip this step and go straight to a cold water jar on a bench, expect sluggish results or no sprouting at all, which is one of the most common frustrations people run into.
Before placing any kumara or slip into water, give the surface a rinse and let cut ends air-dry for a couple of hours. This light callusing helps prevent rot from setting in immediately at the cut surface, which is where most early failures start.
Best water setup for kumara
Container choice and water level
A wide-mouth glass jar, ceramic pot, or opaque container works well. Opaque containers are better because they block light from hitting the water, which dramatically reduces algae growth. If you use a clear jar (and they're fine for short-term sprouting), keep it out of direct sunlight. For a whole tuber, use a container large enough so the tuber sits partially submerged: the bottom third to half of the tuber should be in water, with the top portion above the waterline. This is important. Fully submerging the tuber creates anaerobic conditions that promote rot fast.
For individual slips, place them so only the bottom 2–3 cm (about an inch) is submerged. Submerging more of the stem than necessary increases the chance of stem rot without giving you any benefit in rooting speed.
Supporting the tuber above the water

The classic method is toothpicks or wooden skewers pushed horizontally into the sides of the tuber so it rests above the rim of the jar, with the lower end dipping into the water. It looks a bit agricultural-science-project, but it works. Alternatively, a mesh net pot sitting over a bucket or tote, with the roots just touching the water, works even better because it also allows airflow around the stem base.
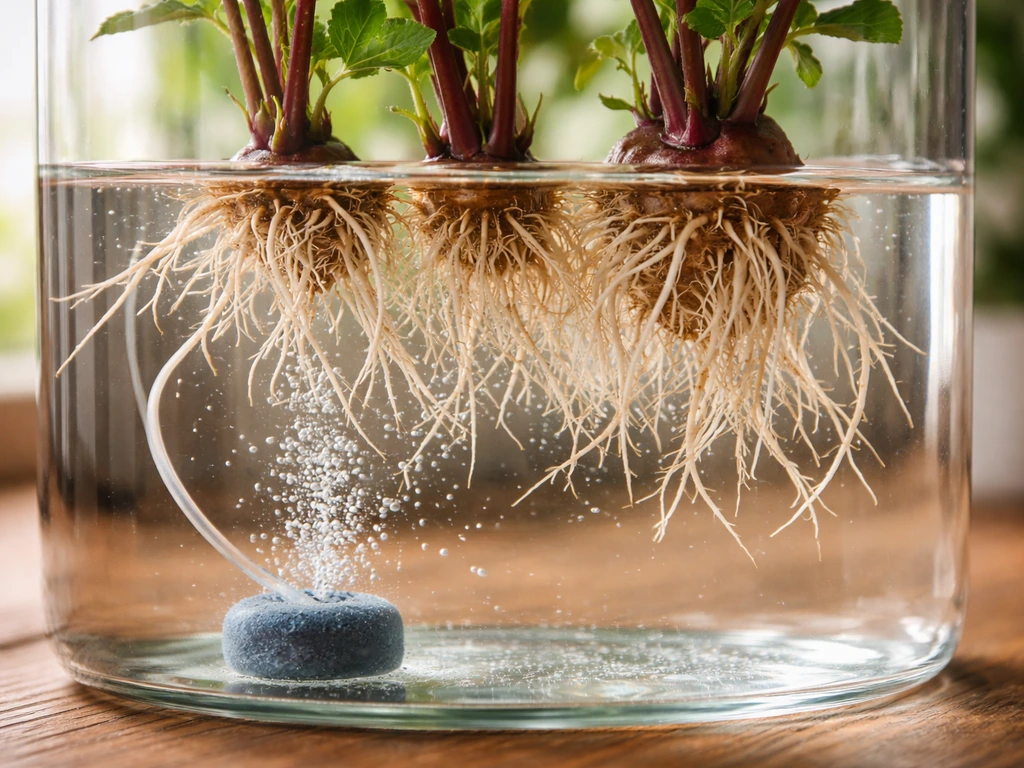
Aeration
Still water in a closed container quickly becomes oxygen-depleted and starts harbouring bacteria. For a simple jar setup, frequent water changes (more on that below) handle oxygenation adequately. If you're scaling up to a larger container or want to run a more proper hydroponic water culture, add a small aquarium air pump with a stone diffuser. This keeps dissolved oxygen levels up, which directly supports root health and prevents the slimy, foul-smelling rot that frustrates so many first-timers.
Light, temperature, and timing
Temperature is the single biggest variable in whether your kumara sprouts quickly or just sits there doing nothing. The sweet spot for sprouting is 24–28°C (75–82°F). Below 20°C, sprouting slows dramatically or stops entirely. I've had jars sitting on a cool windowsill in autumn that showed zero movement for three weeks, then moved them next to a heat mat and had sprouts within ten days. If you're not in a warm season, a seedling heat mat under the container makes a real difference.
Once sprouting begins, you can ease the temperature down slightly to around 21–24°C (70–75°F). This is actually beneficial: very high heat after sprouting encourages leggy, weak growth rather than compact, well-rooted slips.
For light, kumara slips need bright indirect light or a grow light at this stage. Aim for 14–16 hours of light per day. A sunny windowsill can work, but direct sun through glass in warmer months can overheat the water and cook the roots. If you're using a grow light, position it 20–30 cm above the tops of the slips. Without enough light, slips become pale, stretched, and spindly, and they root poorly.
Timeline-wise, expect visible sprouts from a pre-warmed tuber within 2–3 weeks. Slips are typically ready to take or transfer once they're 15–25 cm (6–10 inches) long and have developed a visible root cluster at the base. If you're starting from cold with no pre-warming, budget 4–6 weeks or more.
Water quality and nutrients
How often to change the water
In plain-water propagation, change the water every 2–3 days. This is non-negotiable if you want to avoid rot and bacterial slime. Stagnant water becomes a breeding ground for anaerobic bacteria within days, especially in a warm environment. When you change the water, use room-temperature water (cold water can shock the emerging roots), and briefly rinse the container to remove any biofilm buildup. Don't scrub aggressively if roots are already forming, as you'll damage them.
When to add nutrients
Plain water is adequate for the first two to three weeks of slip sprouting. The tuber itself supplies enough stored energy to push initial root and shoot growth. Once slips are actively rooting and you want to maintain them in water for longer (or run a true hydroponic water culture), switch to a dilute hydroponic nutrient solution.
If you want to grow kangkong in hydroponics, a similar approach works, but you will need an appropriate leafy-plant nutrient solution and EC targets for leafy growth how to grow kangkong hydroponics. A half-strength general-purpose hydroponic nutrient mix is a good starting point. Be cautious with nitrogen: high nitrogen at this stage pushes lush vine growth at the expense of root development, which is the opposite of what you want.
pH and EC basics
Target a pH of 5. 8–6. 2 for kumara in a hydroponic water setup. [The workable range is roughly 5.
](https://extension. missouri. edu/media/wysiwyg/Extensiondata/Pub/pdf/agguides/hort/g06984. pdf)5–6.
5. Outside this window, nutrient lockout becomes a problem even if your solution is perfectly mixed. Research on hydroponic sweetpotato has used starting pH values in the 6. 1–6.
7 range with good results, so you have some flexibility, but drifting below 5. 5 or above 7. 0 causes real problems. Pick up a basic pH test kit or digital pen (they're inexpensive) and check every time you do a water change.
For EC, a starting target of around 1. 0–1. 8 mS/cm is appropriate for young plants; mature hydroponic runs can push to 2. 0–2.
4 mS/cm. If you don't have an EC meter yet, just follow the manufacturer's dilution instructions for your nutrient mix at half-strength to start.
| Parameter | Target Range | Notes |
|---|---|---|
| pH | 5.8–6.2 | Check at every water change; workable band is 5.5–6.5 |
| EC (propagation) | 0.8–1.2 mS/cm | Half-strength nutrient solution for young slips |
| EC (active growth) | 1.8–2.4 mS/cm | Once transplanted into hydroponic system |
| Water temperature | 20–26°C | Avoid fluctuations; cold water shocks young roots |
| Water change frequency | Every 2–3 days | Critical for plain-water setups without aeration |
| Air temperature | 24–28°C (sprouting), 21–24°C (growing) | Heat mat helps in cooler environments |
Moving from water to soil or a hydroponic system
If your goal is just slips to plant out into the garden, transfer them to soil or a container once roots are 3–5 cm long and the slip itself is 15–25 cm. If you want to grow kangkong in soil instead, use well-draining, consistently moist soil and plant cuttings or seedlings in warm weather how to grow kangkong in soil. At this point they're rooted enough to survive transplant but not so established that they resent the move. Harden them off for a few days by placing them in indirect outdoor light before planting, especially if you've been growing them under artificial light indoors.
If you want to grow kumara to harvestable tubers in a water-based system, you need to transition to a proper hydroponic setup: a deep water culture (DWC) bucket, nutrient film technique (NFT) channel, or a media-based system like expanded clay in a flood-and-drain tray. Pure water culture is not practical for tuber production because developing tubers need physical support and consistent oxygen in the root zone. Tuber formation takes roughly 90–110 days after slips are established in a growing system, and some sources put the full harvest window at 150–175 days from slip stage to harvest-ready tubers, so plan accordingly.
When transferring water-rooted slips into a hydroponic system, acclimate gradually. Go straight from water to a full-strength nutrient solution and you'll likely see wilting and stress. Start at half-strength for the first week, then build up. Similarly, if transplanting to outdoor soil, wait until soil temperature is consistently above 18°C and there's no frost risk. Kumara is a warm-season crop and will sulk or die in cold, wet ground.
Troubleshooting common problems
Rot at the base of the tuber or slip
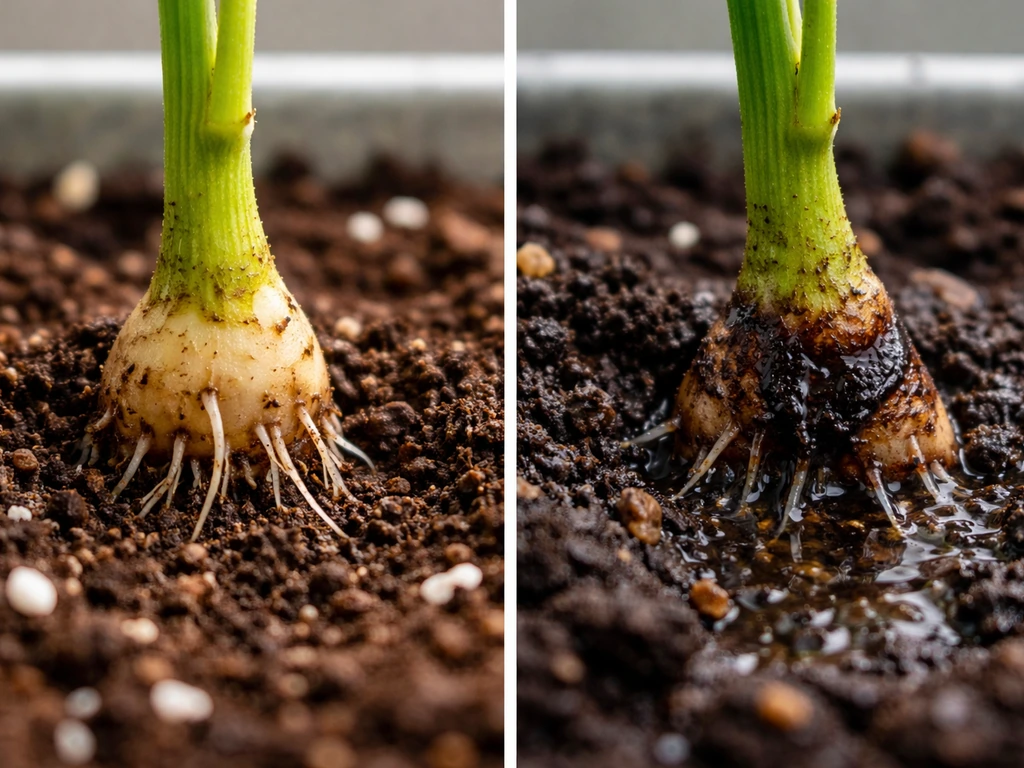
This is the most common failure. Causes include: too much of the stem or tuber submerged, water not being changed frequently enough, water that's too cold (below 18°C), or starting with an already-infected kumara. If you see soft, brown, slimy tissue, remove the affected material immediately, trim back to clean, firm tissue, let it air-dry for a few hours, then restart in fresh water. If the rot is at the very base of a slip, remove and discard it. Don't try to save a mostly-rotted piece.
No roots forming or no sprouting
Almost always a temperature problem. If it's been two weeks and nothing is happening, check your water and air temperature. Below 20°C, sprouting is very slow. Also check whether the kumara you're using was treated with a sprouting inhibitor (common with supermarket stock). If you suspect inhibitor treatment, try sourcing from a local garden centre or farmers market instead. Slips cut from a tuber and placed in water should show root nubs within 5–10 days if conditions are warm enough. If you want the exact step-by-step, see our guide on how to grow monggo seeds in water.
Algae in the water
Green or brown algae in the container signals too much light hitting the water. Switch to an opaque container or wrap your jar in foil or dark paper. Algae itself won't kill your slips immediately, but it competes for oxygen and nutrients, and the associated bacterial load in a heavy algae bloom can stress roots. Change the water, clean the container, and block the light.
Weak, leggy, or pale slips
Leggy slips with long internodes and pale leaves are a light problem. Increase light intensity or extend photoperiod to 14–16 hours. If you're on a windowsill with less than 6 hours of direct light, add a supplemental grow light. Pale yellow leaves can also indicate that the slips have been in plain water too long and need nutrients, so switch to a dilute nutrient solution if slips are more than 3 weeks old.
Slips rooting fine but no tubers forming later
Tuber initiation in sweet potato depends on day length, temperature, and resource availability. Too much nitrogen pushes vine and leaf growth at the expense of root storage. If you're growing hydroponically and vines are huge but roots are thin, cut back your nitrogen and make sure phosphorus and potassium levels are adequate. Also check that your growing season is long enough: sweet potatoes need a warm, frost-free window of at least 90–110 days after transplanting to form tubers worth harvesting.
What to expect at harvest and how to save slips for next time
If you've transitioned your water-rooted slips into soil or a proper hydroponic system, expect the first harvestable tubers roughly 90–110 days after transplanting for most varieties under good conditions. In a less-than-optimal hydroponic setup or cooler climate, 150 days or more is realistic. Tubers are ready when the vines start yellowing or you carefully dig around the root zone and find firm, full-sized kumara. Don't leave them in the ground or system past their peak, as quality declines quickly once maturity is hit.
To save slips for your next growing run, don't just store the harvested tubers in the fridge. Kumara needs to be cured first: hold freshly dug tubers at around 29–32°C with high humidity (85–90%) for 4–7 days to heal any cuts and develop a protective skin layer. After curing, store at around 13–16°C in a dry, ventilated spot. Avoid refrigerating them, as temperatures below 10°C cause internal chilling damage that looks fine on the outside but makes the flesh discolour badly when cooked.
When you're ready to start the next run, pull your stored seed roots out 4–6 weeks before your target planting date and begin the warm, humid pre-sprouting stage again. Use only firm, blemish-free roots with no scurf or soft spots. One healthy seed root can produce 10–20 slips over a sprouting season if you keep taking slips and giving it fresh water. The process is genuinely satisfying once you have the rhythm of it, and it scales up easily once you know what conditions the plants actually need.
If you enjoy this style of water-based propagation, the same basic approach works well for other plants too. Growing kangkong in water, for example, follows a similar logic of water rooting before transitioning to a more permanent system, and it's a great way to build confidence with water-culture techniques before committing to a full hydroponic setup for a longer-season crop like kumara.
FAQ
Can I keep kumara in water the whole time and still harvest tubers?
Yes, but you still need a transition plan. Water culture is mainly for sprouting slips and, in some setups, building a strong root system. To actually grow eatable tubers, move to a true hydroponic system or a growing medium that supports oxygenated roots and tuber development (for example DWC, NFT, or an inert media system). Pure “keep it in water until harvest” usually fails because tubers need physical support and a stable, oxygen-rich root zone.
How much of the kumara tuber or slips should be submerged in the water?
Use the waterline rules. For whole tubers, keep the bottom third to half submerged, the top must stay above water to avoid anaerobic rot. For slips, submerge only the bottom 2 to 3 cm. If more stem is underwater than necessary, you increase stem rot risk without faster rooting.
What should I do if my water turns cloudy or my kumara starts to rot?
If the water goes cloudy, smell turns foul, or tissue becomes brown and slimy, treat it as active rot. Remove the affected tuber or slip immediately, trim back to clean, firm tissue, air-dry cut surfaces for a couple of hours, then restart in fully fresh water (not just a top-up). Don’t try to “dilute” a contaminated container.
When do I switch from plain water to nutrient solution, and what happens if I don’t?
After you switch from plain water to a hydroponic nutrient solution, stop changing to plain water. Instead, do nutrient water changes on your normal schedule (and keep pH and EC in range). If you keep running plain water for too long after slips begin rooting, they can develop pale, weak growth and may need nutrients sooner than you expect (especially once they are actively pushing new leaves).
Why are my slips leggy and weak, even though they sprouted?
If you want slips that root well and grow compactly, avoid high temperatures after sprouting starts. Once you see active growth, ease the temperature down slightly (roughly low 20s °C). High heat after sprouting often creates long internodes and weaker slips that struggle more after transplant.
What causes algae in my kumara water jar, and will it harm the slips?
Algae is mainly a light exposure problem, not a nutrient problem. Use an opaque container or block light (wrap jar in foil or dark paper). If algae is already heavy, change the water, rinse the container, and restart. Also avoid placing the jar in direct sun through glass, even if temperatures look good.
What if I live in a cool climate and sprouting is very slow?
Yes, but only for warm-season starts. If the ambient area is under about 18 to 20°C, sprouting can stall. A seedling heat mat under the container helps maintain stable temperatures, and you may need to keep water and air around the target sprouting range rather than relying on sun.
Why won’t my store-bought kumara sprout in water?
If supermarket kumara were treated with a sprouting inhibitor, slips may not start or may be inconsistent across tubers. The best workaround is sourcing from garden centres or farmers market growers and selecting firm seed roots with no scurf or soft spots. If you suspect inhibitor treatment, try fresh seed roots for the next run rather than repeatedly reusing the same tubers.
Is an air pump necessary for growing kumara slips in water?
Use a consistent “culture” size and oxygen approach. In small, still-jar setups, frequent water changes (every 2 to 3 days) help prevent oxygen depletion. In larger containers, a small aquarium air pump with a diffuser makes oxygen availability more reliable and reduces the slimy, foul-smelling rot risk.
How do I acclimate kumara slips when moving from water to hydroponics or soil?
You can, but don’t expect it to instantly improve. Start at half-strength nutrients when moving from water-rooting to hydroponics, then build toward full strength over about a week if plants stay firm. Skipping the gradual step can cause transplant shock, including wilting even when roots look fine.
My slips look pale after a few weeks, is that a light problem or a nutrient problem?
If leaves look pale or yellow and slips seem “stuck” after a few weeks, nutrient deficiency is a likely cause because plain water eventually runs out of what the slips need. If slips are more than about three weeks old in plain water, switch to a dilute hydroponic nutrient solution and monitor pH.
What pH should I keep for kumara in a hydroponic water setup, and how often should I check it?
Target pH roughly 5.8 to 6.2, with a workable range about 5.5 to 6.5. If pH drifts outside the range, nutrient lockout can happen even when you mixed nutrients correctly. The practical next step is to test pH at each water change, then adjust using appropriate pH up or down products.
When should I harvest kumara from a hydroponic or water-based system?
For harvest, don’t wait forever. Plan around the warm, frost-free window plus the growing time needed after slips are established. Quality declines after peak maturity, so check progress by gently inspecting the root zone and look for vine yellowing as a timing cue.
How should I cure and store kumara after harvesting?
Cure immediately after harvest if your goal is good storage and better eating quality later. Hold tubers warm and humid for several days to heal cuts, then store cooler in a dry, ventilated area. Avoid refrigeration, chilling damage can discolor flesh when cooked even if it looks fine outside.