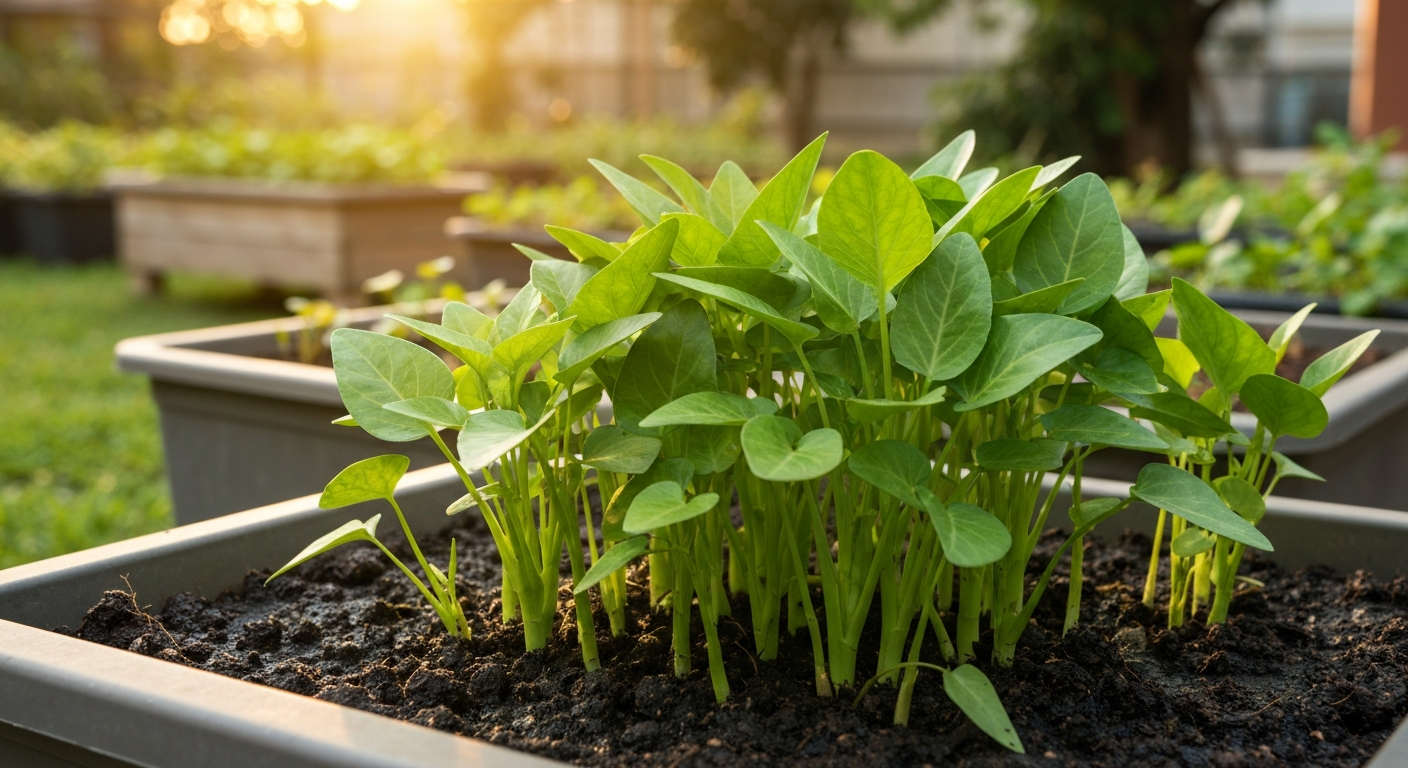
Kangkong (Ipomoea aquatica, also called water spinach) is one of the easiest leafy greens you can grow hydroponically. Hydroponic Food Production, Nutrient Film Technique chapter (channel dimensions, slope, spacing) notes that NFT channel specs for leafy greens (applies to kangkong as a low‑profile leafy crop): channel width ~10 cm (4 in), depth ~3–4 cm effective film, channel slope ~1–2% (≈1–2 cm drop per meter), spacing 15–20 cm between plant centers; recommended channel length <15 m (practical home runs 1–4 m) Hydroponic Food Production — Nutrient Film Technique chapter (channel dimensions, slope, spacing). Drop a few stem cuttings into a jar of water, keep it warm and well-lit, and you will see roots within 3 to 14 days. From there you can stay simple with a pebble tray or vase, or step up to a floating raft, wick, or NFT system for bigger harvests. This guide walks you through every option with real measurements, a beginner nutrient recipe, and the exact fixes for the problems that will trip you up along the way.
How to Grow Kangkong Hydroponics: Step-by-Step Guide
Who this guide is for and what you will learn
Whether you are a first-time hydroponic grower, an aquaponics hobbyist, or someone who just wants fresh kangkong on a kitchen windowsill, this guide is written for you. The focus is entirely hands-on. You will learn how to propagate kangkong from cuttings or seeds, how to pick and set up the right water-based system for your space, what nutrient solution to mix, when to harvest, and how to diagnose the problems that catch most beginners off guard. By the end you will have enough detail to get plants in water today and scale up when you are ready. For a focused step-by-step on how to grow kangkong in water, see this practical how-to guide.
Simple water propagation vs true hydroponics: which one is right for you
Before you buy anything, decide which category fits your situation. Simple water propagation means rooting and growing cuttings in a jar, vase, or pebble tray filled with plain water or a very dilute nutrient solution. True hydroponics means the plant lives its entire life in a purpose-built system (floating raft, wick, or NFT) with a measured nutrient solution, consistent pH, and controlled conditions. Both work for kangkong. The difference is yield, consistency, and how much gear you want to manage.
| Feature | Simple water propagation | True hydroponics (raft/wick/NFT) |
|---|---|---|
| Cost to start | Almost nothing (jar + water) | Low to moderate ($20–$150+ DIY) |
| Setup time | 5 minutes | 1–3 hours |
| Yield per plant | Light (snipping leaves) | Heavy (full-stem harvests) |
| Consistency | Variable | Repeatable with measurement |
| Nutrient control | None to minimal | Full control (EC, pH, NPK) |
| Best for | Beginners, propagation, indoors | Regular harvests, scale-up, outdoors |
| Water change effort | Weekly manual changes | Top-off + full change every 1–2 weeks |
| Scaling | Limited | Easy to expand modules |
My honest recommendation: start with a jar and a few cuttings to get a feel for how fast kangkong roots and grows. Once you have seen that, build a small floating raft. It is the most forgiving true hydroponic system for this crop and the one I come back to every season.
Propagation: cuttings vs seeds
You can start kangkong from either stem cuttings or seeds, and each has its place. For regional readers, see a concise guide on how to grow panikoorka in water for tips tailored to that local name and variety. For home and small hydroponic setups, cuttings win almost every time. They root fast, produce uniform plants, and skip the germination wait. Seeds make sense if you are starting a new variety or cannot source cuttings locally.
Starting from cuttings (recommended)
- Select healthy, non-flowering stems. Aim for cuttings 20 to 40 cm long with at least 5 to 8 nodes; you can root cuttings as short as 10 cm if they have 2 to 3 nodes minimum.
- Strip all leaves from the bottom half of the cutting so no leaf matter sits in the water.
- Optional: dip the cut end in IBA rooting powder or gel to speed rooting, especially in cooler conditions.
- Place cuttings in a clean jar or container with 3 to 10 cm of water covering the lowest nodes.
- Keep the jar in a warm spot (25 to 30°C) with bright indirect light or 12 to 16 hours of grow-light.
- Change the water every 3 to 5 days or whenever it turns cloudy. Cloudy water means bacterial buildup.
- Expect white roots 3 to 14 days after placing in water. Once roots are 2 to 5 cm long, the cutting is ready to move to your chosen system.
Starting from seeds
- Soak seeds in warm water for 12 to 24 hours before planting to soften the hard seed coat.
- Sow into a rockwool cube, coco coir plug, or moistened perlite; keep media moist but not waterlogged.
- Maintain temperature at 25 to 30°C. Germination takes 7 to 14 days.
- Once seedlings have 2 to 3 true leaves and roots are visible at the base, transfer to your hydroponic system.
- Note that seed-grown plants take 1 to 2 weeks longer to reach harvestable size compared with cuttings from established plants.
Simple water propagation: vase, jar, and pebble tray setup
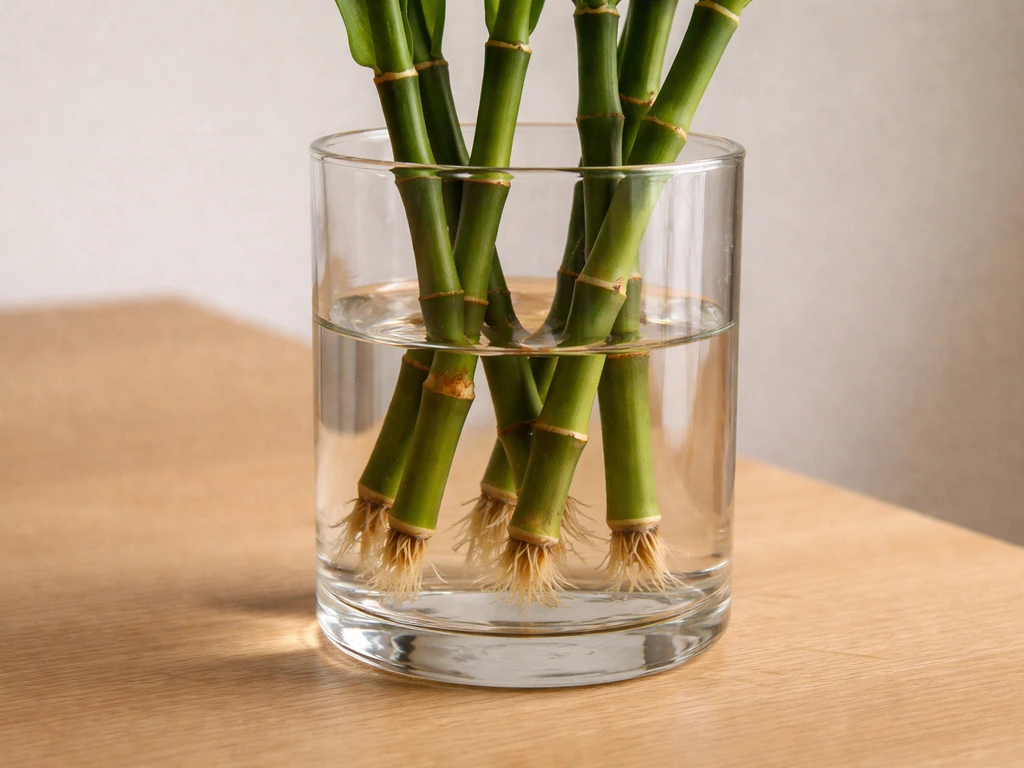
This is where most people start, and it genuinely works for small, continuous harvests. The key is keeping the water oxygenated through regular changes and making sure nodes stay submerged while leaves stay above the waterline. If you want a step-by-step on using pebbles as a growing medium, see our guide on growing lucky bamboo in pebbles. I have had kangkong growing happily in a wide-mouth mason jar on a sunny bench for six weeks straight using nothing but weekly water changes. If you like propagating plants in jars, see how to grow bamboo in a water vase for a similar, low‑maintenance method.
Setup steps
- Choose a clear glass or food-grade plastic container, at least 500 mL volume. Wider is better for multiple cuttings.
- If using a pebble tray, line the base with clean aquarium gravel or hydroton (expanded clay) to anchor stems and keep nodes submerged.
- Fill with dechlorinated tap water or filtered water. You can add a very dilute liquid fertilizer (EC around 0.5 to 0.8 mS/cm) once roots are established.
- Insert cuttings so that at least 2 to 3 nodes are below the waterline. Lower leaves should be stripped; upper leaves should be above the water.
- For a pebble tray or wide container, space stems 5 to 10 cm apart so they are not crowded.
- Place in a sunny window (6+ hours of direct or bright indirect light) or under a grow light set to 12 to 16 hours per day.
- Change 100% of the water every 5 to 7 days, or immediately if it becomes cloudy or smells off.
- Keep water level consistent: 3 to 10 cm above the lowest submerged node
- Leave the top 1 to 2 cm of the container dry to allow some air exposure at the root collar
- Rinse the container with clean water (no soap) at every water change to prevent biofilm
- Avoid placing in direct midday sun in summer as water can overheat and lose oxygen
- Harvest by snipping stems above the lowest node to encourage bushy regrowth
Floating raft, wick, and NFT: what each system actually does for kangkong
Once you move beyond a jar, you have three main system types to consider. Each has real pros and cons for this specific crop, so here is a plain-language breakdown before you invest time building anything.
Floating raft (DWC/raft)
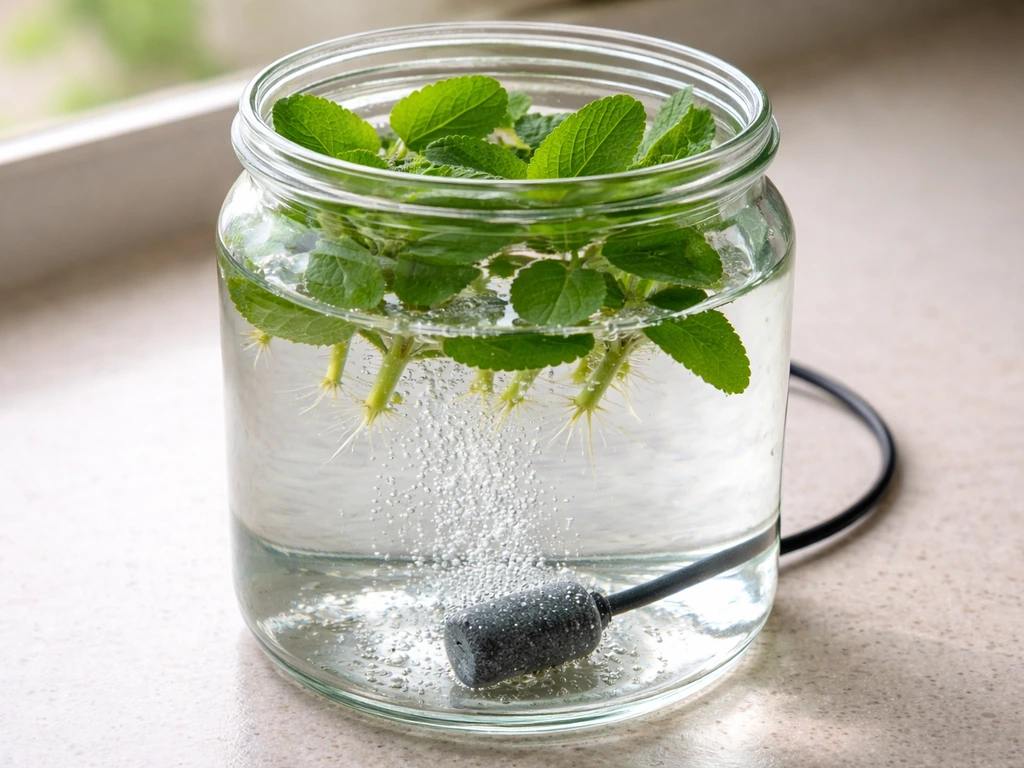
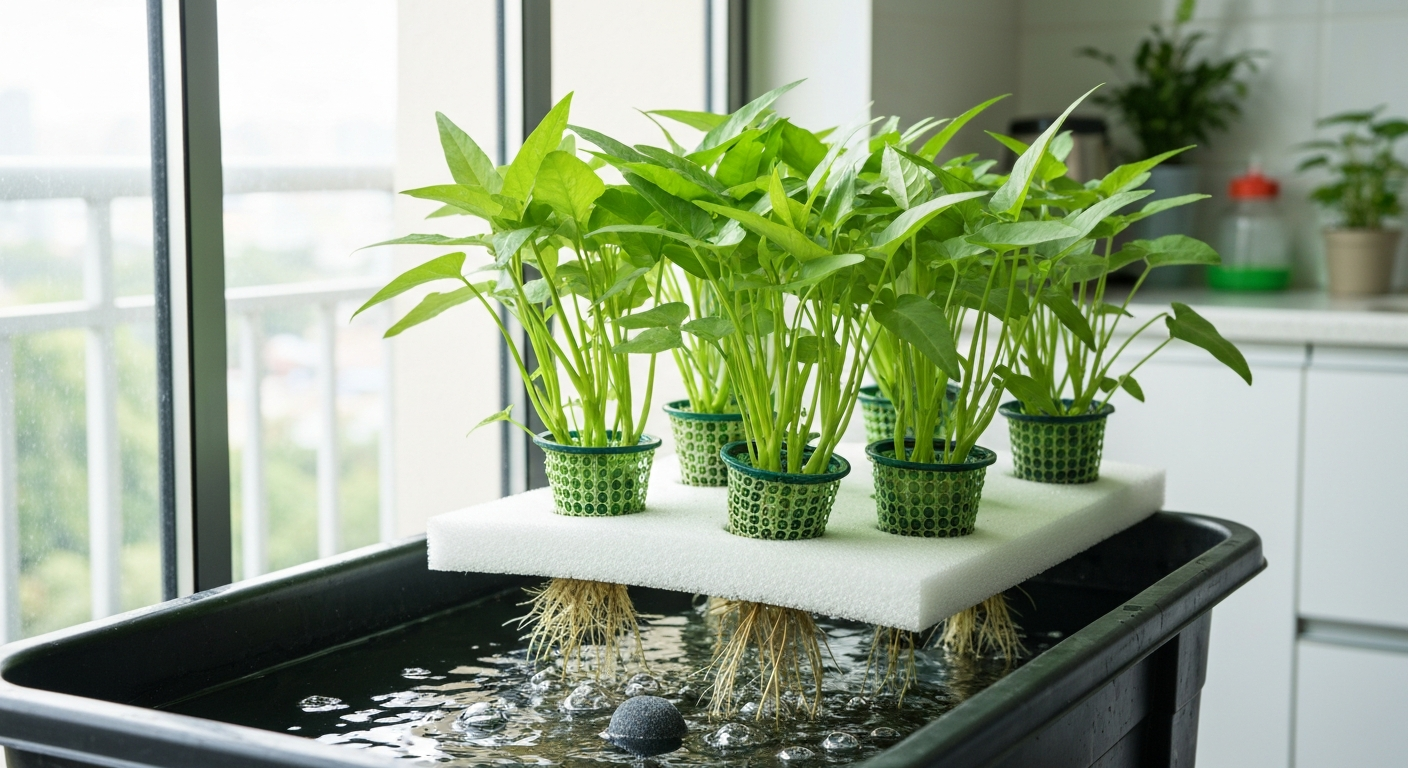
Plants sit in net pots set into holes in a rigid foam or HDPE raft that floats on a reservoir of nutrient solution. Roots hang directly into the oxygenated water. This is the best match for kangkong. It provides continuous nutrient contact, handles kangkong's high water demand, and is easy to build at home. The main tradeoff is that you need an air pump to keep dissolved oxygen above 6 mg/L, otherwise roots suffocate.
Wick system
A wick (braided cotton rope, felt strip, or synthetic capillary material) draws nutrient solution up from a reservoir into the growing medium by capillary action. No pump needed. That is the appeal. The problem is that wick flux, meaning how fast solution moves up the wick, is limited. Kangkong is a fast-growing, high-transpiration plant. A single wick simply cannot deliver water fast enough to support full growth. Wick systems work as a low-tech, passive option for small plants or seedlings, but expect noticeably slower growth and lower yield compared with a raft. If you use one, choose broad felt strips or multiple thick braided cotton wicks and keep plants small.
NFT (Nutrient Film Technique)
A thin film of nutrient solution flows continuously down a sloped channel (1 to 2% slope, about 1 to 2 cm drop per meter). Roots sit in the channel and absorb solution as it passes. NFT is efficient, space-saving, and great for short-rooted leafy greens. Kangkong works in NFT, but it is not the easiest starting point because the roots grow fast and can block the channel. Channel width should be at least 10 cm, channel slope 1 to 2%, and flow rate around 0.5 to 2 L/min per gully. For home runs, keep channels under 4 m to avoid nutrient depletion along the length. NFT suits growers who already have some hydroponic experience.
| System | Best for kangkong | Pros | Cons | Skill level |
|---|---|---|---|---|
| Floating raft (DWC) | Yes, highly recommended | Continuous nutrients, easy build, forgiving | Needs air pump, reservoir space | Beginner |
| Wick | Limited (small plants only) | No pump, cheap, passive | Too slow for full-size plants, low yield | Beginner |
| NFT | Yes, with experience | Space-efficient, scalable | Roots can block channels, needs steady pump | Intermediate |
DIY parts and equipment for every system
Here is what you actually need to build each option. I have kept this to the minimum viable list so you are not over-buying for a first run.
Vase or jar (simple water propagation)
- Wide-mouth glass jar or food-grade plastic container, 500 mL to 2 L
- Clean aquarium gravel or hydroton (optional, for stem support)
- Dechlorinated or filtered water
- Dilute liquid hydroponic fertilizer (optional, once roots form)
- pH test strips or basic pH meter (target 6.0 to 7.0)
Pebble tray
- Shallow tray or dish, at least 10 cm deep, 20 to 40 cm wide
- Washed aquarium gravel or hydroton, enough to fill 6 to 8 cm
- Dechlorinated water
- Dilute nutrient solution (EC 0.5 to 1.2 mS/cm once established)
- pH meter or strips
Floating raft system (1 m² bench)
- Food-grade or liner-covered container/tote, 60 to 150 L volume
- 1 m² rigid EPS foam sheet (50 mm thick) or HDPE raft panel, painted or opaque
- 32 to 48 net pots, 50 to 75 mm diameter
- Hydroton, rockwool, or foam inserts to fill net pots
- Air pump rated 20 to 30 L/min for a 40 to 120 L reservoir
- Air tubing, air stones (one per 10 to 20 L of solution)
- Hydroponic nutrient solution (3-part or pre-mixed)
- pH meter and EC/TDS meter
- pH Up and pH Down solutions
Wick system
- Two containers: one for plants (upper), one for nutrient reservoir (lower)
- Thick braided cotton rope or broad felt strips (at least 2 to 3 wicks per plant)
- Perlite, coco coir, or fine hydroton as growing medium
- Nutrient solution
- pH meter and pH adjustment solutions
NFT system
- PVC channels or purpose-built NFT channels, 10 cm wide, 3 to 4 m long
- Channel caps or covers (to block light and prevent algae)
- Submersible pump, 200 to 400 L/hr for a small 2 to 4 channel home system
- Nutrient reservoir, 20 to 60 L
- Tubing and drip line to distribute flow to each channel inlet
- Net pots (50 mm) and rockwool or hydroton inserts
- Return-flow tray or tubing back to reservoir
- pH meter, EC meter, pH adjustment solutions
Basic aquaponics integration (optional)
- Fish tank (50 L minimum) stocked with hardy fish (tilapia, goldfish, or guppies)
- Water pump to move fish-tank water to plant grow beds
- Grow bed filled with hydroton or gravel (acts as biofilter)
- Return overflow or drain back to fish tank
- Kangkong planted directly into grow bed or in net pots over the fish tank
- Test kit for ammonia, nitrite, nitrate, and pH
Step-by-step build: floating raft system
This is the build I recommend for anyone ready to move beyond a jar. A 60 to 100 L tote with a foam raft will grow 32 to 48 kangkong plants in a 1 m² footprint. Floating raft (DWC/raft) experimental and commercial trials for water spinach tested reservoir volumes around 60, 126, and 252 L/m² and found higher volumes combined with aeration improved uniformity and yield under warm conditions Trials used reservoir volumes of ~60–252 L per m², with higher volumes plus aeration improving uniformity and yield for water spinach.. Here is exactly how to put it together.
Materials
- 1 x food-grade plastic tote, 60 to 100 L (dark or lined to block light)
- 1 x EPS foam sheet (50 mm), cut to sit just inside tote rim
- 32 to 48 x 50 to 75 mm net pots
- Hydroton or rockwool cubes to fill net pots
- 1 x air pump (20 to 30 L/min output)
- Air tubing and 4 to 8 air stones
- Hydroponic nutrients (3-part or all-in-one leafy green formula)
- pH meter, EC meter, pH Up, pH Down
- Kangkong cuttings or seedlings
Assembly
- Clean the tote with diluted hydrogen peroxide or food-safe sanitizer. Rinse thoroughly.
- Cut holes in the EPS foam sheet to fit your net pots. Space holes 20 to 25 cm apart. A 1 m x 1 m sheet typically gives you a 4x8 or 5x8 grid.
- Paint or wrap the foam sheet in black plastic if it is white, to reduce light penetration into the reservoir.
- Place air stones on the reservoir floor. Run tubing up and over the tote edge to the air pump. Position the pump above the water level so it does not back-siphon if power fails.
- Fill the tote with water to within 5 to 10 cm of the rim. Float the raft; the gap between raft bottom and water surface should be minimal (roots will hang through into the solution).
- Mix your nutrient solution directly in the tote. For a beginner recipe, target: N ~150 mg/L, P ~40 mg/L, K ~200 mg/L. A commercial 3-part nutrient at manufacturer's half-strength rate for leafy greens is a safe starting point.
- Adjust pH to 6.0 to 6.5 using pH Up or pH Down. Confirm EC is in the 1.2 to 2.0 mS/cm range.
- Turn on the air pump. Check that all stones are bubbling. Target dissolved oxygen above 6 mg/L (a basic DO meter confirms this).
- Insert rooted cuttings or seedlings into net pots with hydroton around the roots. Set net pots into raft holes. Roots should just touch or hang in the solution.
- Label your start date. First harvest of side shoots is typically 2 to 3 weeks after transplant.
Floating raft startup checklist
- Tote cleaned and rinsed
- Raft holes cut, foam darkened/wrapped
- Air stones placed and pump running before adding plants
- Nutrient solution mixed at half-strength for first week
- pH confirmed between 6.0 and 6.5
- EC confirmed between 1.2 and 2.0 mS/cm
- All net pots filled and seated in raft
- Start date logged; first check scheduled in 3 days
Step-by-step build: wick system (low-tech option)
The wick system needs no pump, no power, and almost no money. That makes it useful as a backup system, for indoor growing where noise matters, or for getting children involved in a hydroponic project. Just go in knowing it will not produce the same volume as a raft. For kangkong, I keep wick-grown plants small and harvest frequently to stay within what the wicks can deliver.
Materials
- 1 x upper planting container (plastic pot or tray, 2 to 5 L)
- 1 x lower reservoir container (slightly wider than the upper, 2 to 4 L)
- Thick braided cotton rope (6 to 8 mm diameter) or broad felt strips, cut to 20 to 30 cm per wick
- Perlite, coco coir, or a 50/50 mix as growing medium
- Hydroponic nutrient solution
- pH meter and EC meter
Assembly
- Drill or cut 1 to 2 holes in the bottom of the upper container, sized to thread your wicks through snugly.
- Thread 2 to 3 wicks through each hole so that 5 to 8 cm hangs below into the reservoir and the rest loops up through the growing medium.
- Fill the upper container with moistened perlite or coco coir. Arrange wicks so they run vertically through the media.
- Fill the lower reservoir with nutrient solution (EC 0.8 to 1.5 mS/cm, pH 6.0 to 6.5). Set the upper container on top so the wicks dip into the solution without the containers touching in a way that blocks airflow.
- Test the wick draw: after 30 minutes the top of the growing medium should feel damp. If not, add more wicks or use thicker material.
- Plant kangkong cuttings (rooted) or seedlings directly into the moist medium. Keep 1 to 2 plants per small container.
- Check the reservoir every 2 to 3 days and top off with dilute nutrient solution. Do a full solution change every 7 to 10 days.
- Keep plants trimmed to 15 to 20 cm height. Taller plants demand more water than wicks can supply.
Wick system startup checklist
- Wicks threaded and tested for draw before planting
- Growing medium moistened before inserting cuttings
- Reservoir filled; pH 6.0 to 6.5, EC 0.8 to 1.5 mS/cm
- Upper and lower containers seated securely
- Plant height kept under 20 cm to match wick capacity
- Reservoir check scheduled every 2 to 3 days
Target growing conditions and nutrient recipe
Getting these numbers right is what separates fast, productive growth from slow, chlorotic plants. Kangkong is forgiving but it does have preferences. The table below is your quick-reference card.
| Parameter | Target range | Notes |
|---|---|---|
| pH | 6.0 to 6.5 | Check daily for first two weeks; adjust with pH Up/Down |
| EC (electrical conductivity) | 1.2 to 2.0 mS/cm | Start at 1.2 for seedlings; raise to 1.8–2.0 for established plants |
| Water temperature | 22 to 30°C | Optimal around 25–28°C; below 20°C slows roots significantly |
| Air/ambient temperature | 25 to 35°C | Kangkong is tropical; cold drafts reduce growth |
| Light (natural) | 6 to 8+ hours direct or bright sun | South or east-facing outdoors ideal |
| Light (artificial) | 12 to 16 hours/day | Full-spectrum LED at 200–400 µmol/m²/s PPFD |
| Dissolved oxygen (raft/DWC) | >6 mg/L | Maintain with air stones; recheck if roots look brown |
| Nitrogen (N) | ~150 mg/L | From commercial 3-part at leafy-green rate |
| Phosphorus (P) | ~40 mg/L | Balanced with K for vegetative growth |
| Potassium (K) | ~200 mg/L | Key for stem and leaf quality |
| Calcium (Ca) | ~100 mg/L | Prevents tip burn; use cal-mag supplement if deficient |
Beginner nutrient recipe
A reliable starting point is a commercial 3-part hydroponic nutrient system (grow, micro, and bloom components) mixed at the manufacturer's half-strength leafy-green rate. Research on water spinach in hydroponic trials used a solution delivering approximately 150 mg/L nitrogen, 40 mg/L phosphorus, 200 mg/L potassium, and 100 mg/L calcium, which closely matches what most quality 3-part nutrients produce at their recommended vegetative rates. For week one, cut that to half strength while plants are establishing. From week two onward, step up to full leafy-green rate. Always mix nutrients into water before adjusting pH, and never mix concentrate A and concentrate B directly together before dilution.
Planting density, harvest schedule, and expected yield
Kangkong grows fast, and crowding it slows everything down. For raft systems, space net pots 20 to 25 cm apart. At that density a 1 m² raft holds 32 to 48 plants. For NFT channels, 15 to 20 cm between plant centers per channel is standard for leafy kangkong.
- Days to first harvest from cutting: 21 to 28 days in a raft or NFT under warm conditions
- Days to first harvest from seed: 35 to 45 days
- Harvest method: cut stems 5 to 10 cm above the root collar or lowest node to encourage regrowth
- Regrowth harvest cycle: every 10 to 14 days after the first cut
- Expected yield per plant (raft system): 50 to 150 g of fresh stems and leaves per harvest cycle, depending on light and nutrient levels
- Continuous harvest: kangkong can produce for 2 to 4 months before plants bolt or become woody; replace with fresh cuttings at that point
Routine care and water change schedule
Consistent maintenance is what keeps a hydroponic kangkong system producing. The good news is that once it is dialed in, it takes about 10 minutes a day.
| Task | Frequency | What to look for |
|---|---|---|
| Check pH | Daily (first 2 weeks), then every 2 days | Drift outside 6.0–6.5 is common; adjust with Up/Down |
| Check EC | Every 2 to 3 days | Drop in EC means plants are feeding; top off with half-strength solution |
| Top off water level | Every 1 to 3 days in warm weather | Use pH-balanced plain water or dilute nutrients if EC is low |
| Full nutrient solution change | Every 7 to 14 days | Prevents salt buildup and pathogen accumulation |
| Check air pump and stones | Weekly | Look for reduced bubbling; clean or replace clogged stones |
| Inspect roots | Weekly | Healthy roots = white and firm; brown/slimy = problem (see troubleshooting) |
| Rinse reservoir walls | At every full change | Removes biofilm without soap |
| Harvest | Every 10 to 14 days after first cut | Cut above lowest node; leave 2 to 3 nodes on stem |
Troubleshooting: root rot, algae, bolting, and pests
I will be straight with you: I have had every one of these problems. Here is what actually fixes them.
Root rot (brown, slimy roots)
- Cause: insufficient dissolved oxygen, water temperature too high (above 30°C), or infrequent water changes
- Fix: increase aeration immediately (add an air stone or upgrade the pump), lower water temperature if possible, and do a full reservoir change with fresh nutrient solution
- Prevention: keep DO above 6 mg/L, change solution every 7 to 14 days, and make sure no light reaches the reservoir (light warms water and promotes pathogens)
- If rot is severe, remove affected plants, trim dead roots back to clean tissue, and soak roots in a diluted hydrogen peroxide solution (3 mL of 3% H2O2 per liter of water) for 5 minutes before replacing
Algae (green slime on reservoir walls or growing medium)
- Cause: light reaching the nutrient solution
- Fix: cover all exposed reservoir surfaces with opaque material (black plastic wrap, paint, or tape)
- Wrap net pots with black tape if light enters through them
- For a pebble tray, drape dark fabric over the water surface between stems
- Do a full solution change to remove the existing algae bloom, then eliminate the light source
Bolting (plants flower instead of leafing out)
- Cause: day length too long (above 14 to 16 hours), plants too mature, or heat stress
- Fix: shorten photoperiod to 12 to 14 hours if using artificial light; harvest more aggressively before plants divert energy to flowers
- Once a plant bolts, leaf quality drops quickly; replace with a fresh cutting
- Growing kangkong as a cut-and-come-again crop, rather than letting plants mature fully, is the best long-term strategy to prevent bolting
Common pests (aphids, whitefly, spider mites)
- Kangkong grown indoors or in a greenhouse is relatively low-risk, but outdoor systems attract pests quickly
- Inspect undersides of leaves weekly; early detection is everything
- For aphids and whitefly: spray with diluted neem oil solution (5 mL neem per liter of water with a few drops of dish soap) in the evening, away from pollinators
- For spider mites: increase humidity around plants and use neem spray; mites thrive in hot, dry conditions
- Avoid systemic pesticides in any water-based or aquaponic system
Scaling up and converting between systems
Once your first raft is working, scaling is straightforward. Add more totes in parallel, sharing the same nutrient mix batch. Keep each raft module under 1 to 2 m² so you can manage pH and EC without a large automated dosing system. NFT is easier to scale vertically in a stacked rack setup if floor space is limited.
Moving kangkong from water to soil is easy and worth knowing. Take a rooted hydroponic cutting, let the roots air-dry for 30 minutes, then plant into moist potting mix or garden soil. Water it in well and shade the plant for the first 2 to 3 days while it adjusts. The transition works because kangkong is naturally semi-aquatic and handles both wet and soil conditions. Going the other direction (soil to water) just means taking a fresh cutting from a soil-grown plant and rooting it in water or a net pot as described in the propagation section above. For a step-by-step guide on how to grow kangkong in soil, see how to grow kangkong in soil. If you are also interested in palms, see our guide on how to grow coconut in water for step-by-step instructions on establishing coconuts in a water-based system.
For aquaponics integration, kangkong is an excellent choice. It tolerates the slightly higher pH typical of aquaponic systems (6.8 to 7.2) and thrives on the ammonia-derived nitrates fish produce. It can grow directly in a media grow bed, in net pots suspended over the fish tank, or in a raft system fed by fish tank water. The nutrient concentrations in a balanced aquaponic system are lower than in standard hydroponics, so expect slightly slower initial growth, but the system is self-regulating once the nitrogen cycle is established. If you are curious about growing other fast-rooting plants alongside kangkong in a water-based setup, the same propagation and water-management principles covered here apply to crops like monggo (mung bean sprouts) grown in water. For step-by-step instructions and tips, see how to grow monggo seeds in water. For a step-by-step example with another tuber crop, see a short guide on how to grow kumara in water that covers propagation, rooting, and common adjustments for success.
FAQ
What are the fastest, most reliable ways to propagate kangkong for water-based systems: cuttings or seeds?
Use stem cuttings for speed and uniformity. Take 15–30 cm tip cuttings with at least 2–4 nodes (5–8 nodes preferred). Strip lower leaves so 1–3 nodes are submerged; roots commonly appear in 3–14 days in warm, well-lit conditions. Seeds will germinate in ~7–14 days under warm, moist conditions but are slower and less uniform for small hydro setups. Optional: dip cuttings in a mild rooting hormone (IBA) to speed and standardize rooting.
How do I set up simple jar/vase water propagation (parts and step-by-step)?
Parts: clear glass or food‑grade plastic jar, pebbles or a grid/net‑pot lid to anchor stems, potable water. Steps: 1) Fill jar so submerged nodes have 3–10 cm water above them. 2) Remove lower leaves and position cuttings so nodes are underwater and stems are stable (use pebbles or a support). 3) Place jar in warm, bright indirect light (avoid full midday sun through glass). 4) Change water weekly (sooner if cloudy) and rinse roots as needed. 5) Transplant to a hydroponic system or keep in jars for continuous harvest. For longer-term growth leave a 1–2 cm air gap under any net‑pot to give roots oxygen access.
How do I set up a floating raft / DWC system for kangkong (parts, sizing, and steps)?
Parts: rigid raft (EPS/HDPE) with holes, 50–75 mm net pots, inert support media (hydroton/foam), reservoir (60–150 L per m² for bench-scale), air pump and airstones (aim for DO >6 mg·L⁻¹), aquarium heater if needed, pump for recirculation optional, pH test kit and EC meter. Steps: 1) Build or place an opaque raft with holes spaced 20–25 cm. 2) Put plants in net pots with minimal media, set into raft. 3) Fill reservoir with nutrient solution to contact the bottom of the net pots. 4) Install airstone(s); run continuous aeration. 5) Monitor pH, EC, DO, and top off daily; change reservoir every 1–2 weeks. For small 1 m² rafts use 32–48 holes and ~60–150 L reservoir; one medium air pump (20–30 L/min) often suffices for 40–120 L.
Can kangkong be grown in wick systems or NFT channels? Which should I choose?
NFT: workable for kangkong if channel width/depth and flow are correct (channel ~10 cm wide, 3–4 cm film depth, slope 1–2%, spacing 15–20 cm). NFT requires continuous, reliable flow and oxygen exposure; suitable for small runs (1–4 m). Wick: generally not recommended for fast-growing kangkong—wick flux is often insufficient for high water/nutrient demand. If you must use a wick, use multiple thick braided cotton or felt wicks and keep plants small; expect slower growth and lower yields.
What beginner nutrient recipe and target ranges should I use for kangkong in water systems?
Beginner nutrient targets: EC 1.2–1.8 mS/cm (daytime/active growth toward upper end), pH 5.5–6.5 (aim 5.8–6.2), temperature 22–30 °C (optimal 24–28 °C), dissolved oxygen >6 mg·L⁻¹ for DWC/raft, PPFD 150–250 µmol·m⁻2·s−1 (8–12 hrs for fast leafy growth). Simple starting recipe (use a balanced commercial 2– or 3‑part vegetative nutrient or mix to match these macro ranges): approximate target macro concentrations for vegetative leafy growth: N ≈120–160 mg·L⁻¹, P ≈20–50 mg·L⁻¹, K ≈150–250 mg·L⁻¹, Ca ≈80–120 mg·L⁻¹, Mg ≈20–40 mg·L⁻¹. Use a commercial hydroponic nutrient and adjust EC/pH rather than measuring each element unless you have lab analysis.
How densely should I plant kangkong and what yields/harvest schedule can I expect?
Spacing: 20–25 cm between plants (30 cm for maximum branch development). For rafts: 32–48 plants per m² at 20–25 cm spacing. Yield and schedule: From healthy cuttings you can expect first usable harvest in 3–4 weeks (fast regrowth from cuttings). After the first cut, use cut‑and‑come‑again harvesting: harvest top 8–15 cm of growth every 7–14 days depending on vigor. Typical continuous harvest yields vary with system and fertility—small raft benches commonly produce weekly harvests from sequential cuttings; expect higher yields with better reservoir volume, aeration and nutrient control.