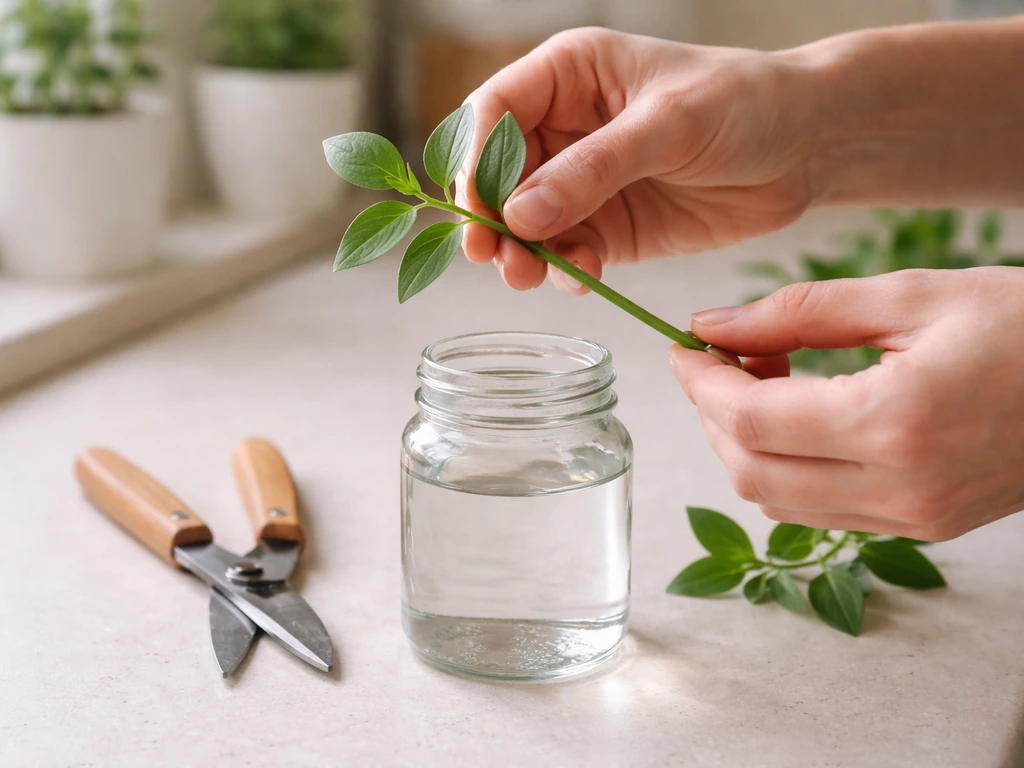
Yes, you can grow panikoorka in water, and it works surprisingly well when you set it up right. Take a healthy stem cutting, strip the lower leaves, suspend it in a jar or container of water so only the bottom node is submerged, keep it in bright indirect light, and roots will appear within 7 to 14 days. [Strip the lower leaves](https://www. missouribotanicalgarden.
How to Grow Panikoorka in Water: Step-by-Step Guide

Marcus Holloway
25 Jun 2026
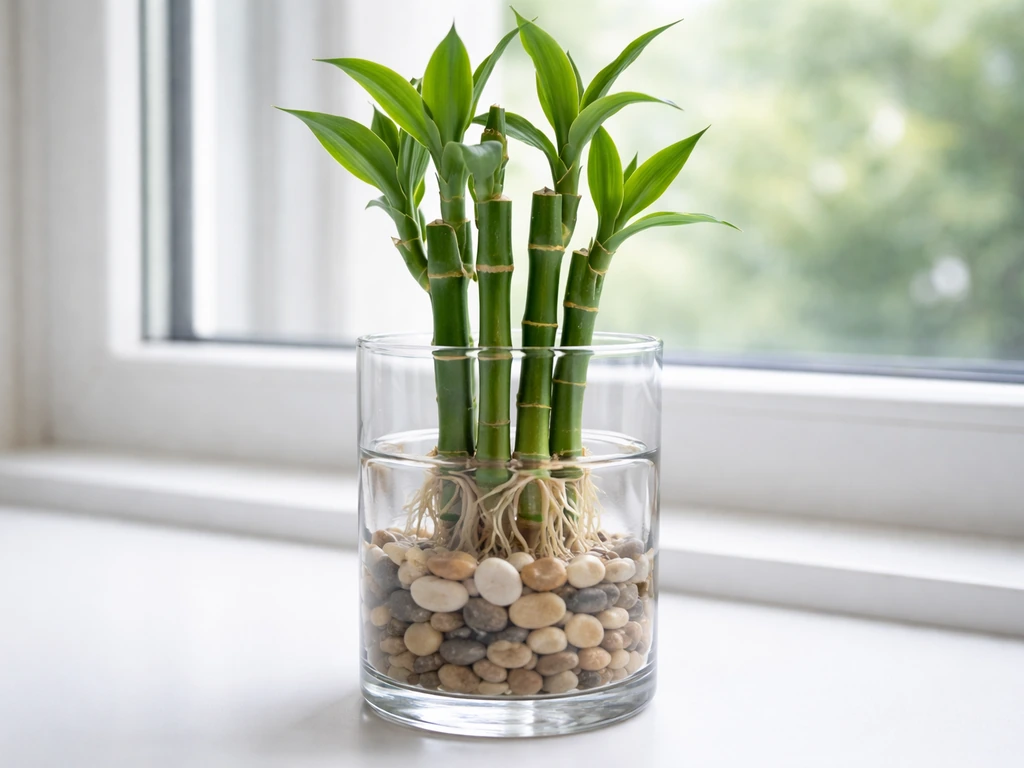
org/gardens-gardening/your-garden/help-for-the-home-gardener/advice-tips-resources/visual-guides/rooting-cuttings-in-water. aspx), cut the stem to a node, remove flowers, and root the cutting in water before potting, using the same general method outlined by Missouri Botanical Garden. To grow bamboo in a water vase, use an opaque vase, keep only the bottom section submerged, change the water regularly, and provide bright indirect light.
From there you move it into a proper water-culture setup with nutrients, aeration, and a consistent care routine, and you'll have a thriving, harvestable plant in about 4 to 6 weeks.
What panikoorka actually is (and the name confusion worth clearing up)

Panikoorka is the Malayalam name used in Kerala, India for the plant scientifically known as Plectranthus amboinicus (sometimes listed under its older name Coleus amboinicus). You'll also see it called Indian borage, Indian mint, Cuban oregano, Mexican mint, karpooravalli, and kanjikoorka depending on where you are. All of these names point to the same thick-leaved, aromatic herb with fleshy, semi-succulent stems and a strong camphor-oregano scent. It's widely used in South Asian and Southeast Asian cooking and traditional medicine.
The important thing to know before you try growing it in water is that panikoorka is not a naturally aquatic or semi-aquatic plant. It grows in full sun to partial shade in tropical and subtropical gardens. However, its semi-succulent, fleshy stem structure makes it one of those plants that roots readily in water and tolerates water-culture systems well, as long as you manage oxygen levels and prevent stagnation. Research has even confirmed that Plectranthus amboinicus can be successfully cultured in hydroponic NFT (Nutrient Film Technique) systems, so the water-growing approach is absolutely legitimate. To get started with kangkong hydroponics, focus on providing strong aeration, consistent nutrient solution strength, and stable temperatures so the roots stay oxygenated hydroponic NFT.
Choosing the right water setup
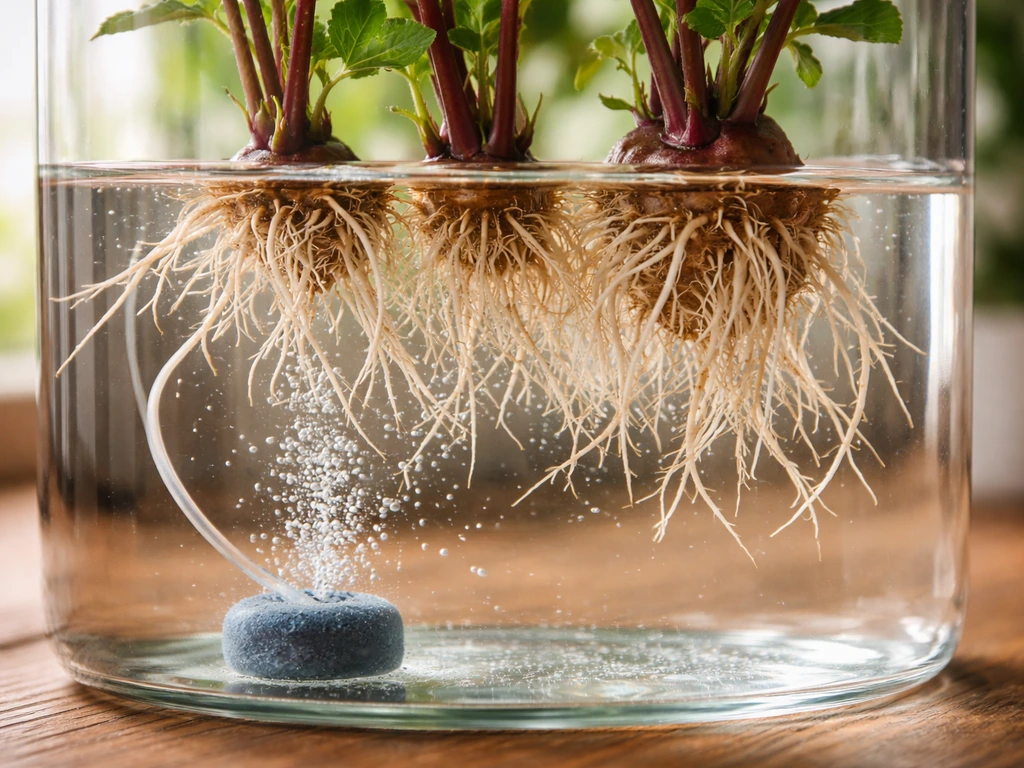
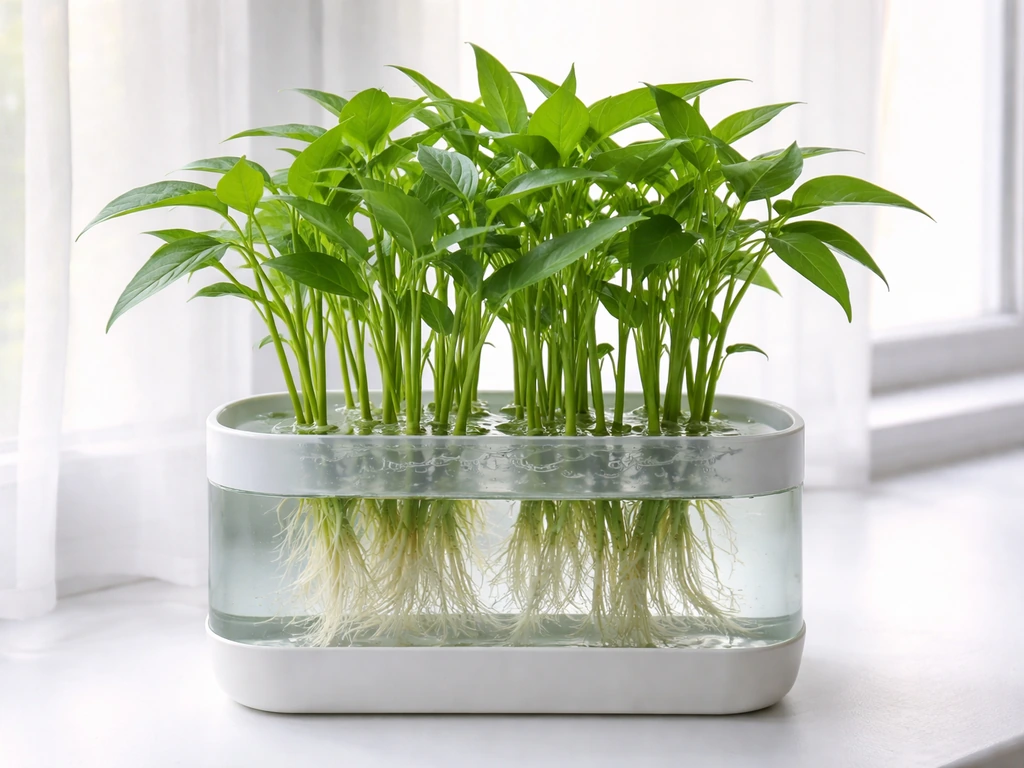
For most home growers, a simple Deep Water Culture (DWC) style setup is the easiest and most reliable option. You don't need expensive equipment. The core idea is that the plant's roots hang suspended in oxygenated, nutrient-rich water while the stem and leaves stay above the waterline. If you are specifically looking for how to grow kumara in water, the same oxygen, light, and nutrient principles apply, just with a different plant water setup. Here are your three practical options ranked from simplest to most capable:
| Setup | Best For | What You Need | Limitations |
|---|---|---|---|
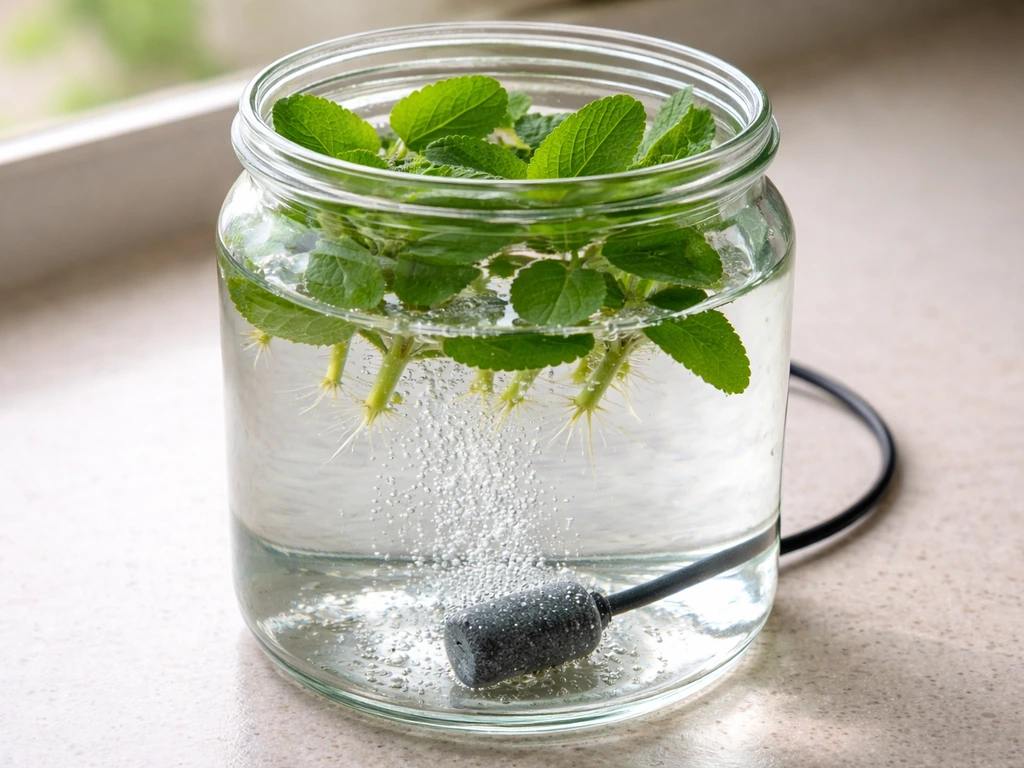
| Glass jar / mason jar | Single cutting, first-time rooting, testing | Any jar, no hardware | No aeration, needs frequent water changes, limited nutrients |
| DWC bucket or tote (5–10 litre) | 1 to 3 plants, ongoing water culture | Opaque container, net pots, air pump, air stone, airline tubing | Needs power for pump |
| Aquarium-style tank | Multiple plants, combined aesthetic and functional setup | Tank, net pots or foam inserts, pump/filter, grow light | More setup time, higher cost |
Whatever container you choose, make sure it is opaque or covered. Clear containers let light hit the water and grow algae fast, which competes with your plant and clogs the roots. I learned this the hard way with a glass jar sitting on a sunny windowsill. Within a week the water was green and the cutting was struggling. Switch to a dark-coloured container or wrap your jar in tape or foil.
For a DWC bucket setup, you'll need net pots (5 cm works well for panikoorka) fitted into holes cut into the lid. The roots hang down into the water below while the cutting or plant sits in the net pot, supported by a small amount of clay pebbles or foam. The air pump connects to an air stone sitting at the bottom of the bucket. This keeps the water oxygenated and prevents the stagnation that rots panikoorka roots faster than anything else.
How to start panikoorka in water: step by step
Panikoorka is almost always started from stem cuttings, not seeds. Munggo (mung bean) seed can also be sprouted in water using a rinse-and-drain method to keep seeds from souring sprout munggo seeds in water. Seeds are available but slow and unreliable. Cuttings give you a rooted, harvestable plant in a fraction of the time. Here's exactly how to do it:
- Choose a healthy, non-flowering stem that is 10 to 15 cm long. Avoid stems with flower buds; all the plant's energy should go to root development, not blooming.
- Cut just below a node (the bump or joint where leaves attach) using a clean, sharp blade. Wipe your blade with rubbing alcohol before cutting to avoid introducing bacteria.
- Strip all leaves from the bottom 5 to 7 cm of the stem. Leave 2 to 4 leaves at the top. Submerged leaves rot quickly and contaminate the water.
- If any flowers or buds are present, pinch them off completely.
- Optional but helpful: dip the cut end briefly in powdered rooting hormone before placing it in water. This speeds up callus formation and root emergence.
- Place the cutting in your container so that 1 to 2 nodes are submerged but the leaves remain above the waterline. In a jar, you can rest the cutting across the opening with a small piece of foam or foil to keep it in position.
- Fill with plain, clean water at room temperature. At this early rooting stage, plain water is fine. Adding nutrients before roots form can actually stress cuttings.
- Put the container in a bright spot with indirect light. Avoid direct harsh sun at this stage.
- Change the water every 2 to 3 days to prevent bacterial buildup and keep oxygen levels up.
- Roots should appear within 7 to 14 days. Once roots are 3 to 5 cm long, you can transfer to your DWC bucket with nutrient solution.
Oxygen, light, nutrients, and temperature: the four things that make or break it
Oxygen
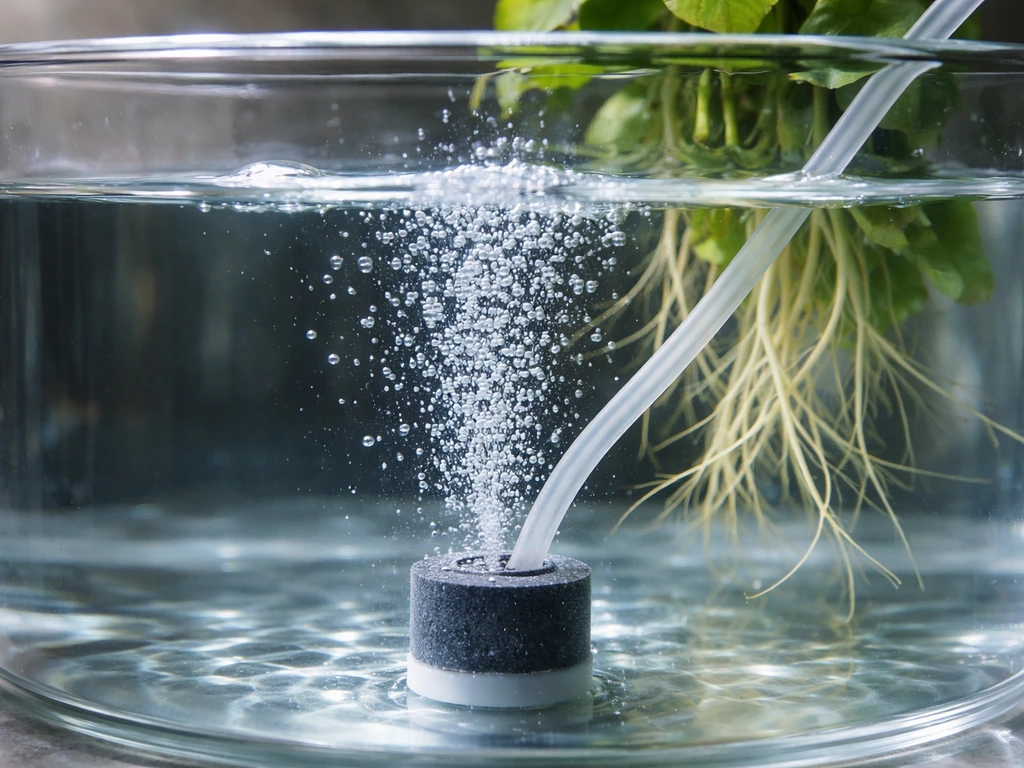
Dissolved oxygen is the most critical factor in any water-culture setup. Panikoorka roots sitting in stagnant, oxygen-depleted water will rot within days. An aquarium air pump with an air stone running 24 hours a day solves this completely. For a 5 to 10 litre bucket, a small 2 to 4 watt air pump is more than enough. If you're using a jar for rooting and don't have a pump, changing the water every 2 days is your next best alternative, but move to an aerated setup as soon as the roots develop.
Light
Panikoorka needs a lot of light, full sun to partial shade outdoors, and the equivalent indoors. Aim for 6 to 8 hours of bright light daily. Outdoors, a spot with morning sun and afternoon shade works well. Indoors, place your setup near the brightest south or west-facing window, or use a grow light. A full-spectrum LED grow light running 14 to 16 hours a day will compensate for lower natural light perfectly. Weak, leggy growth almost always comes down to insufficient light, not nutrients or water quality.
Nutrients
Plain water works for rooting, but once your cutting has developed roots and you're moving to ongoing water culture, you need a hydroponic nutrient solution. A general-purpose hydroponic liquid nutrient (NPK-balanced with micronutrients) mixed according to the manufacturer's instruction for leafy herbs is ideal. Target an electrical conductivity (EC) of 1.2 to 2.0 mS/cm and a pH of 5.5 to 6.5. pH directly controls how well the plant can absorb nutrients from the water. Outside this range, plants can sit in perfectly good nutrient solution and still show deficiency symptoms because the nutrients become chemically unavailable. Get a basic pH meter and EC pen. They're inexpensive and take all the guesswork out.
Temperature
Panikoorka is a tropical plant. It grows best when air temperatures stay between 20°C and 35°C (68°F to 95°F). Water temperature should ideally sit between 18°C and 24°C. Water that is too warm holds less dissolved oxygen and encourages bacterial and fungal growth. If your growing space gets hot in summer and the water warms up significantly, increase aeration and consider partial shade for the container (not the plant, just the water reservoir).
Weekly care routine: water changes, pruning, and keeping things clean
Once your panikoorka is established in a DWC setup, ongoing care is straightforward but needs to be consistent. If you want to grow kangkong in soil instead of water, use a nutrient-rich, well-draining bed and keep the area evenly moist for best leaf growth. Skipping maintenance for even a week can tip the system toward rot, algae, or nutrient imbalance. Recycling nutrient solution can reduce growth by changing electrical conductivity and contributing to nutrient deficiencies, which supports the need for regular replenishment and testing during water-culture Skipping maintenance for even a week can tip the system toward rot, algae, or nutrient imbalance..
- Every 2 to 3 days: Top up the water level with plain, pH-adjusted water as the plant drinks it down. Don't let roots dry out.
- Every 7 to 10 days: Do a full water change. Dump out the old solution, rinse the container (don't use soap; rinse with a dilute hydrogen peroxide solution of 3ml per litre, then plain water), and refill with fresh nutrient solution mixed to your target EC and pH.
- Every 7 days: Check pH and EC with your meters. Adjust pH up with potassium hydroxide solution or down with phosphoric acid. If EC drops significantly, top up with half-strength nutrient solution instead of plain water.
- As needed: Prune any yellowing or dead leaves immediately. These decompose quickly in water and introduce bacteria.
- As needed: Thin out the root mass if it becomes very dense and matted. Healthy roots are white to cream-coloured. Brown, slimy, or mushy roots mean you have a rot problem (see troubleshooting below).
- Algae prevention: Keep the container completely light-proof. If algae does appear, do a full water change, clean the container, and cover any light leaks.
Bacteria is the other risk in any closed water system. One infected plant or a piece of rotting leaf can affect everything in the water. This is the same reason that in aquarium-style hydroponic setups, sanitation at every water change is non-negotiable. If you notice a foul smell coming from the water, that's bacterial growth, and a full clean-out with dilute hydrogen peroxide is your fix.
Harvesting panikoorka and keeping the plant going
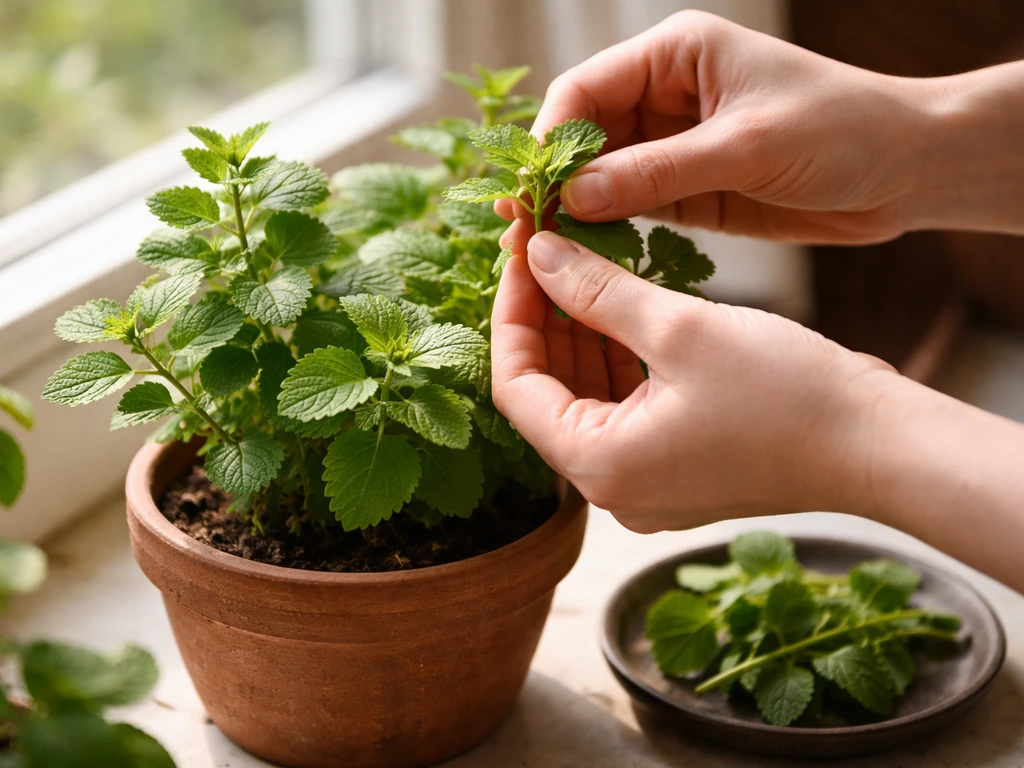
Panikoorka is a cut-and-come-again herb. You don't harvest the whole plant at once. Instead, you take stem tips and individual leaves as needed, which also happens to keep the plant bushier and more productive.
You can start light harvesting once the plant has at least 6 to 8 healthy leaves and has been in nutrient solution for 2 to 3 weeks. Cut stems just above a leaf node using clean scissors. The plant will branch from that node and produce two new stems, doubling your future yield. Never remove more than 30% of the plant's foliage at one time, as this stresses it and slows recovery.
The best part about growing panikoorka in water is that any stem you harvest can itself become a new cutting. Root it in a glass of water as described earlier, and within two weeks you have a new plant to expand your setup or share with someone. This is how a single cutting from a friend's garden can become a continuous, self-sustaining system. The plant's semi-succulent, vegetative growth habit means cuttings almost always root successfully, which makes this one of the most forgiving herbs to propagate in water.
Troubleshooting: when things go wrong in water
Most problems with growing panikoorka in water come down to a handful of fixable issues. Here's how to diagnose and correct the most common ones: If you want the step-by-step details, this guide on how to grow coconut in water covers the same core water-rooting principles.
| Symptom | Most Likely Cause | Fix |
|---|---|---|
| Roots not forming after 14+ days | Water too cold, no light, or leaves touching water and rotting the node | Move to warmer spot (20°C+), improve light, re-strip lower leaves and try a fresh cut |
| Stem base turns brown/mushy | Rot from stagnant water, bacterial infection, or too much stem submerged | Remove affected cutting, clean container with dilute hydrogen peroxide, re-cut above the rot and restart with fresh water |
| Roots are brown and slimy | Oxygen deficiency or bacterial root rot (Pythium) | Increase aeration, full water change, rinse roots gently with clean water, consider adding a small amount of beneficial bacteria (hydroguard or similar) |
| Yellowing leaves (lower leaves first) | Nitrogen deficiency or pH out of range blocking nutrient uptake | Check pH (target 5.5 to 6.5), check EC (top up nutrients if low), remove yellowed leaves |
| Leggy, pale, stretched growth | Insufficient light | Add a grow light or move to a brighter location; 6 to 8 hours of strong light minimum |
| Green water / algae explosion | Light reaching the water through the container | Cover all sides of the container, do a full water change and clean |
| Plant wilting despite being in water | Roots rotted and can no longer take up water, or water temperature too warm reducing dissolved oxygen | Inspect roots, remove rotten material, increase aeration, reduce water temperature |
| Stalled growth (no new leaves for weeks) | Nutrient imbalance, pH drift, or insufficient light | Test and correct pH and EC, ensure 14+ hours of light if indoors, do a full nutrient solution refresh |
The single most common failure I see is people using a clear container in a sunny spot and then wondering why the plant declined after two weeks. The algae bloom depletes oxygen, the water warms up, and the roots rot. Opaque container plus aeration solves about 80% of all panikoorka water-culture problems before they even start.
If you're enjoying water-culture growing and want to explore similar projects, kangkong (water spinach) is another herb that thrives in water-based hydroponic setups and follows a very similar care routine to panikoorka. It's a natural next step if you want to expand your setup beyond herbs into leafy greens.
FAQ
Can I grow panikoorka in water using a normal glass jar, without an air pump?
Yes, for rooting you can use a jar and change the water every 2 days. For ongoing water culture, it is much safer to switch to aeration (air stone and pump), because even short periods of low oxygen can cause root rot in fleshy, semi-succulent stems.
Why does my panikoorka cutting get slimy or smell bad after a week in water?
That usually indicates bacterial breakdown from stagnation, damaged lower node tissue, or a water temperature that is too warm. Remove the cutting, discard the old water, rinse the cutting, trim any mushy parts back to healthy tissue, then restart in fresh water with stronger aeration.
What water should I use for panikoorka, tap water or filtered?
Tap water is usually fine for rooting, but if your tap has very high chlorine or inconsistent pH, it can slow rooting or create nutrient uptake issues later. Let tap water sit overnight (to dissipate chlorine) and then check pH once you move to nutrient solution.
How often should I change the water in a DWC setup?
During nutrient water culture, do not rely on “top-ups” only. Plan a full reservoir change on a regular schedule (often every 1 to 2 weeks depending on growth and temperature) and always clean the container, because biofilm buildup contributes to bacteria and clogged roots.
Can I keep multiple panikoorka cuttings in one bucket?
You can, but overcrowding reduces dissolved oxygen and increases cross-contamination risk if one cutting goes bad. Space cuttings so their root masses do not tangle, and keep a steady bubble pattern across the whole reservoir.
Do I need to use hydroponic nutrients, or can I keep it in plain water forever?
Plain water can keep plants alive for a short time, but panikoorka is a fast, leafy herb that will eventually show deficiency because nutrients are not replenished. Once roots are established, switch to a balanced hydroponic nutrient mix and aim for the stated EC and pH ranges.
What pH and EC readings are “good enough” for panikoorka?
Use the target window as a guide, but do not chase exact numbers daily. If pH is far outside the range, nutrients become less available even when EC looks okay. If you are consistently outside targets, adjust with pH solution rather than repeatedly changing nutrients at random.
My plant is tall and leggy. Is it a nutrient problem?
Often it is a light problem. If you are already feeding, leggy growth usually means insufficient intensity or too-short light duration. Increase bright light to the recommended daily hours, and rotate the container so one side does not overreach toward the light.
Where should the stem sit relative to the water line in water culture?
Only the bottom node should be submerged for rooting. When in DWC, keep the leafy stem and foliage above the water, so you do not invite rot in wet, semi-succulent tissue.
Can panikoorka be grown from seeds in water like cuttings?
It is possible with a rinse-and-drain approach, but it is slower and less reliable than stem cuttings. If you want the most predictable harvest timeline, start with cuttings, then use seeds only if you are growing for experimentation or variety.
How do I harvest without damaging the plant or slowing new growth?
Harvest stem tips and leaves selectively, cutting just above a leaf node with clean scissors. Keep each harvest conservative (do not remove more than about a third of the foliage at once), because panikoorka needs time to regrow branching shoots.
My reservoir is warming up in summer. What should I change?
Warm water holds less dissolved oxygen and encourages bacterial activity. Increase aeration immediately, consider partial shading for the reservoir location, and if possible move the setup to a cooler spot so the water stays within the ideal temperature band.
If I see algae in the container, does that automatically mean the system is failing?
Algae often indicates that light is reaching the water, which can raise oxygen stress and promote bacterial imbalance. Opaque the reservoir (or wrap it), reduce direct sun on the water, and perform a clean-out rather than just scraping algae off the surface.