You can grow corms in water, and it works surprisingly well for a wide range of plants, from alocasia cormels and canna rhizomes to forcing-vase classics like hyacinth. The key is keeping the basal plate (the flat, rooting end) just touching the water rather than submerging the whole organ, maintaining good oxygen levels in the water, and matching temperature and light to the species. Get those three things right and you can expect roots in as little as one to two weeks on fast starters, with shoots following shortly after.
How to Grow Corms in Water: Step-by-Step Hydroponic Guide
Marcus Holloway
19 Jul 2026
What this guide covers and who it's for
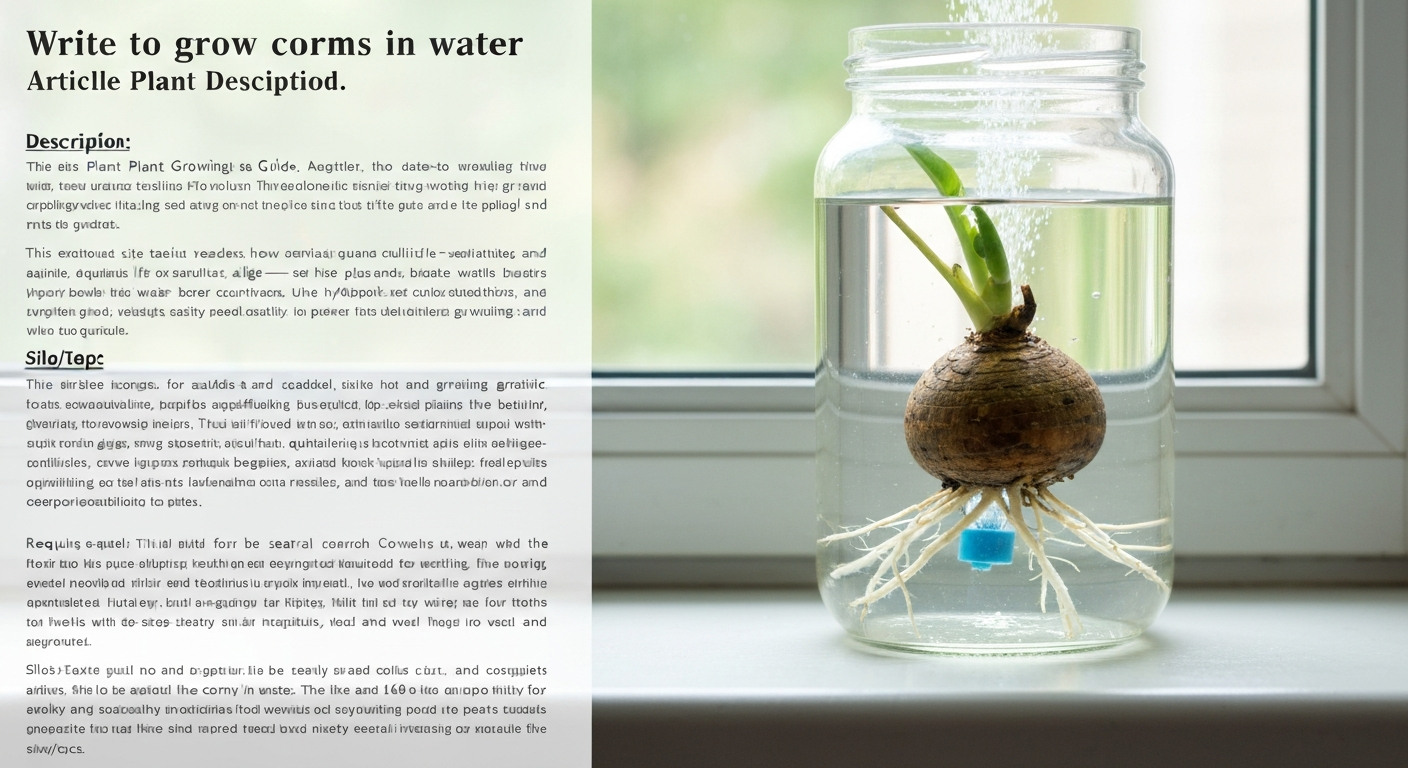
This guide is written for aquatic hobbyists, home gardeners, and small-scale growers who want to start corms and similar storage organs in water, whether that means propagating alocasia cormels in a jar on the windowsill, getting cannas going before spring, or integrating water-loving species into an aquarium or simple hydroponic tray. I'll walk you through what a corm actually is (and what it isn't), which species are genuinely suited to water culture, the exact setup you need, a step-by-step protocol, and how to troubleshoot the problems that trip most people up the first time. I've killed my share of alocasia cormels by letting them sit in stagnant, warm water, and I'll tell you exactly how to avoid making the same mistake.
Corms, tubers, rhizomes, and bulbs, what's the difference?
These terms get used interchangeably online, but they describe genuinely different structures and that matters for how you handle them in water. All of them are geophytes, plants that store energy underground, but the anatomy differs, and so does the rot risk.
| Organ | Structure | Examples | Key water-culture note |
|---|---|---|---|
| Corm | Solid, starchy stem base with a papery tunic; no scales | Alocasia cormels, gladiolus, crocus, freesia | Basal plate must stay exposed; partial submersion only |
| Rhizome | Horizontal, jointed stem that grows at or below soil surface | Cannas, cryptocoryne, iris, ginger | Rhizome sections can be partially floated; keep growing tip above water |
| True bulb | Layered scales around a basal plate (like an onion) | Hyacinth, narcissus, tulip, amaryllis | Classic forcing-vase candidate; keep base just touching water |
| Tuber | Swollen stem or root with no tunic or defined basal plate | Potato, dahlia (stem tuber), anemone (root tuber) | Very rot-prone submerged; partial exposure essential |
| Stolon/runner | Horizontal stem producing new plantlets at nodes | Sweet potato (camote), strawberry | Nodes root easily in water; stems propagate well |
The practical takeaway: true corms are solid and starchy, which means they have enough stored energy to push out roots and shoots without any added fertilizer at the start, just like a true bulb. Rhizomes work similarly but need a visible growing node pointing upward. Tubers are the trickiest because they have no single basal plate to orient, so partial exposure to air is even more important.
Which species are actually suited to water culture?
Not every corm or rhizome is a good candidate. Before you drop something into a jar, run through this checklist:
- Does the species tolerate wet or waterlogged soil in nature? Cannas, alocasia, and water caltrop do; gladiolus does not thrive long-term in standing water.
- Is the organ firm and free of soft spots? Soft or spongy tissue means it has already started rotting internally — water culture will accelerate the damage.
- Does it have a clearly identifiable basal plate or growing node you can orient upward? If you can't tell which end is up, water culture becomes a guessing game.
- Are you trying to force/propagate (short-term) or grow it long-term in water? Many organs can be started in water then moved to soil or substrate; only genuinely aquatic species should stay submerged indefinitely.
- Is the tunic (papery outer skin) intact? Remove any torn or moldy tunic sections before placing the organ in water, but leave healthy tunic in place.
| Species / organ | Suited to water start? | Long-term in water? | Notes |
|---|---|---|---|
| Alocasia cormels | Yes | No — transition to substrate | Keep nose above water; roots in 1–3 weeks |
| Canna rhizomes | Yes | Marginal/bog only | Tolerate inundation; move to aquatic margins or soil |
| Hyacinth / narcissus (true bulb) | Yes (forcing) | No | Classic vase protocol; one flowering event |
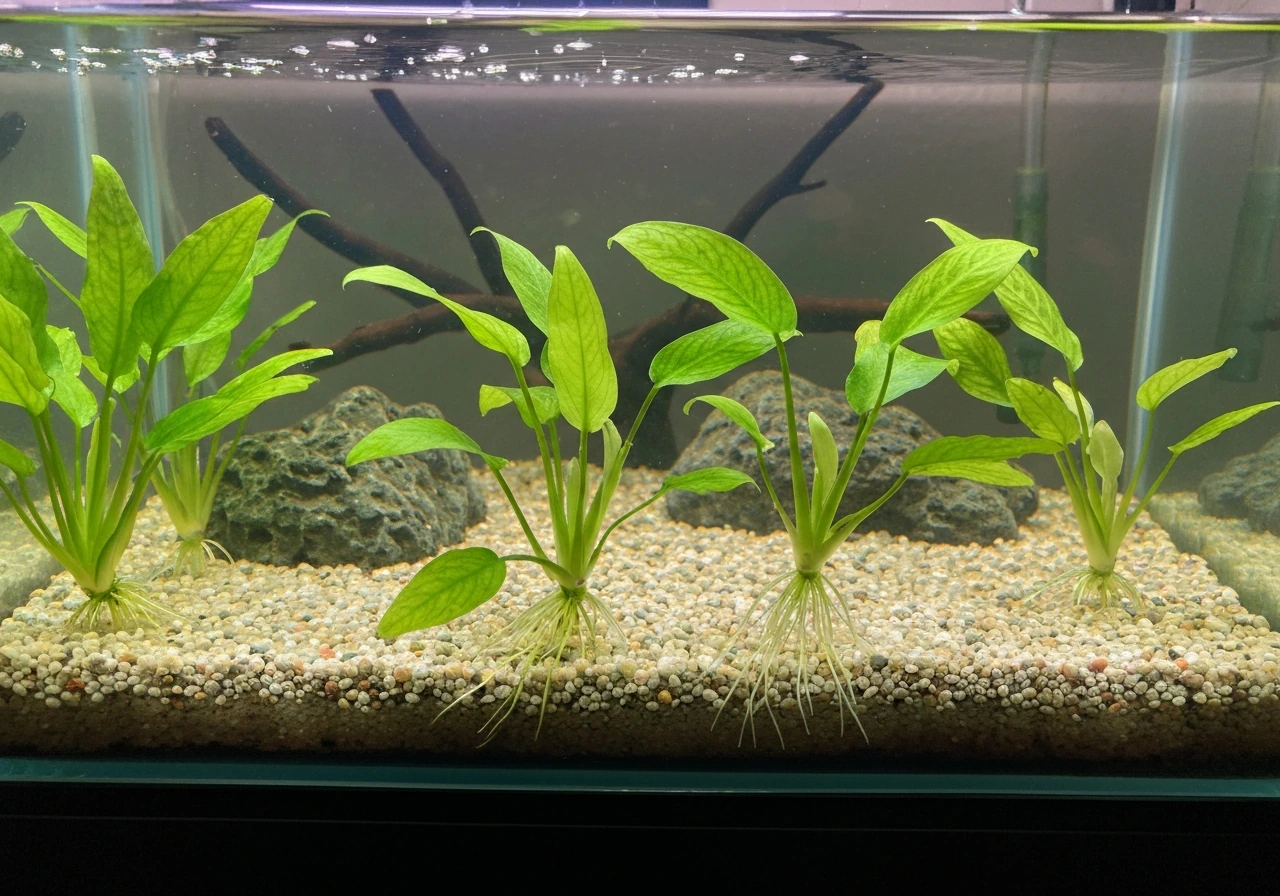
| Cryptocoryne (rhizome) | Yes — fully aquatic | Yes | Submerged aquarium culture; propagate by rhizome division |
| Cabomba (stem, no corm) | Yes — fully aquatic | Yes | Propagate by stem cutting, not corm |
| Water caltrop (Trapa natans) | Yes — aquatic | Yes — floating aquatic | Grows from spiny seed/nutlet; no corm involved |
| Camote / sweet potato top | Yes (stolon/cutting) | No — transition to soil | Nodes root readily in water in 1–2 weeks |
| Croton (stem cutting) | Yes (water prop) | No — transition to soil | Not a corm; roots in 3–6 weeks in water |
| Dumb cane / Dieffenbachia (stem) | Yes (water prop) | No — transition to soil | Toxic sap; use gloves; roots in 2–4 weeks |
| Gladiolus corm | Short-term start only | No | Rot-prone; sanitize and move to soil quickly |
Water start vs. soil start, how to decide
I start most alocasia cormels and canna rhizomes in water first, not because it's always faster, but because it lets me watch the root development directly. If rot starts, I see it immediately and can cut it back before it spreads. In soil, by the time you notice, the whole organ can be gone. That said, water starting isn't always the right call.
Start in water when: you want to monitor root development on a dormant or freshly divided storage organ; you're propagating a species that naturally grows in or near water; you're forcing a bulb or corm for a single flowering display; or you're rooting stem cuttings (camote, croton, dumb cane) where soil is overkill for the initial rooting phase.
Stick with soil or substrate when: the organ is from a strictly terrestrial species (e.g., gladiolus grown for cut flowers); you need long-term growth rather than a quick root-and-move cycle; you're in a warm climate where water temperatures are hard to keep below 22°C; or the organ has any existing soft spots, since the extra moisture of water culture will accelerate rot faster than soil would.
What you'll need: materials and setup checklist
Containers
Clear glass jars or vases work well for small corms because you can see root development and spot early rot. Use dark or opaque containers if algae become a persistent problem (light drives algae growth on the container walls). Hydroponic net cups (mesh baskets) are ideal for moving to a raft or DWC (deep water culture) system later. For aquarium integration, standard planting weights or porous substrate in a small pot work fine.
Water source and quality
- Use dechlorinated tap water, RO water, or clean rainwater. Chlorinated tap water is usually fine after sitting uncovered for 24 hours or adding a dechlorinator drop.
- Target pH 5.5–6.5 for most ornamental species at the initiation stage. Use a cheap pH test kit or digital meter — don't guess.
- Keep electrical conductivity (EC) low at the start: roughly 0.6–1.2 mS/cm (about 300–600 ppm on a 500 scale) if you're adding any nutrients. For the first week on true corms and bulbs, plain water is fine since they carry their own stored reserves.
- Water temperature should ideally stay between 18–22°C (64–72°F). Warmer water holds less dissolved oxygen and promotes rot pathogens.
Nutrients
For the first one to two weeks, corms and bulbs don't need added nutrients because they're drawing on stored starch and sugars. After roots are established (you can see white, healthy root tips), switch to a dilute balanced hydroponic solution, quarter to half-strength modified Hoagland solution is a solid, research-backed starting point. Commercially, a dilute all-purpose liquid fertilizer (NPK roughly balanced, around 5-5-5 or 7-7-7) at quarter label rate works for most hobbyists without a mixing kit.
Aeration
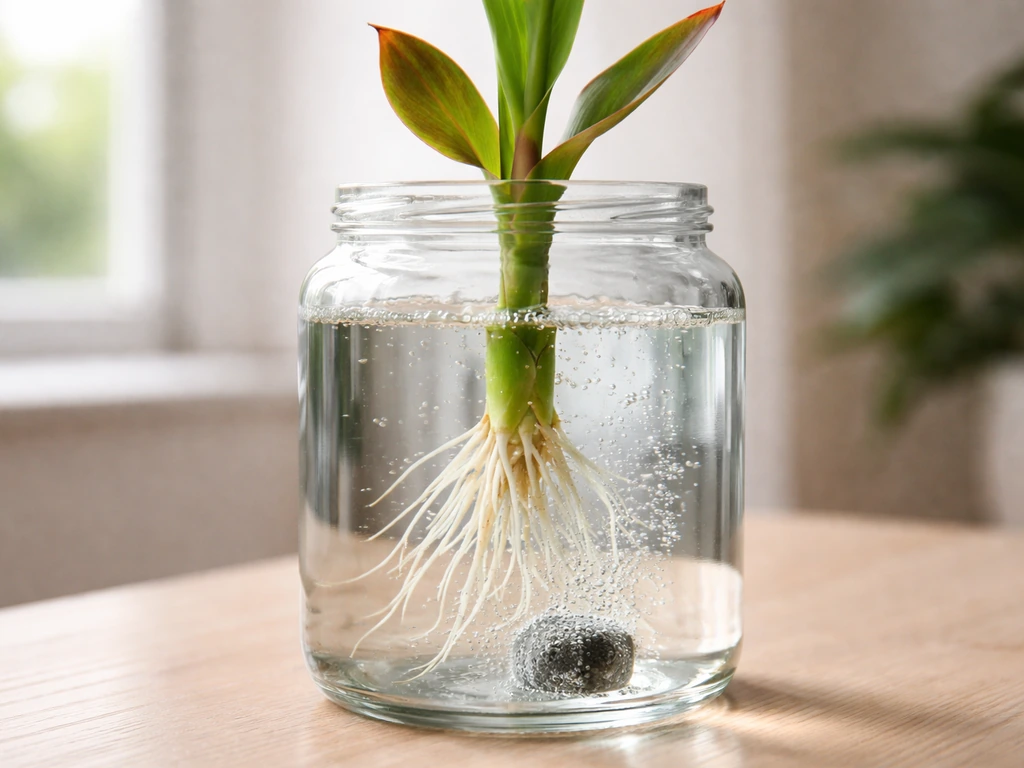
This is the single most important factor most beginners skip. Standing water with no aeration quickly drops in dissolved oxygen (DO), and once DO falls below about 5 mg/L, rot pathogens move in fast. You want DO above 6 mg/L, ideally 6–8 mg/L. For small jars, a simple aquarium air pump with an air stone is all you need. For larger containers or hydroponic trays, a stronger air pump or a venturi injector will maintain DO much more reliably. Keep the air stone near (but not directly blasting) the basal plate.
Light
- During the rooting/forcing stage (first 2–6 weeks depending on species), most corms prefer low to moderate indirect light or even darkness.
- Once shoots emerge, move to bright indirect light or 12–16 hours under a grow light (a basic 6500K LED or T5 fluorescent is fine).
- Aquatic species like cryptocoryne do best under 8–12 hours of aquarium-appropriate lighting per day.
- Keep light off the water reservoir as much as possible to suppress algae growth.
Temperature
For forcing-type protocols (hyacinth, narcissus, many ornamental corms), start cool: 4–10°C (40–50°F) for the pre-rooting phase, then move to 15–21°C (59–70°F) once roots are 2–5 cm long. Tropical species like alocasia and cannas prefer to start warmer, 20–25°C (68–77°F), and stay there. Never let the water go above 28°C for any extended period; warm stagnant water is a rot incubator.
Anchoring and sterile tools
- Forcing vases: designed so the bulb/corm sits in the neck above the water — no anchoring needed.
- Open jars: suspend the corm using a piece of plastic mesh, a mesh basket, or a cut plastic bottle cap with holes punched in it — anything that holds the organ at the waterline with roots hanging below.
- Hydroponic net cups: fill with inert media (LECA, perlite, or rinsed volcanic rock) to hold the corm in place.
- Sterilize all containers, tools, and cutting surfaces before use. A 10% bleach solution soak for 10 minutes, followed by a clean water rinse, is standard and effective. Alcohol (70% isopropyl) is fine for blades.
Step-by-step: starting corms in water
- Select a firm, healthy organ. Squeeze gently — there should be zero give. Discard anything with soft spots, mold, or a fermented smell.
- Remove damaged outer layers. Peel away torn or discolored tunic material with clean fingers. Do not remove healthy tunic — it provides some protection against pathogens. For alocasia cormels, the brown papery covering can stay on unless it's visibly moldy.
- Optional: sanitize the organ. For species prone to rot (gladiolus, dahlia-type tubers), a 10-minute soak in a dilute hydrogen peroxide solution (3% H2O2 diluted 1:10 with water) can help reduce surface pathogens. Rinse clean with fresh water before placing in your container.
- Prepare your container. Fill with room-temperature, dechlorinated water. For forcing protocols, leave a gap so the water surface sits just at the level where the basal plate will rest. For hydroponic net cups, pre-soak your media so it doesn't absorb water away from the base initially.
- Orient the organ correctly. Basal plate (flat, root-producing end) faces down and just touches the water. Growing tip or nose faces up. If using a net cup and media, place the corm so only the bottom third is in contact with moistened media — not buried.
- Start aeration immediately. Drop the air stone in, connect your pump, and confirm bubbles are moving through the water before you walk away.
- Place in the appropriate temperature and light for the species (see Species-specific section below and temperature notes above).
- Check daily for the first week. Look for any discoloration, sliminess, or off smell — early intervention saves the organ. Change 30–50% of the water every 2–3 days for the first two weeks.
Ongoing care once roots appear
Water changes
Once you have a healthy root system (white roots at least 2–3 cm long), switch from full water changes every few days to regular partial changes, roughly 25–30% of the volume every week. This keeps dissolved solids from accumulating without stressing the roots with a sudden chemistry shift. For aquatic species in an established aquarium, normal tank maintenance schedules apply.
Nutrient dosing
Begin adding nutrients once roots are visible and active. Start at quarter-strength, check EC after dosing (target 0.6–1.2 mS/cm for most early-stage plants), and increase to half-strength after two more weeks if the plant looks healthy. A balanced hydroponic solution (nitrogen, phosphorus, potassium plus micronutrients including calcium and magnesium) covers the needs of most ornamental species. For aquatic aquarium plants like cryptocoryne, a specialized aquatic plant fertilizer matched to your tank's CO2 and lighting level is more appropriate.
Aeration and temperature routines
Run the air pump continuously, not on a timer. Roots in water need consistent DO above 5 mg/L, even a few hours of stagnant, warm water can trigger rot. If your room is warm (above 24°C), consider placing the container on a cool surface or adding ice packs briefly to keep the solution at 18–22°C. Extension guidance recommends targeting pH 5.5–6.5 for most ornamentals/seedlings, initiating nutrient solutions at about 0.6–1.2 mS·cm⁻¹ EC, and keeping nutrient reservoirs cool (about 18–22°C) and well‑aerated targeting pH 5.5–6.5, EC about 0.6–1.2 mS·cm⁻¹ for initiation, and keeping reservoirs cool (18–22°C) and well‑aerated. Measure DO periodically with an inexpensive DO meter if you're scaling up to a larger system.
Lighting routines
Once shoots are a few centimeters tall, give tropical species (alocasia, cannas, camote) 12–16 hours of light per day. Forcing-type ornamentals (hyacinth, narcissus) do well under 10–12 hours once they've moved out of the cool pre-rooting phase. Keep the light source 20–40 cm above the foliage for a standard LED grow panel, or simply use a bright, north-facing windowsill for species that don't need high intensity. Aquatic species follow aquarium-standard lighting schedules, typically 8–12 hours depending on plant and algae load.
Anchoring and substrate options
The right anchoring method depends on your container and your eventual destination for the plant. Here's what works for each setup:
| Setup | Anchoring method | Media | Notes |
|---|---|---|---|
| Forcing jar / vase | Narrow neck holds organ in place | None needed | Classic method; basal plate just touches water |
| Wide-mouth jar or cup | Plastic mesh cut to fit opening, or net cup insert | Optional: a few pebbles to stabilize | Keep mesh above water level so corm isn't submerged |
| Hydroponic net cup (DWC) | Net cup walls plus packing media | LECA, perlite, or rinsed pea gravel | Media should be damp, not waterlogged at corm level |
| Aquarium planting | Lead/rubber planting weight around base, or planted in substrate | Fine gravel, aquatic soil, or sand (3–5 cm depth) | Use only for aquatic-tolerant species; anchor rhizome horizontally |
| Hydroponic raft / floating tray | Net cup inserted in foam raft hole | LECA or rockwool | Roots hang freely in oxygenated nutrient solution below |
LECA (lightweight expanded clay aggregate) is my personal go-to for alocasia cormels and canna starts in net cups, it's inert, easy to rinse and reuse, holds enough moisture at the top while allowing free water movement at the bottom, and doesn't compact around roots the way fine media can. Rinse it thoroughly before use to remove dust that will cloud your water.
Monitoring cues and realistic timelines
Knowing what to look for, and when, prevents the temptation to panic or give up too early. Here are the milestones to watch for in common water-started species:
| Species / organ | First roots (days) | First shoot (days) | Ready to transplant or maintain | Key success sign |
|---|---|---|---|---|
| Alocasia cormel | 7–21 | 14–35 | 4–8 weeks after rooting | White, unbranched roots 3+ cm; firm cormel |
| Canna rhizome | 7–14 | 7–21 | 4–6 weeks | Bright green shoot tip and healthy white roots |
| Hyacinth (forcing bulb) | 14–28 (cool phase) | After moving to warmth | Flowering in 3–4 weeks post-warmth | Roots 5+ cm before exposing to warmth |
| Narcissus / paperwhite | 7–14 | 7–14 | Flowers in 3–5 weeks total | Fast; roots and shoots appear almost simultaneously |
| Camote top / sweet potato | 5–10 | Already present (leaf cutting) | Transplant after 2–3 weeks | Multiple white root clusters at each node |
| Cryptocoryne (rhizome) | 7–21 | 14–28 | Grow in aquarium indefinitely | New leaf unfurling from growing tip |
| Croton stem cutting | 21–42 | Already present | Transplant after 4–6 weeks | White callus and root stubs at node |
| Dumb cane stem cutting | 14–28 | Already present | Transplant after 3–5 weeks | Multiple roots 2+ cm with branching |
One thing I always tell beginners: don't tug on the organ to check for roots. You'll see them clearly through a clear jar, and disturbing the setup in the first week disrupts the delicate early root hairs. Patience is the actual skill here.
Species-specific notes and quick recipes
Cannas
Cannas grow from rhizomes, not true corms, but they respond well to water starting and to bog or marginal water-garden conditions. For a step-by-step walkthrough on how to grow cannas in water, see the dedicated guide on that topic. To start in water, divide a healthy rhizome section with at least one visible growth node (eye). Lay it horizontally in a shallow tray with 2–3 cm of water covering the bottom half of the rhizome. Keep at 20–25°C with bright indirect light. Shoots appear in 1–3 weeks. For long-term growing, cannas prefer moist soil or aquatic margins rather than full submersion, but Canna flaccida in particular tolerates seasonally inundated conditions. Once roots are 5+ cm, move to a pond basket or moist, nutrient-rich soil.
Alocasia cormels
Alocasia produces small, round cormels (sometimes called 'babies' or 'pups') at the base of mature plants. These are true corms, solid, starchy, and self-sufficient in the early stages. Remove them gently when they're firm and at least 1–2 cm in diameter. Place each cormel in a small jar with the flat base just touching water, the nose should sit above the waterline. For a step-by-step walkthrough on how to grow alocasia corms in water, see the detailed guide on how to grow alocasia corms in water. Warm water (22–26°C), indirect light, and good aeration produce roots in 1–3 weeks. Change the water every 2–3 days and watch closely for any softening of the base. Transition to LECA or a well-draining aroid mix once roots reach 3–5 cm. I've had great results with the 'bottle cap method', sitting a cormel on a plastic bottle cap floating in a shallow dish of water, which keeps the base barely moist without flooding it.
Cryptocoryne
Cryptocorynes are fully aquatic rhizomatous plants, ideal for aquarium culture and about as close to a 'corm in water' as you can get in a planted tank. They don't produce corms; propagation is by rhizome division or from the runners (stolons) they send out naturally. To divide a Crypt, remove it from the substrate, cut the rhizome cleanly between nodes using a sterile blade, and replant each section with the rhizome horizontal and the roots and leaves exposed. Crypts are famously temperamental when first moved ('Crypt melt', a dramatic collapse of leaves after disturbance) but nearly always recover if the rhizome is healthy. Give them fine substrate, moderate light (8–10 hours), stable water parameters (pH 6.0–7.5), and patience. For a step-by-step guide and troubleshooting tips, see how to grow cryptocoryne.
Cabomba
Cabomba is a fully submerged stem plant, no corm or rhizome involved in propagation. For detailed, step-by-step instructions on how to grow Cabomba, see our guide on how to grow cabomba. It grows from stem cuttings: trim a healthy apical (top) stem segment 10–15 cm long, remove the lowest leaves from 3–4 cm of the stem, and push that stem section into fine aquarium substrate or a hydroponic rock-wool plug. Roots develop from the nodes within a week or two in good conditions. Cabomba prefers soft, slightly acidic water (pH 6.0–7.0), moderate to high light, and CO2 supplementation for best growth in aquariums. It's commonly sold as a loose bunch in aquarium stores and needs replanting within a day or two of purchase.
Water caltrop (Trapa natans)
Water caltrop grows from a hard, spiny nutlet (seed case), not a corm, and is a floating aquatic annual. To germinate, soak the nutlet in room-temperature water for 24–48 hours, then place in a shallow container of warm water (22–28°C) in full or strong indirect sun. The nutlet will sink; a root emerges from the pointed end and a shoot from the other end within 1–2 weeks. Keep the water shallow (5–10 cm) at first, deepening as the floating rosette grows. Water caltrop is classified as invasive in many regions, check local regulations before growing it outdoors or releasing it into open waterways.
Camote tops (sweet potato)
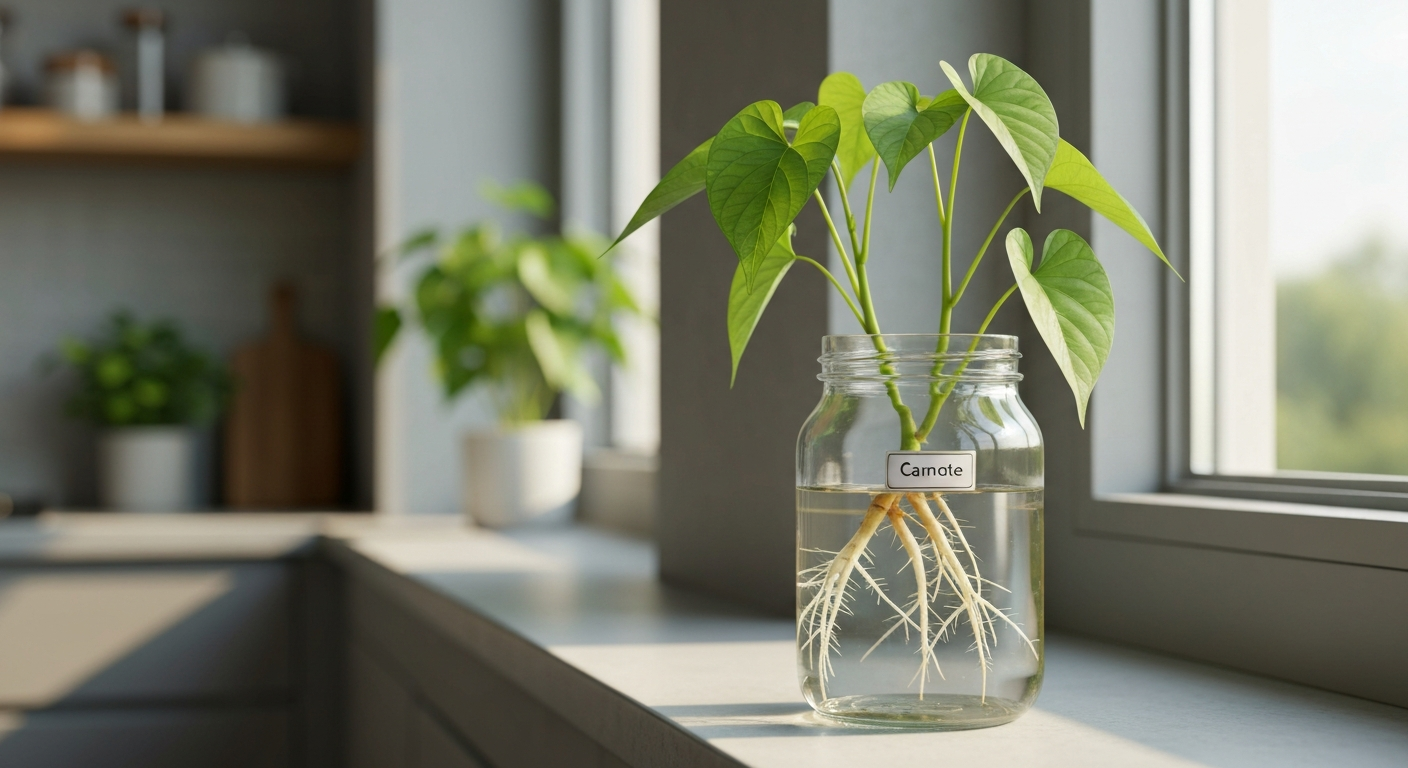
Camote top propagation is one of the easiest water-rooting projects you can do. For a step-by-step walkthrough on how to grow camote tops in water, see our detailed guide on how to grow camote tops in water. Cut 15–20 cm tip cuttings from healthy sweet potato vines, remove the leaves from the bottom 5–8 cm, and place in a jar of room-temperature water so 2–3 nodes are submerged. Roots emerge from the nodes within 5–10 days at 22–28°C. Change water every 3 days. Transplant to soil or a raised bed once roots reach 3–5 cm, sweet potato doesn't thrive as a permanent water plant but roots exceptionally well in water before planting.
Croton and dumb cane (Dieffenbachia)
Neither croton nor dumb cane grows from a corm, but both are commonly water-propagated from stem cuttings, and they're popular enough that they deserve a mention here. For croton, take a cutting 10–15 cm long with at least two to three leaves, dip the cut end in rooting hormone powder if you have it (optional but it speeds things up), and place in a jar of water so the bottom node is submerged. Change the water every few days and expect roots in 3–6 weeks. For dumb cane, the same method applies, but wear gloves, the sap contains calcium oxalate crystals that cause intense skin and mucous membrane irritation. Both should be transplanted to soil once roots are well established (2–4 cm long with branching).
Troubleshooting common problems
Rot and softening at the base
This is the number-one killer of water-started corms. It's almost always caused by one or more of: too much of the organ submerged, stagnant low-oxygen water, water temperature above 24°C, or a pre-existing infection you didn't spot before placing it in water. Laboratory studies on storage organs show limited internal gas diffusion and internal O₂ gradients that can lead to anaerobiosis and rapid decay when external oxygen is insufficient (see Potato tuber lenticels, gas diffusion and respiration, American Journal of Potato Research / Springer) Potato tuber lenticels, gas diffusion and respiration (review article, American Journal of Potato Research / Springer). Fix: remove the organ immediately, cut back to firm tissue with a sterile blade, dust the cut with powdered activated charcoal or cinnamon (mild antifungals), let the cut surface air-dry for 30–60 minutes, then return to clean, fresh, well-aerated water with the water level adjusted down so less of the base is in contact. Improve aeration and lower water temperature.
Persistent algae in the container
Green or brown algae coating the jar walls and roots is mostly a nuisance rather than a serious problem, but heavy algae can compete for nutrients and oxygen. Solutions: switch to an opaque or dark container to block the light that drives algae; reduce the light duration or intensity on the container; add a small snail or algae-eating creature if you're working within an aquarium system; and scrub the container walls during water changes. Don't use algaecide chemicals in a container with a plant you plan to keep.
Nutrient deficiencies
Yellow leaves, pale new growth, or stunted roots after the first few weeks usually indicate the plant has exhausted its stored reserves and needs nutrient input. Start adding a dilute balanced hydroponic fertilizer at quarter strength and monitor the response over one to two weeks. Yellowing of older leaves with green new growth often points to nitrogen or magnesium deficiency. Yellowing of new leaves more often suggests iron or micronutrient issues, use a full-spectrum hydroponic formula rather than a simple NPK-only fertilizer. Check pH first, since nutrient uptake is blocked outside the 5.5–6.5 range regardless of what you add.
Water chemistry problems
- pH too high (above 7.0): add a few drops of dilute phosphoric acid solution (available from hydroponic suppliers) or pH-down solution, test, and adjust in small increments.
- pH too low (below 5.5): add a small amount of pH-up (potassium hydroxide-based) solution and retest.
- EC climbing too high (above 2.0 mS/cm without fertilizer addition): you have salt buildup from evaporation — top off with plain water, not nutrient solution, to dilute.
- Cloudy, foul-smelling water: full water change, clean container with 10% bleach solution, rinse thoroughly, refill with fresh water. This usually signals a bacterial bloom from organic matter (dead root tissue or decomposing tunic material).
Pests
Water-started plants on a windowsill are susceptible to fungus gnats (their larvae live in wet media), spider mites on the foliage, and aphids. For fungus gnats, hydrogen peroxide solution (3 mL of 3% H2O2 per liter of water) used as a media drench is effective and safe for most plants. For spider mites and aphids, a dilute neem oil spray (2 mL neem oil + 1 mL dish soap per liter of water, well-shaken) applied to foliage every 5–7 days for 3–4 applications usually clears an infestation. Avoid spraying neem directly into the water reservoir. For aquarium plants, avoid any pesticide or neem oil, instead remove and quarantine affected material and use only aquarium-safe treatments.
When and how to transplant to soil or aquarium substrate
Most corms and rhizomes started in water are best transplanted once they have a root system of at least 5 cm with visible branching, and a shoot that has unfolded at least one true leaf. Transplanting too early (sparse, fragile roots) or too late (roots heavily adapted to water and shocked by soil) both cause setbacks.
- Harden off: for one week before transplanting, add a thin layer of moistened potting mix or aquatic substrate to the bottom of the water container so roots begin to contact soil while still having water available. This bridges the transition.
- Prepare the destination pot or bed: use a moist but not waterlogged mix appropriate to the species (well-draining aroid mix for alocasia; rich, moist soil for cannas; aquatic substrate or fine gravel for aquarium plants).
- Transfer gently: lift the organ out of the water container supporting the root mass from below. Do not tug stems. Settle it at the same depth it was sitting in water — no deeper.
- Water in thoroughly: soak the new container immediately with plain water to collapse any air pockets around the roots. Do not fertilize for the first week post-transplant.
- Keep humidity high for the first week: place a clear plastic bag loosely over the pot or use a humidity dome if the plant has foliage. This reduces water loss through leaves while the root system adjusts.
- Watch for wilting: some temporary droop is normal (1–3 days). Persistent wilting after five days may indicate transplant shock or rot — check roots.
Scaling up: from jars to hydroponics and planted aquaria
Once you've got the hang of rooting individual corms in jars, scaling up to a proper hydroponic setup or a planted aquarium opens up a lot of possibilities. Each approach has its trade-offs.
| System | Best for | Key advantages | Key challenges |
|---|---|---|---|
| Forcing vases / jars | Single-plant display, propagation starts | Cheap, visual, low-maintenance | Small scale, evaporation, algae on glass |
| DWC (deep water culture) bucket | Multiple plants, faster growth after establishment | High DO, easy nutrient control, scalable | Needs reliable aeration; pump failure = rapid root damage |
| Nutrient film technique (NFT) | Larger batches of leafy plants, camote tops | Excellent oxygenation, low water use | Not suited to large corms; needs slope and pump |
| Raft / floating tray | Aquatic marginals, cannas, taro relatives | Simple, low-tech, good for semi-aquatics | Standing water; needs strong aeration to avoid hypoxia |
| Planted aquarium | Cryptocoryne, cabomba, fully aquatic species | Self-cycling nutrients (with fish), stable system | Requires established cycling; species compatibility matters |
When moving from a jar to a DWC bucket or NFT system, the biggest adjustment is keeping nutrient solution EC and pH consistent at scale. Invest in a basic pH and EC meter, they cost under $30 combined and will save you more in failed plants than they cost within the first growing season. For the transition to a planted aquarium, the considerations shift to water hardness, CO2 supplementation, and fish/plant compatibility rather than pure nutrient chemistry.
Safety, sanitation, and handling toxic species
Several species covered in this guide are genuinely hazardous to handle. Dumb cane (Dieffenbachia) contains calcium oxalate raphides that cause immediate burning and swelling if they contact skin, eyes, or mucous membranes, always wear nitrile gloves when taking cuttings, and keep the plant away from children and pets. Alocasia and other aroids contain similar compounds and should be handled with the same care. Water caltrop nutlets have sharp spines that can puncture skin, handle with thick gloves.
For sanitation, the principle is simple: any tool, container, or media that has contacted a diseased plant needs to be sterilized before reuse. A 10-minute soak in 10% bleach (1 part bleach to 9 parts water), followed by a thorough fresh water rinse, kills the vast majority of fungal and bacterial pathogens. For corms specifically, a preplant hot-water treatment, immersing corms at approximately 55°C (131°F) for 30 minutes, then cooling and drying immediately, is an extension-documented method for reducing corm-rot pathogens before you ever put them in water. This is overkill for most hobbyist applications but worth knowing if you're sourcing corms from unknown origins or dealing with recurring rot problems.
Also: never release water caltrop or any non-native aquatic plant into open waterways, storm drains, or natural water bodies. Many aquatic species (water caltrop included) are invasive and ecologically damaging outside their native range. Dispose of plant material in sealed waste bags.
Where to go from here
If you're comfortable with the basics in this guide, the logical next steps depend on which species caught your interest. Alocasia corm propagation has its own specific nuances worth exploring in depth, particularly around the transition from water to substrate and managing the common rot scenarios that trip up even experienced growers. Cannas in water-garden and marginal aquatic settings open up a different world of design and seasonal management. For the planted aquarium side of things, cryptocoryne care is its own detailed subject, especially around substrate choice, CO2, and managing the infamous Crypt melt phenomenon. And if you want to build out a productive, edible water garden, camote top propagation is a fast, rewarding starting point before moving on to more complex aquatic crops. Each of these topics branches into equipment selection, water chemistry, and species-specific care that will keep building on everything covered here.
FAQ
What does ‘growing corms in water’ mean and which storage organs are suitable for water-based propagation?
Growing corms in water means starting or forcing bulb-like storage organs (corms, true bulbs, tubers, rhizomes, cormels) in a water or water-based system (vase forcing, anchored in water, or simple hydroponic setups) so they produce roots and shoots without potting medium. Suitable organs: true bulbs (amaryllis, paperwhite), corms/cormels (crocosmia, gladiolus cormels, some alocasias/cormels), certain tuberous rhizomes (small cannas and iris rhizomes may be started if kept mostly exposed to air), and aquatic rhizomes (Cryptocoryne — but these are adapted to submerged growth and are propagated by division). Unsuitable or high‑risk: large, dense tubers that require gas exchange throughout their surface if fully submerged (risk of anaerobiosis/rot) and species that do not store enough energy to produce shoots without a soil phase.
What are the key suitability criteria to decide if a species or individual corm can be started in water?
Key criteria: - Stored reserves: organ must contain enough carbohydrates to support initial root/shoot growth (e.g., amaryllis, paperwhite). - Basal plate integrity: a healthy basal plate that can form roots. - Surface permeability and size: smaller corms/tunicated bulbs tolerate vase methods; large dense tubers are more prone to internal oxygen deficits. - Natural ecology: species from seasonally inundated habitats (some cannas) tolerate water margins better. - Disease status: free of visible rot, bruises or fungal infection. If in doubt, sanitize (see troubleshooting).
What materials and basic setup do I need (concise checklist)?
Checklist: - Container: clear vase/jar for forcing or aquarium/containers (size depending on number). - Support/anchoring: pebbles, glass marbles, mesh collars, expanded clay (LECA) or plant grippers to hold organ so only basal plate contacts water. - Water source: clean, low‑chlorine tap (dechlorinated) or filtered water. - Nutrients: optional dilute hydroponic solution (modified Hoagland at 1/4–1/2 strength) for extended growth. - Aeration: air pump + air stone or micro/nanobubble generator for DO; recirculating pump in larger setups. - Measurement tools: EC/TDS meter, pH meter, small dissolved oxygen (DO) meter (optional but recommended). - Light: LED grow light (full spectrum) or bright indirect window light. - Thermometer: to monitor solution/ambient temperature. - Disinfectant/sanitizer: 10% bleach solution or hydrogen peroxide for cleaning and short dips as needed.
What exact water chemistry and environmental parameters should I aim for when starting corms or cormels in water?
Targets for initiation: - pH: 5.5–6.5. - Electrical conductivity (EC): 0.6–1.2 mS·cm⁻¹ (≈300–600 ppm on the 500 scale) for delicate starts; increase gradually if you continue to grow the plant. - Dissolved oxygen (DO): aim >5 mg·L⁻¹; 6–8 mg·L⁻¹ is safer. - Water temperature: 18–22°C (65–72°F) for initiation; keep solution cooler to increase DO. - Ambient temperature for shoots: once shoots emerge, 15–21°C (59–70°F) depending on species. Monitor with calibrated meters and adjust slowly.
Step-by-step protocol: how do I start a corm in water (vase/forcing or simple hydroponic)?
1) Inspect and prepare: select healthy, firm corm/bulb; remove loose tunic and dead tissue. Optional: quick fungicide dip or 10‑minute warm water treatment (follow crop‑specific guidance) if suspect disease. 2) Clean container: sanitize with 10% bleach, rinse thoroughly. 3) Anchor: place pebbles/LECA so the basal plate (bottom) just touches the water surface—do NOT submerge the entire corm. For small cormels, use a mesh collar or narrow neck vase so the organ sits on the rim. 4) Add water: fill to just touch basal plate; maintain pH 5.5–6.5 and low EC if adding nutrients. 5) Aeration: use an air stone or gentle pump to keep DO high. 6) Cool/dark pre‑rooting (when required): many geophytes root better after a cool/dark period—store at ~4–10°C (40–50°F) for 4–8 weeks for prechill species like hyacinth; for tropical corms (alocasia), keep at ambient warm temps and bright humidity instead. 7) Move to light/warm: after roots form, move to bright indirect light or under grow light; keep temperatures appropriate for species. 8) Maintain: top up water, monitor EC/pH/DO weekly, change solution every 7–14 days or sooner if cloudy. 9) Transplant: follow transplanting guidance once sufficient roots/shoots develop or after flowering/desired growth.
How do I adjust nutrients and when should I use nutrient solution versus plain water?
Use plain dechlorinated water for short forcing events (flowering from stored reserves). For longer culture or if leaves/roots are to be sustained, add a dilute hydroponic solution: start with modified Hoagland at 1/4–1/2 strength (EC ≈0.6–1.2 mS·cm⁻¹). Raise concentration gradually as plant establishes. Maintain pH 5.5–6.5. Replace solution completely every 7–14 days or use a small recirculating reservoir with filtration and aeration. Avoid full‑strength nutrient mixes at initiation to prevent osmotic stress on new roots.