Yes, you can grow a croton (Codiaeum variegatum) in water. If you want a true aquatic planted tank option instead, learn how to grow Cabomba and meet its light and nutrient needs Yes, you can grow a croton (Codiaeum variegatum) in water. . If you want to learn how to grow corms in water, use the same idea of controlled moisture and clean rooting conditions grow a croton.
How to Grow a Croton Plant in Water: Step-by-Step Guide

Marcus Holloway
22 May 2026
It won't live its entire life submerged like a true aquatic plant, but you can root cuttings in plain water and then move them into a semi-hydro setup using LECA (expanded clay pellets) where the roots sit in a shallow nutrient reservoir indefinitely. If you specifically want to know how to grow cannas in water, focus on keeping the rhizomes supplied with oxygenated, nutrient-rich water and avoiding stagnant conditions semi-hydro setup. That's the practical path most water-based growers use, and it works well once you understand what croton actually needs.
Is croton actually possible to grow in water?
Croton is not an aquatic plant, so it won't thrive with its roots fully and permanently submerged. What it can do is root in water easily from cuttings, and it can then live long-term in a semi-hydro system where the lower portion of the root zone sits in a shallow nutrient solution while the upper roots get air. Think of it like how you'd handle other dramatic-leaved tropicals: dumb cane (Dieffenbachia) and Alocasia follow the same basic principle, starting in water and graduating to a more stable semi-hydro setup. Croton is just a bit more particular about light and temperature, which I'll get into below.
The thing that trips people up is expecting croton to behave like a simple propagation plant that you just drop in a vase and forget. It's moodier than that. It drops leaves when stressed, hates cold drafts, and needs bright light to keep those vivid reds, oranges, and yellows going. Get the conditions right, though, and it roots reliably and holds up well in LECA over the long term.
Choosing the right cutting and timing it well
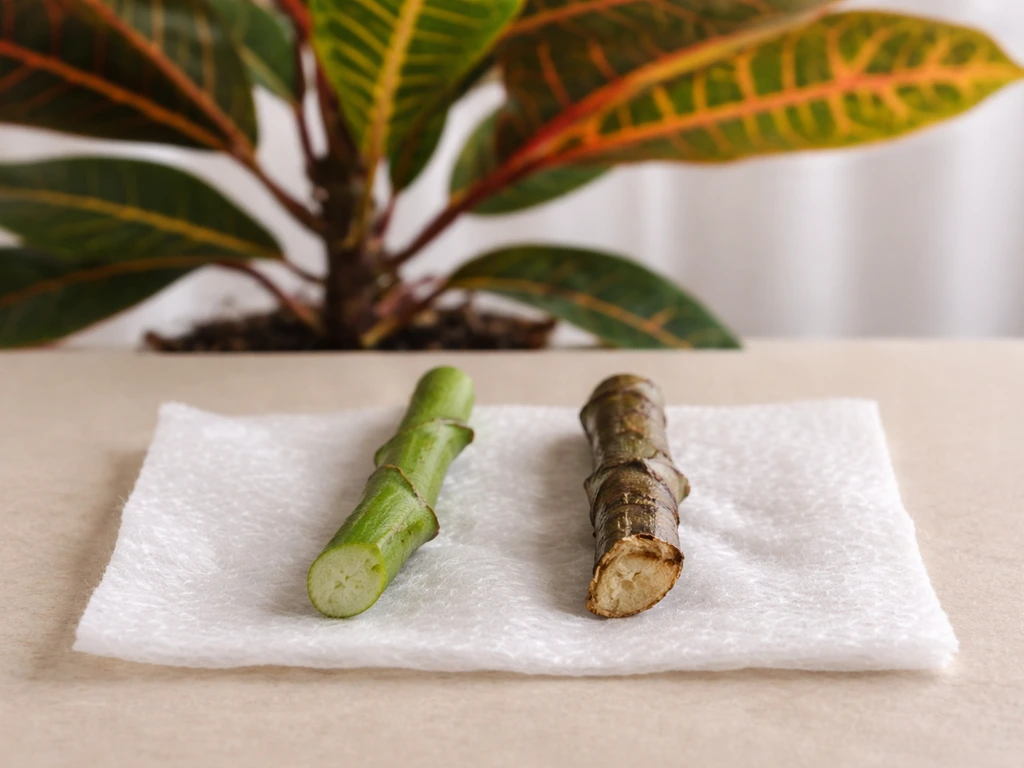
The cutting is where most failed attempts begin. You want a softwood tip cutting taken from a healthy, actively growing stem. That means new-ish growth that's flexible but not limp, typically 4 to 6 inches long with at least 3 to 4 leaves. Avoid woody, thick stems from the base of the plant; those root slowly and inconsistently in water.
Timing matters more than most guides admit. Research on seasonal propagation of croton cuttings found that rooting percentages and root system quality were significantly better in winter-to-spring conditions than in summer or fall. Practically, that means April through June is your best window if you're propagating from an existing plant. Cuttings taken during active spring growth have higher natural auxin levels and root faster and more densely. If you're taking a cutting in late summer, manage your expectations; it'll still work, just more slowly.
- Choose a stem tip with 3 to 4 healthy leaves, 4 to 6 inches long
- Cut just below a leaf node with a clean, sharp blade or scissors
- Remove the bottom 1 to 2 leaves so the submerged portion of the stem is bare
- Let the cut end sit in open air for 20 to 30 minutes so the milky latex sap dries slightly (this reduces bacterial contamination in the water)
- Ideal cutting season: April through June; workable but slower in other seasons
One thing I've found helpful: lightly scraping the bottom inch of the stem with a blade before placing it in water. This wounding technique exposes more cambium tissue and can noticeably speed up root initiation, especially on slightly more mature stems.
Setting up your water-growing container
Container choice
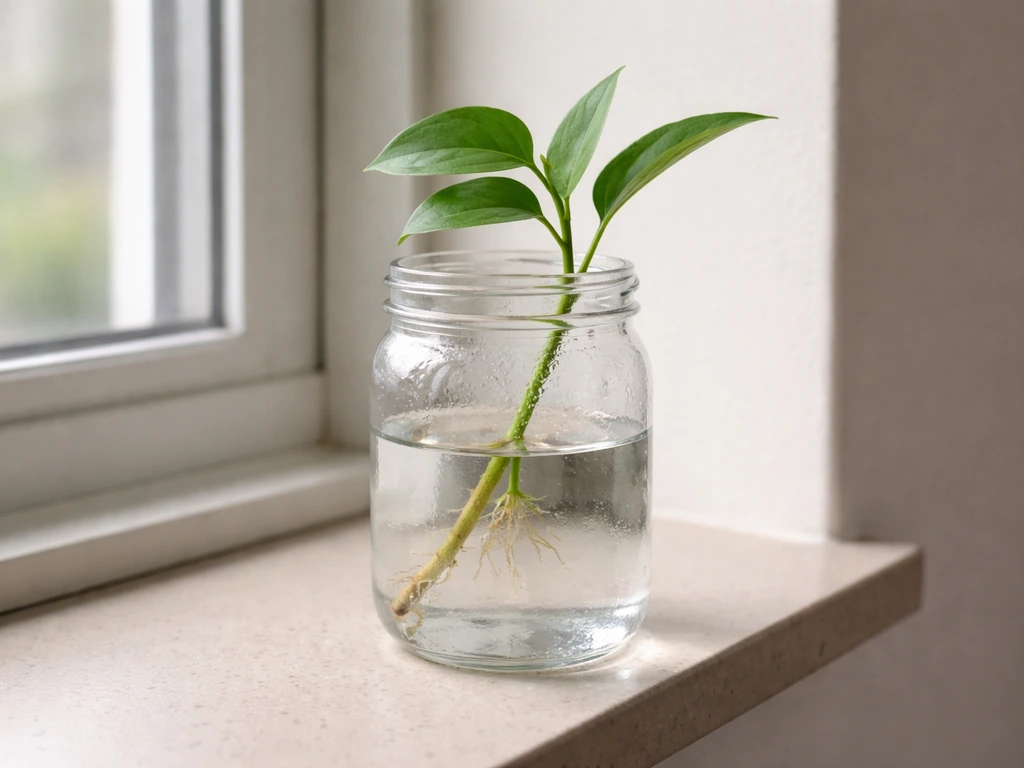
Use a dark or opaque container rather than a clear glass jar. I learned this the hard way: clear containers let light hit the water, which fuels algae growth and can coat developing roots in green slime within two weeks. A dark glass bottle, a ceramic vase, or a container wrapped in tape works well. The container only needs to be deep enough to submerge the bottom 2 inches of the stem, with the leaves well above the waterline.
Water quality
Tap water is fine for the initial rooting phase, but let it sit out uncovered for 24 hours first to off-gas chlorine. Chloramine (used by some municipalities) doesn't off-gas as easily; if your tap water uses chloramine, use a small amount of filtered or distilled water instead. For a long-term semi-hydro setup, water quality becomes more important: keep pH between 5.8 and 6.5, and monitor TDS (total dissolved solids) if you're adding fertilizer. A basic pH pen and a cheap TDS meter are worth the $15 to $20 investment once you move beyond the initial rooting phase.
Light and temperature
Croton needs more light than most water-propagated plants. Place the cutting where it gets several hours of bright indirect light daily, or use a grow light set to 12 to 14 hours. Direct harsh sun through a window can burn the leaves at this stage, but dim conditions will stall rooting entirely and cause leaf drop fast. Temperature is equally critical: keep the rooting environment between 68°F and 75°F (20 to 24°C). Cold windowsills in winter are a common silent killer; roots just don't initiate well below 65°F.
Step-by-step: how to root croton in water

- Prepare your cutting as described above, let the latex dry for 20 to 30 minutes, and optionally dip the cut end in powdered rooting hormone (IBA-based) before placing it in water. This isn't strictly required but does improve results, especially outside of the spring window.
- Fill your opaque container with room-temperature, dechlorinated water. Submerge only the bare bottom 2 inches of stem; keep all leaves above water.
- Place in bright indirect light at 68 to 75°F. A spot near (but not directly at) a south- or east-facing window is ideal, or use a grow light overhead.
- Change the water every 5 to 7 days. This is non-negotiable. Stagnant water breeds bacteria that will rot the stem before roots have a chance to form. When you change the water, give the container a quick rinse too.
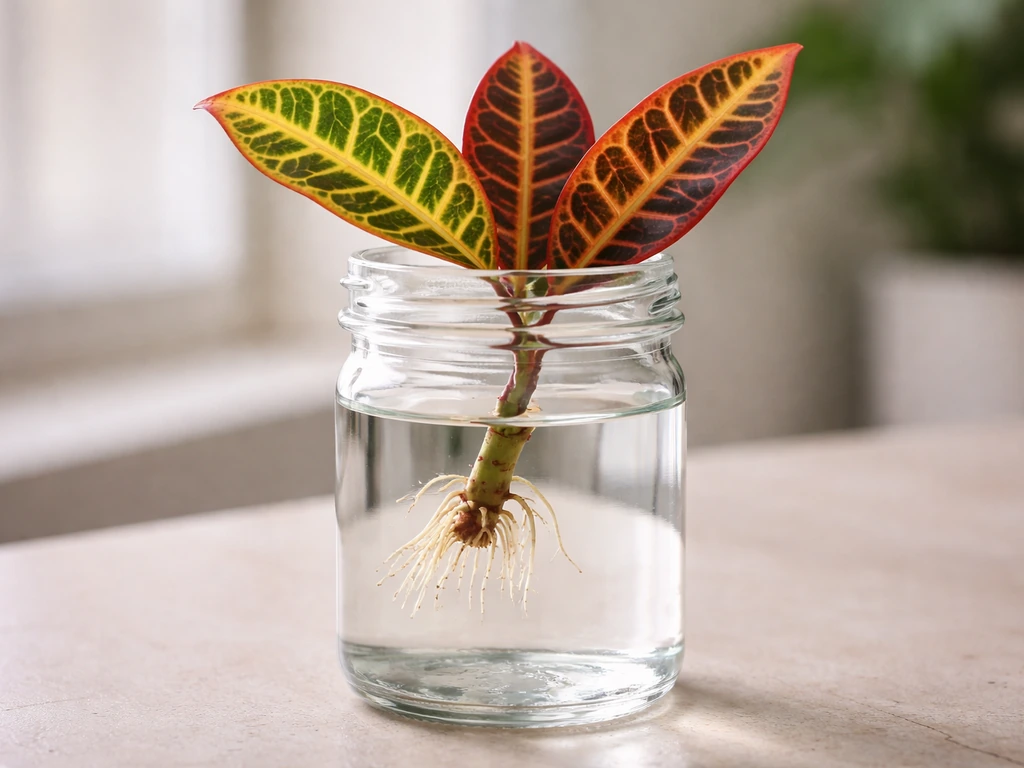
- Check for root nubs starting at the 2- to 3-week mark. With a spring cutting and warm temperatures, you may see small white root bumps within 14 days. On a slower fall cutting, it might be 4 to 5 weeks.
- Once roots reach about 1 inch in length, the cutting is ready to transition. Don't let roots grow extremely long in plain water; very long water-grown roots are fragile and often die back when moved to a new medium.
A note on patience: croton is genuinely one of those plants where the first week looks like nothing is happening and then roots appear seemingly overnight. Don't give up before the 3-week mark. As long as the stem isn't soft, brown, or smelly, it's still viable.
Transitioning from water to soil or semi-hydro
Once roots are about 1 inch long, you have two paths: transition to potting mix (standard approach) or move into a semi-hydro LECA setup (the water-based long-term option that keeps this plant in the spirit of a hydro system). Both work, but they require different handling.
Moving to soil
If you're going the soil route, use a well-draining mix and pot the rooted cutting into a small 4-inch pot. Water it in gently and keep it in the same warm, bright location. Expect some leaf drop in the first week as the roots adjust from water to substrate. This is normal. Don't fertilize for the first 3 to 4 weeks; let the root system adapt first.
Moving to semi-hydro (LECA)
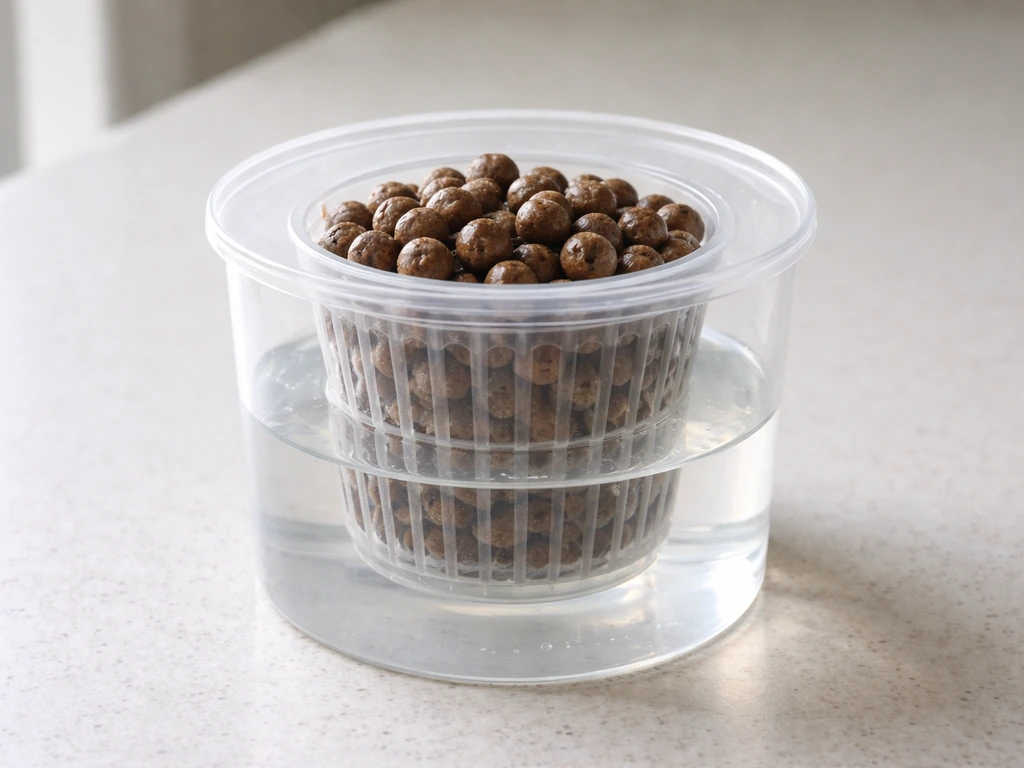
This is the better fit for a water-cultivation setup. Rinse LECA pellets thoroughly, then fill a net pot or a container with drainage holes (sitting inside a slightly larger outer pot that acts as a reservoir). Place your rooted cutting in the center, pack LECA around it, and add diluted nutrient solution to the outer reservoir so the water level sits at about one-third of the inner container's height.
The roots will grow down into the reservoir while the upper roots stay in moist-but-airy LECA. This mimics what extended research on hydroponic root-zone management shows: keeping part of the root zone out of the water avoids the oxygen-starved conditions that cause root rot. Semi-hydroponics guidance also warns that prolonged exposure to a wet environment can lead to root rot, so transition and reservoir/wetting conditions need to be controlled [avoids the oxygen-starved conditions that cause root rot](https://www. lecaaddict.
com/leca-information/transferring-plants-into-semi-hydroponics).
During the first two weeks in LECA, keep the reservoir slightly higher than usual (halfway up) to help the transition, then drop back to the one-third rule once you see new leaf growth, which signals the roots have settled in.
Ongoing care while your croton grows in water or semi-hydro
Water changes and reservoir management
In plain water (during rooting), change the water every 5 to 7 days. In a semi-hydro reservoir, top off with plain water as the level drops, and do a full flush and refill every 2 to 3 weeks. In warm, bright conditions or if you notice any smell from the reservoir, flush sooner. Hard tap water can cause mineral crust buildup on LECA; if you see white deposits, a monthly flush with plain pH-adjusted water (pH 6.0 to 6.5) will dissolve most of it.
Fertilizing
In plain water, don't fertilize. The cutting needs to root, not push growth. Once it's in semi-hydro and showing new leaves, start with a complete, balanced liquid fertilizer at 25% to 50% of the label strength. Croton is a moderate feeder; pushing full-strength nutrients too early will burn young roots. I typically mix nutrient solution at about EC 1.0 to 1.5 mS/cm for an established croton in LECA. Adjust up gradually if growth looks slow or leaf color is fading.
Light and leaf color
Croton's color intensity is directly tied to light. A plant getting strong bright indirect light for 6 or more hours a day will show vivid reds, oranges, and yellows. Move it to a dim corner and within a few weeks the new growth will come in green and dull. If you're using artificial light, 12 to 14 hours of a full-spectrum LED grow light placed 6 to 12 inches above the canopy works well. Don't cut light hours trying to save electricity; this is one plant where light is everything.
Pruning
Croton doesn't need heavy pruning in a water-based setup, but you can trim leggy stems to encourage bushier growth. Always let any cut dry and seal before the stem sits near water again to prevent bacterial entry. Remove any yellowing or brown leaves promptly; they decompose and foul the water or LECA faster than you'd expect.
Troubleshooting the most common problems
| Problem | Likely Cause | Fix |
|---|---|---|
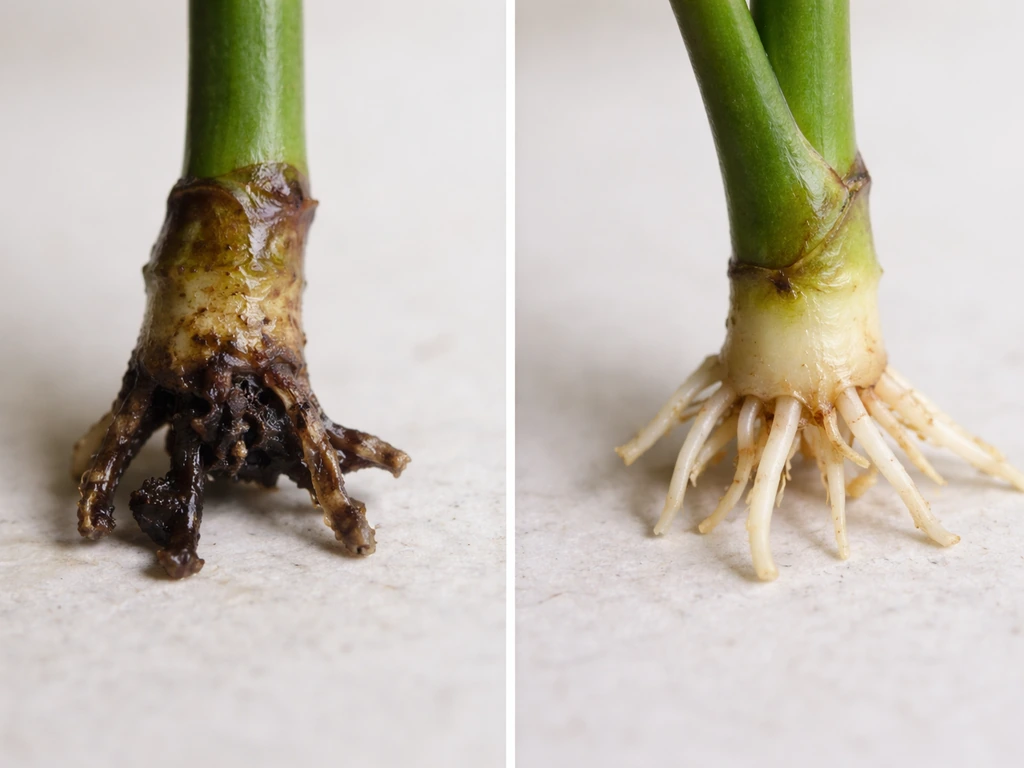
| Stem goes soft and brown at the base | Bacterial rot from stagnant water or latex residue | Remove cutting, trim the rotted section back to healthy tissue, let dry 1 hour, restart in fresh water with a clean container. Change water every 5 days going forward. |
| No roots after 4+ weeks | Too cold, too dark, or cutting taken in fall/winter from a mature stem | Check temperature (must be 68°F+), increase light, try wounding the stem and adding IBA rooting hormone, or take a fresh spring cutting. |
| Leaves turn yellow and drop | Temperature shock, drafts, or sudden move to lower light | Keep at 68–75°F, away from AC vents and cold windows. Stabilize the environment. Some leaf drop when moving is normal; more than 3 to 4 leaves at once signals a bigger stress. |
| Algae coating on roots or container walls | Light reaching the water | Switch to an opaque container. Clean algae off roots gently during water changes. Algae itself won't kill the cutting but signals poor setup. |
| LECA reservoir smells bad | Bacterial buildup, stale water, or too-high reservoir level | Full flush with clean water, rinse LECA, refill with fresh nutrient solution. Reduce reservoir level to one-third. Increase flush frequency. |
| Fungus gnats hovering around the plant | Moist organic matter on or near LECA surface, or decaying leaf debris | Place yellow sticky traps near the base of the plant to catch adults. Remove decayed organic matter. LECA itself doesn't harbor gnat larvae the way soil does, so check for any soil debris left from the original cutting. |
| Spider mites (tiny dots, fine webbing on leaves) | Low humidity, warm/dry conditions common in indoor setups | Wipe leaves with a damp cloth, increase humidity around the plant (a pebble tray with water nearby helps), and treat with insecticidal soap if infestation is visible. Check neighboring plants. |
Root rot is by far the most common failure, and it almost always traces back to the same two causes: water that wasn't changed often enough, or a container that wasn't clean. The good news is that if you catch it early (slightly soft stem, not yet black and mushy), you can cut back to healthy tissue and restart. I've rescued cuttings that looked nearly gone by trimming aggressively back to a firm, white-stemmed section and starting fresh in a clean jar.
What success actually looks like
A healthy croton rooted in water and moved to semi-hydro will show new leaf growth within 4 to 6 weeks of being established in LECA. The new leaves will unfurl slowly (croton isn't a fast grower) but they should be colorful and firm, not pale or limp. Roots in a semi-hydro setup will eventually become a dense, healthy mass that fills the inner container and dips into the reservoir.
At that point you have a genuinely low-maintenance, water-based growing system for a plant most people only know as a fussy soil houseplant. If you want a related water-growing guide for edible greens, see how to grow camote tops in water for a similar approach to rooting and maintaining fresh growth in a water setup.
Water caltrop is a different plant from croton, so if you’re specifically trying to grow how to grow water caltrop, use aquatic-plant requirements like dedicated pond or container conditions and suitable nutrients rather than a semi-hydro croton setup. If you want to apply the same approach to cannas, start by rooting cuttings in water and then move them into a semi-hydro setup for steady growth water-based growing system.
If you meant cryptocoryne instead of croton, the process is different, with more emphasis on stable aquarium conditions and substrate care for long-term growth grow cryptocoryne. If you meant cryptocoryne instead of croton, the process is different, with more emphasis on stable aquarium conditions and substrate care for long-term growth: here is how to grow cryptocoryne.
If you enjoy this style of water-based tropical propagation, the same basic approach applies to other plants covered on this site: Alocasia corms, dumb cane, and cannas all follow similar rooting-in-water and semi-hydro principles, with slight adjustments for each plant's temperature and nutrient preferences. Croton is one of the more rewarding ones to get right because the payoff in leaf color is so immediate and visual once conditions are dialed in.
FAQ
Can my croton cutting live permanently in the same plain water in a vase?
Not reliably. Croton is a tropical, not an aquatic plant, so long-term success usually requires moving to semi-hydro (LECA with a shallow nutrient reservoir). If you keep it in plain water, expect ongoing leaf drop and a higher risk of rot unless you refresh water very often and keep it bright and warm.
How deep should the stem be submerged when rooting in water?
Keep only the bottom 1.5 to 2 inches submerged, with leaves well above the waterline. If more of the stem is underwater, it stays wet without oxygen and increases the chance of mushy tissue.
Should I use rooting hormone for croton in water?
It can help, especially on slightly mature or thicker cuttings. Dip only the scraped/wounded area in the powder or gel, then immediately place it in the dark container, since rooting hormone residue in the water can sometimes foul faster.
Why is my croton cutting growing new leaves but the stem is soft or turning brown?
New top growth can happen even as roots are failing. Soft, brown, or smelly lower stem tissue is a rot signal, not a “normal adjustment.” Trim back to firm tissue, disinfect the container, and restart in clean water (dark container, correct temperature) rather than hoping it stabilizes.
Do I need to change water more often if I see algae or green slime?
Yes. Green slime often forms when light reaches the water and nutrients build up. Use an opaque/dark container, wipe any film from the inside, and do more frequent changes (every 3 to 5 days) until the water stays clear.
What’s the best light placement if my window light is strong but intermittent?
Croton prefers several hours of consistent bright indirect light, or a steady grow light schedule. If your window causes harsh midday sun or frequent cloud-to-sun swings, use a grow light (12 to 14 hours) or diffuse the window so the cutting does not experience leaf-burn followed by dim stress.
My water tastes fine, but the LECA has white crust. Is that harmful?
White deposits are usually mineral buildup from hard tap water. It can reduce nutrient availability and foul oxygen flow around roots. Flush the LECA monthly with pH-adjusted water in the 6.0 to 6.5 range and, if possible, use filtered or partially distilled water for future top-offs.
How do I know when it’s time to move from water to LECA?
Move when roots are about 1 inch long and still look healthy (not brown and collapsed). If roots are shorter, they can’t reach far enough into the reservoir to transition smoothly, and the plant may sit and stall for weeks.
Should I keep the nutrient level high for the entire transition period?
No. Start slightly higher for the first 1 to 2 weeks to reduce shock, then lower to the one-third rule once you see new leaf growth. Keeping the reservoir too high longer increases the chance of oxygen-poor roots.
What fertilizer strength should I use in LECA, and how do I avoid burning?
Start at 25% to 50% of label strength only after the plant shows new leaves. If growth looks slow or color fades, increase gradually while staying around EC 1.0 to 1.5 mS/cm for many established setups, then adjust upward only if roots look vigorous and the reservoir stays clean.
Is it normal for leaves to drop when switching from water to soil or LECA?
A little leaf drop is common in the first week or two because the plant is changing water chemistry and oxygen availability around the roots. But heavy or fast leaf loss usually means the light is too low, temperatures are too cold, or the reservoir level is wrong.
How can I troubleshoot root rot quickly?
Check two things first: stem firmness and container cleanliness. If the cutting base is slightly soft or smells, cut back to firm, white tissue, rinse or replace the water immediately, sanitize the container, then restart with dark container rooting and correct temperatures (roughly 68 to 75°F).
Do I need a net pot and reservoir setup for semi-hydro, or can I just use a plain cup of LECA?
A reservoir system helps because it keeps nutrients stable while allowing upper roots to stay airy. If you use a plain cup with no defined reservoir, water tends to wick unpredictably and roots can become constantly wet. Use a container with drainage and an outer reservoir so you can control the water level.