Cabomba grows best when you plant healthy stem cuttings 1–2 inches deep in a fine substrate, keep water between 68–82°F (20–28°C) at pH 6. If you are specifically wondering how to grow a croton plant in water, the approach is very different from keeping cabomba submerged in an aquarium how to grow croton plant in water. 0–7.0, give it strong lighting, and trim it regularly to force bushy, dense growth. Get those four things right and cabomba is one of the most rewarding aquatic stem plants you can keep. Get them wrong and you end up with bare, leggy stalks or a mushy pile of melting leaves within days of planting.
How to Grow Cabomba: Step-by-Step Plant Care Guide

Marcus Holloway
15 May 2026

What cabomba needs to thrive
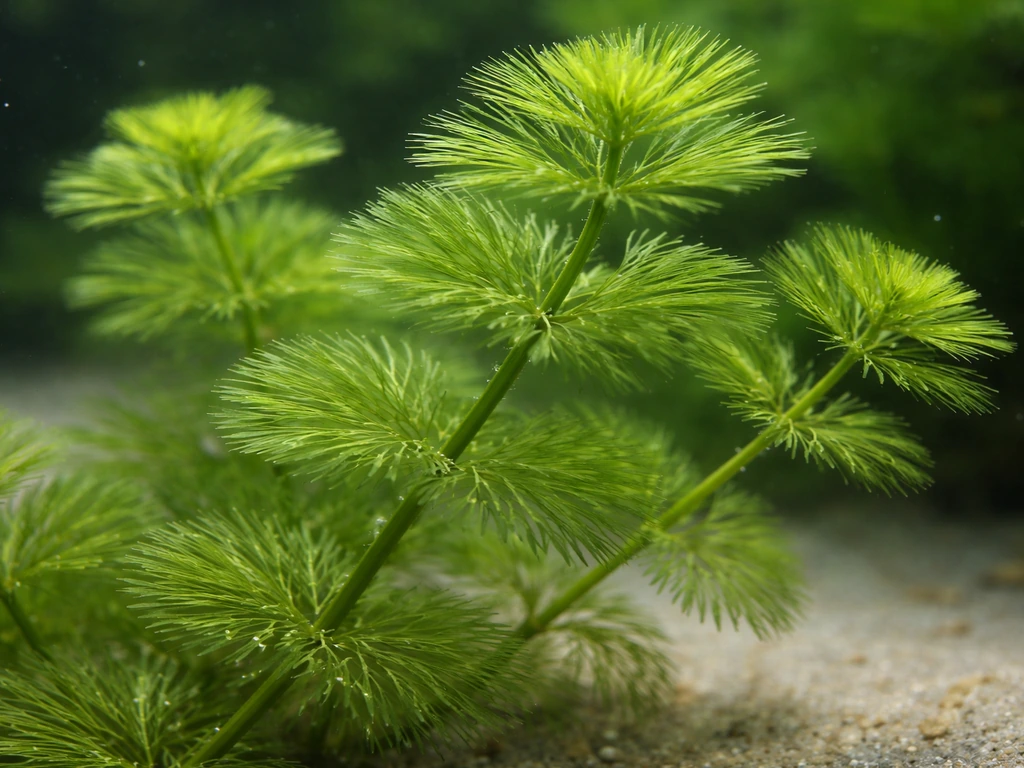
Cabomba (fanwort) is a fast-growing stem plant with feathery, fan-shaped leaves arranged in whorls along each stem. In nature it roots into soft sediment and grows toward the surface in clear, warm water, which tells you almost everything you need to know about what it needs in an aquarium. It is not a low-light, low-effort plant. Think of it as a moderate-to-high-demand plant that rewards a bit of attention with incredibly lush growth.
Lighting is the single most important factor. Cabomba needs at least moderate-to-high light intensity, typically in the range of 30–50+ PAR at the substrate level depending on species. Too little light is the number-one reason cabomba drops leaves, stretches toward the surface, and eventually dies. Run your lights for a consistent 8–10 hours per day on a timer.
Water conditions matter just as much. Aim for slightly acidic to neutral water: pH 6.0–7.0, soft to moderately hard, and temperature kept solidly in the 68–82°F (20–28°C) range. Letting the tank drop below 68°F noticeably slows growth and stresses the plant. Water flow is also important because cabomba's feathery leaves are very good at trapping debris. That trapped detritus blocks light to lower leaves and creates the perfect environment for algae to take hold. Gentle to moderate circulation keeps the leaves clean without battering the delicate fronds.
Choosing the right species and finding healthy plants
There are three species you will commonly see offered in the aquarium trade, and the one you pick should match your experience level and setup.
| Species | Color | Difficulty | Key Requirements |
|---|---|---|---|
| Cabomba caroliniana | Green | Beginner-friendly | Moderate light, standard planted-tank parameters |
| Cabomba aquatica | Green/yellow-green | Intermediate | Higher light, benefits from CO2 |
| Cabomba furcata (red cabomba) | Red/purple | Advanced | High light, CO2 injection, soft acid water essential |
If you are just starting out, go with Cabomba caroliniana. It is more forgiving about water hardness, tolerates a slightly wider pH range, and will survive without CO2 injection as long as lighting is adequate. Cabomba furcata is genuinely beautiful but it is a different beast: it declines within weeks without CO2 injection and needs soft, acidic water plus high light intensity. I tried furcata in a moderately hard tap-water tank without CO2 and watched it slowly fall apart over a month. It was a painful lesson in not skipping the research.
When sourcing plants, look for stems with bright, dense foliage all the way down to the base. Avoid bunches where the lower half of each stem is bare. Check that the stems are firm, not slimy or mushy. Healthy green cabomba should be a vivid, saturated green, not yellowing or translucent. If you are buying online, factor in shipping stress and handle the plants carefully on arrival (more on that in the planting section below).
Setting up your tank for cabomba success
Tank size and placement
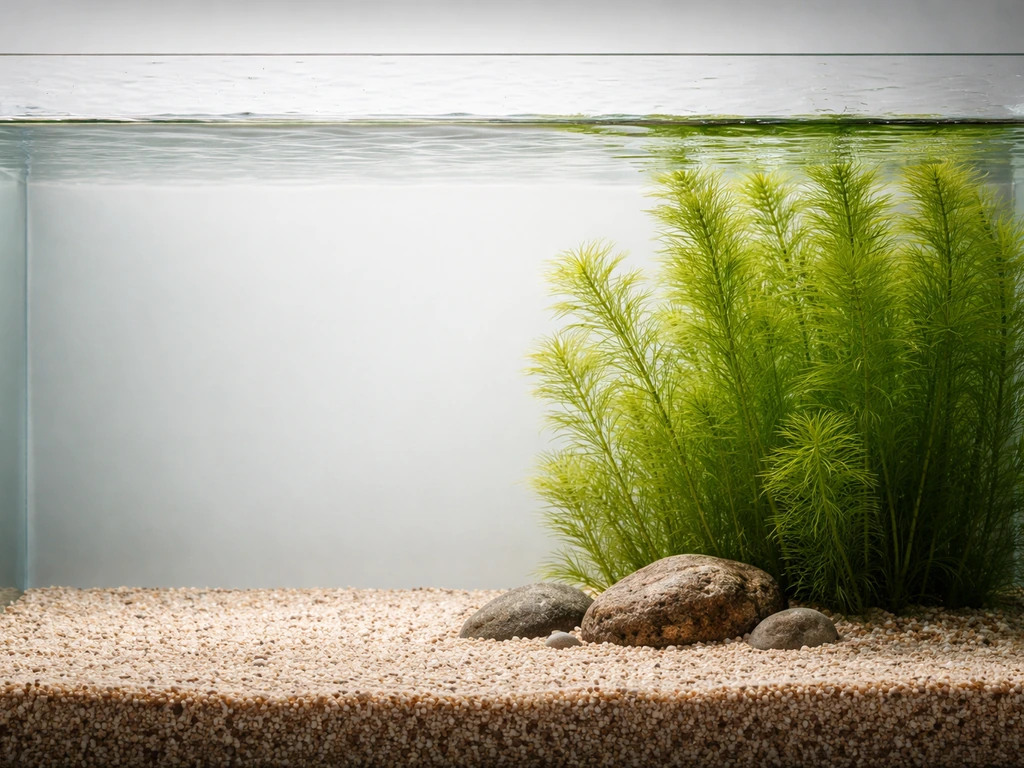
Cabomba is typically used as a background plant in aquascaping. It grows tall, so a tank of at least 10–15 gallons with 12+ inches of water depth gives it room to develop properly. Shorter tanks work but you will be trimming much more frequently. Position cabomba toward the back and sides of the aquascape so it does not shade shorter foreground plants.
Substrate
This is where a lot of beginners go wrong. Coarse gravel does not anchor cabomba well and provides very little nutrition to its roots. Use a fine-grain substrate: nutrient-rich aquarium soil (like ADA Amazonia or similar planted-tank substrates), or at minimum a fine sand layer over a root-tab-supplemented base. The substrate should be at least 2–3 inches deep so cuttings can root properly. If you are committed to gravel, use root tabs placed right at the planting spots as a minimum workaround.
Water flow and filtration
A gentle to moderate flow is ideal. A sponge filter or a canister filter with a spray bar diffusing the output across the surface works well. Avoid blasting cabomba directly with a strong powerhead current; the delicate leaves will shred and trap even more debris. Aim for a turnover rate of about 3–5 times the tank volume per hour, directed to circulate water throughout the tank without creating a turbulent tornado around the plants.
Planting and propagating cabomba
Getting new plants into the tank without damaging them
When you bring cabomba home (or unbox it from a shipment), remove any rubber bands or packaging ties carefully. Cabomba stems are brittle and bruise easily at the nodes, which are exactly the points where roots and side shoots form. Gently swish the bunch in aquarium water to loosen the stems and rinse off any packaging residue before planting. For help with canna propagation and early growth, check out our guide on how to grow cannas in water.
How to plant the stems
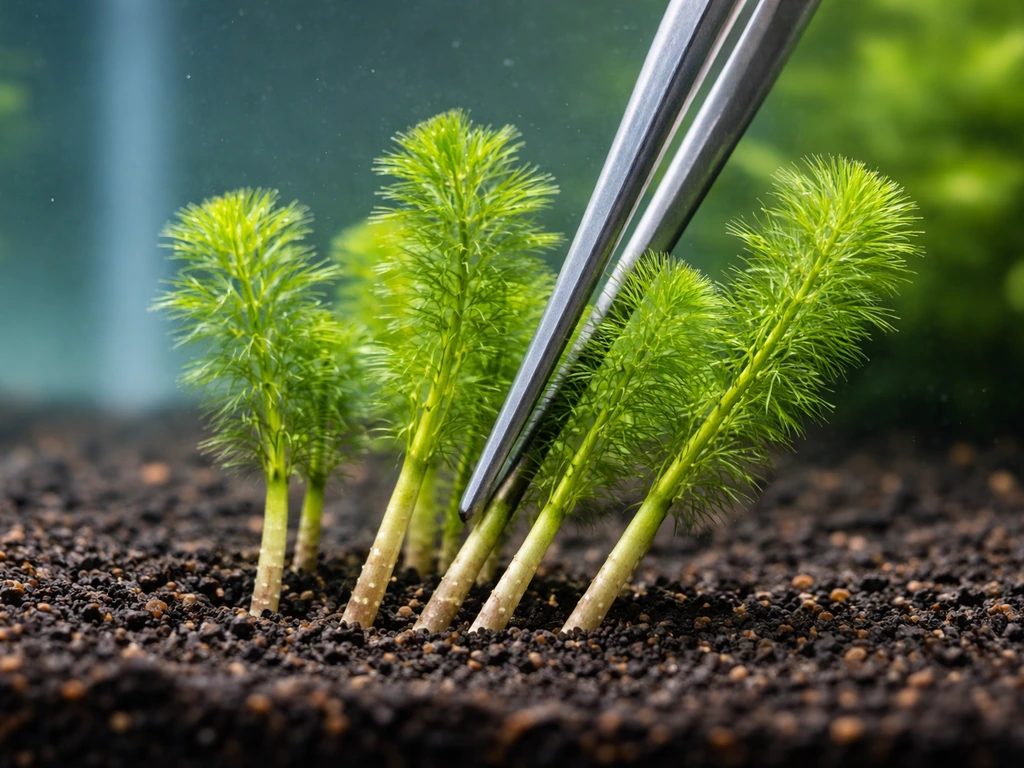
- Select healthy stem sections at least 4–6 inches long.
- Strip the leaves from the bottom 1–2 inches of each stem. These buried nodes are where roots will develop.
- Use aquascaping tweezers or your fingers to push each stem gently into the substrate, 1–2 inches deep.
- Space stems at least 1 inch apart along the rear of the tank so each one has room to fill in as it grows.
- Avoid compacting the substrate around the stem too tightly; a loose fit lets roots establish more easily.
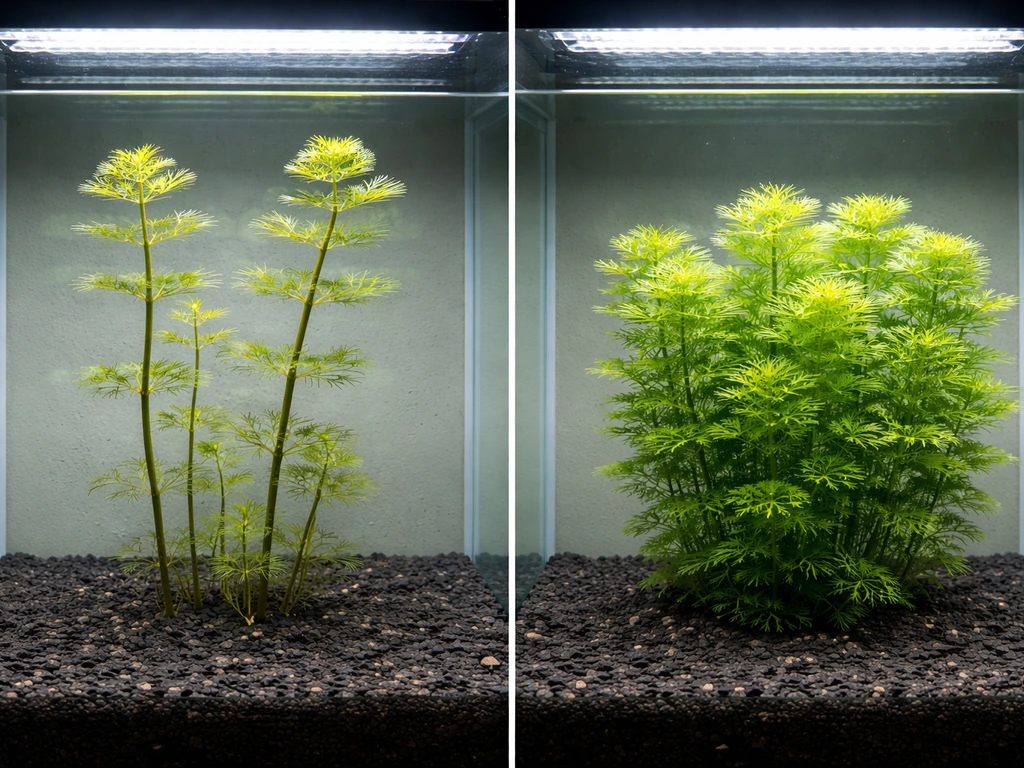
Expect some initial drama. Many cabomba plants sold commercially are grown emersed (above water) in nurseries. When you put them in your tank, those emersed-grown leaves will often melt and die off over the first 1–3 weeks. This is completely normal and not a sign you have done something wrong. The plant is converting to its submerged growth form. New submerged leaves will begin appearing from the growing tips as long as your parameters are right. Do not rip the plants out the moment you see some melting. Wait, watch for new growth, and assess from there.
Propagating by cuttings
Cabomba is one of the easiest aquatic plants to propagate. If you are growing water caltrop (Trapa natans), start by learning how its seeds are handled and germinated so you can match the plant’s needs from day one Propagating by cuttings. Camote tops can also be grown in water by rooting them first and then transferring the rooted cuttings into a suitable growing setup Propagating by cuttings. Once a stem is growing well, simply cut a healthy top section about 2–3 inches long, remove the lower leaves, and replant it exactly as you would a fresh cutting. The original cut stem will sprout two or more side shoots from just below the cut, which is how you build a dense, bushy colony over time. Trimming is not just maintenance, it is your main propagation tool. The more you trim, the fuller the plant becomes.
Feeding cabomba: fertilizers and CO2
Cabomba is genuinely hard to grow well without fertilizers. Light alone is not enough because the plant needs micronutrients and macronutrients to build those dense, feathery leaves. A good all-in-one liquid fertilizer dosed weekly is the simplest starting point. Once you get the basics down, follow the same principles as you would for cabomba to dial in your cryptocoryne tanks for steady growth fertilizers. Follow the manufacturer's dosing instructions and adjust based on how the plant looks. Yellowing between leaf veins often points to iron or micronutrient deficiency, while overall pale or stunted growth can signal a shortage of nitrogen or potassium.
Root tabs placed every few inches near the planting area every 2–3 months provide a slow-release nutrient source directly to the roots, which is especially useful in inert substrates like sand or plain gravel.
On the CO2 question: for Cabomba caroliniana in a well-lit tank, pressurized CO2 is helpful but not always essential, especially if your bioload provides some natural CO2. For planted-tank setups, Aquarium Co-Op explains the difference between CO2-injected high-tech systems and low-tech systems, and it also warns that dangerous CO2 excess can harm fish On the CO2 question. For Cabomba furcata, CO2 injection is not optional. Target around 20–30 ppm dissolved CO2 (a drop checker running lime-green is a practical gauge). Just be careful not to crash your CO2 levels overnight; always put the CO2 system on a timer that runs with the lights and shuts off a couple of hours before they do to avoid CO2 buildup harming your fish.
Troubleshooting common problems
Melting after planting
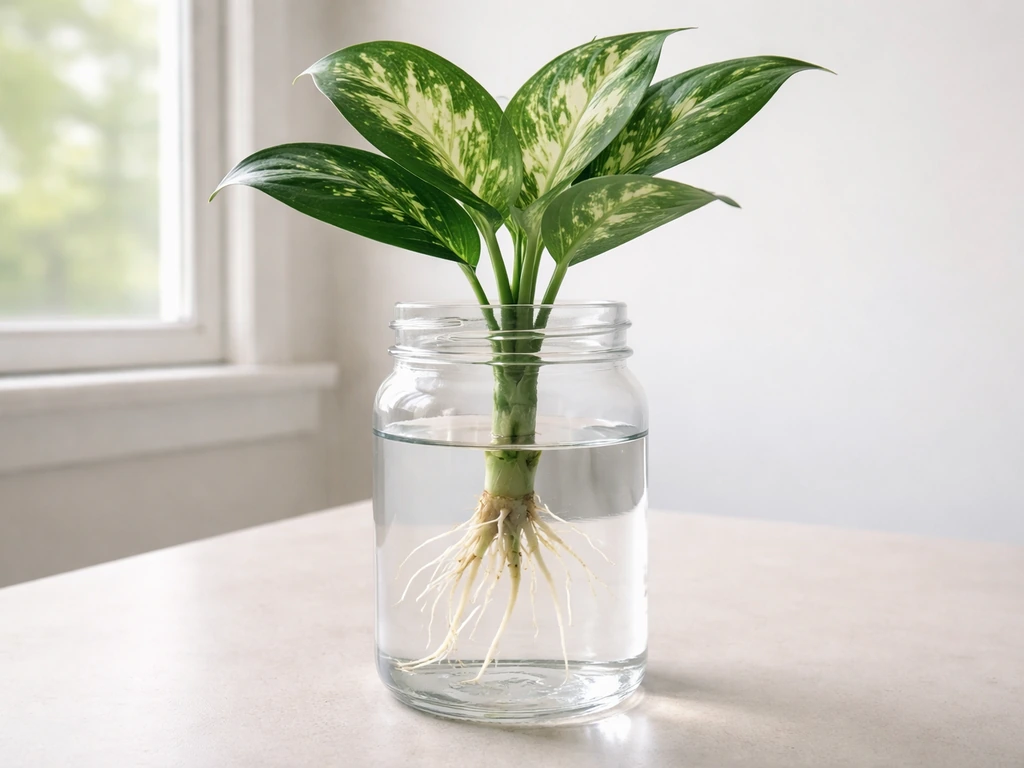
As mentioned above, melting in the first few weeks is almost always the emersed-to-submerged conversion. It looks alarming but is usually temporary. Keep parameters stable, leave the plant in place, and watch for new submerged growth from the growing tips. If you are also experimenting with other houseplants, you might find this useful for how to grow dumb cane in water as a related water-growing comparison. If melting continues past 3–4 weeks with no new growth, reassess your lighting and CO2 levels.
Leggy, sparse growth
Long stems with widely spaced leaves and bare lower sections almost always mean insufficient light. Upgrade your light fixture or reduce the depth of water above the plants. Also make sure you are trimming regularly. Without trimming, cabomba just races for the surface and becomes a single bare stalk with a tuft of leaves at the top.
Yellowing or browning leaves
Yellow leaves usually indicate a nutrient deficiency. Start by checking your fertilizer routine. If you are not dosing at all, begin with a liquid all-in-one formula. If you are already fertilizing, consider adding root tabs or increasing iron supplementation. Brown or translucent leaves that feel mushy often indicate rot from detritus buildup around the base, which is a flow and cleanliness issue.
Algae overgrowing the leaves
Cabomba's feathery leaves are algae magnets when flow is too low or the tank has too many nutrients relative to plant uptake. The fix is usually a combination of: improving circulation so debris does not settle on the leaves, reducing photoperiod slightly if algae is severe, and ensuring the plants are growing fast enough to outcompete algae for nutrients. A healthy, fast-growing cabomba clump will generally out-compete algae on its own once parameters are dialed in.
Slow or stalled growth
If the plant has been in the tank for more than a month and is barely growing, run through this checklist: Is the light strong enough and running 8–10 hours? Is the temperature at least 68°F? Is pH within 6.0–7.0? Are you fertilizing? For furcata: is CO2 injected? Slow growth is almost always tied to one of these five variables being off.
Your ongoing maintenance routine
Cabomba is a fast grower once it is established, which means maintenance is not a once-in-a-while thing. Building a simple weekly routine makes the difference between a tank that looks stunning and one that slowly becomes a tangled mess.
| Task | Frequency | Notes |
|---|---|---|
| Water change (25–30%) | Weekly | Dilutes waste, replenishes minerals, stabilizes parameters |
| Trimming tops and replanting cuttings | Weekly or bi-weekly | Prevents legginess, promotes bushy growth, creates new plants |
| Remove trapped debris from leaves | Weekly | Use gentle flow from a turkey baster or your finger to dislodge buildup |
| Dose liquid fertilizer | Weekly | Follow product instructions; adjust if yellowing or algae appears |
| Check temperature, pH, and CO2 | Weekly | Especially important in seasonal temperature swings |
| Replace root tabs | Every 2–3 months | Push new tabs in near planting zones |
| Deep substrate clean (gentle vacuum) | Monthly | Avoid disturbing roots; vacuum around, not through, the planting area |
Seasonal adjustments
In rooms without climate control, tank temperature can drift noticeably in winter and summer. If your tank drops below 68°F in colder months, a small aquarium heater set to 72–74°F keeps cabomba in its comfort zone year-round. In hot summers, watch for temperatures creeping above 82°F, which stresses the plant and accelerates algae growth. A small fan blowing across the water surface can lower tank temperature by a couple of degrees if needed.
Seasonal changes in ambient light (especially near windows) can shift your algae situation. If you notice an algae spike in spring or summer, reduce your photoperiod by an hour and see if that brings things back into balance. The goal is to keep the tank as stable as possible so cabomba can focus its energy on growing rather than recovering from swings in conditions.
Once you have cabomba thriving, the routine almost runs itself. You trim, replant the tops, do your water change, and dose fertilizer, and the plant rewards you by growing visibly week after week. If you enjoy rooting other aquatic and semi-aquatic plants in water-based systems, the same careful attention to water chemistry and consistent care applies whether you are working with cabomba or other aquarium plants like cryptocoryne, which has its own interesting approach to substrate rooting and water chemistry demands. If you want to grow Alocasia corms in water, use similar consistency with water conditions and give the corms stable warmth and brightness water-based systems.
FAQ
Can cabomba grow from seed, or only from cuttings?
Cabomba is almost always grown from stem cuttings in aquariums. Even when it flowers in captivity, viable seed is uncommon and results are inconsistent. If your goal is reliable growth, start with healthy cuttings and let them root in fine substrate 2–3 inches deep.
How long should it take for cabomba cuttings to root and start sending new growth?
With the right light, temperature, and stable water, rooted growth is usually visible within 1–2 weeks. If you see melting but no new submerged tips after 3–4 weeks, recheck light intensity and CO2 (furcata especially), and also confirm pH is staying in the 6.0–7.0 range.
Should I plant the whole stem tip-up or any specific orientation matters?
Plant the cutting so at least the lower portion is covered (about 1–2 inches deep as a starting point) and keep the growing tip upright. Cabomba roots from nodes, so if you bury only the very bottom segment and leave most nodes exposed, rooting and side-shooting can be slow.
My cabomba melts but then comes back later. At what point should I remove and replant it?
Do not pull it the first time you see emersed-to-submerged melting. Only replant if the stem is turning mushy from the base or the cutting has lost most leaves with no sign of new submerged growth. In that case, trim back to firm, healthy tissue and replant the top section.
What’s the best way to reduce detritus buildup on cabomba leaves?
Target gentle circulation that moves water around the plants without blasting them. Also keep your substrate surface clean, because mulm settles on feathery fronds and blocks light to lower leaves. If algae and rot are recurring, consider slightly increasing flow and performing more consistent maintenance, not just more lighting.
How often should I do water changes for cabomba, and does it matter if I use tap water?
Use regular partial water changes to prevent nutrient imbalance and to keep temperature and pH stable, since sudden swings stress cabomba. If your tap water is hard or very alkaline, you can still grow cabomba, but you may need dilution or buffering to keep pH closer to 6.0–7.0, especially for furcata.
Is CO2 required for all cabomba species, or just furcata?
CO2 is optional for Cabomba caroliniana in many well-lit tanks with adequate bioload, but furcata generally requires injected CO2 to thrive. If you are unsure which species you have, treat it like furcata until verified, because lack of CO2 often shows up as gradual collapse rather than instant failure.
Why does cabomba look pale or yellow in my tank even though my light is strong?
When color fades despite strong lighting, it often points to nutrient shortages or an imbalance. Yellowing between leaf veins can indicate iron or micronutrient gaps, while uniformly pale or stunted growth often suggests missing nitrogen or potassium. Adjust fertilization and consider root tabs if you are using sand or inert gravel.
Can I keep cabomba with fish that stir up the substrate?
It can be risky. Cabomba traps debris, so tanks with bottom-feeding fish or frequent substrate stirring can accelerate leaf fouling and rot near the base. If you have active diggers, use better flow control to keep debris moving away from the plants and consider more frequent cleaning of the substrate surface.
Why do my lower leaves die even when the top looks fine?
This is usually an evidence-of-shading problem, either from too little light reaching the lower stems or from debris settling and blocking light. Increase light intensity or shorten water depth above the plants, then trim to encourage a fuller clump that keeps lower growth supported by better internal light.
How should I trim cabomba to avoid it becoming leggy again?
Trim frequently enough that the plant maintains a dense canopy, not long bare stalks. When you cut the top and replant the tops, it promotes side shoots just below the cut on the original stem, letting you build a thick background mass over time.
What tank depth and size are safest for beginners growing cabomba?
A practical target is a tank with at least 12 inches of water depth and roughly 10–15 gallons for easier light distribution and trimming management. In shorter tanks, cabomba can still grow, but you may need to trim more often to prevent rapid surface growth and shading within the clump.
How do I tell if brown or translucent leaves are from algae versus rot?
Brown or translucent leaves that feel mushy and collapse suggest rot, often linked to detritus buildup around the base and inadequate cleanliness or circulation. If the plants look coated but the tissue is firm, it may be algae. Fixes differ, so evaluate texture and location, base versus leaf surface.
Should I turn lights on the same schedule every day for cabomba?
Yes, stability matters. Use a timer for a consistent 8–10 hour photoperiod. If algae gets severe, reduce the daily photoperiod slightly rather than making big day-to-day changes, because cabomba struggles when conditions swing.