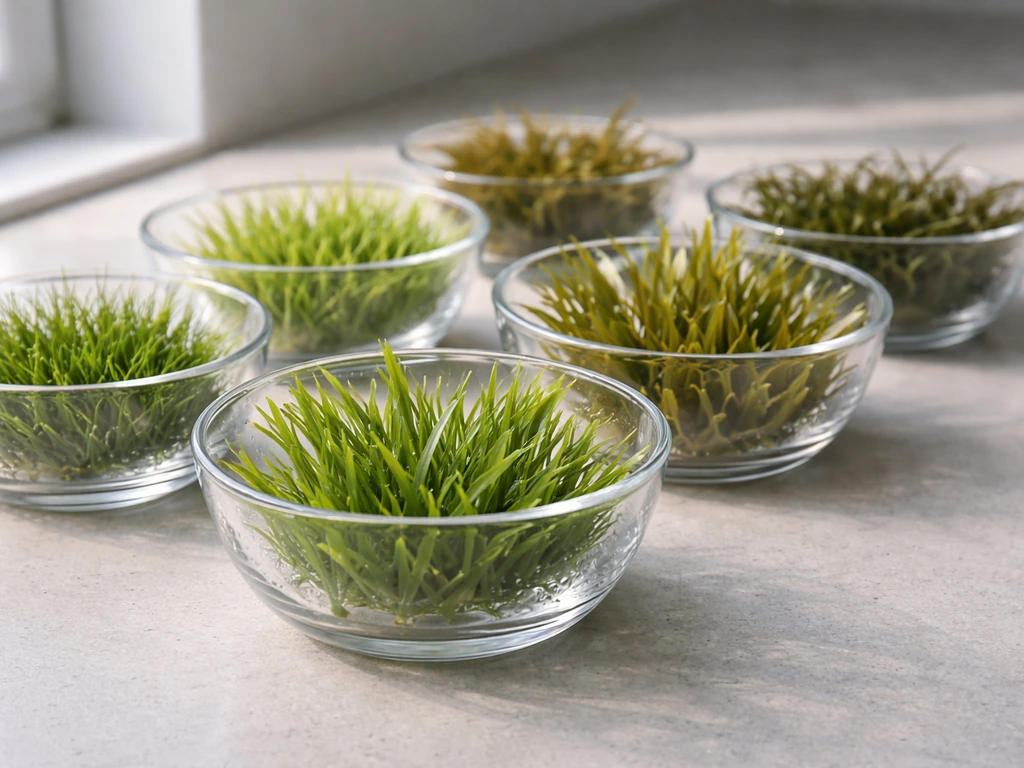
Growing seagrass in an aquarium is absolutely doable, but it is one of the more demanding planted tank projects you can take on. You need a marine or brackish setup, strong lighting, a deep sand bed, stable salinity, and a bit of patience. Get those four things right from day one and seagrass will root, spread, and look incredible. Skip any of them and you will be pulling out brown mush within a week. Here is the full workflow, from species selection to your first real growth spurt.
How to Grow Seagrass in an Aquarium: A Step-by-Step Guide

Marcus Holloway
3 Jun 2026
First, be clear about what seagrass actually is
Seagrass is not seaweed, not chaeto, and not a freshwater aquarium plant. It is a true flowering plant (an angiosperm) that evolved to live fully submerged in saltwater or brackish water. It grows roots and rhizomes in the sediment, just like a land grass. That distinction matters because its care requirements are completely different from macroalgae like chaeto or Caulerpa, which float or attach to rock.
If you are thinking about low-maintenance aquatic carpet plants for a freshwater tank, something like Monte Carlo or bacopa would be far simpler starting points. Monte Carlo is often discussed as a beginner-friendly carpet plant, but you still need a compatible setup and lighting plan to avoid slow growth or browning. If you want a freshwater aquarium version, bacopa is a much better-known option, and its growth depends heavily on light and nutrient availability.
Seagrass is specifically a marine or brackish plant, and this guide treats it that way.
Choosing the right seagrass species for aquariums
Not every seagrass species is realistic for a home aquarium. Some grow too large, some are too cold-dependent, and some are almost impossible to source. Here are the four species that actually work in aquarium conditions, along with honest notes on each.
| Species | Common Name | Salinity Tolerance | Light Need | Best For |
|---|---|---|---|---|
| Halodule wrightii | Shoal grass | Broad (can handle 15–50 ppt) | Moderate (~25% surface irradiance) | Warm-water reef or FOWLR tanks |
| Halophila engelmannii | Star grass | Full marine | Low (~8–10% surface irradiance) | Shaded or deeper tank sections |
| Zostera noltii (Nanozostera noltii) | Dwarf eelgrass | Broad (marine to brackish) | Moderate | Brackish or cooler marine tanks |
| Ruppia maritima | Widgeon grass | Very broad (0–60+ ppt) | Moderate | Brackish biotope tanks |
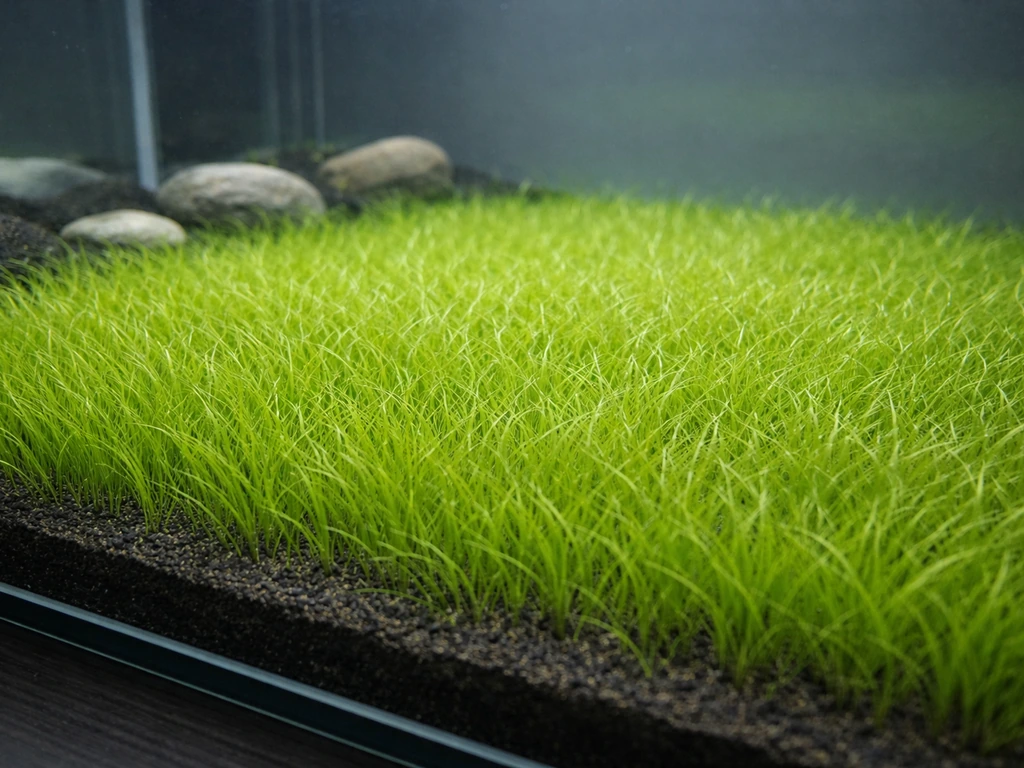
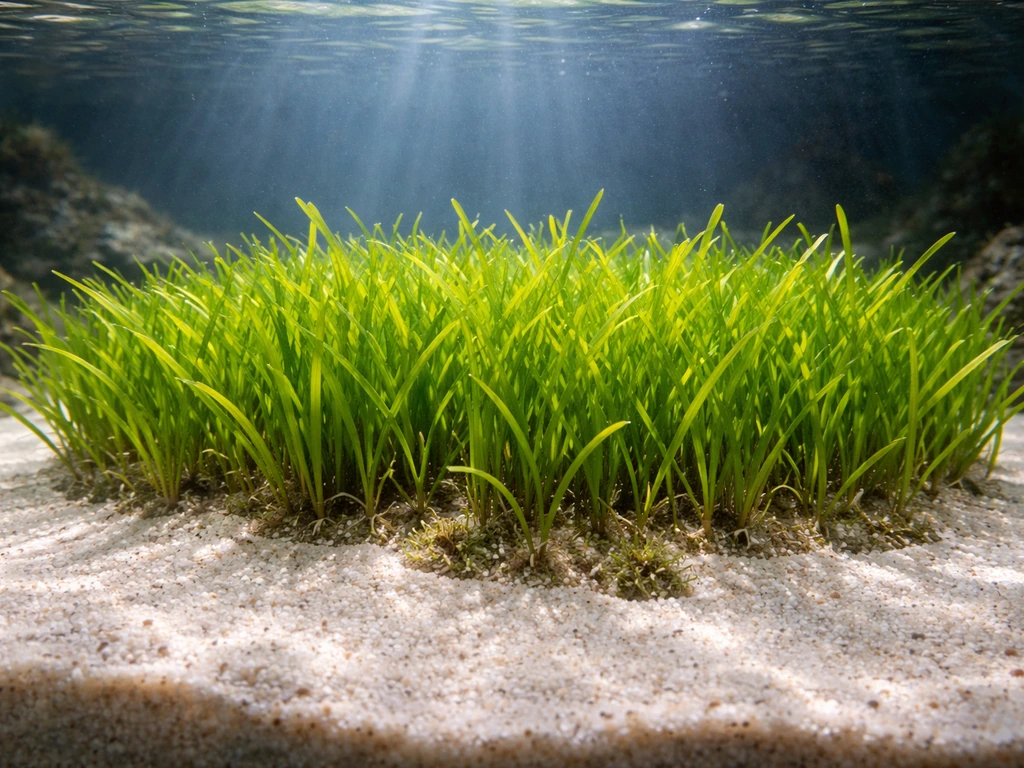
For most hobbyists starting out, Halodule wrightii is the best choice. It tolerates a wide range of salinity and temperature, it spreads via rhizomes which makes propagation straightforward, and it is the species most commonly available through marine plant suppliers. Halophila engelmannii is worth considering if your tank has less intense lighting, since research documents its light threshold at around 8 to 10 percent of surface irradiance, which is significantly lower than other species.
Zostera noltii is excellent for brackish setups because its salinity tolerance lets it thrive in permanently submerged brackish conditions.
Ruppia maritima is the toughest of the bunch salinity-wise but tends to look scrappier and is harder to find commercially. Avoid full-size Zostera marina (common eelgrass) unless you have a very large, cold-water system, as it prefers temperatures below 20°C and needs significant space.
Tank setup: lighting, substrate, flow, and salinity and temperature
Lighting
Seagrass needs strong, consistent light delivered at the right spectrum. Aim for a full-spectrum LED or T5 fixture rated for reef or planted marine tanks. A photoperiod of 10 to 12 hours per day is ideal. The intensity you need depends on species: Halodule wrightii wants roughly 25 percent of surface irradiance reaching the substrate, which in a typical 18-inch deep tank translates to a fixture in the 50 to 100 PAR range at substrate level.
Halophila engelmannii can survive on less, around 8 to 10 percent. If you have a PAR meter, use it. If you do not, position your light closer to the surface and watch the plants for the first two weeks. Yellowing or bleaching means too much light; dark green with no new growth means too little.
Substrate
This is the part most people underestimate. Seagrass roots and rhizomes need to go somewhere, and a thin gravel layer will not cut it. Use a fine aragonite sand or a dedicated marine substrate with a minimum depth of 3 to 4 inches (8 to 10 cm). Deeper is better, especially for Halodule and Zostera species. The substrate also holds the porewater nutrients (ammonium and phosphate) that seagrass roots actively absorb, so a biologically active sand bed is genuinely helpful here, not just decorative. Avoid coarse gravel or substrates with large particle sizes, as the rhizomes cannot penetrate them easily.
Water flow
Seagrass evolved in coastal environments with gentle, consistent water movement. You want flow that gently sways the blades without blasting the plants sideways. A wavemaker or circulation pump set to create a low-velocity surge works well. Aim for a turnover of 10 to 20 times tank volume per hour, but directed so no single pump jet hits the planting area directly. If your seagrass blades are constantly bent flat, reduce flow or redirect the pump.
Salinity and temperature
For Halodule wrightii and most warm-water species, keep salinity between 30 and 35 ppt (specific gravity 1. 022 to 1. 026) and temperature between 22 and 28°C (72 to 82°F). Stability matters more than hitting an exact number.
Research on Halodule wrightii shows that salinity spikes above 60 ppt combined with temperatures above 30°C caused roughly 50 percent coverage loss in field observations. In an aquarium, you are unlikely to hit those extremes, but sudden swings of even 5 ppt or 4 to 5°C in a short period will stress the plants noticeably. For Zostera noltii in a brackish tank, you can run salinity as low as 10 to 15 ppt, but keep it consistent.
Use a reliable refractometer or conductivity meter and top off with fresh RODI water daily to compensate for evaporation.
Water quality basics and nutrient needs
Seagrass is not a zero-nutrient plant. It actively absorbs nutrients through both its leaves and its root system. Project Seagrass also emphasizes that seagrass needs differ from general water-quality targets and that their “Seagrass vs Water Quality” materials specifically address tissue and water relationships for dwarf eelgrass seagrass needs nutrients through both its leaves and its root system. In a closed aquarium, you need to supply those nutrients intentionally without letting them spike to the point of fueling algae outbreaks.
- Nitrate: 1 to 5 ppm is a healthy target. Seagrass uses nitrogen actively. Too low (near zero) and growth stalls. Too high (above 20 ppm) and algae will outcompete the seagrass.
- Phosphate: 0.05 to 0.1 ppm at the water column level. The substrate porewater typically holds higher concentrations, which the roots tap directly.
- Iron and trace elements: dose a marine-specific trace element mix weekly. Seagrass responds visibly to iron supplementation with deeper green color.
- pH: maintain 8.0 to 8.3 for full marine tanks. Seagrass photosynthesis is sensitive to pH swings.
- Alkalinity: 8 to 12 dKH, consistent. Alkalinity swings affect pH, which affects photosynthesis efficiency.
- Ammonia and nitrite: zero. Both are toxic to the plants and to any animals in the tank.
In practical terms, a well-established live sand bed in the substrate will generate porewater ammonium and phosphate naturally as organic matter breaks down. If you are also running a shrimp tank, encouraging a healthy biofilm can support early grazing while you build up the sand bed biology biofilm in shrimp tanks.
This is actually one of the reasons seagrass does well in tanks with a deep sand bed and some detritus, unlike some other marine plants that want ultra-clean conditions. If your tank is very new and the sand bed has no biology yet, you may need to dose a small amount of a marine plant fertilizer to get rooting started. Do not overdose. Start with half the recommended amount and test your water weekly.
Planting and rooting: how to start seagrass successfully
Getting seagrass to root is the hardest part of this whole project. Most failures happen in the first ten days. Here is the step-by-step process that actually works. Once your seeds or planting material are ready, you can apply the same lighting, substrate, and salinity steps to learn how to grow carpet grass seeds in an aquarium. While seagrass needs a marine setup, monstera can be grown in a tank with different lighting and humidity conditions, so it is worth learning the right approach for that species too how to grow monstera in aquarium.
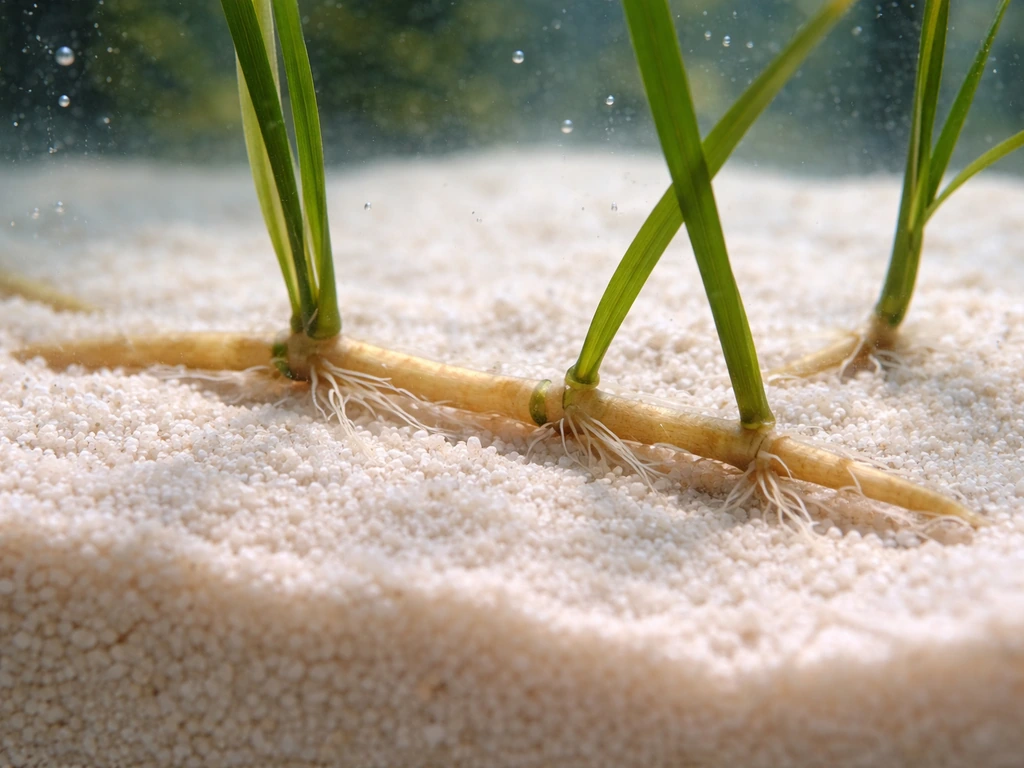
- Source healthy plant material. You want shoots with intact rhizomes (the horizontal runner stem connecting blades) and ideally some roots already attached. Online marine plant vendors and some reef clubs sell Halodule wrightii this way. If the rhizomes look white and firm, they are viable. If they are dark brown and mushy, do not bother.
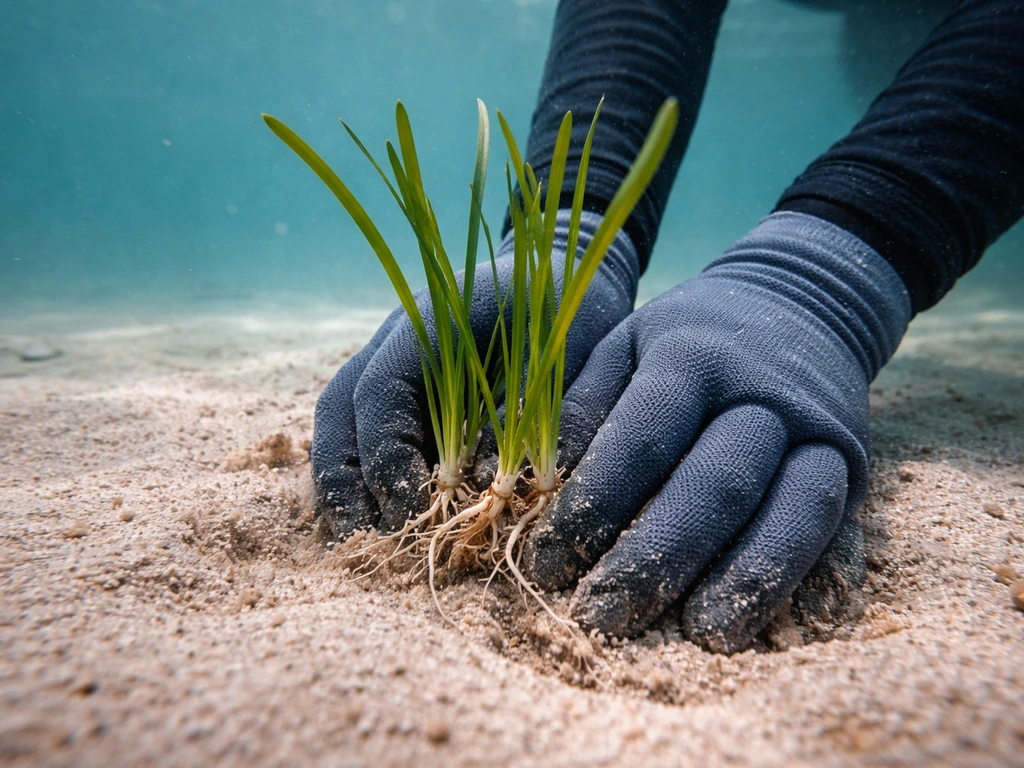
- Rinse the plant gently in saltwater matched to your tank's salinity. Do not use freshwater, even briefly.
- Prepare a planting area in the front or midground of your tank. Push aside the sand to create a shallow trench about 2 inches deep.
- Lay the rhizome horizontally in the trench with the blades pointing upward. Cover the rhizome with sand, leaving the blades exposed. Do not bury the blades themselves.
- Anchor the rhizome if needed. Use small pieces of rubble rock, a plant anchor weight, or even a toothpick pushed beside the rhizome to keep it from floating up. Rhizomes that pop out of the sand before rooting will not survive.
- Reduce flow near the planting area for the first week. You can redirect a pump temporarily or lower flow settings. Once roots establish, normal flow is fine.
- Leave the plants alone for 10 to 14 days. Check that they are staying in the substrate, but do not pull them up to inspect. Trust the process.
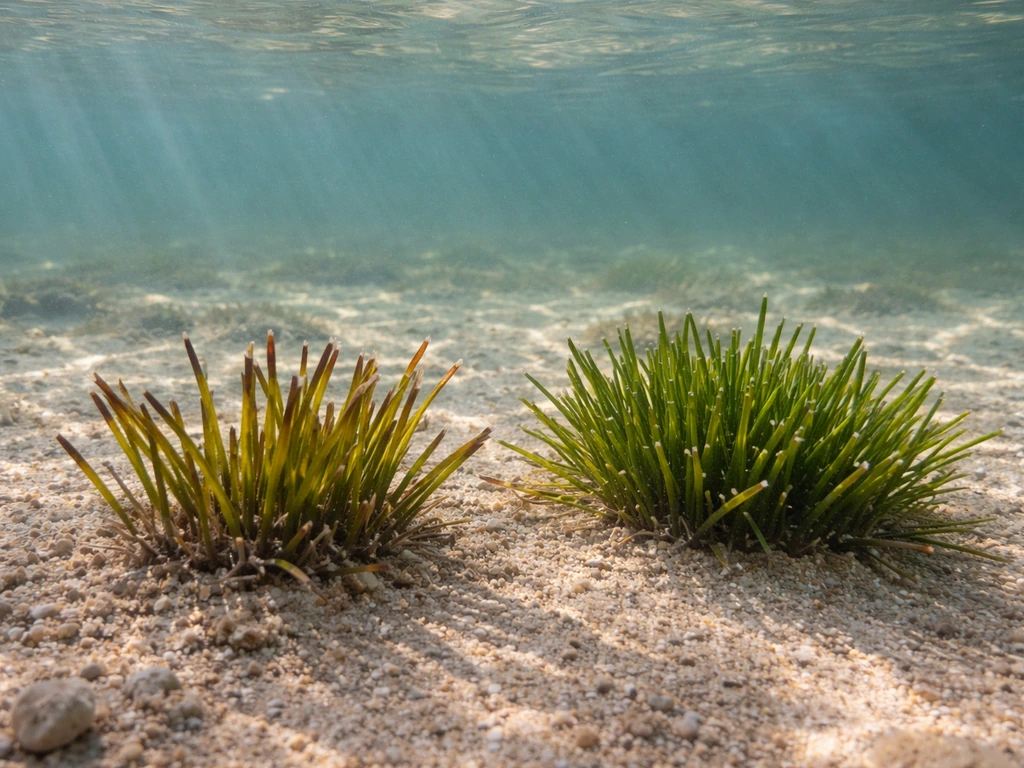
Realistically, you will start to see new root growth anchoring into the substrate within 7 to 14 days if conditions are right. New blade growth from rhizome nodes typically appears at 2 to 4 weeks. If you see the blades staying green and upright after week two, you are winning. Seagrass spreads by sending out new rhizomes horizontally, which then send up new blade shoots. That spreading behavior is the sign that the plant is truly established, and you will usually see it beginning around weeks 4 to 6.
Ongoing care: growth management, trimming, and avoiding die-off
Once seagrass is established, it is relatively low-maintenance compared to the setup phase, but it is not hands-off. Here is what ongoing care actually looks like.
Trimming
Trim blade tips with clean aquarium scissors when the blades get longer than about 6 to 8 inches (for Halodule) or start shading the base of the plant. Cut at an angle about two-thirds of the way down the blade, not at the rhizome. Never cut the rhizome itself unless you are intentionally propagating. Trimming encourages lateral spreading and keeps the blades receiving even light. Trim every 3 to 4 weeks once the plant is established.
Managing spread
Seagrass will spread across your substrate if conditions are good. That is the goal, but it can overtake other elements of your scape. Use a thin piece of egg crate or a buried plastic divider to contain the rhizome spread to a designated area, or simply pull out sections of rhizome from the edges every few months. Halodule wrightii can spread surprisingly fast once it hits its stride.
Preventing stress and die-off
The main stressors that cause seagrass to suddenly melt or brown out are: abrupt salinity changes, temperature spikes above 30°C, lighting interruptions longer than a day or two, and physical disturbance of the root zone. Keep a consistent top-off schedule, make sure your heater and chiller (if you use one) are functioning reliably, and do not rearrange the substrate in the seagrass planting area. Even well-meaning maintenance like vacuuming near the roots can set the plant back weeks.
Troubleshooting common problems
The blades are melting or turning to mush
This is the most common failure and it usually happens in the first two weeks. The causes are almost always one of three things: the rhizome came out of the substrate and lost contact with the sand, salinity or temperature shifted sharply during shipping or acclimation, or the plant was already stressed when you got it. Fix it by re-anchoring any loose rhizomes immediately, checking your salinity and temperature against the targets above, and cutting away any completely mushy blades with clean scissors. If the rhizome itself is still white and firm, there is hope. If the rhizome is also brown and soft, the plant is gone and you need to start with new material.
Poor or no rooting after two weeks
If blades are still green but the plant keeps floating up and no roots are visible, your substrate is likely too coarse or too shallow. Try replanting in a finer-grained area with more depth, and weight the rhizome more aggressively. Also check flow: if a pump jet is hitting the planting area, the constant force will prevent roots from establishing. Redirect flow away from the area for another week.
Leaves are browning at the tips
Tip browning that is not accompanied by overall mush or melting is usually a light or nutrient issue. If tips are brown but the rest of the blade is green, suspect low iron or inadequate trace elements first. Dose a marine trace element supplement and observe over the next 7 to 10 days. If the entire blade is turning uniformly yellow-brown, suspect insufficient light or a pH problem. Measure pH and check that your lighting is hitting the right intensity and duration at the substrate.
Algae is covering the blades and outcompeting the seagrass
Filamentous algae colonizing seagrass blades is a real and frustrating problem. If you are trying to control biofilm in the aquarium, addressing excess nutrients and light is just as important as managing algae Filamentous algae. It is almost always caused by excess nutrients in the water column (nitrate above 10 ppm, phosphate above 0. 2 ppm) combined with high light.
Reduce feeding in your tank, increase skimmer efficiency, and do a 15 to 20 percent water change. Do not manually scrub algae off seagrass blades as this damages the leaf surface. Instead, introduce appropriate algae grazers like small sea urchins or turbo snails that will clean the blades without uprooting the plants. Also check that your light photoperiod is not exceeding 12 hours, as extended photoperiods fuel algae more than they help seagrass.
No new growth after a month
If the plant is green and rooted but not spreading or producing new blades after 4 weeks, the most common culprit is insufficient nutrients in the substrate. Carefully push a small amount of marine plant fertilizer tablet into the sand near (but not touching) the rhizome. Also re-examine your lighting intensity at substrate level. In deeper tanks, PAR can drop dramatically between the water surface and the sand, and seagrass roots will exist but growth will stall at very low light levels.
Maintenance routine and when to expect results
Here is the realistic timeline and what a simple weekly maintenance routine looks like once seagrass is established.
| Timeframe | What to Expect | Action |
|---|---|---|
| Days 1 to 3 | Plants look the same or slightly stressed from handling | Check anchoring, confirm salinity and temperature, reduce flow |
| Days 4 to 10 | Some blade tips may yellow slightly; this is normal transition stress | Maintain stable parameters, do not disturb |
| Weeks 2 to 3 | Roots begin anchoring into substrate; blades stay upright | Resume normal flow, begin weekly water testing |
| Weeks 3 to 5 | New blade shoots emerge from rhizome nodes | Begin light trimming if blades exceed 6 inches |
| Weeks 5 to 8 | Rhizome spreading begins; coverage expands | Trim edges, dose trace elements, manage algae grazers |
| Month 3 onward | Dense, spreading coverage; regular maintenance needed | Trim monthly, do water changes every 1 to 2 weeks, recheck nutrients |
For weekly maintenance, keep it simple: test nitrate, phosphate, and salinity, do a 10 to 15 percent water change with RODI-mixed saltwater, check that the light timer is running correctly, and glance at the rhizome edges to catch any algae early. Monthly, give the blades a trim, check the substrate depth in the planting area (sand settles over time), and assess whether nutrient supplementation is needed based on growth rate.
Seagrass is genuinely rewarding once it takes hold. A healthy, spreading bed of Halodule wrightii in a reef tank does something no other marine plant quite replicates: it creates that shallow coastal seagrass meadow look that is rare in hobby tanks and absolutely stunning. The setup is demanding, but if you follow this workflow and stay patient through the first month, you will get there.
FAQ
Can I grow seagrass in a freshwater aquarium if I slowly acclimate it to low salinity?
No, even if it survives for a short time, most seagrass species are adapted to specific marine or brackish salinity ranges, and long-term health requires a stable marine environment. If you want an aquarium “meadow” look in freshwater, use true freshwater seagrass-style plants only as a visual substitute, and plan for standard freshwater planted-tank lighting and nutrients instead.
Should I start seagrass from seeds or can I use rhizomes/plugs?
Rhizomes and plugs are usually the most reliable in aquariums because you can confirm substrate contact immediately. Seeds can work, but success depends heavily on keeping the sediment undisturbed and achieving consistent light at the substrate during the earliest root establishment window (first 10 days).
How do I stop seagrass rhizomes from taking over the whole tank without constantly pulling plants?
Use a physical boundary from day one, such as a buried plastic divider or a container-style planting area with egg crate, so rhizomes cannot cross. This reduces repeated stress from digging, and it also makes algae control and nutrient dosing more predictable because the planting zone stays consistent.
What salt mix and saltwater parameters matter most when growing seagrass?
What matters most is stability of salinity and correct ionic composition, not just matching a number at one time. Use a reliable marine salt mix and match temperature when preparing top-off or water changes, then verify with a refractometer or conductivity meter after mixing and again after the water reaches tank temperature.
Why does my seagrass melt after acclimation even though salinity and temperature look “close”?
The common hidden issue is salinity swing during transport and drip acclimation, even if the final readings match. Also check that you did not expose the rhizome to air for more than a few minutes, because lost contact or partial desiccation can lead to rapid melting while blades appear green initially.
Do I need a skimmer and a refugium if I am trying to grow seagrass?
You can run both, but be careful not to “over-export” nutrients during early establishment. If your tank is very young or you are seeing poor growth, consider temporarily reducing nutrient removal or ensure fertilizer targets are still met through substrate porewater rather than relying on constant dosing to the water column.
Is there a safe way to dose nutrients if my tank is new and the sand bed has little bioactivity?
Yes, but dose conservatively and near the substrate. Start with half-strength marine plant fertilizer, and if you add anything, prefer small, localized additions that support root and leaf uptake rather than large water-column spikes that feed nuisance algae.
What nutrient targets should I aim for, and how often should I test nitrate and phosphate?
Use testing primarily as a guardrail, because seagrass benefits from available nutrients but algae will respond quickly to excess. A practical approach is to test nitrate and phosphate at least weekly during the first month, and act immediately if values climb toward the algae-fuel range mentioned in the troubleshooting section.
Can I manually remove algae from seagrass if it’s only on the tips?
Avoid scrubbing the blades. Even small scrubbing can damage the leaf surface and slow recovery. Instead, adjust light and nutrient balance first, then use compatible grazers that clean without uprooting or rubbing the plants.
My blades are green but they are not spreading. How can I tell if it is light versus nutrients versus substrate depth?
Run a quick diagnostic: if blades maintain color but new rhizome growth stalls after a month, the most frequent causes are low light at the substrate or insufficient substrate nutrient availability. Confirm sand depth (re-settle after vacuuming if needed), then check PAR at sand level or compare growth response after reducing tank depth shading and rebalancing light intensity.
How do I trim seagrass without damaging the rhizome?
Cut only the blades, and do it where you are not directly cutting into the rhizome zone. Use clean aquarium scissors, remove the shaded or overly long portion, and avoid repeated trimming in the same spot week after week, because frequent cuts can slow lateral spread temporarily.
What should I do if fish or invertebrates uproot my seagrass?
Identify the likely digger first, then create protection immediately. Add a deeper planting pocket, reduce direct flow disruption near the rhizome, and rearrange your scape to keep uprooting behavior from being rewarded, for example by removing loose rocks or shells that provide leverage for digging.