Biofilm is one of the most useful things you can grow in an aquarium, and most people don't even realize they're growing it. If you want to do it intentionally, here's the short version: provide the right surfaces, keep a light but steady food source, maintain stable water conditions, and then leave things alone. That's mostly it. The longer version, with timelines and troubleshooting, is below.
How to Grow Biofilm in an Aquarium: Step-by-Step Guide

Marcus Holloway
22 Apr 2026
What aquarium biofilm actually is (and why it matters)
Biofilm is a living community of microorganisms, mainly bacteria, but also fungi, protozoa, and microscopic algae, all held together in a sticky matrix called extracellular polymeric substances, or EPS. Biofilm cells are embedded in an extracellular matrix composed of extracellular polymeric substances (EPS), typically a mix that includes extracellular polysaccharides, proteins, lipids, and DNA blank" rel="noopener noreferrer">extracellular polymeric substances, or EPS. A biofilm is an EPS matrix in which microorganisms are embedded, and EPS includes primarily polysaccharides (along with proteins and nucleic acids depending on the system) blank" rel="noopener noreferrer">sticky matrix called extracellular polymeric substances, or EPS. The EPS is mostly polysaccharides and proteins secreted by the microbes themselves. Think of it as a self-built apartment complex: the microbes manufacture the walls, hallways, and plumbing, then colonize every layer. That matrix is also what gives healthy biofilm its soft, slightly slippery texture and faint iridescent sheen on wood and rock surfaces.
Why cultivate it deliberately? A few reasons. First, biofilm is a living food source. It's packed with protein, beneficial bacteria, and protozoa that juvenile shrimp, fry, and snails graze on constantly. Second, it's a key part of a tank's nitrogen cycle. Nitrifying bacteria are biofilm organisms. When they colonize your filter media and substrate, they're forming a structured biofilm that processes ammonia and nitrite. Third, a well-established biofilm layer on wood, rocks, and substrate signals a mature, stable ecosystem. New tanks that lack it are more fragile. Growing biofilm intentionally speeds up that stability.
Where biofilm shows up in your tank
Biofilm colonizes every hard surface in your aquarium, but it doesn't develop evenly. Surface texture, water flow, and organic load all determine where it grows fastest and thickest. Here's what to expect on each surface type:
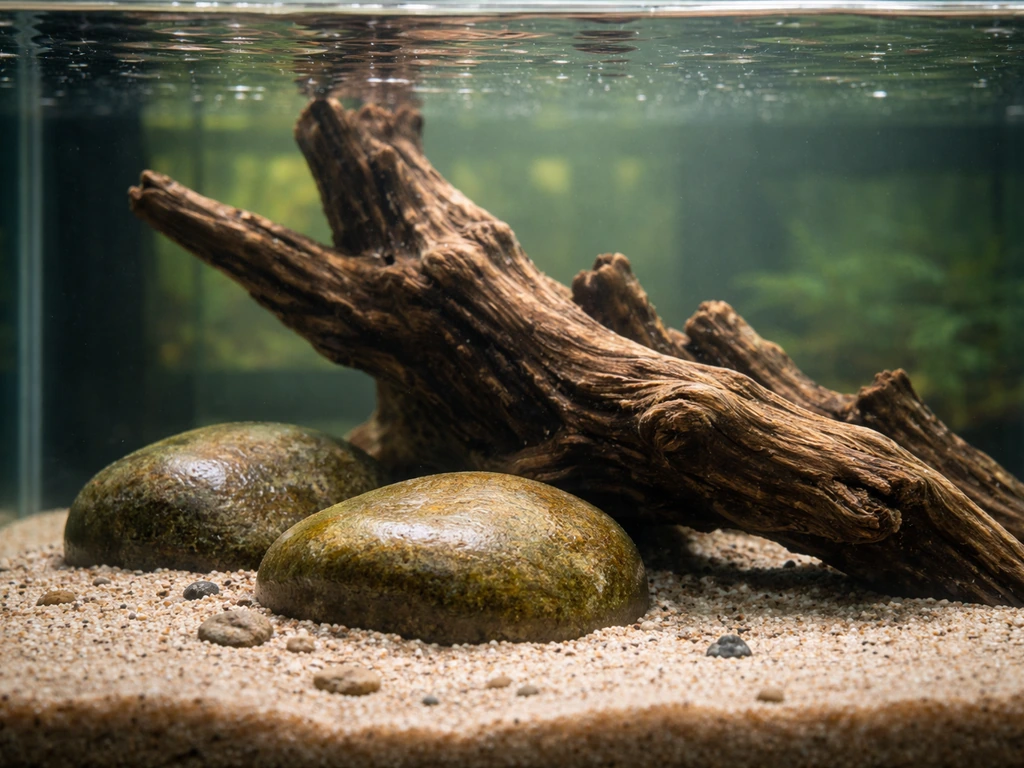
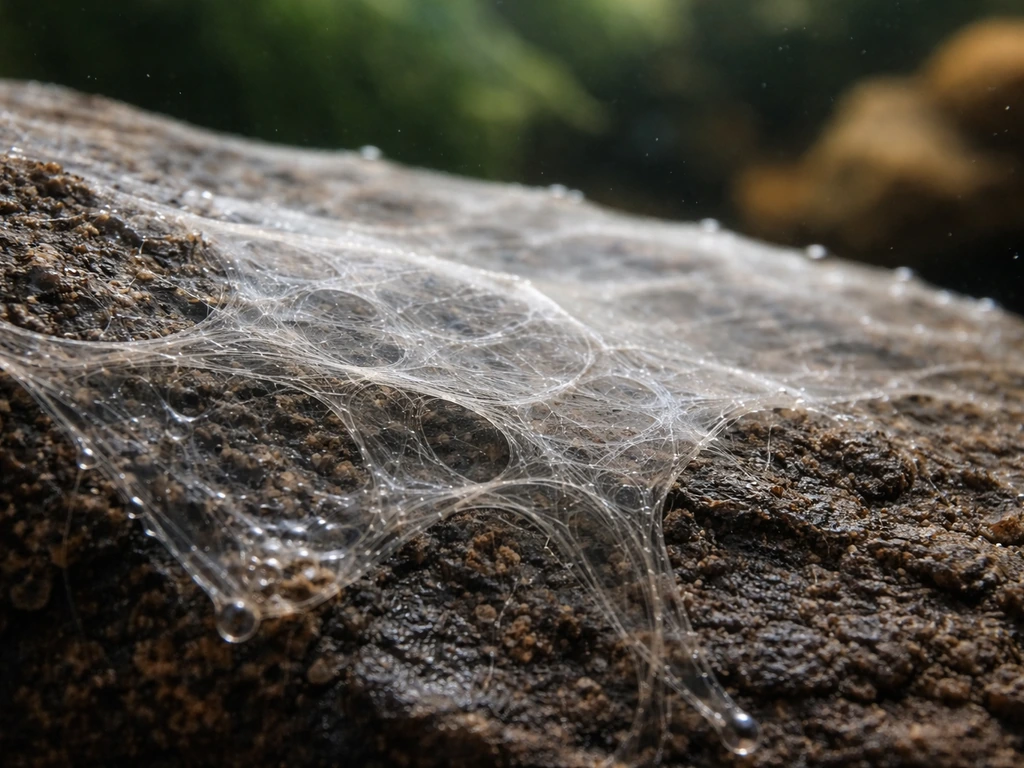
- Driftwood and botanicals: These are biofilm goldmines. Natural wood is porous, leaches tannins and organic compounds that feed bacteria, and has a rough surface microstructure that anchors microbial communities. You'll usually see a fuzzy white or cream coating appear on new wood within 3 to 7 days of adding it to a cycled tank.
- Rocks and hardscape: Smoother rocks colonize more slowly than rough, porous ones like lava rock or Seiryu. Lava rock in particular is a favorite for deliberate biofilm cultivation because the high surface area allows thick colonization. You'll often see a thin, brownish or golden film develop over 1 to 3 weeks.
- Substrate (sand and gravel): Sand and fine gravel develop a microbial mat layer just below and at the surface. This is where a lot of shrimp nose around. Coarser gravel traps detritus in gaps, which feeds local biofilm patches.
- Sponge filters and filter media: This is where nitrifying biofilm concentrates most heavily. Studies on home aquarium biofilters show nitrogen cycling can reach maturity in roughly 12 weeks, with the most active biofilm forming in high-flow, high-surface-area zones, exactly where a sponge filter sits.
- Glass and acrylic walls: Biofilm appears here too, especially away from areas you regularly clean. It's usually thinner and harder to see than on wood or rock, but it's there. A thin brown haze before diatom bloom is often biofilm starting to colonize.
How to grow biofilm step by step
This method works whether you're starting a new tank or adding biofilm growth to an established setup. The core strategy is simple: create surfaces, add a steady food input, and keep conditions stable.
Step 1: Add the right surfaces
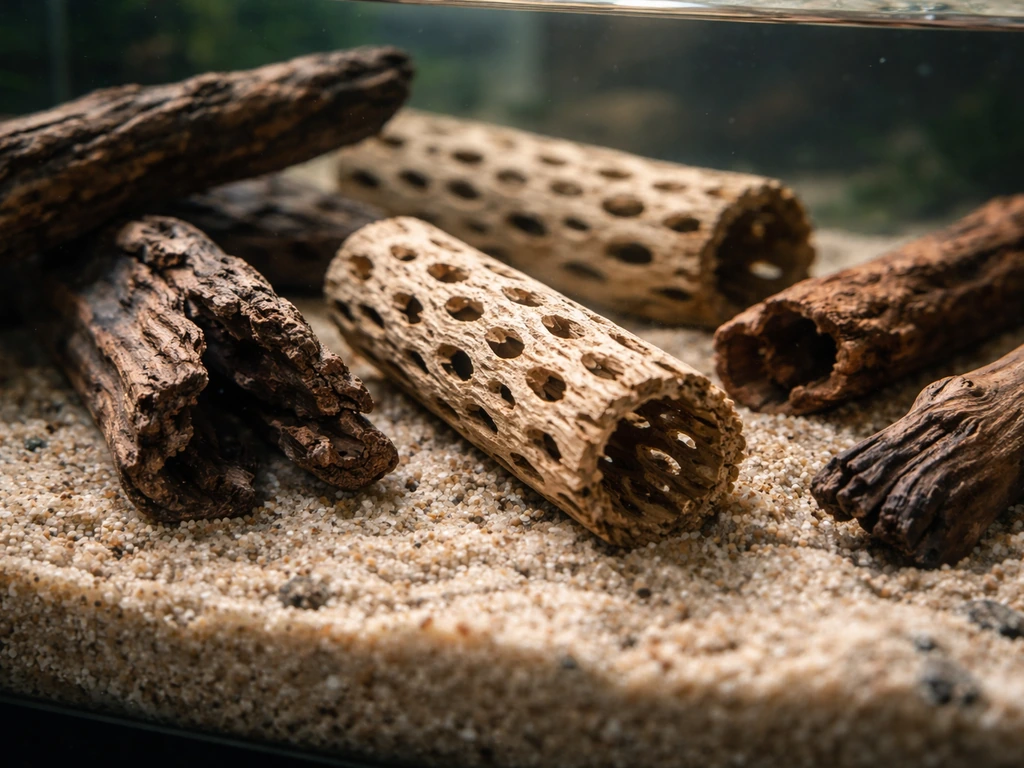
If you want biofilm, give it something to grip. Driftwood is the single best addition. I've used spider wood, cholla wood, and Malaysian driftwood, and all of them produce a visible biofilm coating within a week in a healthy tank. Add cholla wood specifically if you're growing biofilm for shrimp: the hollow tubular structure gives shrimp a place to graze inside and out. Lava rock is the second best option. Drop a few pieces near your substrate. Sponge filters pull double duty by providing surface area and gentle flow, which is the ideal combination for microbial colonization.
Step 2: Seed the tank with beneficial microbes
If you're working with a new tank, add established filter media or a small piece of sponge from a mature, healthy tank. This seeds the water column with the bacterial communities that will form your biofilm. Commercial bacterial starters work too, though I've had better results with real mature media. For an established tank, you may already have plenty of microbes and just need to give them more surface area and food.
Step 3: Establish a light, steady food source
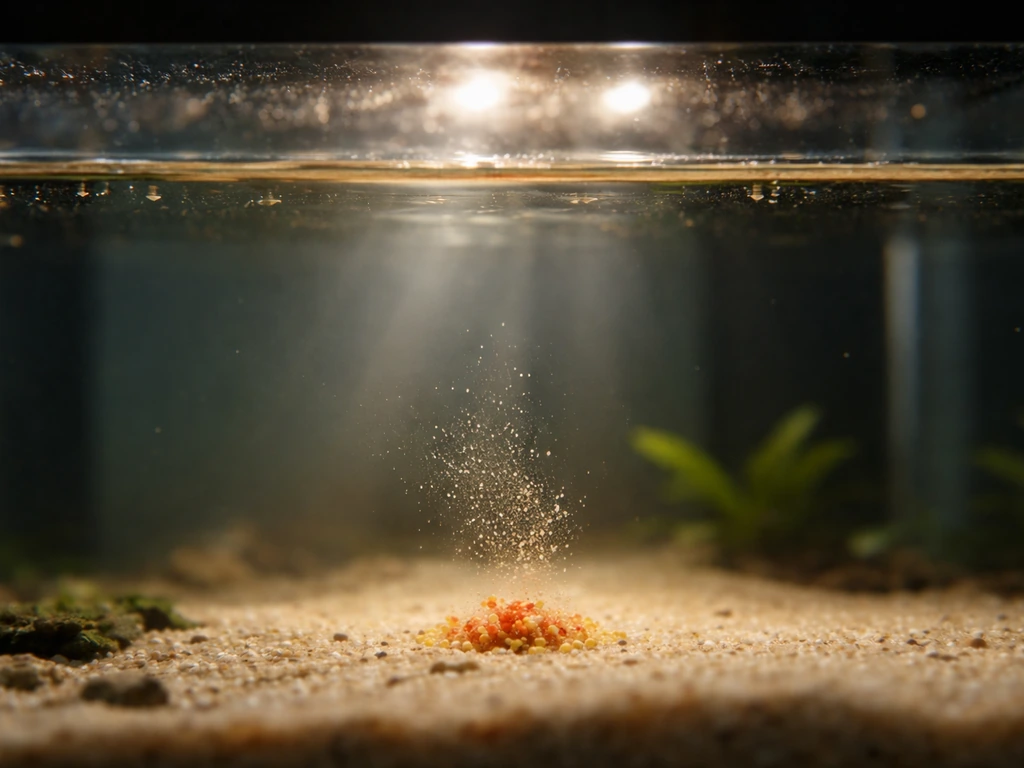
Biofilm grows on dissolved organic matter, fish waste, leftover food, and compounds leaching from wood. The key word is light. You don't want to dump food in and spike ammonia, but you do need a consistent trickle of nutrients. In a tank with fish, regular feeding creates enough waste to sustain biofilm. In a fishless setup or one where you're boosting biofilm production for shrimp fry, add a tiny pinch of powdered fish food or a small piece of blanched vegetable every few days. Let it sit and decompose slightly rather than siphoning it out immediately. Leaf litter like Indian almond leaves is excellent because it breaks down slowly and continuously feeds surface microbes.
Step 4: Set the right water conditions
Biofilm communities are not fragile, but they do have preferences. Stable temperature between 72 and 82 degrees Fahrenheit supports most freshwater biofilm communities. Warmer temperatures (76 to 80°F) slightly accelerate microbial growth. Gentle to moderate flow is important: water movement carries nutrients to the biofilm surface and removes metabolic waste, but heavy turbulence can physically shear young biofilm off surfaces before it establishes. A sponge filter providing light circulation is ideal for biofilm cultivation, especially in shrimp or fry tanks. Avoid overdosing CO2 or crashing pH suddenly, as sharp swings disrupt microbial communities more than steady low or high values do.
Step 5: Leave things alone
This is the step most people skip. Once you've added surfaces, seeded microbes, and set up a light nutrient input, resist the urge to scrub everything. Biofilm takes time to attach, grow, and mature into that recognizable fuzzy or filmy coating. Avoid cleaning wood, rocks, and the substrate surface for at least two to three weeks. Don't over-gravel-vac either. A thin layer of mulm in the substrate is part of the food web that feeds biofilm at the sand surface.
How long it takes and how to tell it's working
In a tank that's already cycled and has fish or organic input, you'll see the first signs of biofilm within 3 to 10 days on wood and porous rock. The early stage looks like a thin whitish or cream-colored fuzz on driftwood surfaces, or a slightly cloudy film on smooth rocks. After 2 to 4 weeks, you should see a more consistent brownish to golden biofilm layer on most surfaces. By 8 to 12 weeks, the microbial community fully matures, which lines up with research showing aquarium biofilter communities stabilize over roughly 12 weeks from startup.
Behavioral signs are often more reliable than visual ones. If you have shrimp, watch them. Shrimp grazing actively on wood, rocks, and the substrate is the clearest sign that biofilm has established. Snails nosing over every surface, fry picking at wood edges, and otocinclus spending time on the wood rather than just glass all indicate biofilm is there and edible. Healthy biofilm should have no smell, or at most a faint earthy smell if you lift a piece of wood. If it smells sulfurous or rotten, you have an anaerobic problem, not healthy biofilm.
Biofilm vs. diatoms vs. nuisance algae: how to tell what you're looking at
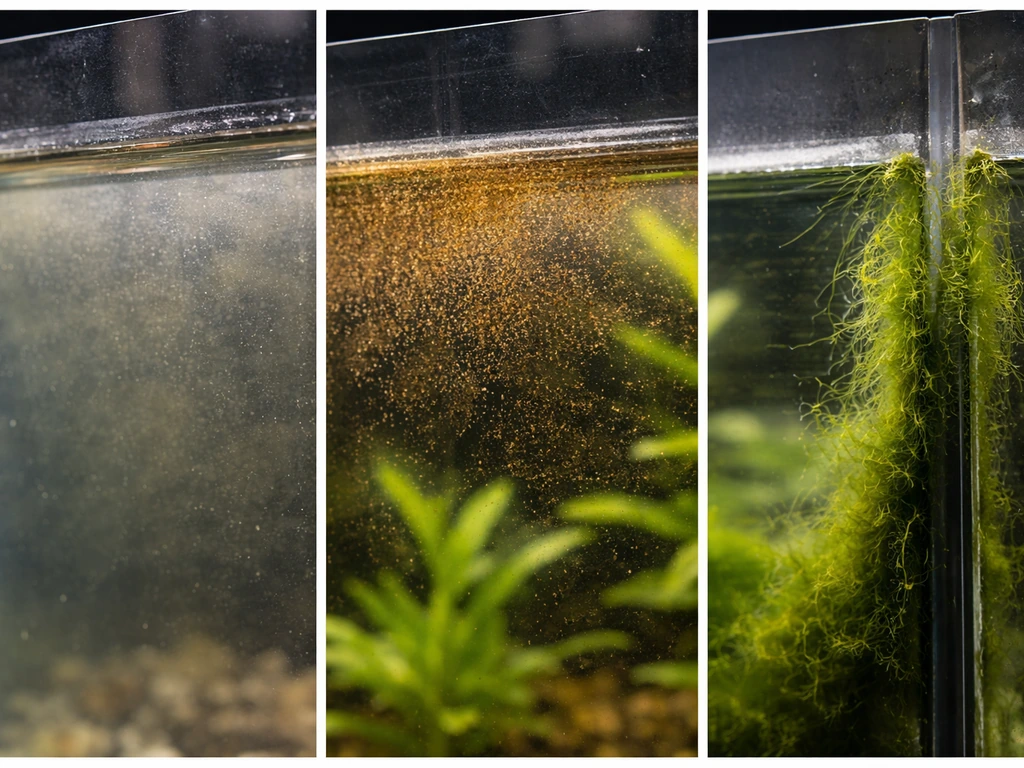
This is where a lot of people get confused, including me early on. Not everything that grows on surfaces in a new or maturing tank is biofilm. Here's a practical breakdown of what you're likely seeing and what to do about it:
| What You See | What It Probably Is | Texture/Smell | What to Do |
|---|---|---|---|
| Fuzzy white or cream coating on driftwood | Early-stage biofilm | Soft, no bad smell | Leave it alone, it's what you want |
| Brown dusty film on glass, rocks, and substrate | Diatoms (silica-based algae) | Slightly gritty, wipes off easily | Normal in new tanks; add nerite snails or otocinclus, reduce silicate, improve flow |
| Bright green patches on glass or leaves | Green algae | Slippery, no smell | Reduce photoperiod, reduce nutrients, add algae grazers |
| Thick green or blue-green mat on substrate, may smell | Cyanobacteria (BGA) | Slimy, musty or rotten smell | Increase flow, reduce nutrients, do a 3-day blackout, check nitrate/phosphate balance |
| Cloudy water column (not surface growth) | Bacterial bloom | May smell slightly organic | Normal in new tanks; do not over-filter, let it resolve in 5 to 10 days |
| Thin iridescent or golden film on wood and rock | Mature healthy biofilm | Earthy or no smell | Leave it, this is the goal |
The most common mistake is scrubbing off the white fuzzy coating on new driftwood thinking it's mold or something harmful. It usually isn't. True mold in a submerged tank is uncommon because most mold species can't survive submersion long-term. That soft white coating is almost always early-stage biofilm or a harmless fungal bloom that biofilm bacteria outcompete within a week or two. Leave it alone and watch what happens. If it's gone or transformed into a golden-brown film after 10 days, it was biofilm all along.
Cyanobacteria (blue-green algae or BGA) is the one you do need to act on. It's identifiable by its slimy mat texture, tendency to form on the substrate surface or low-flow corners, and a distinct musty or sewage-adjacent smell. Biofilm does not smell like that. If you're seeing BGA, increase flow in low-circulation areas, reduce photoperiod by 2 to 3 hours, and check that nitrate and phosphate aren't wildly imbalanced. BGA often signals a nitrogen-deficient, phosphate-heavy situation.
Water parameters and feeding that drive biofilm growth
Biofilm doesn't need perfect water, but it does need stable water. To learn the specifics of growing seagrass instead of biofilm, follow a seagrass-focused setup guide how to grow seagrass in aquarium. Sudden large water changes, dramatic temperature swings, or aggressive chemical treatments can wipe out surface microbial communities that took weeks to establish. Here's what to aim for:
- Temperature: 72 to 82°F (22 to 28°C) for most freshwater setups. Higher end of this range speeds up microbial metabolism and biofilm growth.
- pH: 6.5 to 7.8 covers most freshwater biofilm communities. Avoid swings greater than 0.5 units in a day.
- Ammonia and nitrite: Should be 0 ppm in an established tank. If ammonia spikes above 1 to 2 ppm, it can inhibit some beneficial biofilm bacteria even though nitrifiers themselves are processing it.
- Nitrate: Low to moderate nitrate (under 20 ppm for shrimp tanks) is fine for biofilm. Elevated nitrate doesn't suppress biofilm but signals overfeeding or under-maintenance.
- Flow: Gentle to moderate. Sponge filters, powerheads set to low, or hang-on-back filters with flow turned down are all appropriate. High turbulence disrupts biofilm attachment on surfaces.
- Light: Low to moderate. Biofilm grows fine with 6 to 10 hours of light per day. Excess light drives algae competition rather than biofilm development.
Feeding rate has a direct effect on biofilm density. More organic input means more microbial food and faster biofilm development, up to a point. If you overfeed and ammonia spikes, you've crossed from helping into hurting. A practical rule: feed only what fish consume in 2 to 3 minutes, once or twice daily. Let some detritus accumulate in substrate gaps and on wood surfaces rather than vacuuming everything out at every water change. That detritus layer is part of the food web that feeds your biofilm.
Using biofilm to feed your livestock safely
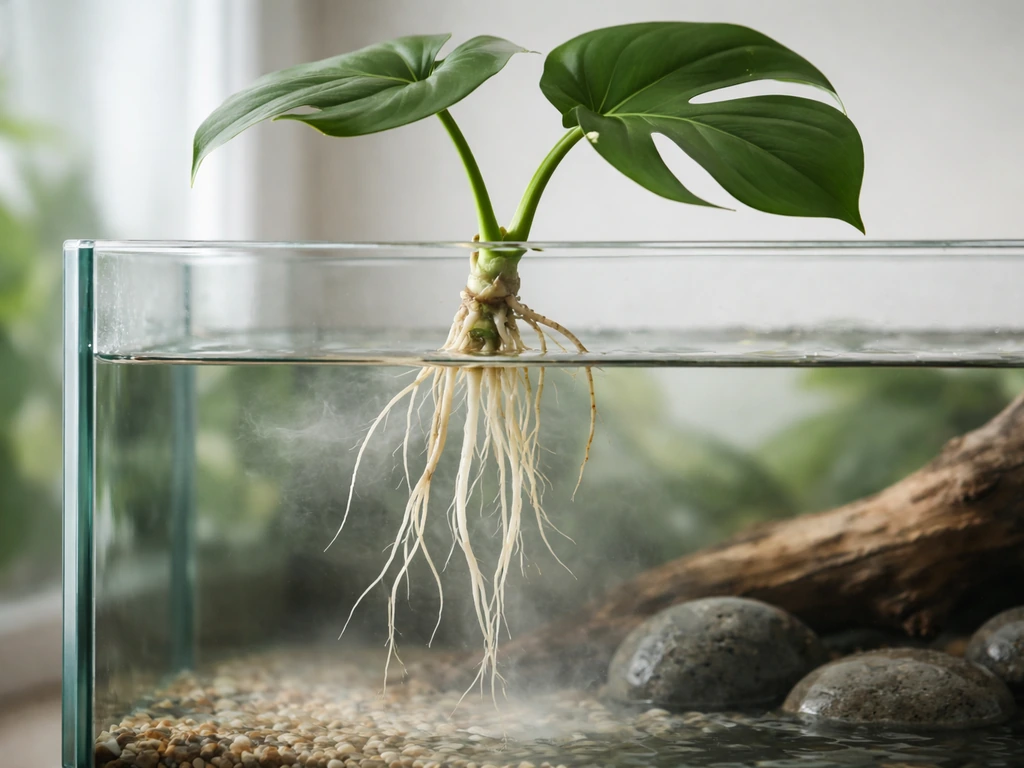
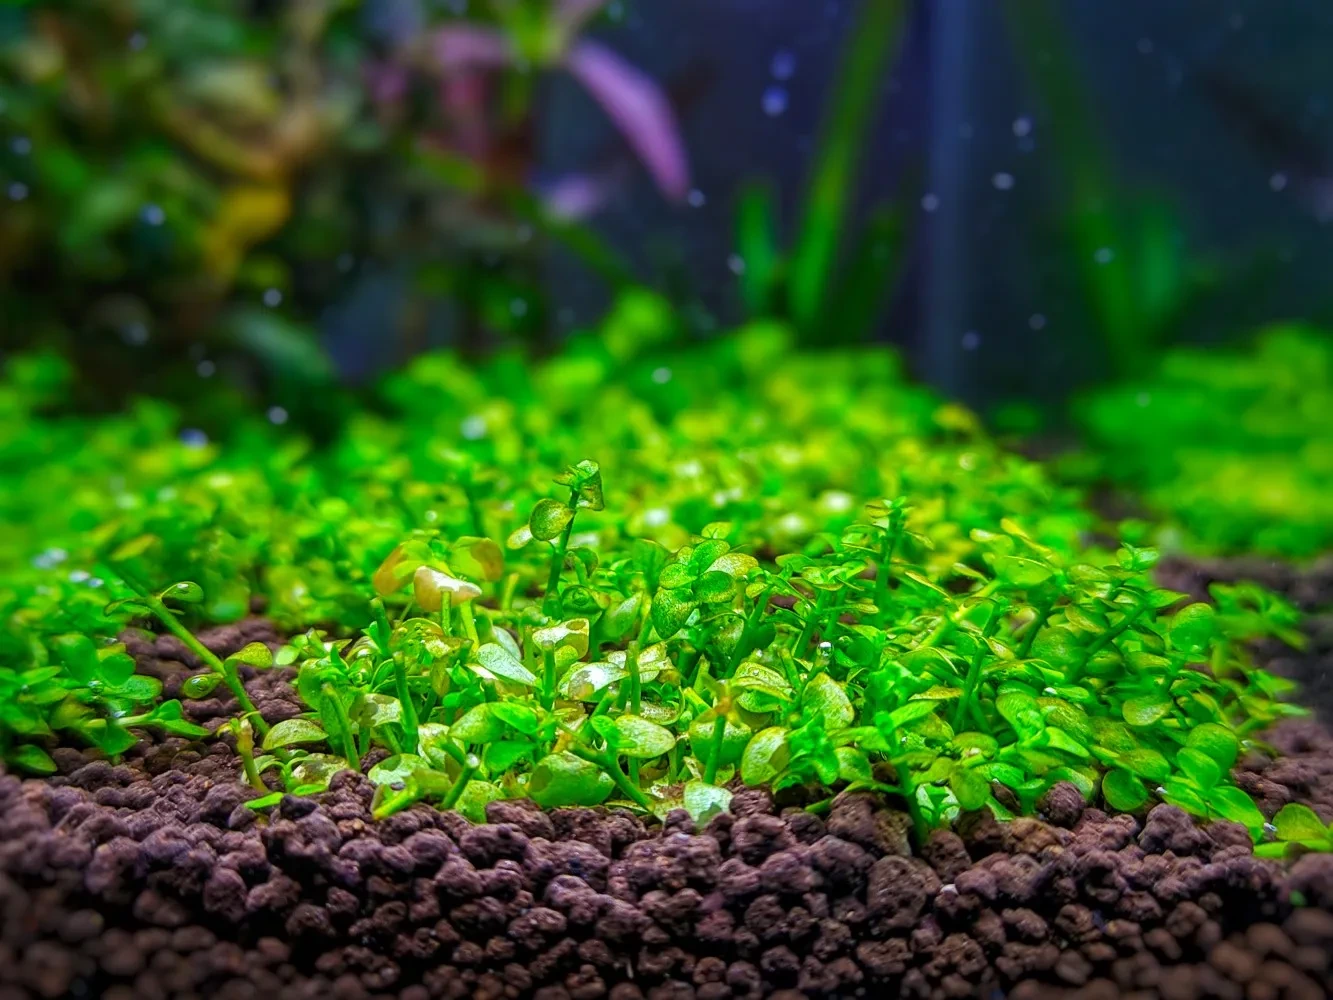
Biofilm grown in a healthy, cycled tank is safe to eat for virtually every grazing species in freshwater aquariums. Shrimp of all species (Neocaridina, Caridina, Amano) graze biofilm constantly and benefit from it significantly. Research on shrimp larvae and juveniles consistently shows that microbial-rich natural feeds improve survival and growth rates, which is why biofilm-coated surfaces matter so much in shrimp breeding setups. This overlaps closely with the principles behind growing biofilm specifically in shrimp tanks, where the goal is often providing passive, constant nutrition for babies and juveniles. If you also want to build a biofilm base for shrimp, follow the same approach and learn how to grow monte carlo in aquarium setups for steady grazing how to grow biofilm specifically in shrimp tanks. If you want the shrimp-specific setup and timelines, use the guide on how to grow biofilm in shrimp tanks principles behind growing biofilm specifically in shrimp tanks. Bacopa plants can be grown in an aquarium by providing suitable light, nutrients, and stable water while trimming and replanting as they develop how to grow bacopa in aquarium.
For fish fry, biofilm is often the first solid food they can consume. Newly hatched fry that are too small for baby brine shrimp or commercial powder foods will pick at biofilm on glass walls and wood surfaces. This is why experienced breeders keep biofilm-heavy tanks for conditioning and breeding pairs, and never sterilize their breeding tanks between spawns.
Snails, otocinclus, plecos, hillstream loaches, and most other benthic grazers also feed on biofilm constantly. If you notice these animals looking thin or inactive, biofilm depletion is one of the first things to check, especially in heavily cleaned or new tanks.
When to hold back on biofilm growth
Biofilm growth should be moderated in a few situations. If you're dealing with a fish disease outbreak and treating with antibiotics or other medications, the drugs will suppress your biofilm bacterial community, including your nitrifying bacteria. Expect a mini-cycle after antibiotic treatment and monitor ammonia carefully. Also avoid aggressively growing biofilm in tanks with heavy fish loads and poor filtration: more organic input means more microbial activity means more oxygen consumption. In a low-oxygenated, overstocked tank, dense biofilm can contribute to low dissolved oxygen. Keep flow and surface agitation adequate any time you're deliberately pushing biofilm growth.
What to do right now
If you want to start growing biofilm today, here's what you can do in the next hour. For the full process, including equipment and timelines, see our guide on how to grow grass in aquarium. First, add a piece of driftwood or cholla wood to your tank if you don't have one. Second, if you have access to established filter media from a healthy tank, add a small piece to your filter or drop a seeded sponge into the tank. Third, reduce your cleaning schedule: skip scrubbing wood and rocks for the next two to three weeks, and ease up on gravel vacuuming. Fourth, do a light feeding and let a small amount of detritus accumulate. Fifth, check that your flow is gentle rather than turbulent, and that your photoperiod is 8 to 10 hours maximum.
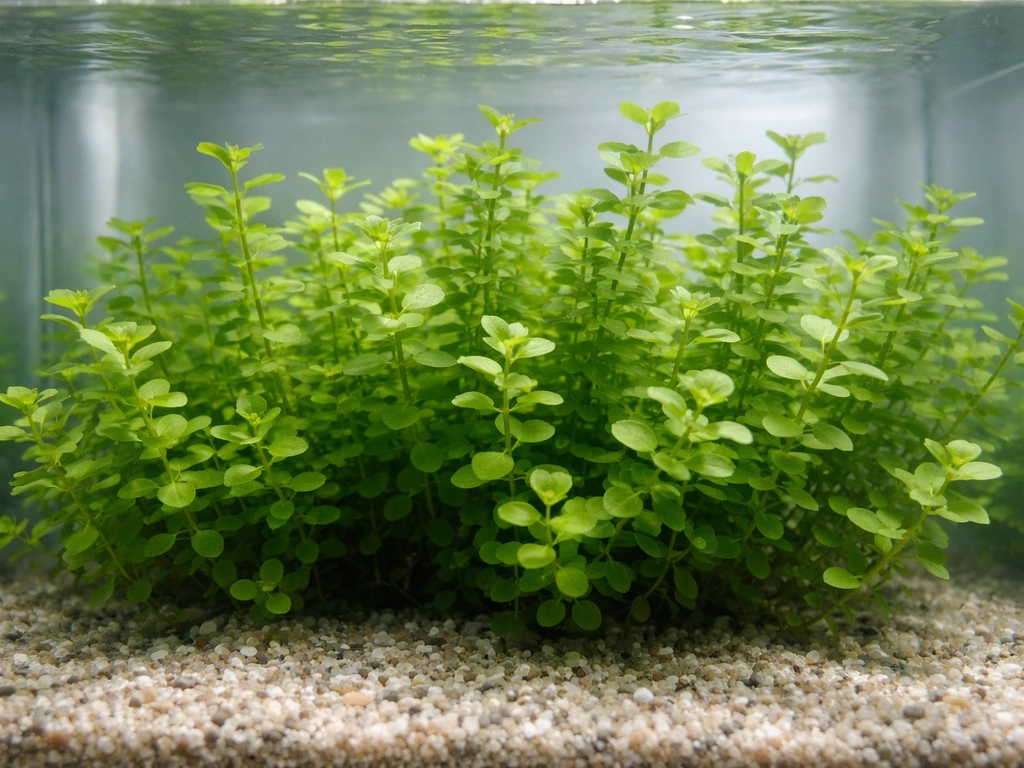
Then wait. Check for the white fuzzy coating on wood within a week. Watch your shrimp or snails for grazing behavior. By week three or four, you should see a visible golden-brown biofilm layer developing on wood and rock surfaces. That's the sign you've done it right. From there, maintaining biofilm is just about maintaining a stable, consistently-fed tank, which is good aquarium practice regardless. If you want a carpet grass result, you can apply the same stability ideas from biofilm and then focus on lighting, CO2, and nutrient delivery for the seeds carpet grass seeds in an aquarium. If you want to apply the same stable, biofilm-friendly principles to plants, this is also useful for how to grow monstera in aquarium aquarium practice.
FAQ
Can I grow biofilm in an aquarium that is not fully cycled yet?
Yes, but treat it as “encouraging biofilm,” not “breeding biofilm.” Keep a stable temperature, add a solid surface like driftwood or lava rock, and provide a light, consistent nutrient trickle (for example, leaf litter or a very small feeding). If the tank is newly cycled, avoid increasing ammonia risk, since biofilm can only grow as fast as the tank can keep waste levels safe.
What should I check if I’m trying to grow biofilm before nitrification is established?
If ammonia or nitrite are high, the risk is not that biofilm will fail, it is that fish and shrimp will suffer while microbes struggle to establish the right nitrifiers. Seed surfaces (established sponge or filter media) and keep feeding minimal, then confirm nitrite drops to safe levels before relying on the tank as a grazing nursery.
Are commercial bacterial starters enough to grow biofilm, or do I need established media?
Use “seeding” plus stability. Beneficial biofilm organisms are typically carried by established filter media, a seeded sponge, or mulm from a healthy tank. If you use only bottled bacterial starters without any real surface seeding, growth can happen slower or patchier, and it may take longer to reach the mature biofilm stage you want for shrimp fry grazing.
How does substrate choice or gravel vacuuming affect biofilm growth?
Substrate depth and vacuuming habits matter. Biofilm and detritus live in surface layers and substrate gaps, so frequent deep-gravel vacuuming can repeatedly remove the feeding layer and slow down biofilm buildup. A practical approach is to spot-clean only when needed (for example, when detritus becomes visibly excessive), and otherwise disturb only the top layer.
Does increasing aquarium light make biofilm grow faster, or does it just cause algae?
Light matters mainly because it supports microscopic algae and affects how much “mixed” film you get. For true biofilm you do not need strong lighting, and you can even run a modest photoperiod (about 8 to 10 hours) to reduce algae that can mask results. If you see heavy green film instead of the expected soft, slightly iridescent biofilm on wood, shorten the light period.
How can I encourage biofilm but avoid algae blooms?
To grow biofilm without boosting nuisance algae, keep nutrients steady but low, avoid overfeeding, and don’t remove every bit of detritus. A good indicator is that surfaces develop a consistent film over time, while water stays clear. If you notice recurring algae outbreaks, reduce the feeding trickle and shorten the photoperiod slightly rather than scrubbing everything.
What changes if my goal is biofilm for shrimp or fry, not just a “healthy tank” film?
Yes, and it changes what you should expect. In a shrimp or fry tank, include porous surfaces (like cholla wood) and ensure there are no dead zones where flow is absent. Also avoid harsh spot-cleaning right after adding new surfaces, since young biofilm can be physically removed by sudden rinsing.
How much water flow is ideal for growing biofilm?
Aeration and circulation are the safety limit. Gentle to moderate flow helps deliver nutrients and remove waste, but very strong current can shear off young biofilm. Target circulation that prevents stagnant corners, especially near the substrate, while still allowing films to form undisturbed on wood and rock.
Can I use a heater setting outside the usual biofilm temperature range?
Temperature stability is usually more important than hitting an exact number. If you keep the tank within the typical freshwater range (roughly 72 to 82°F) and avoid fast swings, biofilm communities should progress normally. If you raise temperature quickly, you may see faster initial growth but also more detritus decomposition and potential oxygen draw.
Is there a way to tell if the film is actually biofilm without disturbing it?
Not reliably, and it can be risky. Smell is useful (healthy biofilm should be neutral to faint earthy), but “scrape tests” can remove the very film you are trying to cultivate. If you must remove buildup, do it in small sections and only after you confirm the tank is otherwise stable (good oxygen, no ammonia spikes).
What’s the best way to respond if I suspect cyanobacteria instead of biofilm?
If you see musty or sewage-adjacent odor with a slimy mat in low-flow areas, treat it as a potential cyanobacteria or anaerobic-ish problem rather than healthy biofilm. The practical first steps are increasing circulation in that area, reducing light by a few hours, and checking nutrient balance (not just one parameter). If symptoms persist, consider the source of the imbalance, like overfeeding or poor filtration turnover.
How do antibiotics or water treatments affect biofilm growth and shrimp feeding?
Medicines can interrupt microbial communities, so growth will often stall and the tank may need time to recover. After antibiotics or heavy chemical treatments, expect a reset in surface colonization, and re-stabilize before relying on biofilm as food. If you can, pause intentionally “feeding for biofilm” until ammonia and nitrite are back under control.
If the initial coating stays white, does that always mean something is wrong?
A thin, patchy white coating often matures into the warmer brownish to golden look as the community develops, usually over a couple of weeks. If it stays fluffy and unchanged for a long time while water parameters are unstable, reassess nutrient level and stability instead of assuming it will become healthy biofilm on its own.
Can growing too much biofilm harm my aquarium?
Yes, and it is usually a “too much, too fast” feeding symptom or an oxygen balance problem. Biofilm can grow denser with more organic input, but oxygen demand rises as microbial activity increases. If fish are gasping, shrimp are sluggish, or you see rapid decays and cloudiness, reduce feeding and increase surface agitation.
How can I maintain a consistent biofilm source while still doing normal tank maintenance?
Start a small “biofilm station” inside your main tank if you want steady grazing without changing everything. Use a dedicated piece of driftwood or a seeded sponge and place it where flow is gentle. This gives you a reliable source even if you later need to modify lighting, feeding, or substrate cleaning.