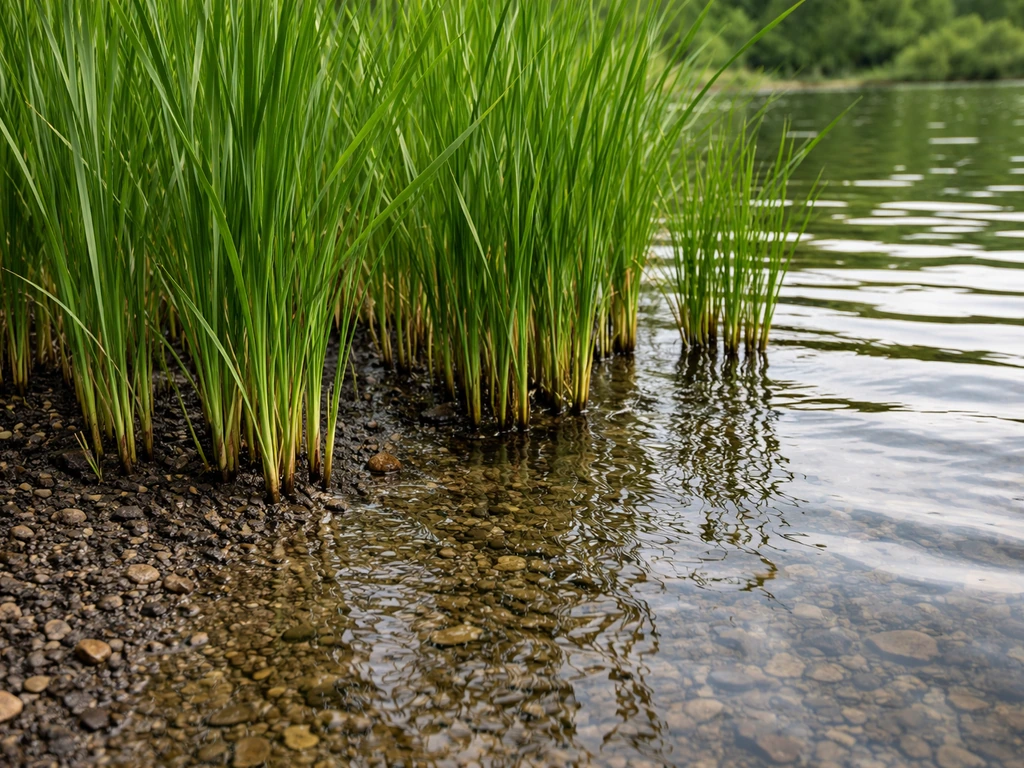
You can successfully grow reeds in a pond edge, wetland bed, or container system by starting with rhizome divisions in spring, planting them in 2 to 6 inches of water or saturated soil, giving them full sun, and using planting baskets or root barriers from day one to keep them from taking over. The species you pick matters enormously: common reed (Phragmites australis) can sprint 3 to 30 feet per year and is nearly impossible to contain once established, while broadleaf cattail (Typha latifolia) and sweet flag (Acorus calamus) are far more manageable for most home or production setups. Get the containment strategy right before you plant, and the rest is straightforward. This makes it easier to follow a simple step-by-step plan, including how to grow reeds by starting with the right containment and water depth.
How to Grow Reeds: Planting, Propagation, Care Tips

Choose the right reed species for your setup and goals
The word 'reed' gets applied loosely to a whole group of tall, emergent wetland plants, and your first job is to pick the one that actually fits your space and purpose. I made the mistake early on of treating them as interchangeable. They are not.
| Species | Max Height | Water Depth Tolerance | Spread Risk | Best Use Case |
|---|---|---|---|---|
| Phragmites australis (common reed) | Up to 13 ft (4 m), occasionally 20 ft | Shallow to moderate margins | Extremely high — rhizomes exceed 20 ft | Large natural wetlands only; not recommended for contained systems |
| Typha latifolia (broadleaf cattail) | 5 to 8 ft | Best at 4 to 18 in; dies above ~25 in | High — vigorous rhizomes and persistent seed bank | Pond edges with root barriers; productive food/fiber systems |
| Acorus calamus (sweet flag) | 2 to 4 ft | Saturated soil to ~4 to 6 in standing water | Low to moderate — slow rhizome spread | Container systems, small ponds, aquatic herb production |
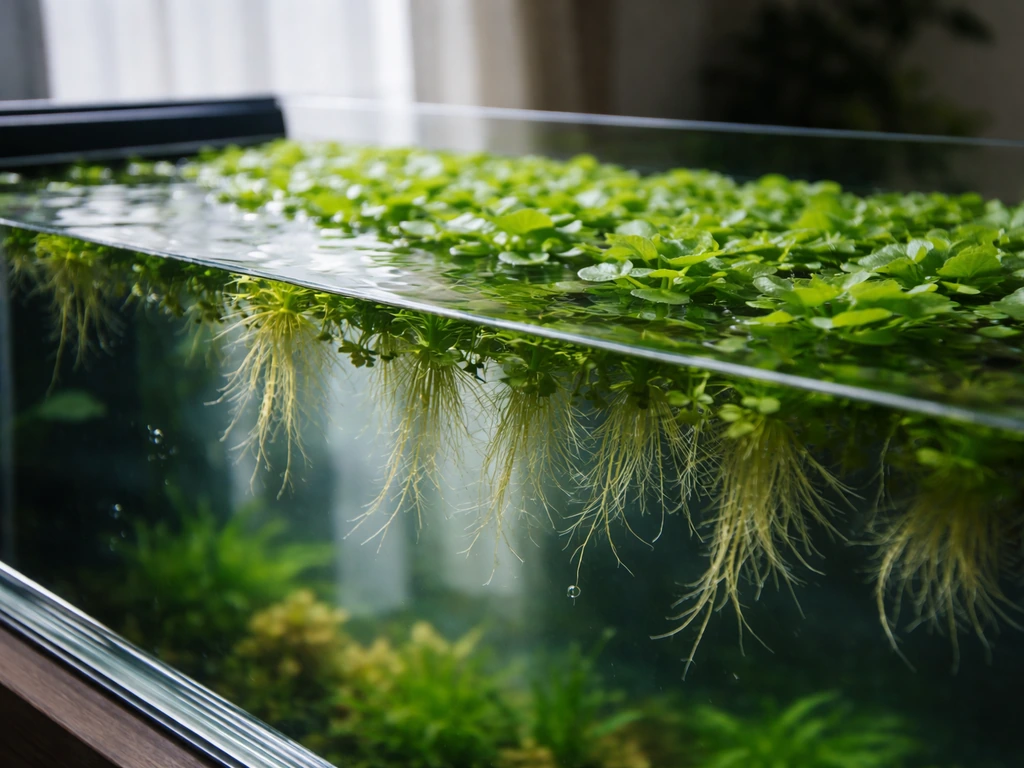
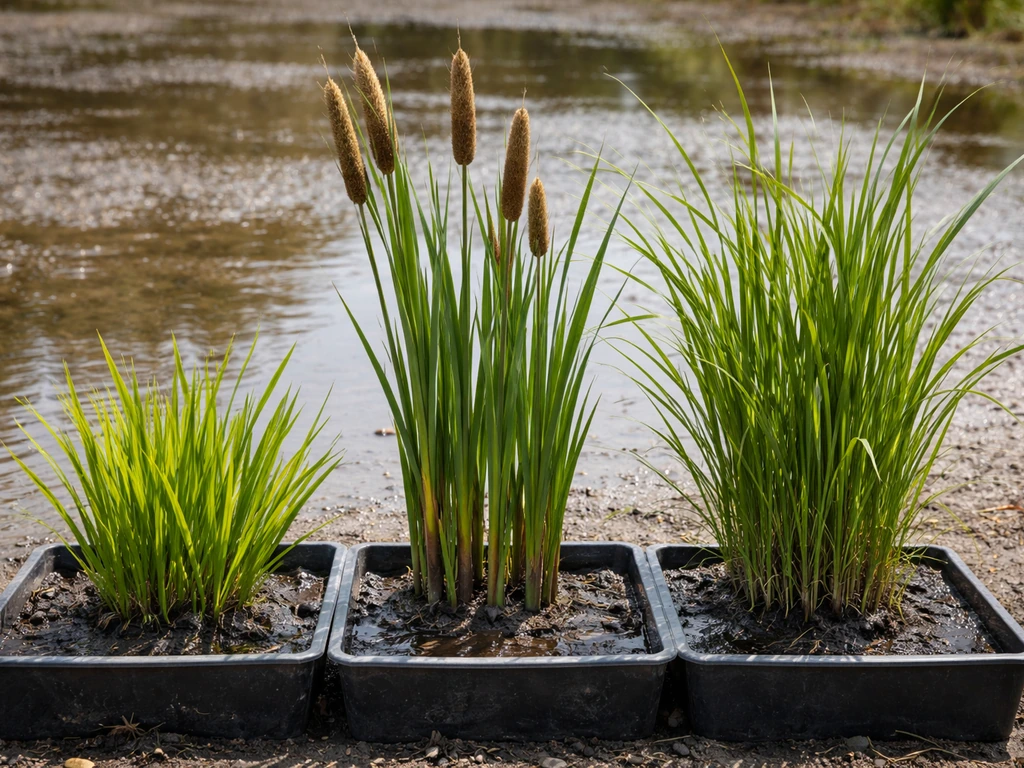
If you are setting up a controlled container or planting basket system, sweet flag (Acorus calamus) is the easiest starting point. It thrives in consistently wet to saturated soil or standing water up to about 4 to 6 inches deep, spreads slowly via rhizomes, and is genuinely manageable. Broadleaf cattail is a great choice if you want productive biomass, food use (the young shoots and pollen are edible), or natural filtration, but you must use containment from the start. Phragmites australis is worth avoiding in any bounded system, its rhizome network can push through pond liners, crack container walls, and spread to neighboring areas faster than most people expect. Save that one for large, open restoration projects.
One more thing worth knowing: if you are in North America and want sweet flag specifically, pay attention to which species you are sourcing. Acorus calamus was introduced from Eurasia in the 1600s, while Acorus americanus is the true native. Both grow similarly in wet conditions, but A. americanus is the better ecological choice for native plantings and behaves slightly differently in terms of fertility and seed set.
Site setup: water depth, location, and containment
Getting the site right before you plant saves you months of trouble. Reeds in the wrong depth or an uncontained bed will either die from anaerobic stress or escape and spread in ways that are genuinely hard to reverse.
Water depth by species
- Acorus calamus (sweet flag): saturated soil to 4 to 6 inches of standing water is ideal. It can tolerate brief flooding but does not like deep submersion.
- Typha latifolia (broadleaf cattail): plant into 2 to 18 inches of water. Research shows that sustained depths above about 25 inches (63 cm) will kill even established plants, and depths around 18 to 20 inches significantly slow rhizome spread — useful as a natural control lever.
- Phragmites australis: tolerates a wide range of soil moisture and shallow water, but depth alone will not contain it.
In-ground, container, or planting basket?
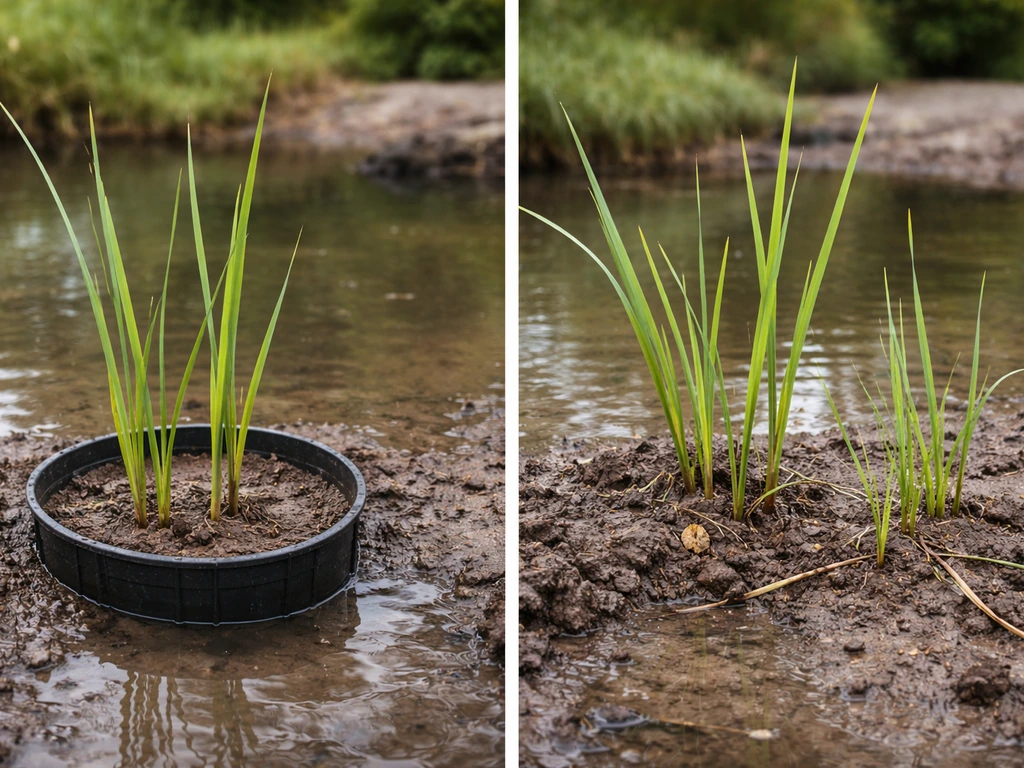
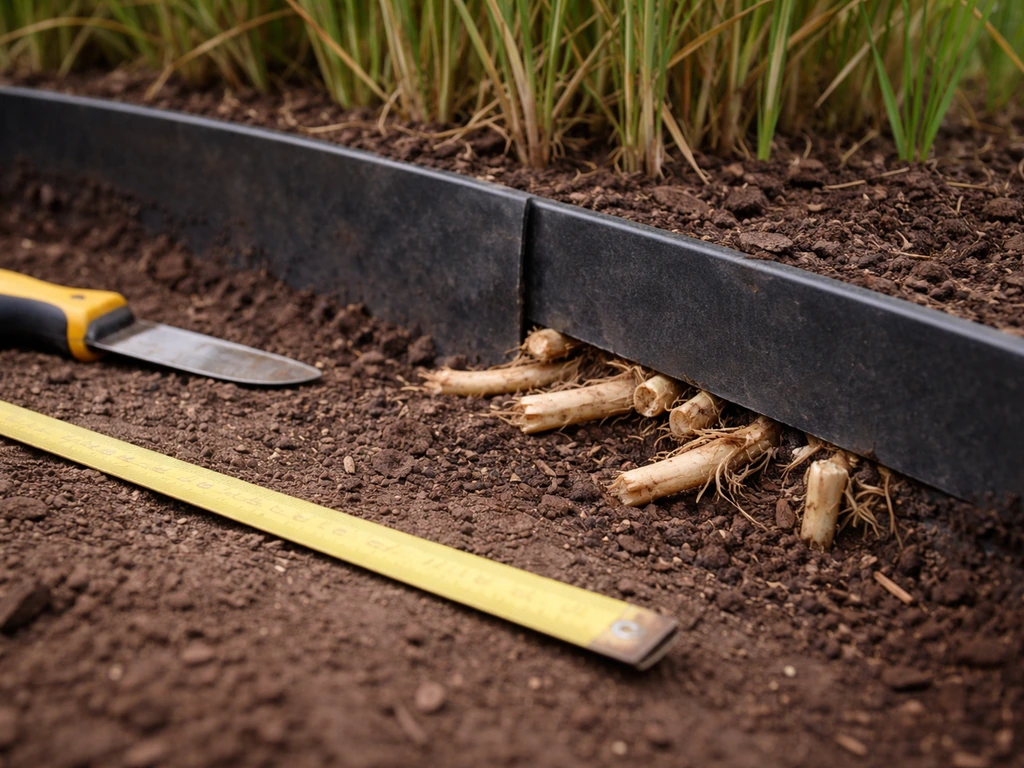
For any managed or hobbyist setup, I strongly recommend planting baskets or rigid containers over planting directly in-ground. Rhizomatous reeds like Typha and Phragmites send runners in every direction, and once those rhizomes hit open substrate, containment becomes a removal project, not a maintenance task. Planting baskets (the mesh-sided aquatic plant baskets used in pond work) slow spread but are not foolproof for vigorous spreaders. For real control, use solid-walled containers with no drainage holes in the sides, or line a raised bed with a heavy root barrier fabric folded into a deep U-shape, at least 18 to 24 inches deep.
If you are building a wetland-style bed, choose a spot with at least 6 hours of direct sun per day. Partial shade slows growth significantly, which can actually help with management of aggressive spreaders. You can also use this strategically: shading methods like black polyethylene fabric have been used as a suppression tool for Typha, so placing the bed where it gets afternoon shade is a passive way to reduce rhizome production.
Seeds vs rhizomes: how to start your reeds
Almost every practical reed-growing guide will tell you to skip seeds and go straight to rhizome divisions or potted nursery plants, and I agree with that advice for 95% of setups. Here is why: reed seeds are fussy, require very specific germination conditions, and even when they work, you are waiting a full season before you have anything resembling an established plant. Rhizome divisions, on the other hand, are already primed to grow and will establish in a matter of weeks.
Rhizome propagation (recommended)
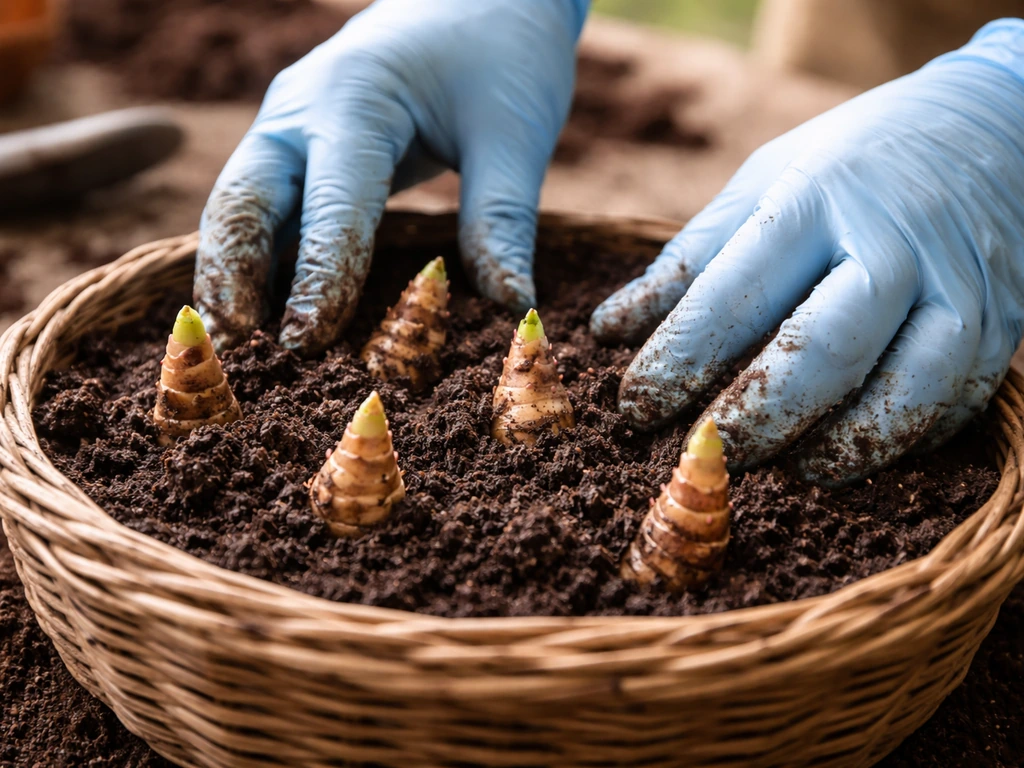
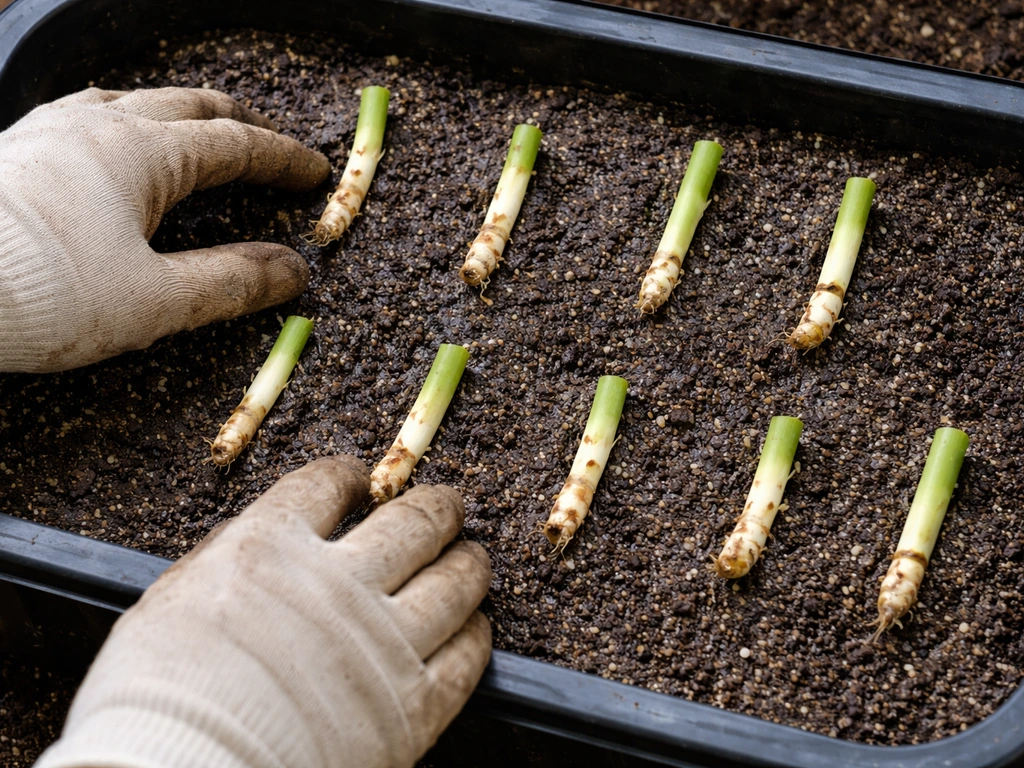
Source rhizome sections from a reputable nursery or from a known, healthy stand you have permission to divide. Each rhizome section should be at least 4 to 6 inches long with at least one visible bud or node. Keep them moist from the moment you cut them, even a few hours of drying can reduce viability.
For Typha and Acorus, spring division (March through May in most temperate zones) is ideal because the plants are just breaking dormancy and root energy is high. A fall planting window (late October through November) also works for Typha: outplanting just after the first fall rains lets the rhizomes root and establish clonal growth before winter dormancy, which gives a strong head start in spring.
Seed starting (optional, slower)
If you want to start from seed, for Typha especially, which maintains a persistent seed bank, sow fresh seeds into trays of saturated sand or peat in early spring. Keep the surface moist and at 65 to 75°F. Germination is inconsistent, and seedlings need to be kept in very shallow water (barely wet trays) until they reach at least 4 to 6 inches tall before transplanting. Broadleaf cattail can rapidly colonize bare wet mineral soil via seed in disturbed conditions, but in a managed tray environment, expect 30 to 60 days to a transplantable size. For Acorus, seed propagation is rarely used because the plant spreads vegetatively and seed set can be unreliable, especially for the introduced A. calamus.
Planting step-by-step and spacing
Here is the actual planting sequence I use. It applies equally to a pond basket setup, a raised wetland bed, or a large container.
- Prepare your container or bed with a heavy, moisture-retentive substrate: a mix of loam or clay-based soil and coarse sand works well. Avoid pure potting mix, which floats and breaks down too quickly in wet conditions.
- Fill the container to within 3 to 4 inches of the top, then soak the substrate thoroughly before planting.
- Lay rhizome sections horizontally, just below the soil surface — about 1 to 2 inches deep. Do not stand them vertically; rhizomes want to run horizontally the way they grow naturally.
- Cover with about an inch of soil and firm down gently. The growing tip (bud end) should be pointing upward or angled slightly upward.
- Spacing: for Typha, plant rhizome sections 18 to 24 inches apart. For Acorus in containers, 12 inches apart is fine since growth is slower. For Phragmites (if you are growing it in a large controlled area), 24 to 36 inches apart.
- Lower the container into your pond or flood your bed slowly. Start with just 1 to 2 inches of water over the soil surface for the first two to three weeks, then raise to your target depth as shoots emerge and establish.
- Label your planting date and check for shoot emergence at 2 to 3 weeks. In good spring conditions with warm water (above 55°F), you should see shoots within 10 to 21 days.
One thing that trips up beginners: planting too deep immediately. Reeds like to ease into depth. Starting shallow and raising the water level gradually mirrors what happens naturally at a pond edge and dramatically improves first-season survival.
Water, light, nutrients, and seasonal care
Light
Full sun, at least 6 hours of direct light per day, is non-negotiable for dense, healthy growth in all three of the main reed species. In shadier spots, Acorus calamus is the most tolerant, managing in partial shade without completely stalling. Typha in shade will grow spindly and produce fewer rhizomes. If you are growing for biomass, fiber, or food production, prioritize the sunniest position available.
Water level and quality
Keep water levels consistent within your target range for the species (see the depth table above). Fluctuations are tolerated, but prolonged deep flooding beyond 25 inches will stress or kill Typha. Water quality matters more than most reed-growing guides admit. Keep an eye on dissolved oxygen (DO), pH, and turbidity, these three parameters directly affect root health and how available nutrients are to the plant. Healthy DO levels for a planted aquatic bed are generally above 5 mg/L. A pH of 6.0 to 7.5 suits all three species. If water turns murky brown and smells sulfurous, anaerobic conditions are developing in the substrate and you need to improve circulation or reduce organic load before roots rot.
Nutrients
Reeds are heavy feeders and do well in nutrient-rich water, which is actually one of their best features for aquatic production systems, they can serve as biofilters, drawing excess nitrogen and phosphorus out of the water column. In a natural pond or aquaponics setup, the water often supplies enough nutrients on its own. In a standalone container with inert water, you will need to fertilize: use a slow-release aquatic plant tablet pushed into the substrate near the rhizome zone, once in spring and once in midsummer. Avoid high-phosphorus fertilizers if you are trying to prevent algae blooms in the same system.
Seasonal care
- Spring: This is your main action window. Divide and replant rhizomes, raise water levels gradually, and begin fertilizing as shoots emerge.
- Summer: Maintain water levels, monitor for pests, and harvest young growth if you are using the plants for food or fiber. Phragmites and Typha grow fastest now — check container walls and root barriers for any escaping rhizomes monthly.
- Fall: Cut aerial stalks back to 6 to 12 inches after the first hard frost. This reduces overwintering pest habitat and prevents the dead stalks from shading new spring growth. For Typha, this is also a secondary planting window if you want to add new rhizomes.
- Winter: Reeds are dormant and very cold-hardy. Leave the root mass in place — the rhizomes survive freezing in most temperate climates. If you are in a pot that could crack from ice expansion, move it to a sheltered but unheated space.
Maintenance, harvesting, and keeping spread under control
This section is where most reed-growing guides fall short, and where most growers run into problems. Reeds are not plant-and-forget, they are plant-and-manage. The good news is that once you build a routine, it takes maybe 30 minutes a month.
Harvesting
For Typha (cattail), young shoots can be harvested in early spring when they are 12 to 18 inches tall, the inner white core is edible raw or cooked. Pollen is harvestable in early summer. Mature stalks for dried arrangements or thatching are ready in late summer when the brown seed heads are fully formed. For Acorus, the aromatic rhizomes can be harvested in fall after two to three years of establishment. Harvest by digging up a section of the root mass and replanting the rest. For Phragmites, tall stems are typically cut for thatching or screens in early fall; cut at ground level before the stems become too woody.
Preventing invasive spread
This is the most critical ongoing task. Phragmites rhizomes can grow more than 20 feet from the parent plant in a single season and spread to new areas when even small rhizome fragments are moved by water, tools, or foot traffic. Great Lakes Phragmites Collaborative notes that Phragmites can spread to new areas when rhizome or stolon pieces are broken off and moved to a new location, where they can root Phragmites spread to new areas when rhizome or stolon pieces are broken off and moved. Typha is nearly as aggressive. A few rules I follow religiously:
- Inspect container edges and root barriers every 4 to 6 weeks during the growing season for rhizomes pushing through or over the edges.
- Never compost rhizome trimmings from aggressive spreaders — bag and dispose of them, because fragments can re-establish in a compost pile or if scattered.
- Clean any tools (shovels, boots, gloves) that contact the rhizome zone before using them in other areas of your garden or pond.
- If growing Typha near open water, consider raising water depth to 18 to 20 inches at the periphery of the bed — the deeper water naturally slows rhizome spread outward.
- Cut back aerial growth at least once per season to reduce the plant's energy reserves and slow rhizome production.
Thinning
After two to three seasons, most reed plantings get crowded and productivity drops as plants compete for light and nutrients. Thin by digging up sections of the root mass every two to three years, discarding (or replanting) the older central rhizomes and keeping the younger outer growth. This also gives you the opportunity to inspect for rot or disease in the root zone.
Troubleshooting common problems
Slow or stalled growth
If shoots emerge but then stall at 6 to 12 inches and stop, check water temperature first. Rhizome growth slows significantly below 55°F. If temperatures are fine, the issue is usually nutrient deficiency (add an aquatic fertilizer tablet near the root zone) or too much shade. Planting too deep too soon can also stall young plants, if you rushed from shallow to deep water in the first few weeks, try lowering the water level back to 1 to 2 inches over the substrate until growth picks up.
Yellowing leaves
Yellow foliage is most often a nitrogen deficiency in a container or isolated bed with clean water. Add a slow-release aquatic plant tablet. If the yellowing starts from the leaf tip and moves inward with brown margins, it can indicate salt accumulation (rare but possible if you have been adding fertilizer salts) or fluoride sensitivity in Acorus. Flush the container with fresh water and dial back fertilizer.
Rhizome rot
Rotting rhizomes are the most common failure mode in container setups, and the culprit is almost always anaerobic substrate, waterlogged soil with no oxygen reaching the root zone. The warning sign is a sulfur or rotten-egg smell from the water. To fix it: pull the container out, gently rinse the roots, cut away any soft, dark, foul-smelling rhizome sections with a clean blade, and repot into fresh substrate with better drainage at the base. To prevent recurrence, avoid using pure compost or fine potting soil (it compacts and goes anaerobic quickly), and consider adding a thin layer of coarse gravel at the bottom of the container to allow some oxygen movement.
Pests and disease
Aphids are the most common pest on reed foliage, typically appearing in dense colonies on new growth in late spring. A strong spray of water knocks them back; repeated treatment over two to three weeks is usually sufficient. Caterpillar damage (chewed leaf margins, frass on leaves) is occasionally seen on Typha, hand-pick or apply Bt (Bacillus thuringiensis) if the infestation is heavy. Fungal leaf spots appear in overcrowded or shaded plantings with poor air circulation, thin the stand and improve sun exposure. Root rot pathogens (Pythium, Phytophthora) are opportunistic and typically follow anaerobic conditions rather than causing them, so fixing the substrate oxygen issue is the real fix.
Nuisance algae blooms
If you are growing reeds in or adjacent to a pond, algae blooms are a common companion problem, especially in warm, nutrient-rich water. Ironically, reeds are part of the solution here, established stands actively pull nitrogen and phosphorus from the water, which are the main algae fuels. But during the establishment phase before the reed canopy closes in, excess nutrients and high light on open water can trigger blooms.
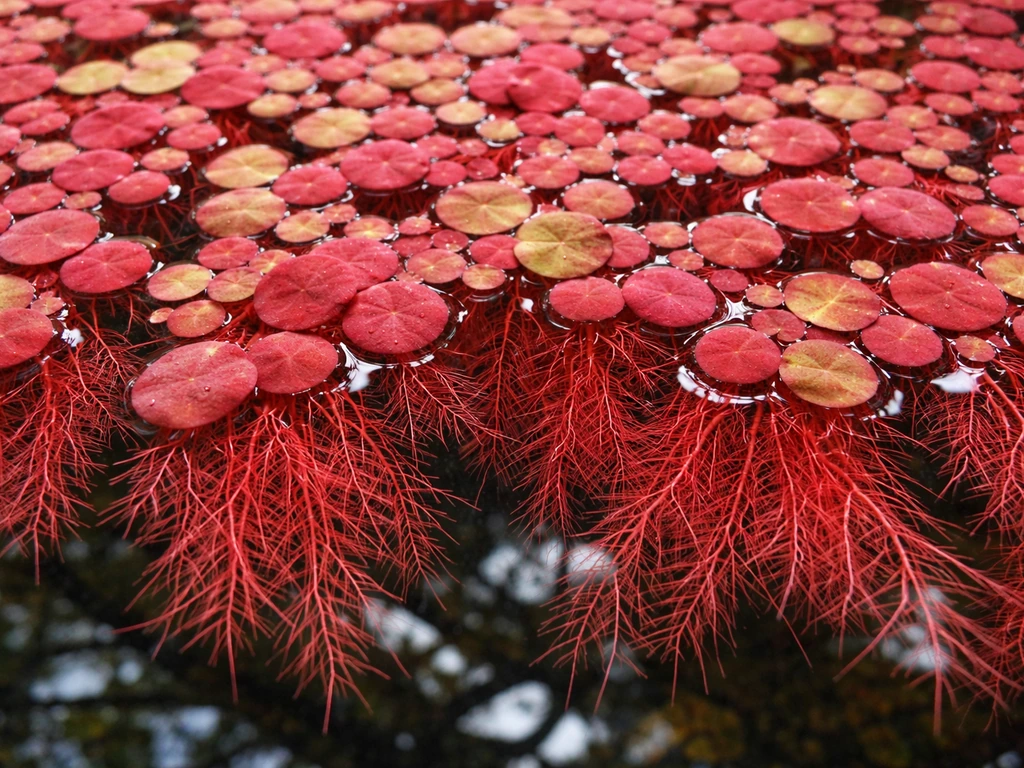
Short-term fixes: add floating plants (like red root floaters or other surface-covering aquatic plants) to shade the water surface and compete with algae for nutrients during that gap. If you want to grow floating plants, focus on light, water quality, and choosing species that match your pond conditions. Red root floaters thrive when you keep the water warm, provide bright light, and let the plants form a dense surface mat to block excess algae-fueling sunlight.
Longer term, reduce fertilizer inputs to the reed bed and make sure you are not overfeeding any fish in the same system. Monitor pH and temperature, as high pH (above 8. 5) and warm temperatures (above 77°F) accelerate algae growth.
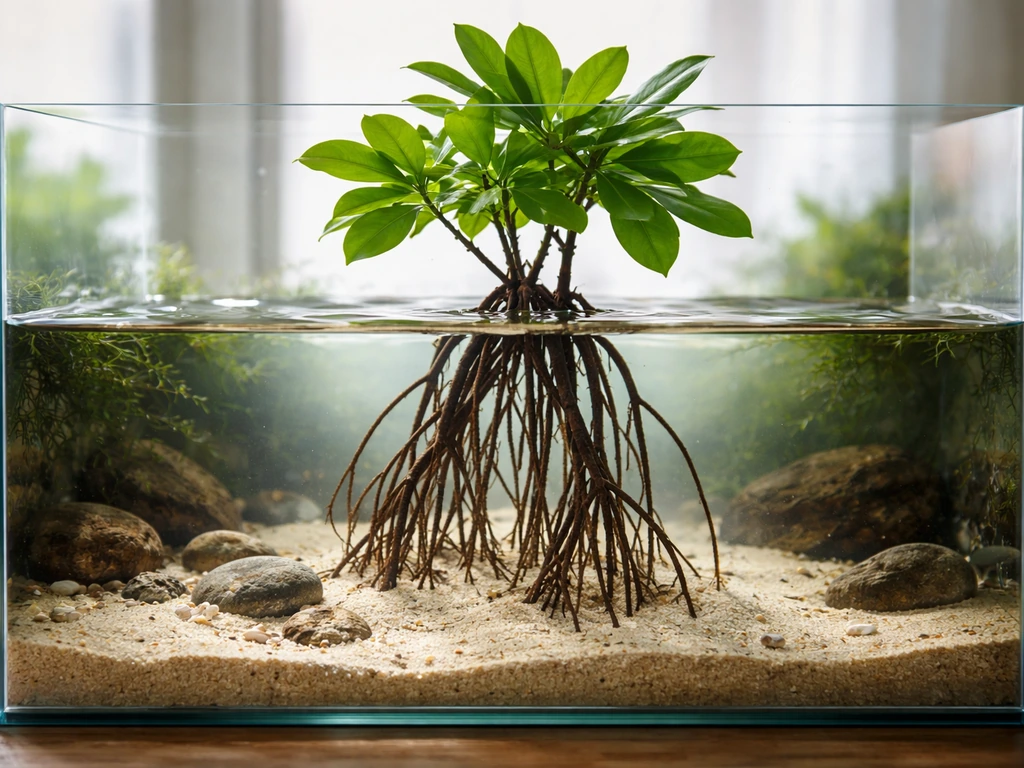
If you are also growing other emergent or floating aquatic plants alongside your reeds, such as mangrove propagules in a brackish edge system, or floating plants in the open water zone, the same water quality principles apply across the board. If you are wondering how to grow mangroves in freshwater, the key is to match the right species, keep salinity low but consistent, and use stable, well-aerated water conditions. If you are growing mangrove propagules in a brackish edge system, keep salinity and water quality steady to improve establishment. Keeping nutrients in balance and maintaining good dissolved oxygen levels benefits the whole aquatic system, not just the reeds.
FAQ
Can I grow reeds from cuttings instead of rhizome divisions?
Usually not reliably. Most reed species you’re trying to establish rely on rhizomes with visible buds or nodes, because those contain the growth points. If you have plant material that looks like stem only (no rhizome attached), treat it as ornamental rather than propagation material, and plan on sourcing proper rhizome sections from a nursery or a permitted stand.
What’s the best way to choose the water depth when my pond level changes seasonally?
Pick a target depth band for your species, then base planting on the lowest expected water level so the rhizomes still stay submerged or in saturated substrate most of the time. If the site can drop significantly in summer or winter, use containers or rigid-lined beds so you can control depth. Avoid relying on natural fluctuations if you are trying to prevent rhizome dieback or exposure stress.
How can I tell whether my reed problem is oxygen-related or nutrient-related?
Oxygen issues often come with a sulfur or rotten-egg smell, dark mushy rhizomes, and stalled growth in warm or stagnant conditions. Nutrient issues more commonly show as uniform pale or yellow growth without foul odors. If you see rot or smell, fix substrate aeration and water movement first (better drainage base, less compaction, fresh substrate), then adjust feeding.
Will reeds automatically take over my pond, even if I’m planting only a few baskets?
They can, even in baskets, if rhizomes escape through gaps or the basket system is too shallow or unstable. To reduce risk, anchor baskets firmly, keep the rim below the waterline so fragments do not find exposed edges, and inspect periodically for under-runners. For aggressive species, solid-walled containers or deep root-barrier lining is the safer long-term choice.
How often should I fertilize reeds in an aquatic container, and how much is too much?
Follow the spring and midsummer schedule with slow-release aquatic plant tablets placed near the rhizome zone, not sprinkled into open water. If you routinely get algae blooms or very rapid scum formation, reduce fertilizer input or switch to a lower-phosphorus product, because excess nutrients can fuel algae during establishment or after water changes.
Do reeds need to be trimmed back, and when is the safest time?
For most setups, you can cut back old stalks in early fall or early spring depending on your goal, dried material, and aesthetic preference. Avoid heavy cutting during active establishment if you’re trying to maximize rhizome energy storage. For Phragmites in particular, cutting before stems become too woody makes later cleanup easier.
Why are my reeds emerging but then stopping at a small size?
Check three common causes in order: water temperature (slows growth below about 55°F), insufficient light (especially partial shade), and planting depth. If you increased depth too quickly, lowering the water level back to shallow substrate for a few weeks often helps recovery. If those are all correct, add an aquatic fertilizer tablet near the root zone and reassess after a couple of weeks.
Are the plants I’m buying actually the species I want, especially for invasive risk?
Not always. Names on labels can be misleading, especially around reed-like species. Ask your supplier for the exact species and, when applicable, the native versus introduced source. If you’re avoiding high-risk spreaders, require that the plant you’re purchasing is the intended non-Phragmites species for bounded systems, and keep sourcing records.
Can I plant multiple reed species together, or should I keep them separate?
You can combine species, but only if their water depth and spread behavior are compatible and you can maintain effective containment. Mixing aggressive rhizomatous spreaders increases the chance that one species outcompetes another and makes thinning difficult. If you do mix, plan on separate thinning and harvest cycles and consider separate container zones inside the same bed.
What should I do if water turns murky brown or develops a strong bad odor?
Treat it as a substrate and oxygen warning, not just an appearance issue. Reduce organic inputs (avoid compacted media and excessive debris), improve circulation or oxygen exchange if possible, and consider repotting or replacing substrate in containers. If odors persist, remove affected rhizome sections promptly to prevent further rot.
Is it safe to harvest shoots or pollen from reeds growing in a pond with fish?
In most cases it’s possible, but do it cautiously. Avoid harvesting from areas where you suspect chemical exposure (fertilizer runoff, treated water, or contaminated sediment). Also keep in mind that removing shoots or pollen can temporarily reduce cover, which may affect habitat. If you’re using the pond as a managed ecosystem, harvest lightly at first and monitor fish behavior and water clarity.
How do I manage reeds in winter without losing the whole planting?
For rhizome-based perennials, survival usually depends more on rhizome health entering dormancy than on winter cutting. Don’t let containers dry out, and avoid sudden changes that push rhizomes into anaerobic, swampy conditions right before cold weather. If you’re in very cold regions, keeping plants in a protected, consistently submerged container often prevents freeze-thaw damage.