Red root floaters (Phyllanthus fluitans) are one of the blank" rel="noopener noreferrer">easiest aquatic plants to grow well, but getting that signature deep red color and dense root growth takes more than just dropping them in a tank. If you nail the light, keep the water surface calm, and feed them consistently, they'll double in coverage every week or two. This guide walks you through every step: picking healthy starters, setting up the right environment, driving red color with light, feeding without triggering algae, and fixing the most common problems that kill them early.
How to Grow Red Root Floaters: Setup, Care, and Troubleshooting

Marcus Holloway
12 Apr 2026
What red root floaters are and how to pick healthy ones
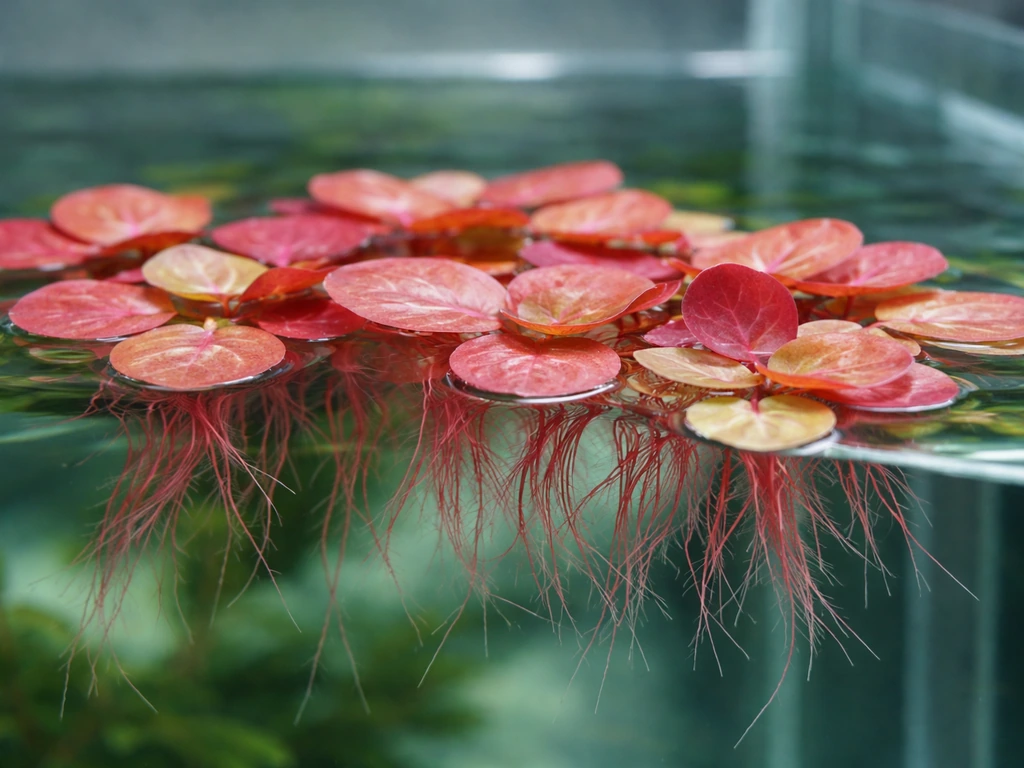
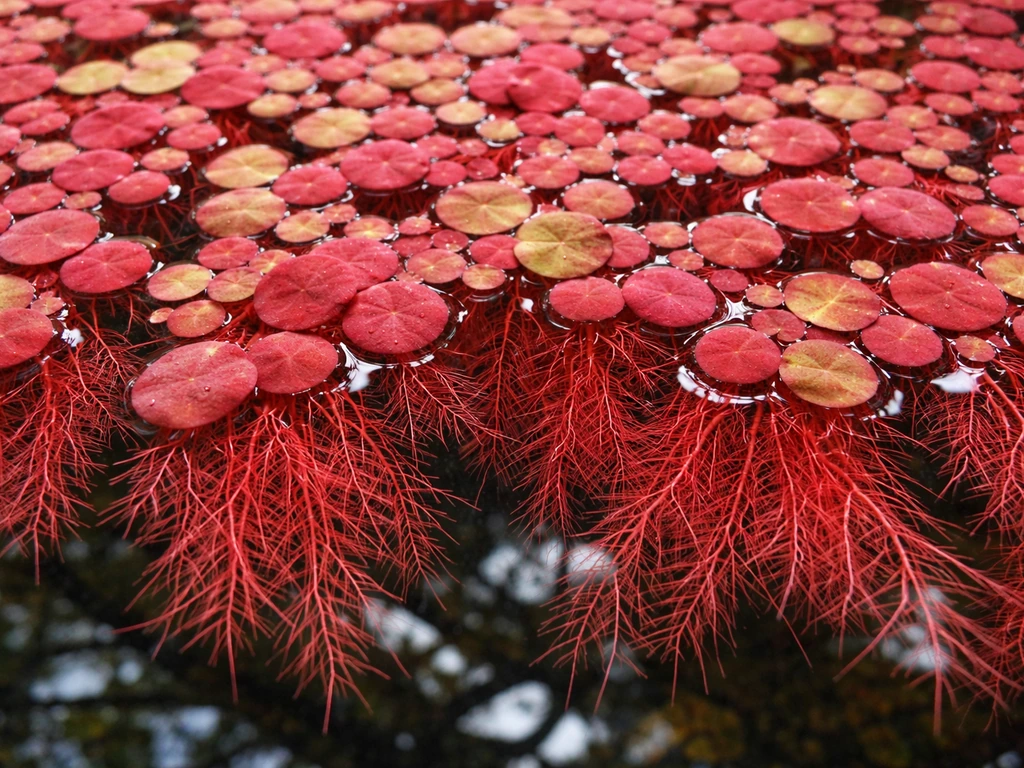
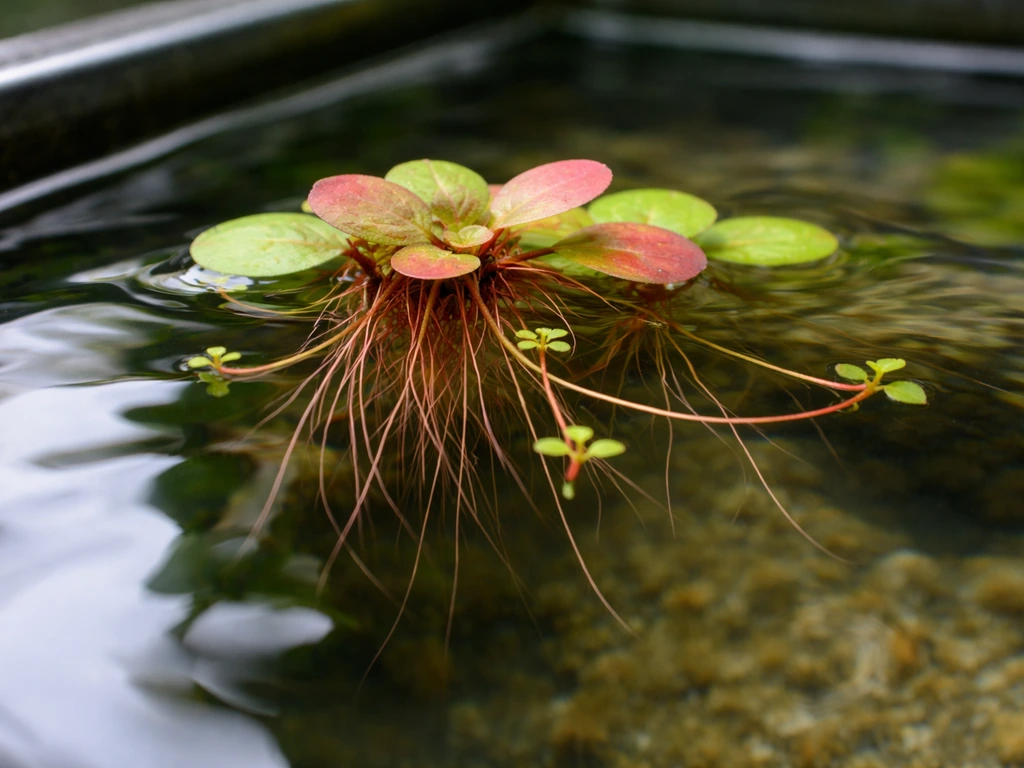
Phyllanthus fluitans is the plant the aquarium hobby calls 'red root floater.' It's blank" rel="noopener noreferrer">a free-floating aquatic plant native to South America, and it lives entirely at the water surface, no substrate needed. The leaves are small and round, roughly the size of a fingernail, and the roots hang freely below the plant body. When it's thriving under strong light, both the roots and the underside of the leaves turn a vivid red or deep maroon. When it's stressed, pale green, or barely alive, you'll see washed-out greenish leaves and white or colorless roots.
When you're buying starter plants, look for specimens that already show some red or pink coloration on the leaves and roots. That tells you they've been grown under reasonable light and weren't just pulled out of a low-light holding tank. Avoid plants that are yellowing, have brown or mushy leaves, or smell off. A small amount of green on a red root floater isn't a deal-breaker, it just means it needs better light, but slimy or disintegrating plants usually don't recover well. If you're buying online, ask whether the seller ships with a heat pack in cooler months and check that the package won't sit in transit for more than two days.
Setup: tank or tub, water quality, temperature, and flow
Red root floaters are flexible about container size. A 10-gallon tank is enough to get started, but they grow fast and will crowd out a small surface quickly. A 20-gallon long or larger gives you more room to work with and makes it easier to manage density. If you want to grow a lot of them cheaply, a shallow outdoor plastic tub works brilliantly in warmer months. The key is surface area, not depth. These plants live at the top, so a wide, shallow container beats a tall, narrow one every time.
Water quality is straightforward. Most sources and retailers put the ideal pH between 6.5 and 7.5, though Phyllanthus fluitans can tolerate a wider range down to about 5.8 if your water is otherwise stable. Soft to moderately hard water works fine. Temperature should stay between 68°F and 82°F (20°C to 28°C). They'll slow down below 65°F and start to decline. Keep ammonia and nitrite at zero, and expect them to actually help with nitrate export once they're established and growing fast.
Flow is where a lot of people go wrong. Red root floaters hate surface agitation. A strong filter return or powerhead pointed at the surface will shred the plants and push them into clumps against the glass. Use a sponge filter or point your HOB return down into the water column, not across the surface. If you're running a canister filter, use a spray bar aimed below the waterline. Still or very gently moving water at the surface is what you're after.
One more setup detail: cover gaps around your tank lid or use a lid that sits close to the water surface. Red root floaters don't jump, but they do need high humidity above the waterline. A tight-fitting lid traps moisture and keeps the air just above the plants warm and humid, which helps the leaves stay healthy. An open-top tank in a dry room can cause the leaf edges to crisp up even when the roots are submerged and healthy.
Lighting: the single biggest driver of red color

If you want red roots and red leaves, light is the lever you pull. Red root floaters produce red pigmentation (anthocyanins) as a response to high-intensity light. Low light gives you green, floppy plants with pale roots. Strong light gives you compact plants with deep red coloration on both the leaves and the dangling roots.
Aim for a PAR (photosynthetically active radiation) reading of at least 50 to 80 at the water surface where the plants sit. For most aquarium LED fixtures marketed as 'high light' planted tank lights, that means running them at 70% to 100% intensity and positioning them 8 to 12 inches above the water surface. A photoperiod of 10 to 12 hours per day works well. Going longer than 12 hours often triggers algae without adding meaningful growth.
A full-spectrum LED that includes a strong red wavelength component will push coloration more than a purely white light. That said, I've gotten good red color under standard planted tank LEDs like the Fluval Plant 3.0 and the Twinstar series just by running them at higher intensity. If you're using fluorescent T5 lights, they work but run warm, which is something to manage in a sealed setup. Don't obsess over the fixture brand; prioritize intensity and consistency.
For outdoor tub setups, natural sunlight handles everything. A spot with 4 to 6 hours of direct sun per day produces some of the most vivid red root floaters you'll ever see. Just watch water temperature in peak summer heat: a small tub in direct sun can get dangerously warm fast, so provide shade during the hottest afternoon hours if temperatures push above 85°F.
Feeding your plants: liquid fertilizers, root tabs, and dosing safely
Red root floaters are water-column feeders. They have no roots in substrate, so root tabs do nothing for them. All their nutrients come from the water itself, which means liquid fertilization is the way to go. A complete liquid fertilizer that includes both macro and micronutrients (NPK plus iron, manganese, and trace elements) is what they need.
Iron is especially important for coloration. A small but consistent iron level in the water (around 0.1 ppm) supports the red pigment production alongside high light. Products like Seachem Flourish Comprehensive, APT Complete, or similar all-in-one planted tank fertilizers work well. Dose according to the manufacturer's recommendation and then watch your plants: if growth stalls and leaves pale out, increase slightly. If you start seeing algae (especially green spot or thread algae on the glass), back off.
The safest dosing strategy is to fertilize small amounts two to three times per week rather than one large weekly dose. This keeps nutrient levels stable and gives the plants a steady supply without creating the spikes that algae love. In a lightly stocked fish tank, the fish waste already provides some nitrogen and phosphorus, so you may only need to supplement iron and micros rather than a full NPK dose. Test your water periodically to understand what's already there before you add more.
CO2 injection is not required. Red root floaters grow well without it, pulling CO2 directly from the air at the water surface. If you're already running CO2 for other plants, it won't hurt them, but don't add CO2 just for red root floaters.
Adding them to your tank: acclimation and spacing
When you first get red root floaters, whether from a store, a fellow hobbyist, or an online seller, don't just dump them in and walk away. Float them in a separate container of your tank water for 30 to 60 minutes to temperature-acclimate. If they've come from very different water chemistry (especially a big pH difference), do a slow drip acclimation over an hour or two. Phyllanthus fluitans is sturdier than many aquatic plants, but skipping acclimation is one of the most common reasons people see rapid melting in the first week.
Once acclimated, place them on the water surface and spread them out so they're not clumped. Give each plant a few centimeters of space. They'll spread and fill in quickly on their own. The instinct to add a huge amount at once is understandable, but overcrowding from day one causes the plants underneath the pile to die from lack of light, which then rots and degrades water quality. Start with a coverage rate of about 30 to 50% of your surface, and let them grow into full coverage over two to three weeks.
If you're growing floating plants alongside other species in the same tank, think about how they'll compete for surface space. Red root floaters can crowd out slower-growing floaters like frogbit or dwarf water lettuce if left unchecked. Plan your surface zones from the start, and use a floating ring or airline tubing formed into a loop on the surface to corral them to one section if needed.
How to propagate them and grow more from what you have
This is the best part: red root floaters propagate themselves. They spread vegetatively by producing runners and daughter plants that branch off the main stem. You don't need to do anything special to trigger this. Give them good light, stable water, and consistent nutrients, and they'll fill your tank surface on their own within weeks.
To actively multiply them faster, simply scoop out a portion when the surface is getting dense and move them to a second tank or tub. Even a small portion will grow rapidly in a new container if conditions are right. This is how you scale up: start one tank, let it fill, then split and seed new containers. I've gone from a golf-ball-sized cluster to full coverage of a 40-gallon breeder in about three weeks under strong light.
When splitting, handle the plants gently. The leaves are delicate and bruise easily, which can lead to rot on damaged sections. Use a net or your hands (rinsed, no soap) and move them with some of their surrounding water to minimize stress. You don't need to do anything to 'cut' or 'trim' them for propagation. Just scoop, transfer, and spread.
If you're exploring other plants that propagate in a similarly low-effort way, it's worth knowing that growing reeds in a water garden context follows a similar principle of dividing clumps to multiply your stock, though the physical handling is obviously quite different.
Fixing the most common problems
Slow or no growth
Slow growth almost always comes down to light or nutrients. Check your light intensity first: if the plants are green instead of red, light is almost certainly the limiting factor. Increase intensity or move the light closer. If light looks adequate, dose a small amount of an all-in-one liquid fertilizer and watch for a response over 3 to 5 days. Also make sure your water temperature is in the 72°F to 80°F range. Cool water dramatically slows their metabolism.
Melting after introduction
Melting (leaves becoming soft, translucent, and disintegrating) in the first one to two weeks usually means acclimation stress or a transition from emersed (above water) growth to submersed floating conditions. Some plants sold commercially are grown emersed and look different from true aquatic floaters. Remove the melting leaves to prevent water quality issues, keep conditions stable, and be patient. New growth that emerges after the melt is usually healthy and adapted to your water.
Turning green instead of red
Green leaves mean low light. Full stop. If your red root floaters are consistently green, the first step is to increase light intensity, not duration. Running your light for 14 hours at low intensity is worse than running it for 10 hours at high intensity. Also check if other floating plants or surface debris are shading your red root floaters from below. Supplement with liquid iron if light is already strong but color is still lacking.
Algae outbreaks
Algae under or alongside red root floaters usually means excess nutrients relative to plant uptake, or lighting that's inconsistent (varying the photoperiod confuses the balance). Stick to a consistent light schedule using a timer, reduce fertilizer dose temporarily, and do a 30% water change to dilute nutrients. Once the plant colony grows dense and healthy, it outcompetes most algae for nutrients naturally.
Root rot and browning roots
Brown, slimy, or disintegrating roots usually point to poor water quality, overcrowding, or anaerobic conditions near the roots (which can happen if plants are clumped so densely that no water circulation reaches the root zone). Remove dead roots manually, do a water change, and thin the surface coverage so water can move between plants. Healthy roots should be white to light pink when young, darkening to red as the plant matures under strong light.
Red root floaters vs. similar floating plants
People often compare Phyllanthus fluitans to other popular floaters when deciding what to grow. Here's a quick breakdown of how it stacks up against the most common alternatives:
| Plant | Light needs | Growth speed | Color payoff | Difficulty |
|---|---|---|---|---|
| Red root floater (Phyllanthus fluitans) | High | Fast | High (red/maroon) | Easy |
| Frogbit (Limnobium laevigatum) | Low to medium | Fast | Low (green only) | Very easy |
| Dwarf water lettuce (Pistia stratiotes) | Medium to high | Medium | Low (green) | Easy |
| Amazon frogbit (Limnobium spongia) | Low to medium | Fast | Low (green) | Very easy |
| Salvinia (Salvinia natans) | Medium | Very fast | Low (green) | Very easy |
Red root floaters are the clear winner if visual impact and unique coloration are your goal. They're not harder to grow than frogbit or salvinia, they just need more light to hit their potential. If you're running a low-light tank and don't want to upgrade your fixture, one of the other options will serve you better. But if you can give them the light they need, Phyllanthus fluitans is genuinely one of the most rewarding floaters available in the hobby.
Your maintenance routine
Once red root floaters are established and growing well, they're low-maintenance. Here's what a solid weekly routine looks like:
- Water changes: 20 to 30% weekly to export nitrates and replenish trace minerals. This also prevents nutrient buildup that triggers algae.
- Thinning: Remove excess plants whenever surface coverage exceeds 70 to 80%. This keeps light reaching the plants below and prevents dead zones in the colony.
- Fertilizer: Dose two to three times per week with a liquid all-in-one fertilizer. Adjust up if growth slows or leaves pale; adjust down if algae appears.
- Check flow: Make sure your filter return is still directed below the surface. It can shift over time, especially in busy tanks.
- Remove dead material: Pull out any yellow, brown, or mushy leaves as soon as you spot them. They decompose fast and spike ammonia.
- Check temperature: Especially important in outdoor setups where ambient temps swing. Keep a thermometer visible.
When to adjust your settings: if growth suddenly slows after a period of healthy growth, check water temperature first, then light (bulbs and LEDs dim over time), then nutrients. If color shifts from red to green without a change in your routine, your light fixture may be aging or you may have inadvertently reduced photoperiod. If you're seeing lots of new daughter plants but the leaves look small and pale, it's a nutrient deficiency, not a light issue.
Red root floaters are adaptable plants that respond quickly and visibly to changes in conditions, which makes them excellent indicators of tank health. If you have a thriving colony of Phyllanthus fluitans, your water parameters are almost certainly in good shape for most other aquatic inhabitants too. That feedback loop is part of what makes them such a satisfying plant to grow.
If you want to branch out once your red root floater setup is dialed in, the skills transfer well to other aquatic plants. For example, growing a mangrove propagule in an aquarium setup follows a similar logic around water chemistry and patience during establishment, though the timescales and techniques are very different. And if you're building an outdoor water garden alongside your indoor tanks, exploring growing mangroves in freshwater conditions can open up some interesting possibilities for combining floaters with larger aquatic plants in the same system.
For those interested in low-tech wetland-style setups where red root floaters might share space with emergent plants, reading up on how to grow reeds in an aquatic garden context gives you useful framing for thinking about how different plant types can coexist when they occupy different vertical zones in the same water body.
FAQ
Can I grow red root floaters in a bare-bottom tank with no heater or filter?
You can, but only if the room temperature stays in the 68°F to 82°F range and the water is otherwise stable. A filter that causes surface turbulence usually harms them, so if you use one, choose gentle filtration like a sponge filter or aim the return below the surface. Without any form of filtration or regular water changes, nutrient and waste spikes can fuel algae and stress the floaters.
How do I prevent red root floaters from clumping against the glass?
Avoid any strong directional flow across the top. If you see them gathering, redirect the return, lower the flow output, or switch to a sponge filter. Also spread them farther apart at planting, because dense initial piles block light to lower leaves and can create localized decay.
What water test results matter most for red root floaters?
Prioritize ammonia and nitrite as true deal-breakers, keep them at zero, and watch nitrate as an indicator of how much nutrient cycling your tank is handling. pH matters, but stability matters more than hitting the middle of the 6.5 to 7.5 range. If you have algae outbreaks alongside healthy-looking floaters, it usually points to nutrient imbalance or inconsistent lighting rather than just pH.
Should I remove white or pale roots when they melt or turn colorless?
Yes, remove them as soon as you notice disintegration. Dead tissue can cloud water and feed algae, and clumps can also create micro-zones of low oxygen near the roots. Use a net to lift the plants gently and thin the surface area so circulation reaches all plants.
Why are my red root floaters making runners but not filling in the surface?
Runners without surface coverage often means light is not reaching new daughter plants or there is shading from overcrowding in one spot. Check that the colony is not piled in a tight mass, increase light intensity rather than photoperiod, and confirm that the lid spacing and humidity are not drying the plants at the surface.
Can I keep red root floaters with fish that nibble plants?
It depends on the fish. Many small community fish may graze lightly, but aggressive nippers or herbivores can stunt the colony by constantly removing leaves and disrupting runners. If you notice missing leaves and slow regrowth, consider using a prefilter flow approach to reduce plant damage, and temporarily reduce stocking or add more surface area to let the colony recover.
Do red root floaters need CO2 if I already run injected CO2 for other plants?
They do not require CO2 injection because they pull carbon from the air-water interface at the surface. If you already run CO2, it can still be fine, but do not increase CO2 just to boost floater color. The bigger levers remain surface calm and adequate high-intensity light.
How can I dose fertilizer without causing algae?
Use small, frequent doses instead of one large weekly application. Start at the lower end of the label for an all-in-one liquid fertilizer, and increase only if growth stalls and leaf color remains pale. If algae appears, temporarily reduce fertilizer amount, keep lighting consistent on a timer, and do a partial water change to dilute nutrients.
Is iron deficiency the only reason for poor red color?
No. Color can also stay green if light intensity is insufficient or inconsistent. If your light is already strong, then iron and micros become more relevant, so bump iron gently using a complete planted fertilizer. If color is still poor after a small fertilizer adjustment, re-check PAR at the water surface and make sure floating debris is not blocking light from below.
How do I acclimate red root floaters when shipping water chemistry is very different?
Float them for 30 to 60 minutes for temperature matching, then use slow drip acclimation when pH or hardness differs a lot. Aim for a gradual change over one to two hours to prevent osmotic shock. Skipping slow acclimation is a common cause of fast melting in the first week.
Can I use a UV sterilizer or strong chemical filtration with red root floaters?
UV sterilizers are usually safe for floaters as long as they do not create strong surface turbulence. For chemical filtration, avoid heavy use of media that strips nutrients aggressively, because red root floaters are water-column feeders and can slow down if micros or macros get removed faster than you dose them.
What lid setup works best to keep humidity for red root floaters?
Use a lid that sits close to the water surface and covers gaps around openings. The goal is warm, humid air above the plants, which helps prevent leaf edges from drying. If you have a fully open-top tank in a dry room, expect more edge crisping even if roots are healthy.
Do red root floaters grow better outdoors than indoors?
Outdoor tubs can produce extremely vivid red color with 4 to 6 hours of direct sun, but temperature spikes are the main risk. If peak summer heat pushes above about 85°F, shade the tub during the hottest afternoon hours to protect root health and reduce stress-driven melting.
How do I scale up propagation without damaging plants?
When the surface gets dense, scoop and transfer a portion to a new tank or tub rather than ripping out a clumped mass. Handle gently, move with some surrounding water, and spread the new batch so it is not overcrowded in one spot. Bruised leaves are more prone to rot, which can quickly worsen water quality.