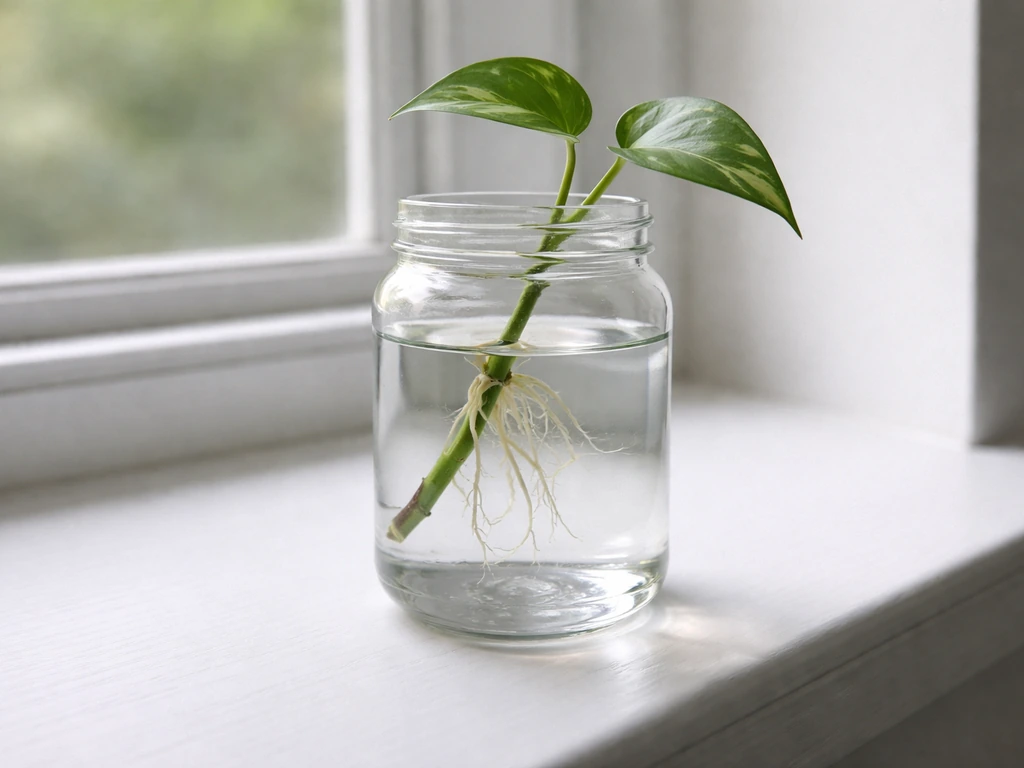
You can grow flowers in water by taking a 4–6 inch stem cutting just below a node, stripping the lower leaves, and placing the cut end in a clean jar of room-temperature water. Most soft-stemmed flowering plants, coleus, impatiens, begonias, geraniums, hydrangeas, will push visible roots within one to three weeks. Keep the water clean, the jar out of direct sun, and add a dilute nutrient solution once roots appear, and you'll have a rooted, actively growing plant ready for soil or a hydroponic setup within four to six weeks.
How to Grow Flowers in Water: Beginner Step-by-Step Guide
Marcus Holloway
1 May 2026
Which flowers and plants actually work in water
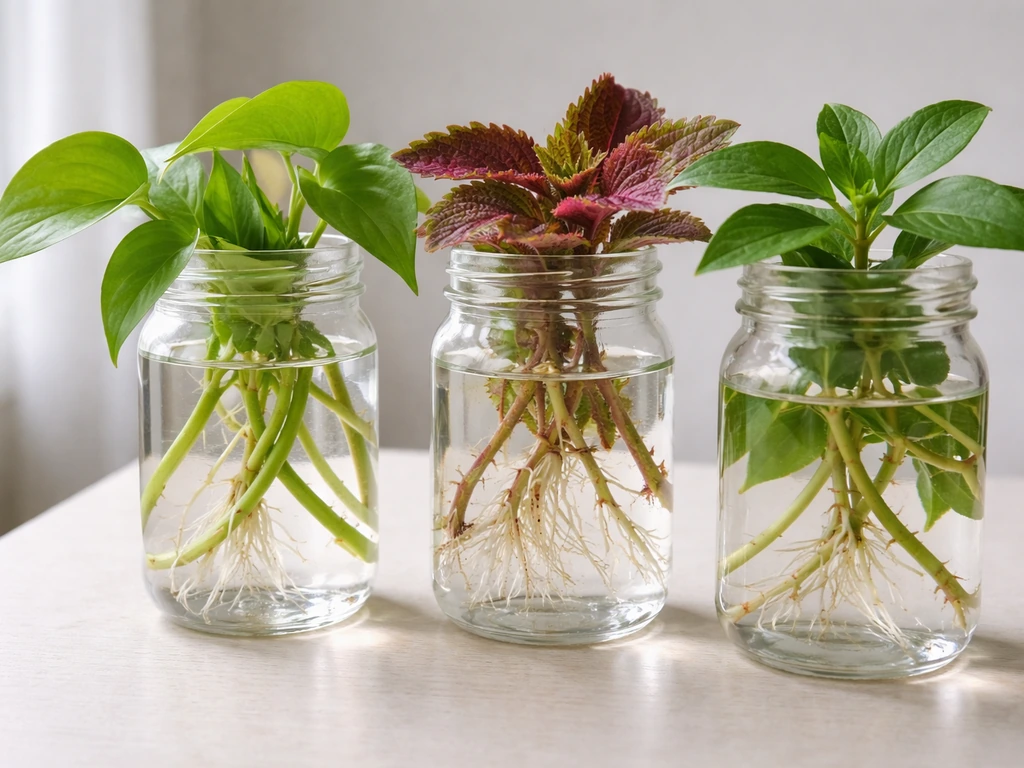
Not every flower is a good candidate for water propagation. The easiest wins are soft-stemmed, fast-rooting plants. Woody or hard-stemmed species can root in water but take much longer and need more help. Here's a practical breakdown:
| Plant | Root Time in Water | Notes |
|---|---|---|
| Coleus | 5–10 days | One of the fastest; soft stems root almost without trying |
| Impatiens | 7–14 days | Extremely beginner-friendly; almost foolproof |
| Begonia | 10–14 days | Use short tip cuttings; keep warm |
| Geranium (Pelargonium) | 10–21 days | Roots are brittle; handle gently at transplant |
| Hydrangea | 7–14 days (some varieties 4–5 weeks) | Panicle types take longer; rooting hormone helps |
| Fuchsia | 10–14 days | Soft new growth roots quickly |
| Pothos / Philodendron | 7–14 days | Not flowering plants but great for learning the method |
| Syngonium | 7–10 days | Fast and reliable for beginners |
Coleus and impatiens are where I'd tell any beginner to start. They root so reliably in water that they build your confidence fast. Geraniums will root in water, but the success rate is honestly lower than rooting them into compost, and the roots that form are more fragile, so go in with that expectation. For anything woody or slow-rooting, a rooting hormone becomes less optional and more essential.
Setting up your water-growing system
The setup you need depends on whether you're just rooting cuttings short-term or planning to keep flowers growing in water long-term. Both approaches work, they just use different equipment.
Simple jar or vase setup (best for rooting)
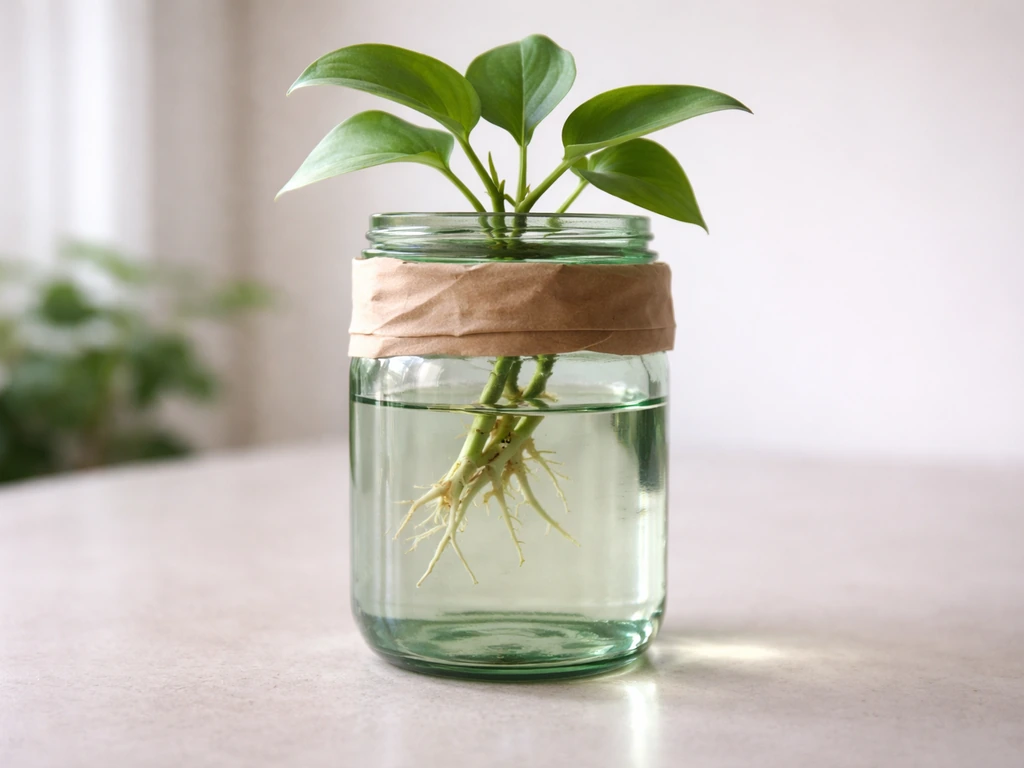
For rooting cuttings, a clean glass jar, bottle, or vase is all you need. The one thing most people miss: use a green or amber-colored container, or wrap a clear jar in brown paper. Blocking light from reaching the water dramatically reduces algae growth and keeps the rooting zone healthier. Fill the jar with room-temperature water so the lower node of the cutting is submerged but the leaves are not.
Hydroponic reservoir setup (for ongoing growth)
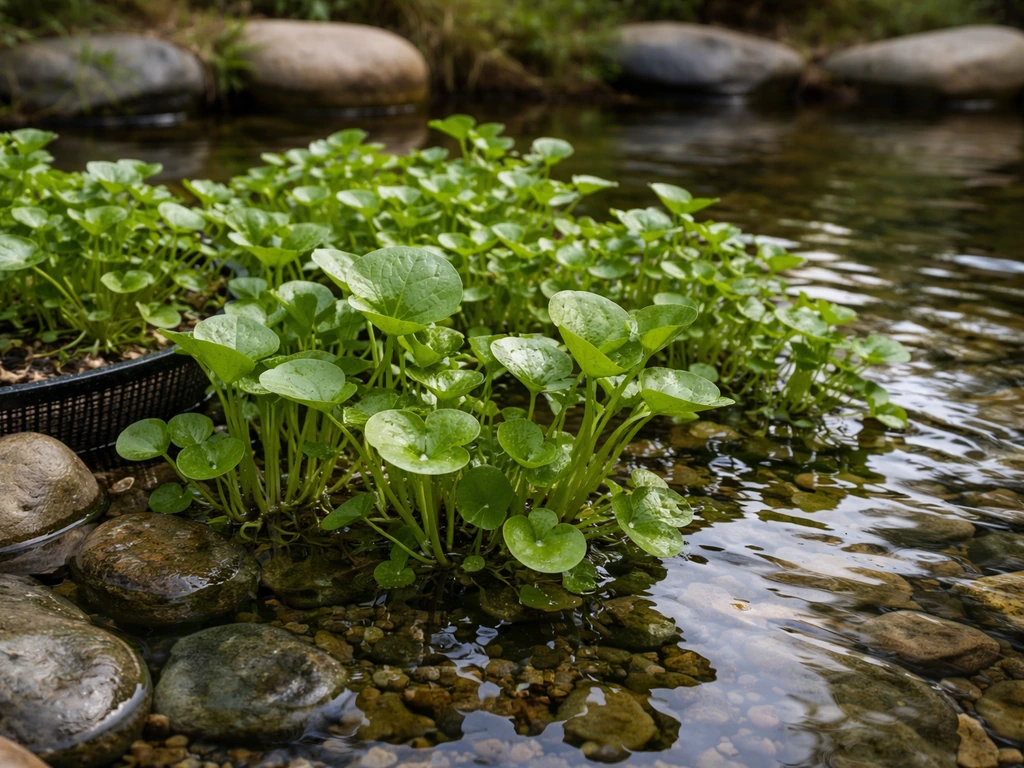
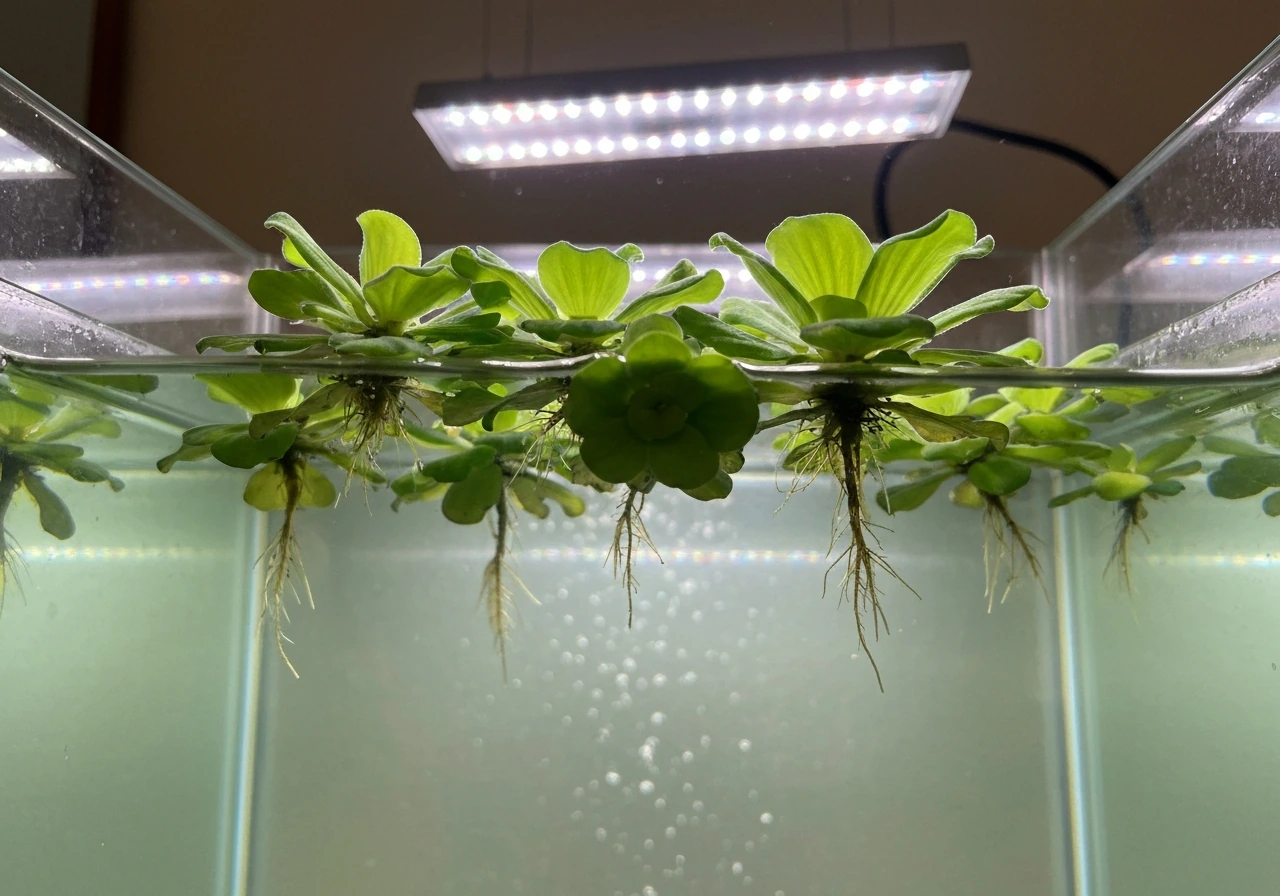
If you want flowers to keep growing in water beyond the rooting stage, you need a proper reservoir with oxygenation. A simple bubbler system works well: take a 5-gallon bucket with a lid, cut a hole for a net cup, fill the reservoir so the bottom of the net cup barely touches the water level, and run an air stone connected to a small aquarium pump. The air bubbles oxygenate the solution and keep dissolved oxygen levels high enough to prevent root rot. This is the same principle used for growing water plants in larger aquatic systems. If you're planning to expand into a pond, the same idea applies, but you'll want to match the lighting, water quality, and oxygenation to your pond setup growing water plants in larger aquatic systems. Fill net cups with a neutral medium like clay pebbles or rockwool to support the plant while the roots grow down into the nutrient solution. If you're growing adenium in water, the same reservoir setup works, just keep the roots oxygenated and feed at the right stage hydroponic.
What you need at minimum
- Clean glass jar, vase, or opaque container (300–500 ml for one to three cuttings)
- Room-temperature water, dechlorinated if possible
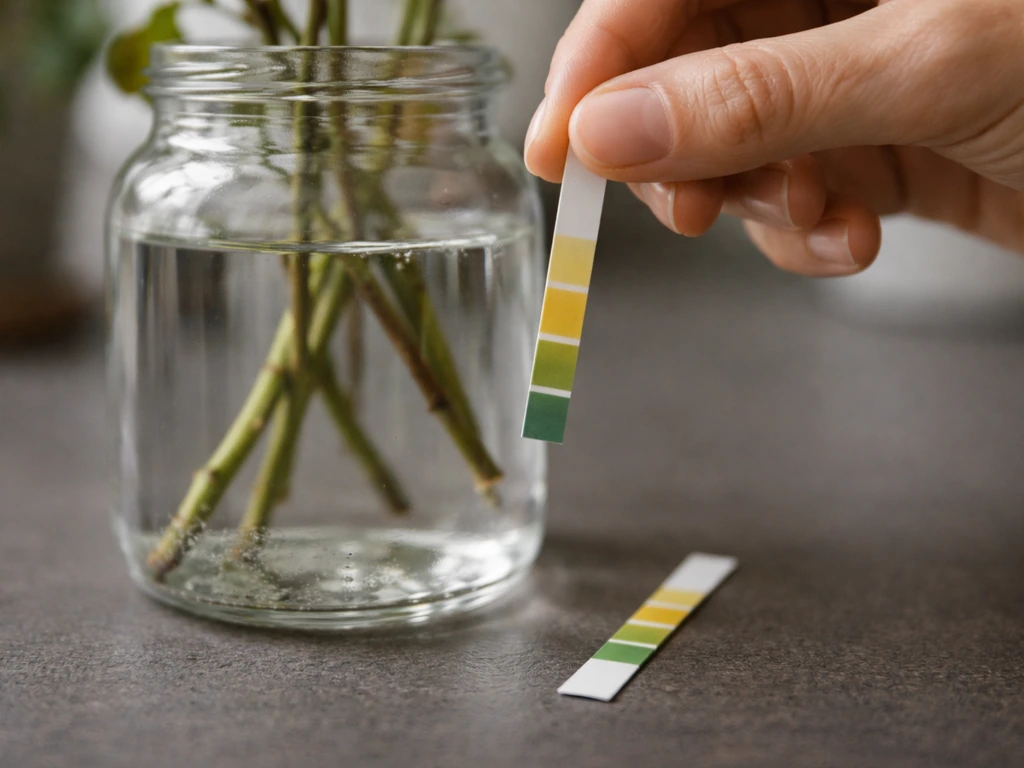
- A pH meter or test strips (target 5.5–6.5)
- Rooting hormone powder or gel (optional but recommended for slower-rooting species)
- A sharp, clean blade — wipe it with rubbing alcohol before cutting
- Air pump and air stone (only needed if growing long-term in a reservoir)
Step-by-step propagation: cuttings vs. seeds
Starting from cuttings (recommended method)
- Choose the right stem: look for soft, healthy, non-flowering growth. Avoid stems that are woody, diseased, or already flowering — energy goes to roots, not blooms, at this stage.
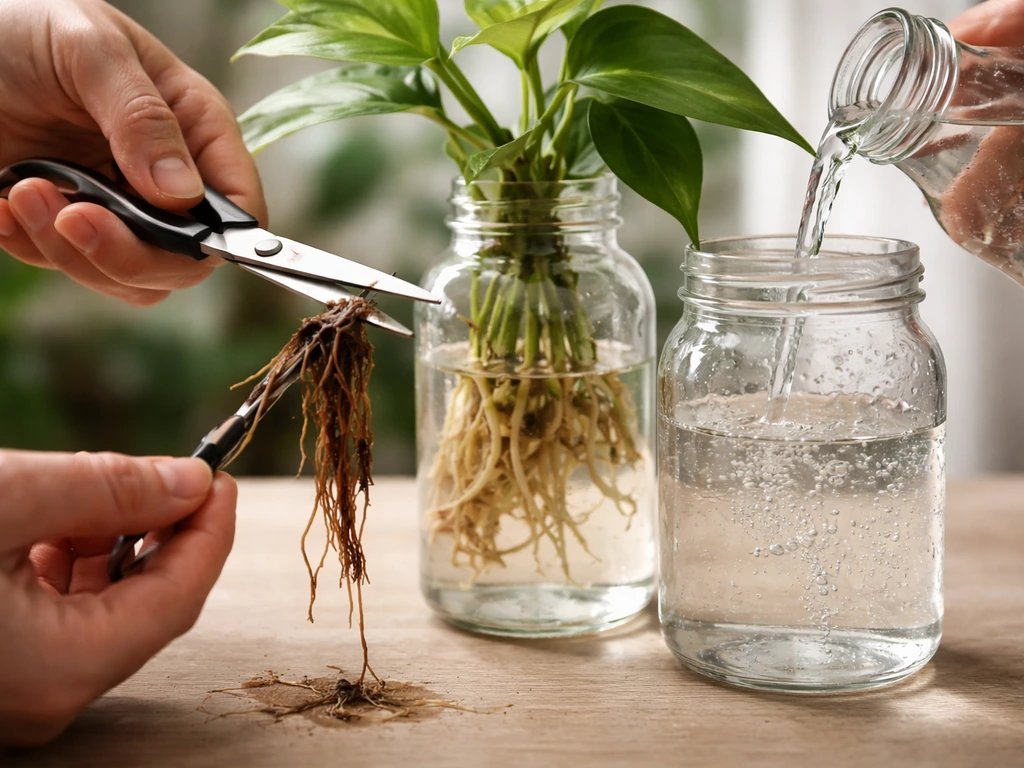
- Cut to 4–6 inches just below a leaf node using a clean, sharp blade. A straight cut is fine; angled cuts don't make a meaningful difference in water propagation.
- Strip leaves from the lower half of the cutting. Submerged leaves rot quickly and foul the water. Keep two to four leaves at the top.
- Optional but helpful: dip the cut end in rooting hormone powder or gel (IBA-based products work well). Tap off excess powder. For stubborn species, lightly scrape or wound the bottom inch of the stem before dipping — this breaks through surface tissue and speeds root emergence.
- For geraniums and succulents specifically: let the cut end air-dry for 30–60 minutes before putting it in water. This seals the wound slightly and reduces rot risk.
- Place the cutting in your jar so at least one node is submerged. Make sure no leaves are underwater.
- Top up with clean water as needed and change the water completely every 5–7 days.
- Expect roots in 7–21 days for soft-stemmed plants, up to 4–5 weeks for tougher species like panicle hydrangeas.
Starting from seeds in water
Growing flowers from seed directly in water is much less reliable than cuttings and honestly not the method I'd recommend for most people. Seeds need oxygen during germination, and submerging them fully typically causes rot before they sprout. The exception is a seed-starting approach where you use a floating medium (like rockwool cubes kept moist but not submerged) in a shallow tray of water. The seed sits in the moist medium, the roots eventually reach down into the water, and you transition from there. This is closer to hydroponic propagation than true water germination. For beginners, cuttings are faster, more reliable, and more satisfying.
Water quality, oxygenation, and light
Water quality
Tap water is fine for most cuttings, but chloramine (which many municipal systems use instead of plain chlorine) doesn't evaporate overnight the way chlorine does. If you're in a chloramine-treated area, use a dechloraminator or a filter with KDF media, standard carbon filters alone don't reliably remove chloramine. Alternatively, use filtered or rainwater. Keep water temperature between 65–75°F (18–24°C). Cold water slows rooting noticeably; warm water above 80°F encourages bacterial growth.
pH
This is the detail most people skip and then wonder why roots are slow or weak. Target a pH of 5.5–6.5 in your water. For hydroponic setups moving into the nutrient phase, aim for the sweet spot of 5.8–6.2. Outside this range, the plant can't take up nutrients efficiently even if the nutrients are there. pH drops or drift up tend to happen slowly, so check once a week with a test strip or meter and adjust with pH up/down solutions as needed.
Oxygenation
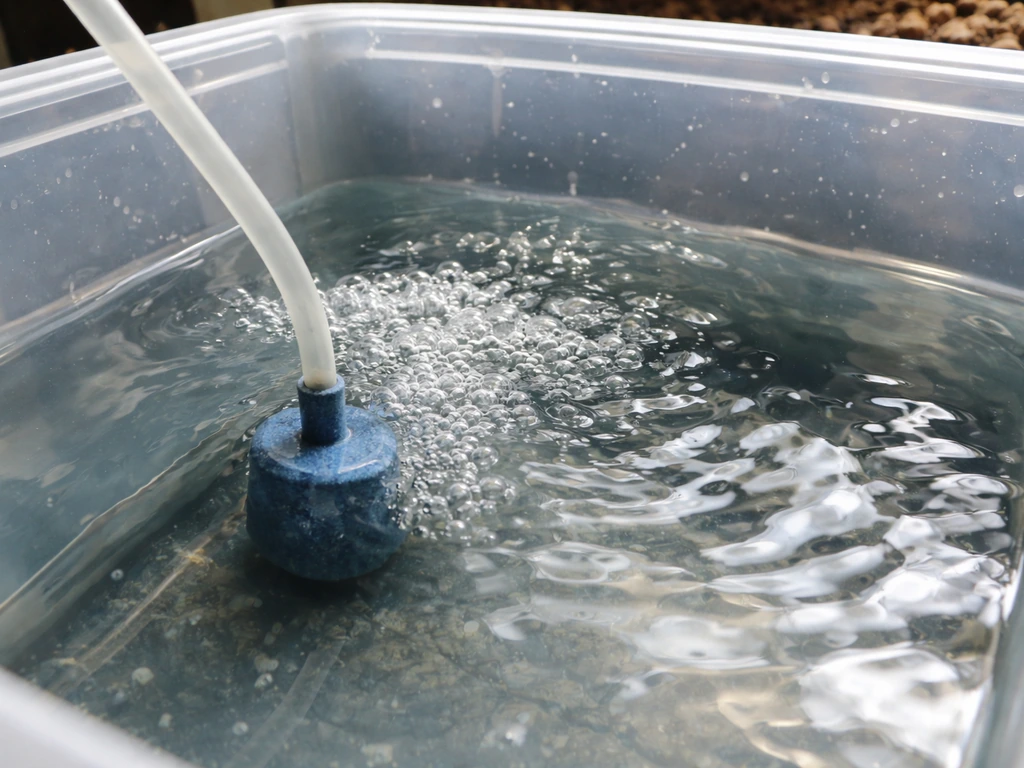
Dissolved oxygen is one of the most underrated factors in water growing. Low oxygen in the root zone is a direct cause of root rot, even when the water looks clean. For a simple jar setup, changing the water every 5–7 days and not filling it completely (leaving some air gap) helps. For reservoir growing, an air stone running continuously is non-negotiable. Think of it the same way you'd oxygenate a fish tank, the roots need that oxygen exchange constantly.
Light
Cuttings in the rooting phase don't need intense light and actually do better with bright indirect light rather than direct sun. Direct sun heats the water, promotes algae, and stresses a cutting that has no roots yet to take up water. Place jars near a north or east-facing window, or a few feet back from a south-facing one. Once rooted and moved to a hydroponic reservoir for ongoing growth, most flowering plants need 12–16 hours of light daily, either natural or from a grow light positioned 6–12 inches above the canopy.
Nutrient strategy: when plain water is enough and when it isn't
During the first week or two while roots are forming, plain clean water is genuinely fine. The cutting is living off stored energy in its tissues, and adding full-strength fertilizer at this stage can actually stress or burn it. If you want to give cuttings a small boost, use a hydroponic nutrient solution diluted to one-quarter to one-half strength, that's enough to support early root development without overwhelming the plant.
Once you see roots that are at least 1–2 inches long, the plant is ready for nutrients. At this point, switch to a balanced liquid hydroponic fertilizer at the manufacturer's recommended dilution rate. A general-purpose formula with roughly equal N-P-K (like a 3-1-2 ratio) works well for vegetative growth and early flowering. As the plant matures and you want to push blooms, shift to a formula with higher phosphorus and potassium relative to nitrogen, this is what most hydroponic bloom formulas are designed for. Keep checking your pH after adding nutrients, because nutrient solutions can shift it.
Rooting, transplanting, and when to move to soil or hydroponics
The hardest part for most beginners is knowing when a cutting is ready to move out of the jar. The answer: wait until the root system is substantial enough to support the plant on its own, usually when roots are 2–4 inches long and you can see multiple root branches, not just one or two thin threads.
Water-grown roots are structurally different from soil-grown roots. They're adapted to a low-resistance, high-moisture environment. Moving them directly into dry soil can shock the plant hard. If you're potting into soil, choose a light, well-draining mix, water it thoroughly before transplanting, and keep the plant in indirect light and high humidity for the first week to ease the transition. Alternatively, if you're moving into a hydroponic system, transfer the rooted cutting into a net cup with clay pebbles and lower it into your reservoir, the roots adapt to hydroponic solution more easily than to soil because the environment is still water-based.
Geraniums deserve special mention here: their water-grown roots are particularly brittle, so handle them with extra care at transplant. Let the root ball drip-dry for a moment before moving it, and pot it without pressing the soil too firmly around the roots.
Troubleshooting: what's going wrong and how to fix it
| Problem | Likely Cause | Fix |
|---|---|---|
| Slimy or brown roots | Root rot from low oxygen or dirty water | Change water immediately, trim rotted roots with clean scissors, add air stone, reduce water level |
| No roots after 3+ weeks | Wrong species, cold water, or too much light stress | Move to warmer spot (70–75°F), try rooting hormone, check pH is 5.5–6.5 |
| Green algae coating jar and water | Too much light reaching the water | Switch to opaque/dark container or cover jar; move out of direct sun |
| Yellow leaves on cutting | Nutrient deficiency (if rooted) or normal leaf drop (if early stage) | If rooted: add dilute nutrient solution. If early: remove yellow leaves, leave the rest |
| Limp, wilting stems | Transpiration stress — cutting losing water faster than it can absorb | Remove more leaves from the cutting, mist lightly, cover loosely with a plastic bag to raise humidity |
| Fungal fuzz or gray mold on stems | High humidity, poor airflow, or dead plant material in water | Remove affected material immediately, change water, improve air circulation around jar |
| Roots forming but then dying back | Bacterial buildup in stale water | Change water every 5–7 days, keep container very clean, rinse roots gently at each water change |
The most common failure I see (and have made myself) is leaving the water too long between changes. The water turns cloudy, bacterial slime builds up on the stem, and by the time you notice, root rot has set in. Set a weekly reminder to change it. It takes two minutes and saves the plant.
Simple care schedule to keep things on track
Once you have a system running, the ongoing maintenance is genuinely light. Here's what a basic weekly routine looks like:
| Frequency | Task |
|---|---|
| Every 5–7 days | Change water completely in jar setups; top up reservoir setups and check solution level |
| Weekly | Check and adjust pH (target 5.5–6.5) |
| Weekly | Inspect roots for slime, rot, or discoloration; trim if needed |
| Weekly | Remove any dead or yellowing leaves from the cutting or plant |
| Every 2 weeks (once rooted) | Refresh nutrient solution in reservoir setups; replace with fresh mixed solution |
| Monthly | Deep-clean jars or reservoir with a dilute hydrogen peroxide solution (3 ml per liter) and rinse thoroughly before refilling |
| As needed | Check for algae on container walls; switch to darker container if it keeps recurring |
For longer-term hydroponic grows, the same principles that apply to growing water plants in other aquatic systems apply here: consistent water quality, regular nutrient replenishment, and good oxygenation are the three variables that determine whether you get healthy blooms or a struggling plant. Get those right and the flowers will take care of themselves.
If you find yourself wanting to expand beyond individual cuttings into growing multiple plant species in water-based systems, the same core skills transfer directly. The method you learn propagating flowers in a jar is the foundation for more advanced setups like deep water culture or floating plant reservoirs, where the controlled water environment does most of the work for you.
FAQ
When should I start feeding nutrients, and how strong should the fertilizer be?
For cuttings, skip full fertilizer until roots are visible, then start with diluted nutrient (about one-quarter to one-half strength). For long-term hydroponic growing, keep nutrients in the reservoir but continue weekly pH checks, because fresh nutrients can shift pH even when water looks clear.
Why is my flower cutting wilting or stalling in water even if I changed the water?
If the cutting wilts but the water is clean, the most common cause is low dissolved oxygen or heat buildup. Change the water, keep the jar out of direct sun, and consider moving from a still-jar approach to a bubbler system if you are keeping plants in water longer than rooting.
How often do I really need to change the water, and what signs mean I should do it sooner?
Use a clear water change schedule based on what you see: if the water clouds, smell changes, or algae appears, change immediately. Otherwise, follow a weekly change for jar setups, and for reservoir setups ensure the air stone runs continuously and the oxygenation stays consistent.
Will I be able to grow flowers in water using tap water if my area uses chloramine?
Yes, but treat chloramine first. Standard carbon filters often miss chloramine removal. Use a dechloraminator made for chloramine, KDF media, or filtered or rainwater, then let the water come to room temperature before using it.
What should I do if I suspect root rot but I cannot tell how bad it is yet?
If roots turn brown, mushy, or smell sour, remove the cutting, discard the affected water, and start over with a fresh cutting. Going forward, keep an air gap for jar setups (do not fully submerge above the cutting zone) or use continuous aeration for reservoirs, and avoid direct sun on the container.
How much light should I give the cutting while it’s rooting, and how does that change after roots form?
Target bright indirect light during rooting, then increase to 12 to 16 hours of light after rooting when you move into ongoing water growth. If using a grow light, keep it about 6 to 12 inches above the canopy and adjust if leaves bleach or stretch.
My water is getting algae-heavy. What’s the fastest way to fix it?
If you see lots of algae and the water looks green, reduce light hitting the container. Switch to an amber or green jar, wrap a clear container in brown paper, and move it away from sunny windows. Also avoid topping off with nutrient water, top up with plain water until you can reset.
Can I transfer water-rooted cuttings into soil without killing them?
Yes, but do it gradually. After roots are 2 to 4 inches long with multiple branches, transplant into a light, well-draining soil mix and keep high humidity and indirect light for about a week. Avoid pressing soil tightly around brittle water-grown roots, especially for geraniums.
What are the most common reasons roots are slow or weak in a water jar?
If your roots are thin and slow, verify pH (around 5.5 to 6.5 for general water growing, about 5.8 to 6.2 for hydroponic nutrient phase) and water temperature (65 to 75°F, 18 to 24°C). Cold slows rooting, and warm above 80°F can increase bacterial activity.
How deep should the cutting be submerged, and what mistakes cause stem rot?
Stems and leaves can rot if the node zone stays submerged too deeply or if leaves sit in the water. Submerge only the cut end and the lower node area, strip lower leaves so they stay above the water line, and choose a container height that keeps foliage dry.
Is it possible to keep flowers growing in water long-term using only a mason jar?
If you want long-term flowering in water, you generally need a reservoir approach with oxygenation, not a simple jar. Build or buy a system with net cups, a properly sized reservoir, and an air stone that runs continuously, then maintain pH and nutrient replenishment regularly.
Why is seed-starting in water usually a failure, and what’s the better workaround?
For starting from seed, true water germination is unreliable because fully submerged seeds often rot before sprouting. If you do try seed-starting, keep seeds in a moist medium above the water surface in a shallow tray, then move them once roots reach down into the water.