Yes, you can absolutely grow watercress hydroponically, and honestly it's one of the better crops to start with. Watercress (Nasturtium officinale) is a semi-aquatic plant that naturally grows along stream banks with its roots in flowing, oxygenated water. That means it's already adapted to exactly the kind of environment a hydroponic system provides. Give it clean, moving, well-oxygenated nutrient solution and the right light, and it'll reward you with harvests in as little as three to four weeks.
How to Grow Watercress Hydroponically: Full Setup Guide
Marcus Holloway
14 Apr 2026
I've run watercress through a few different setups, and the results are consistently faster and more productive than soil. The main thing to get right is oxygenation, because watercress roots hate stagnant, warm water just as much as they hate drought. Get that part dialed in and everything else is straightforward.
Choosing the right hydroponic setup for watercress
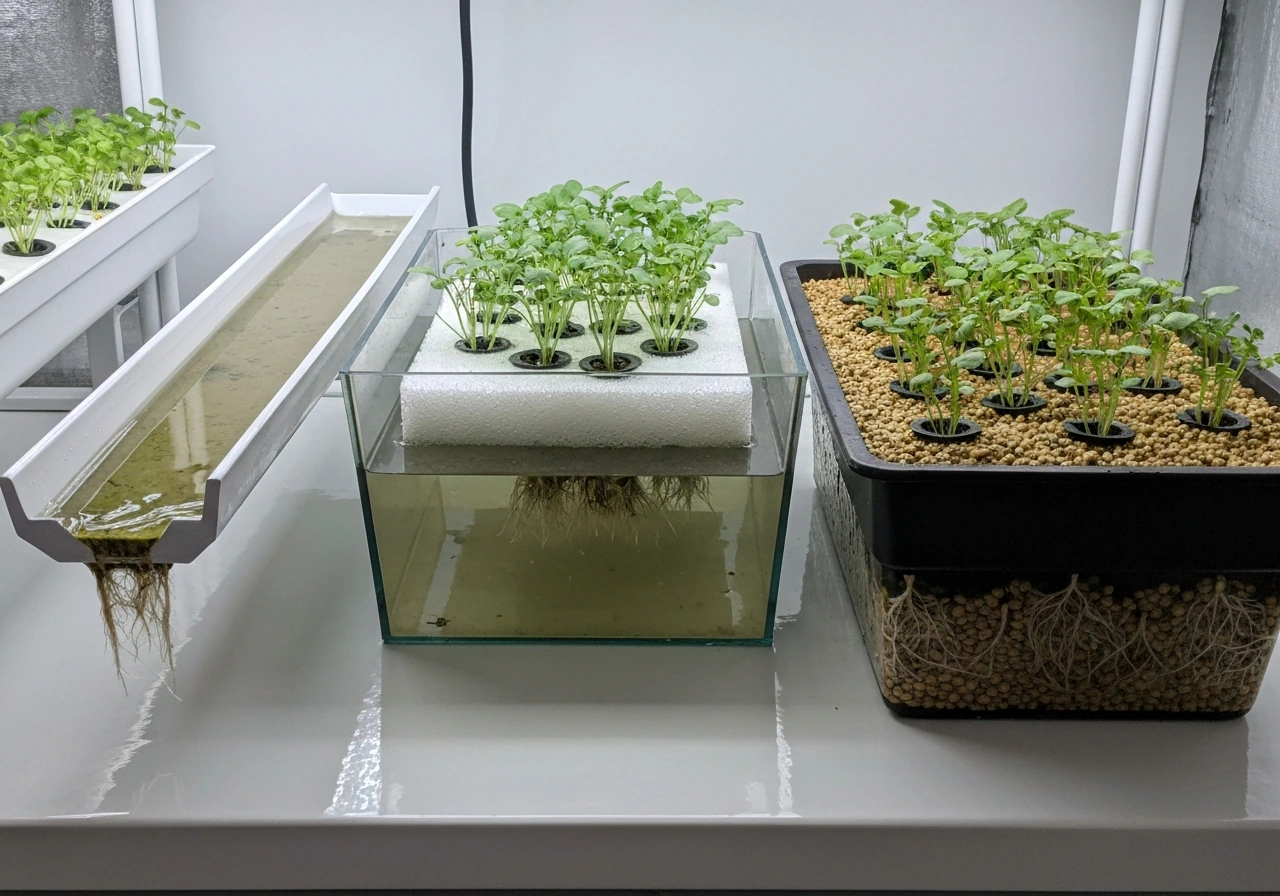
Watercress thrives in systems where nutrient solution is constantly moving or where roots have access to both water and oxygen. That narrows down your best options to three main system types: NFT (nutrient film technique), floating raft/DWC (deep water culture), and media-based. Here's how each one stacks up for this particular crop.
NFT (Nutrient Film Technique)
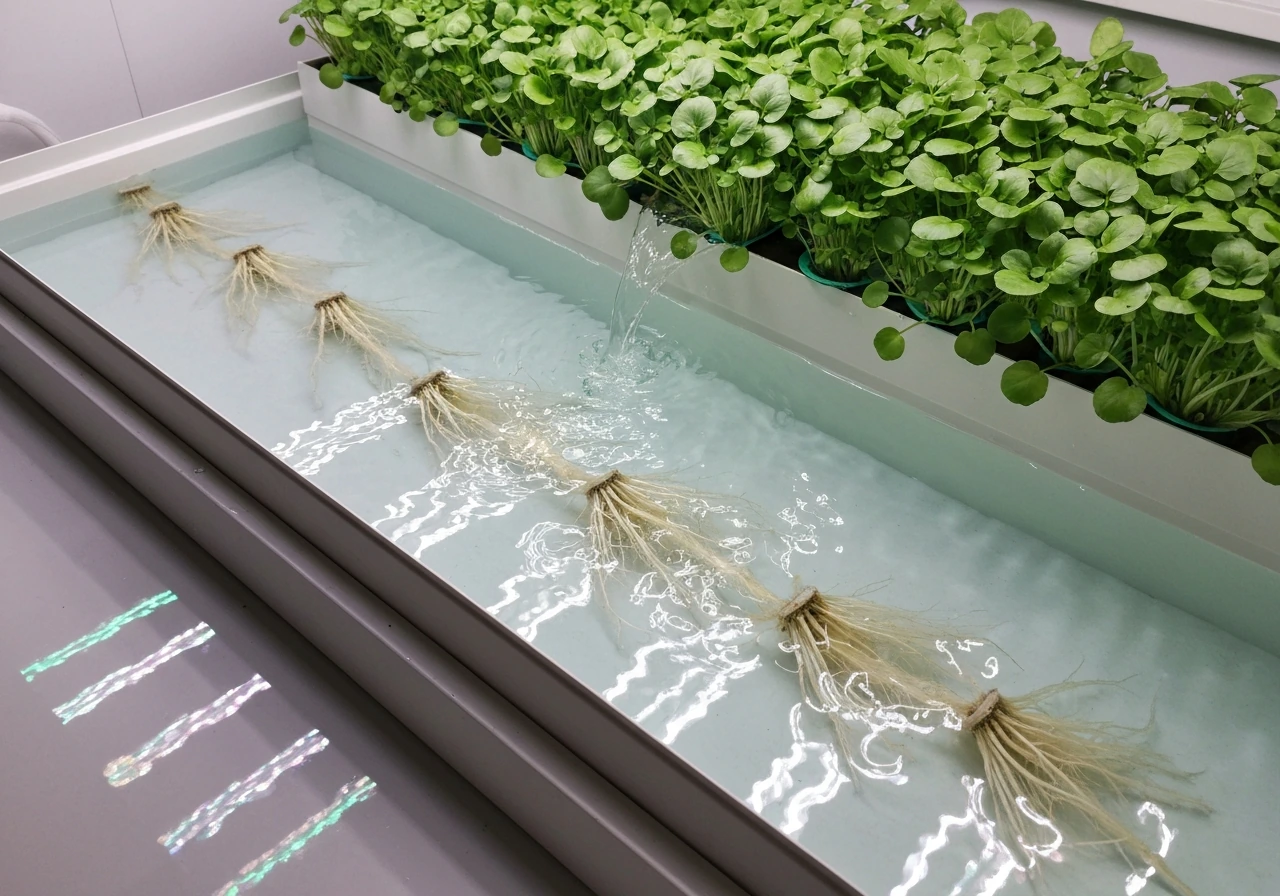
NFT is a strong first choice for watercress. It circulates a very shallow, continuous stream of nutrient solution along sloped channels, past exposed roots. The roots get constant nutrition from the film of solution, while the air above them keeps oxygen levels high. For a plant that naturally grows in fast-moving stream water, this setup genuinely mimics its natural habitat. The key is keeping flow uniform across all channels so no dry spots develop. Pump failures or uneven slope are the main things to watch.
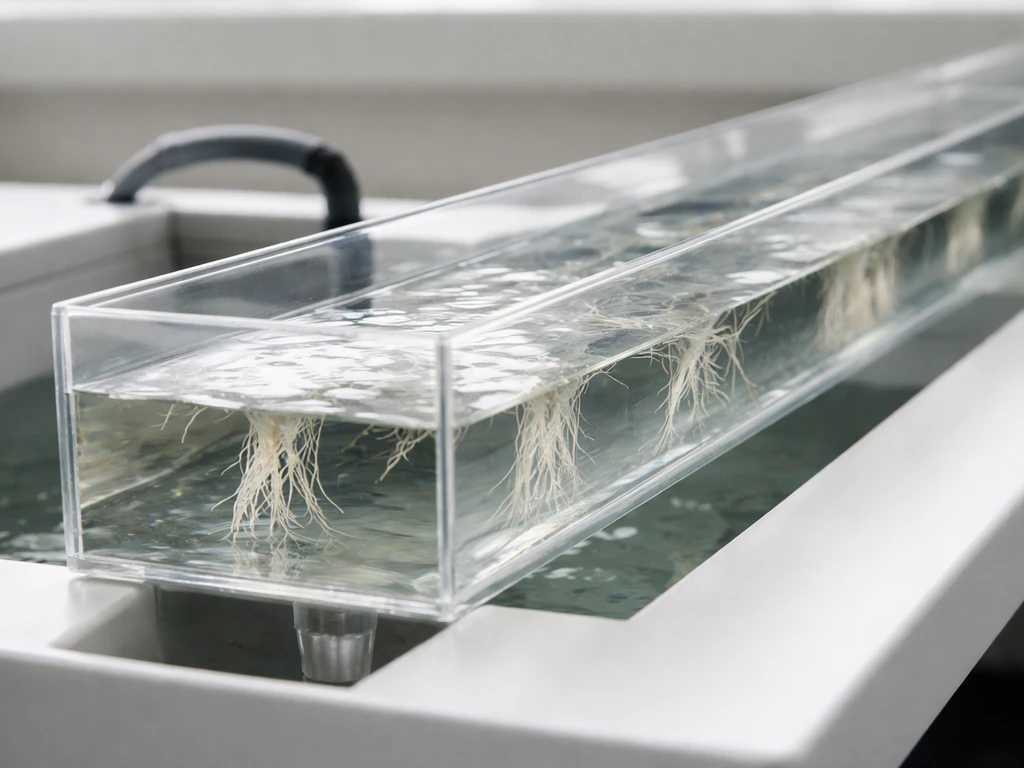
Floating Raft / Deep Water Culture (DWC)
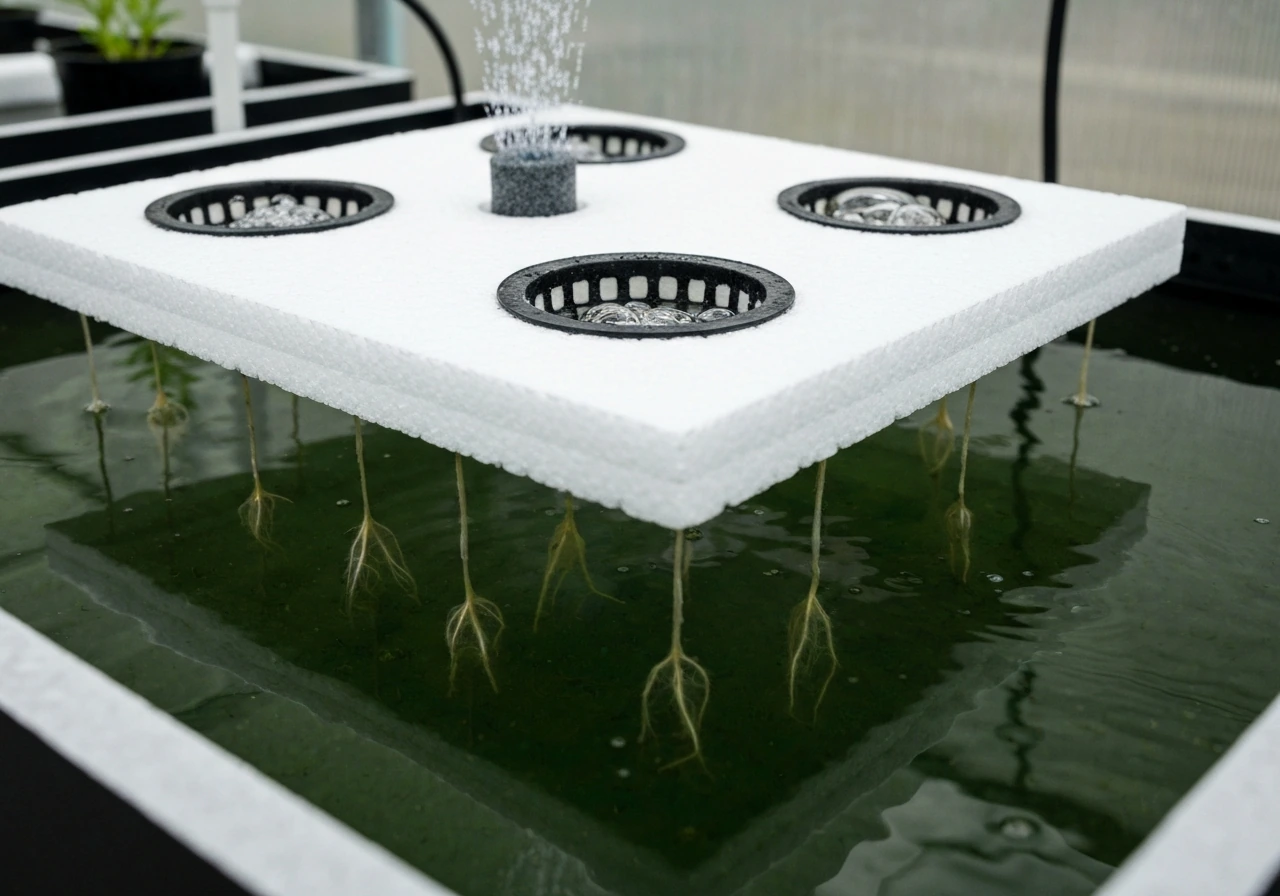
Floating raft systems suspend plant roots in a tank of oxygenated nutrient solution using foam boards with net pots cut into them. This is probably the easiest system to build at home, and watercress does well in it as long as you run an air pump continuously. Without good dissolved oxygen (DO), DWC becomes a root rot factory, especially if your reservoir temperature creeps above about 70°F (21°C). Keep your air stone running 24/7 and monitor DO levels. Many commercial growers use this style for leafy greens, and it works well for watercress at any scale.
Media-Based (Rockwool or Similar)
Media-based systems use an inert growing medium in containers or trays that are flood-and-drain or drip-irrigated. Rockwool is a popular choice because it provides excellent aeration alongside high water-holding capacity, which reduces the oxygen stress that leads to root failures. If you're starting from seed or cuttings and want to establish plants before moving them into a raft or NFT system, starting them in rockwool cubes is an easy first step. It's also a practical standalone approach, especially for small indoor setups.
| System | Pros for Watercress | Cons / Watch-outs | Best For |
|---|---|---|---|
| NFT | Excellent oxygenation, mimics natural stream flow | Pump failure = quick crop loss; needs even slope | Intermediate growers, larger setups |
| Floating Raft / DWC | Easy to build, consistent moisture, low cost | Root rot risk if DO drops or temp rises | Beginners, small-to-medium setups |
| Media-Based (Rockwool) | Easy propagation, forgiving for seedlings | More hands-on irrigation management | Starting seeds/cuttings, small indoor grows |
If you're just getting started, a floating raft/DWC setup is the most beginner-friendly and forgiving. If you want to explore other leafy crops alongside watercress, the same system works well. You can also check out this guide on how to grow hydro for a broader introduction to setting up your first system before diving into watercress specifics.
Water, light, and temperature: the real targets that matter
Watercress is particular about its environment, but not in a complicated way. It prefers cool, well-oxygenated water and moderate light. Get these three dials set correctly and you're most of the way there.
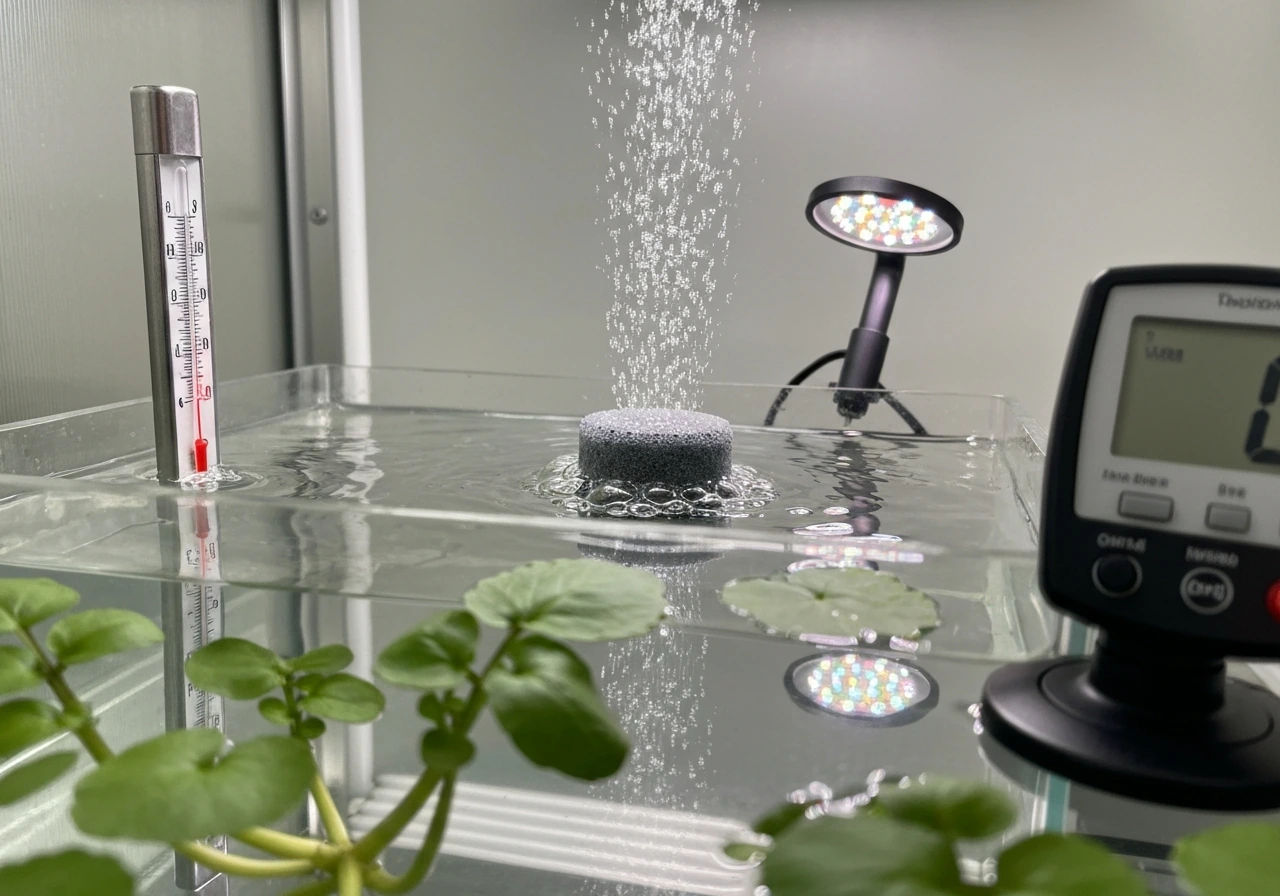
Water temperature and dissolved oxygen
Keep your nutrient solution between 50°F and 68°F (10°C to 20°C). Watercress is a cool-season crop and genuinely struggles once water temps push above 70°F, which is also the zone where Pythium (root rot) becomes a real threat. If you're growing indoors in summer, a small aquarium chiller or locating your reservoir in a cool space makes a big difference. Dissolved oxygen should stay above 6 mg/L. If you're running DWC, that means a quality air pump with a proper air stone sized for your reservoir volume, running continuously. Measure DO with a portable meter if you can.
Light intensity and photoperiod
Watercress tolerates lower light than many crops, which is actually one of its advantages indoors. For seedlings, target a PPFD of around 25 to 50 and a color temperature of 6500K. For established vegetative growth, you're aiming for a Daily Light Integral (DLI) of 14 to 25 mol/m²/day, which you can achieve with 14 to 16 hours of LED light per day. A practical default for LED photoperiod is 16 hours on, 8 hours off. Give it at least 6 hours of darkness per cycle. More light than this can actually fuel algae growth on your nutrient solution surface, which is a separate headache covered later.
Air temperature
Ambient air temperature should sit between 50°F and 70°F (10°C to 21°C) for best growth. Watercress can handle light frost outdoors but in a hydroponic setup you want to avoid extremes in either direction. If your grow space regularly hits 75°F or above, watercress will bolt (go to seed) faster and quality drops off. Cool basements and climate-controlled indoor spaces are ideal.
Step-by-step: from seeds or cuttings to harvest
Step 1: Choose your starting material
You can start watercress from seed or from stem cuttings. Seeds are reliable and easy to source. Expect sprouts within about 7 days of sowing. Cuttings are faster if you already have a plant or can buy fresh watercress from a grocery store: just take a 4 to 6 inch stem, remove the lower leaves, and place it in water or a moist rockwool cube. Roots typically appear within 5 to 10 days.
Step 2: Germinate seeds or root cuttings
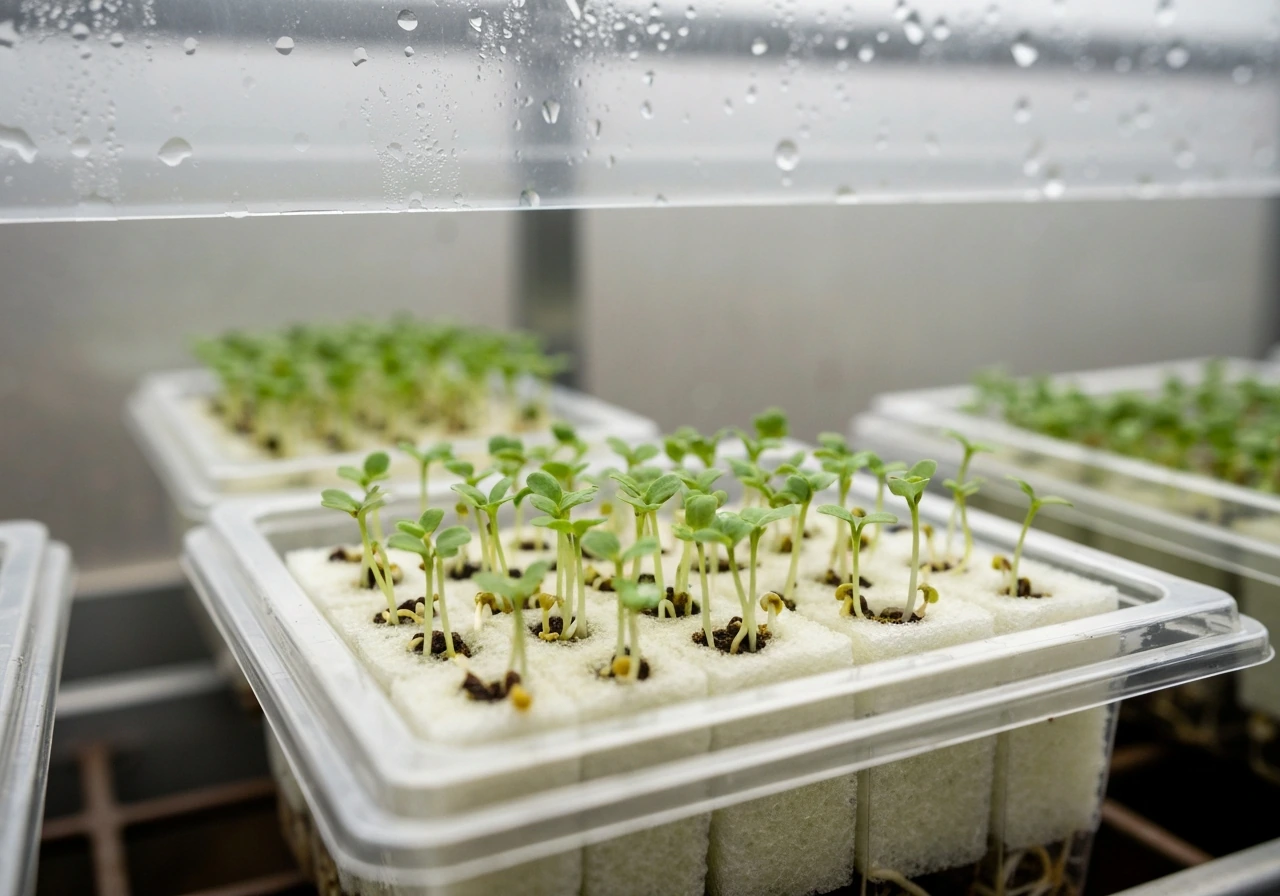
If starting from seed, sow onto the surface of a moistened rockwool cube or a tray of growing medium. Watercress seeds are tiny, so don't bury them. Keep them moist and at room temperature (around 65°F to 70°F). Under good conditions you'll see sprouts in 5 to 7 days. Keep light gentle at this stage (the lower PPFD range works fine). For cuttings in rockwool, keep the cube consistently moist and out of intense light until roots form.
Step 3: Transplant into your system
Once seedlings have their first true leaves (roughly 10 to 14 days from germination) or cuttings have visible roots of at least 1 inch, they're ready to move into your main system. For DWC, place the rockwool cube or rooted cutting into a net pot so roots can reach the nutrient solution. For NFT, set net pots into the channel openings with roots hanging down into the flow. Start with a lower EC at transplant (around 0.4 to 0.8 mS/cm) and ramp up as plants establish.
Step 4: Establishment and vegetative growth
For the first week or two after transplant, monitor your plants daily. Check for root development, leaf color, and that your flow (NFT) or aeration (DWC) is functioning. Increase EC gradually toward your target range as plants grow. This is also when you establish your 16-hour light cycle. Plants should show visible new growth within a few days of transplanting into a well-oxygenated system.
Step 5: First harvest
Watercress is typically ready for its first harvest around 3 weeks after planting (or from day 25 onward depending on conditions). Wait until stems are at least 4 to 6 inches tall. Use clean, sharp scissors and cut stems just above a leaf node or above the root base. Harvesting during the cooler part of the day (morning, indoors this is less critical) helps maintain crispness. Never take more than one-third of the plant at a time so it can recover quickly for the next cut.
Nutrients, pH, and EC: the numbers you actually need
Watercress is not a heavy feeder, which makes it forgiving for beginners. But you still need to hit the right ranges for pH and EC, because drifting outside them causes problems that are easy to misdiagnose as disease.
pH targets
Most references put the optimal pH range for watercress between 5.8 and 6.8, with a tighter practical target of 6.0 to 6.5 for general use. A pH optimum of 5.8 is cited in commercial lettuce/kale/watercress programs, while other guides put the ceiling at 6.4 or 6.8. Splitting the difference: aim for 6.0 to 6.5 and adjust if you see signs of nutrient lockout (yellowing or pale new growth). pH drifts over time as plants and microbes consume nutrients, so test every 2 to 3 days and correct with pH up or pH down solutions in small increments.
EC (electrical conductivity) targets
Watercress has an EC range of 0.4 to 1.8 mS/cm. Start seeds and young seedlings at the low end (0.4 to 0.8 mS/cm) and move toward 1.2 to 1.8 mS/cm during active vegetative growth. A commercial program for this crop group targets 100 to 150 ppm nitrogen as its management metric, which roughly corresponds to the mid-to-upper part of that EC range depending on your nutrient formula. If EC climbs above 1.8, dilute with fresh water. If it drops below 0.4, add more nutrient concentrate.
What nutrients to use and how to mix them
Use a complete hydroponic nutrient solution formulated for leafy greens. Two-part or three-part liquid formulas (like General Hydroponics Flora series) or dry soluble blends designed for hydroponics both work well. Follow the manufacturer's mixing instructions, always adding concentrates to water (never the reverse) and mixing each part separately before combining. After mixing, check EC with a meter and then check pH. Adjust pH last, because adding nutrients changes it. Top off your reservoir with plain water between full solution changes to compensate for evaporation and uptake, then do a full reservoir flush and refill every 7 to 14 days in a recirculating system.
Watercress is sometimes grown in aquaponic systems where fish waste provides nutrients, which is a compelling option if you already keep fish. That said, for a straightforward hydroponic build, a standard leafy green nutrient formula keeps things simple and predictable. If you enjoy growing unusual edibles hydroponically, you might also be interested in how to grow wasabi hydroponically, another semi-aquatic plant with similarly specific water chemistry needs.
Keeping the crop productive: ongoing care and harvest cycles
Watercress is a cut-and-come-again plant, meaning regular harvesting actually prolongs the plant's productive life rather than exhausting it. Once you've made your first cut at 3 to 4 weeks, you can harvest again every 1 to 2 weeks depending on growth rate and conditions. Each time, cut stems just above a growth node using clean shears. The plant redirects energy into new shoots from those nodes.
After 6 to 10 weeks, productivity starts to decline as plants mature and begin to bolt. At that point, pull the old plants, flush your system, refill with fresh nutrient solution, and start a new batch. If you stagger your plantings (start a new batch every 2 to 3 weeks), you can maintain a continuous harvest rather than having peaks and gaps. I've found this is the biggest practical improvement for anyone who wants watercress as a regular part of their kitchen supply rather than a one-off experiment.
Between crop cycles, rinse your channels or reservoir thoroughly and inspect for biofilm or algae buildup. A diluted hydrogen peroxide rinse (3% solution) works well for sanitizing surfaces without leaving harmful residues. Let the system dry briefly before refilling if possible.
Troubleshooting the most common watercress problems
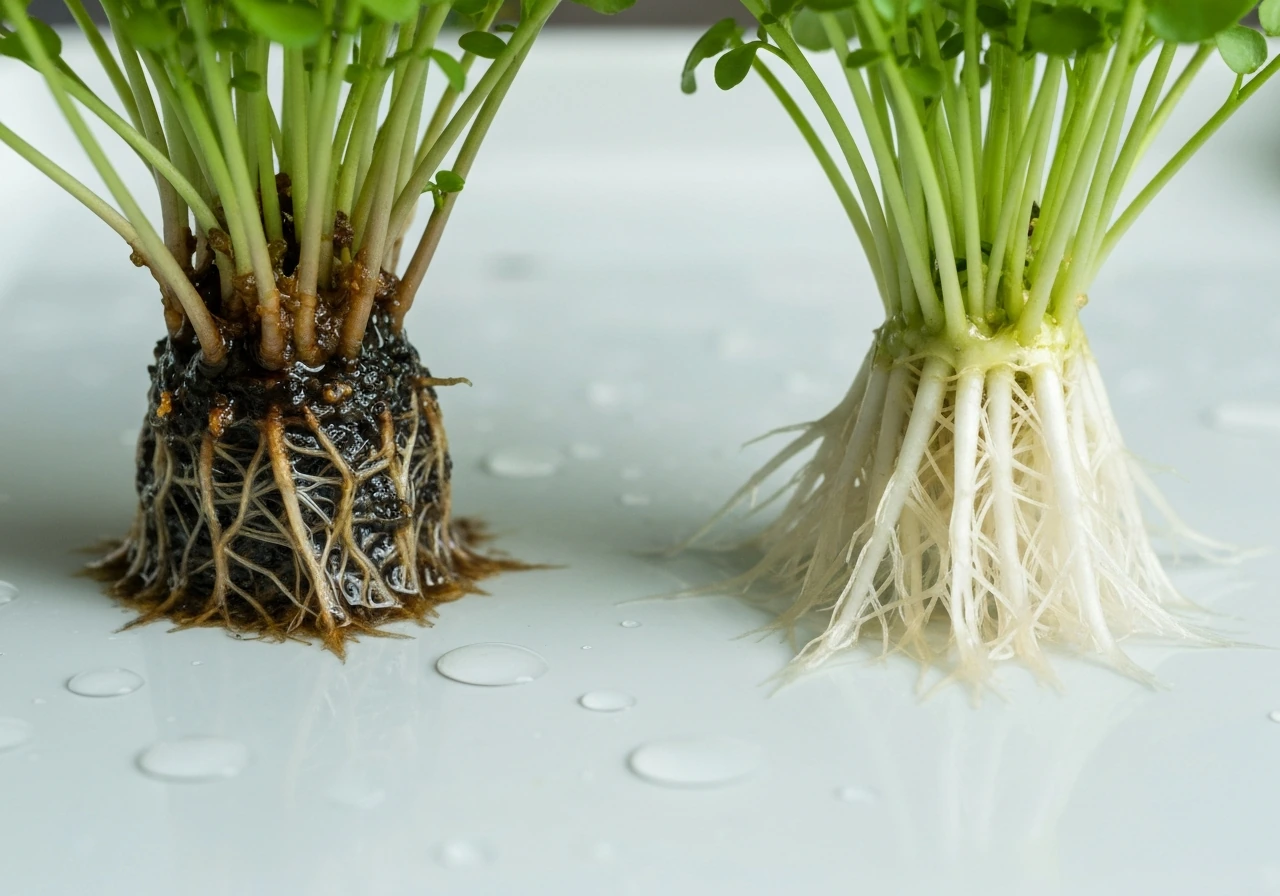
Root rot (Pythium)
Root rot is the number one killer of hydroponic watercress. It's caused by Pythium and related water molds that thrive when your nutrient solution is warm (above 70°F) and oxygen-depleted. Symptoms: roots turn brown or gray and slimy instead of white and firm, plants wilt even though they're sitting in water, and leaves may yellow rapidly. If you catch it early, remove affected plants, do a full reservoir drain, rinse the system, refill with fresh solution at proper temperature, and boost aeration immediately. Adding beneficial bacteria products (like Hydroguard) to your reservoir can help prevent recurrence. Keeping solution temperature below 68°F and DO consistently above 6 mg/L is your best prevention.
Algae growth
Green algae on your reservoir surface, channel walls, or net pots is almost always a light problem. Algae needs both light and nutrients to grow, and your nutrient solution provides the latter. The fix is light exclusion: cover your reservoir with opaque material, use black tubing and opaque channels, and make sure no gaps let light into the solution. If algae is already established, drain and clean the system, then reassemble with better light blocking. Algae competes with your plants for oxygen at night and can clog NFT channels, so don't ignore a light bloom of green.
Nutrient imbalance symptoms
Yellowing older leaves usually signals nitrogen deficiency (low EC or pH too high locking out uptake). Yellowing new leaves with green veins suggests iron deficiency, typically a pH issue. Pale, washed-out plants with slow growth often mean overall EC is too low. Dark or blue-green leaves that look waterlogged can mean EC is too high. The fix is almost always the same: test pH and EC first, correct pH to the 6.0 to 6.5 range, then adjust EC to the 0.8 to 1.5 target zone for established plants. Nutrient solution pH and EC drift over time as plants and microbes consume nutrients, so regular testing (every 2 to 3 days) catches problems before they become visible damage.
Tip burn and bolting
Tip burn (brown edges on leaves) in watercress is usually caused by calcium deficiency or poor airflow around leaves, not an overall nutrient problem. Improve air circulation with a small fan and make sure your nutrient formula includes calcium. Bolting (plants going to seed quickly, producing small leaves and woody stems) is triggered by high temperatures or very long photoperiods. If your watercress is bolting faster than you'd like, drop air and water temps, reduce your photoperiod to 14 hours, and harvest more frequently. Once a plant has fully bolted it won't revert, so pull it and start fresh.
Branching out with your hydroponic setup
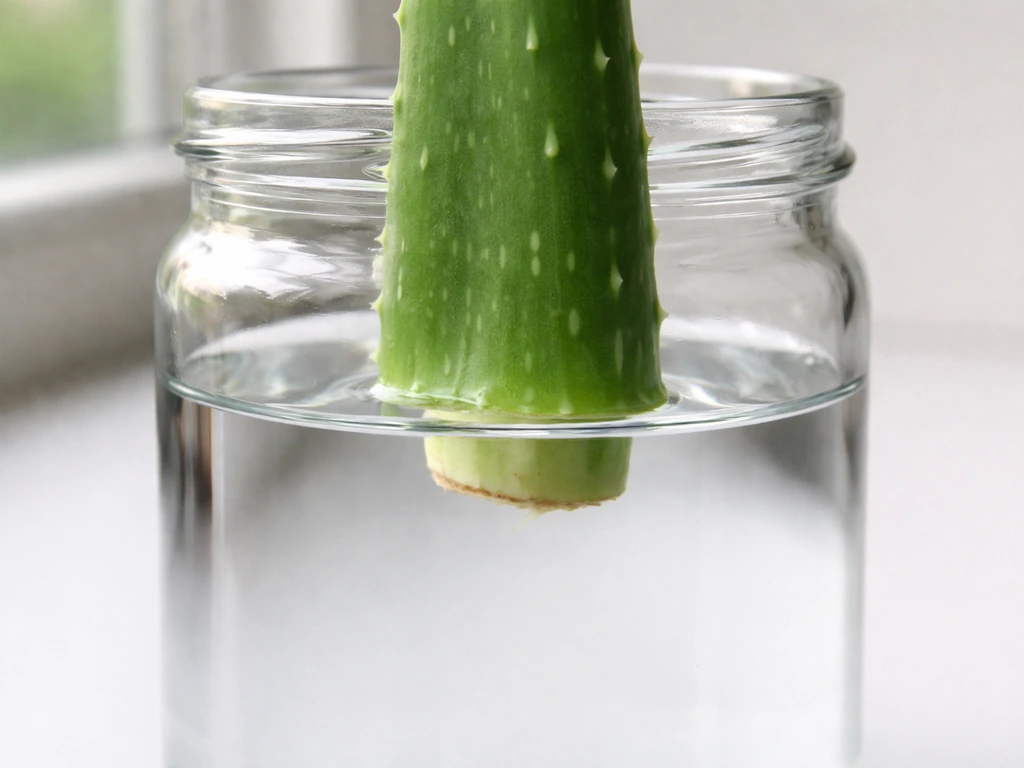
Once you've got watercress running smoothly, the same system and approach works for a wide range of other crops. Fenugreek is another leafy herb that adapts well to hydroponic growing, and if you're curious about expanding your setup, how to grow fenugreek hydroponically covers a similar nutrient-film friendly approach. On the more unusual end of the spectrum, some growers use their water-based systems for propagating plants you might not expect to root so easily. For example, how to grow aloe vera in water without roots is a surprisingly accessible project if you have a spare propagation tray. And if you want to understand whether aloe can actually go fully soil-free long-term, can you grow aloe hydroponically breaks down the real limits and possibilities for that plant in a water-based system.
For watercress specifically, the bottom line is this: set up a DWC or NFT system, keep your water cool and well-oxygenated, run your lights 14 to 16 hours a day, maintain pH between 6.0 and 6.5 and EC between 0.8 and 1.5 mS/cm for established plants, and harvest regularly with clean scissors. You'll have fresh watercress in three to four weeks, and with staggered plantings you can keep that supply going indefinitely.
FAQ
How do I prevent watercress from wilting if my pump or air stone stops?
In NFT and DWC, always keep plant roots in contact with the solution or oxygenated water, not just misting. If the reservoir runs dry or the flow stops long enough, watercress can wilt quickly because it cannot tolerate stagnant conditions. For safety, use a float valve for top-off and an audible or visual alarm on the pump.
Can I grow watercress hydroponically year-round, including hot summer months?
Yes, but treat it as “cool-season” gardening, not a summer crop. If your water temperature routinely exceeds 70°F (21°C), you’ll likely see faster root decline and more Pythium risk even if you keep DO high. The most reliable approach is to shade the system and run it in a cool room or add active cooling for both reservoir and channel sections.
Should I adjust pH first or EC first when mixing a new batch?
For nutrients, do your pH adjustment after you mix concentrates and after you confirm EC. Watercress is sensitive to pH drift, so change small amounts rather than swinging targets. As a practical routine, test pH and EC every 2 to 3 days, then correct back into about 6.0 to 6.5 pH and 0.8 to 1.5 mS/cm for established plants.
How often should I harvest, and does overharvesting harm watercress?
Plan on harvesting more frequently than you might with basil or lettuce. Watercress stays productive because you repeatedly cut back stems, so waiting too long usually means lower quality and earlier bolting. A good rule is to harvest when stems are roughly 4 to 6 inches tall and avoid taking more than one-third of a plant in a single cut.
Can I run lights and pumps on a timer to save energy?
You generally should not. Frequent starting and stopping creates uneven oxygen and nutrition delivery, which can trigger root stress in both NFT and DWC. If you must reduce energy use, do it by shortening the light schedule only, not by cycling aeration, and always keep DO above 6 mg/L.
In DWC, do I need water circulation in addition to an air stone?
Watercress does best with continuous oxygenation, but the reservoir water does not need constant circulation in the same way as NFT. In DWC, keep the air stone running 24/7 and consider gentle mixing only to even out temperature and nutrient distribution, especially in large reservoirs. The key risk is warm, oxygen-poor water, so do not let dead zones form.
What should I do if I cannot measure dissolved oxygen (DO)?
If you do not have a DO meter, you can still reduce risk by using a properly sized air pump, using a quality air stone, and keeping solution cool. DO symptoms show up late as root rot, so temperature control plus strong aeration is your best low-tech safeguard. Still, if you’re serious about hydroponic watercress, a portable DO meter is one of the most useful tools.
My seedlings look stressed, how can I tell whether it is light vs nutrient vs temperature?
Distinguish seedling problems from water chemistry problems. If seedlings are pale but roots look fine, check light first and keep PPFD within the lower seedling range. If seedlings are yellowing fast with limited root structure, re-check EC and pH and confirm your solution temperature is not trending above 68°F (20°C).
How should I clean my system between batches to reduce root-rot risk?
Cleanliness matters because watercress can carry biofilm quickly in nutrient-rich water. Between crop cycles, rinse channels and inspect for slime or film, then sanitize surfaces with a diluted 3% hydrogen peroxide rinse. Let everything dry briefly before refilling so you do not seed the next batch with algae or pathogens.
What causes bolting in hydroponic watercress, and what can I do once it starts?
Cutting frequency and plant density both affect bolting. If plants bolt early, first lower water and air temperature, then reduce photoperiod toward about 14 hours, and increase harvesting cadence so you remove stem growth before it matures. Once a plant bolts fully, remove it and start fresh rather than expecting recovery.
Is hydroponic watercress practical in a small countertop system?
Yes, you can scale down, but avoid small reservoirs without insulation in warm spaces. In tiny tanks, temperature swings and DO drops happen faster, which increases root rot risk. If you use a small setup, prioritize chilling or location in a cool area and use robust aeration relative to the reservoir volume.
If I see root rot, what is the fastest recovery plan?
Treat “dark and slimy roots” as Pythium until proven otherwise. Remove affected plants immediately, drain and rinse the system, refill with correctly cooled fresh solution, and restore strong aeration. Do not simply add more nutrients, because the underlying oxygen and temperature imbalance is what drives the rot.