Yes, you can grow aloe vera hydroponically, but it works differently than growing leafy greens or herbs in water. Aloe is a succulent, so it wants far less moisture than most hydroponic crops. The key is choosing a semi-hydroponic or low-moisture system, keeping roots oxygenated, and running nutrients at a lower concentration than you would for fast-growing plants. Done right, aloe grows steadily in a hydroponic setup with minimal fuss. Done wrong, you get root rot within two weeks. This guide walks you through exactly how to do it right. If you are wondering about wasabi specifically, focus on clean, oxygenated roots and keep nutrient strength gentle from the start how to grow wasabi hydroponically. To learn more about the bigger setup, including the best hydroponic methods for succulents, see our complete guide on how do you grow hydro.
Can You Grow Aloe Hydroponically? Setup, Care, and Fixes

Is hydroponic aloe actually feasible?
Aloe vera is a drought-adapted plant, which makes a lot of people assume it cannot survive in water-based systems. That assumption is wrong, but the concern behind it is valid. Aloe's roots need oxygen just as much as they need moisture, and in a poorly designed hydroponic setup, the roots stay waterlogged and rot fast. The good news is that tissue culture and micropropagation research has demonstrated aloe rooting successfully in liquid and agar-based nutrient media, so the plant clearly can establish roots outside of soil. The difference is that those setups provide constant oxygen and carefully controlled moisture exposure, which is exactly what a well-designed hydroponic system does.
The realistic expectation is this: aloe in hydroponics grows slower than leafy greens or herbs, and it needs a lighter nutrient solution than most crops. You are not going to harvest gel in six weeks. But you will get a healthy, established plant that is easier to monitor than soil-grown aloe, and you will never have to guess whether you overwatered it.
Which hydroponic system works best for aloe?
Not every system is a good fit for a succulent. Here is how the main options stack up for aloe specifically. An OSU Extension publication on hydroponic “ebb and flow” describes hydroponic system approaches, including ebb-and-flow and buckets-style concepts, which can provide useful background when you contrast systems for succulents versus leafy crops ebb-and-flow/buckets style.
| System | How it works for aloe | Difficulty | Best for |
|---|---|---|---|
| Wicking (semi-hydroponic) | Roots draw moisture upward from a reservoir through perlite or LECA; roots are never submerged | Beginner | First-time hydroponic aloe growers |
| Deep Water Culture (DWC) | Roots hang in oxygenated nutrient solution with an air stone running continuously | Intermediate | Growers who want full hydroponic control |
| NFT (Nutrient Film Technique) | Thin film of nutrient solution flows over roots; roots get air exposure between flows | Intermediate | Growers with an existing NFT channel setup |
| Kratky (passive DWC) | No air pump; roots sit above the waterline as the level drops | Beginner | Low-maintenance single-plant experiments |
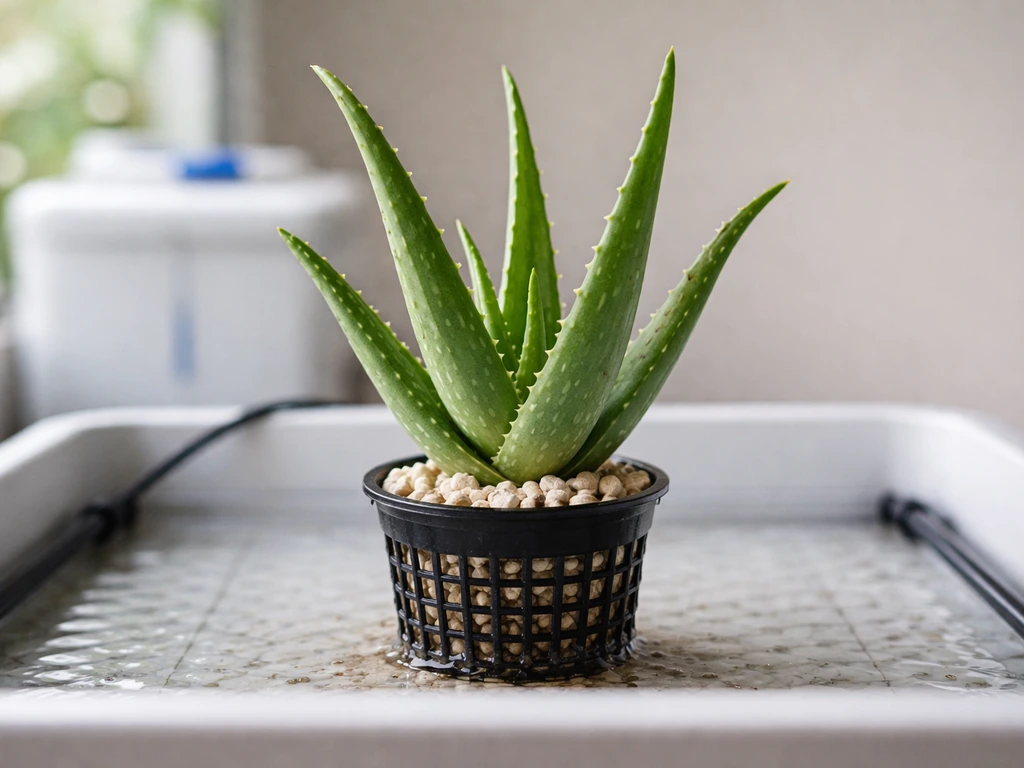
Wicking is the easiest starting point

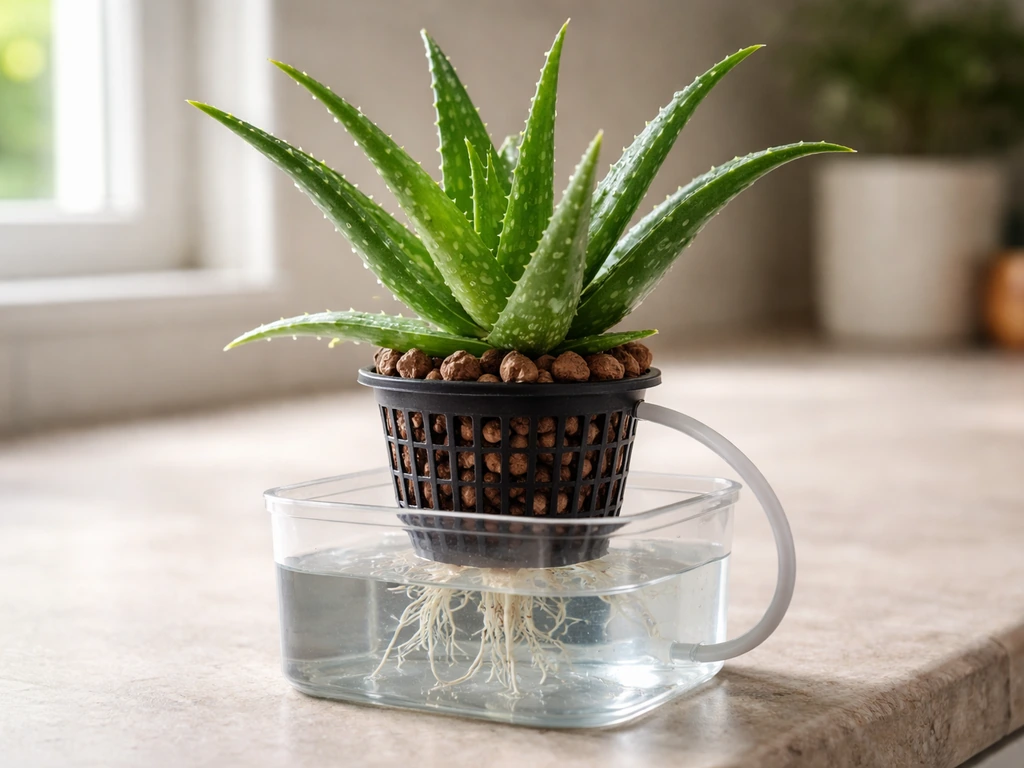
For most people reading this, wicking or semi-hydroponics is the right call. You fill a net pot or small container with perlite, set it above a shallow reservoir, and let capillary action pull moisture up to the roots. The roots never sit in water directly, which eliminates the main rot risk. I started my first hydroponic aloe this way and had zero losses. The downside is that you have less precise control over nutrient delivery compared with DWC, but for a slow-growing succulent that does not need aggressive feeding, that tradeoff is absolutely fine.
DWC with a good air stone works if you manage oxygen
Deep Water Culture can work well for aloe if you run a strong air stone and keep dissolved oxygen above 6 ppm. Research from the University of Missouri Extension sets that 6 ppm threshold as the optimum for hydroponic root health, and aloe is no exception. The trap with DWC and aloe is keeping the crown and stem base out of the nutrient solution. Only the roots should contact the water. Set your net pot high enough that the base of the plant sits above the waterline by at least an inch.
NFT and Kratky are workable but with caveats
NFT works because the intermittent flow gives roots air exposure, which aloe appreciates. The downside is that NFT channels are usually designed for smaller, faster-growing plants, and aloe's root ball can get large enough to obstruct flow. Kratky is passive, cheap, and easy, but because there is no active aeration, you need to keep the reservoir level low enough that roots are not fully submerged, and the system can stagnate in warm conditions. If you are experimenting with a single plant, Kratky is a low-stakes way to test the concept before investing in a full DWC setup.
How to root and start aloe cuttings for hydroponics
The biggest mistake people make is cutting an aloe leaf or offset and immediately dropping it into nutrient solution. Aloe cuttings need to callus first. Cut a healthy offset (a pup from the base of a mature plant, ideally with some root nubs already attached) and let the cut end dry in open air for 24 to 48 hours. If you specifically want to grow aloe vera in water without roots, you still need to oxygenate the crown and keep the cutting dry long enough to callus before introducing moisture. This forms a dry, protective layer over the wound that dramatically reduces rot risk when the cutting contacts moisture.
- Cut a healthy pup from the base of a mature aloe plant, as close to the parent stem as possible without tearing.
- Let the cut end sit uncovered in a dry, shaded spot for 24 to 48 hours until a dry callus forms over the wound.
- Place the callused cutting into a small container filled with dry perlite. Perlite stays airy and drains fast, so early roots establish without sitting in standing moisture.
- Mist the perlite lightly every 2 to 3 days. Do not saturate it. You want slightly damp, not wet.
- Keep the container in a warm spot (70 to 80°F / 21 to 27°C) with indirect light while rooting takes place.
- After 3 to 5 weeks, gently tug the cutting. Resistance means roots have formed. You can also check by lifting it carefully out of the perlite.
- Once you have roots at least 1 to 2 inches long, the cutting is ready to move into your hydroponic system.
If you are sourcing a plant that is already rooted in soil, rinse all the soil off the roots under lukewarm water very gently before introducing it to your hydroponic system. Soil particles in a hydroponic reservoir cause bacterial buildup and block root oxygen uptake fast.
Light, temperature, and nutrients: the numbers that matter
Light
Aloe vera does best with bright, indirect light or direct sun for part of the day. Research comparing aloe under different irradiance levels confirms that light significantly affects both growth rate and the concentration of beneficial compounds like aloin. Indoors under grow lights, aim for a photoperiod of 14 to 16 hours per day with a full-spectrum LED positioned 12 to 18 inches above the plant. Aloe can handle high light but will bleach or develop orange-red stress coloring if it gets too intense without adjustment. That stress color is not immediately harmful, but it signals the plant is working hard rather than growing.
Temperature
Aloe prefers air temperatures between 60 and 80°F (15 to 27°C). It can tolerate short dips below that but will stall growing. For your nutrient reservoir, keep water temperature between 65 and 72°F (18 to 22°C). Warmer water holds less dissolved oxygen, which directly raises rot risk. This is the same oxygen-temperature relationship described in University of Missouri Extension hydroponic guidance: as temperature rises, dissolved oxygen drops, so keeping your reservoir cool is not just about plant comfort, it is about root survival.
Nutrients: keep it light
Aloe is not a heavy feeder. If you run it at the same EC as tomatoes or lettuce, you will burn the roots. Start with a half-strength to quarter-strength hydroponic nutrient solution and work up only if you see deficiency symptoms. In practical terms, target an EC of 0.8 to 1.2 mS/cm for established aloe. For young or recently rooted plants, stay closer to 0.5 to 0.8 mS/cm until they adjust. Use a balanced hydroponic nutrient formula designed for general crops, or one formulated for low-nitrogen succulents if you can find one.
pH is critical in any hydroponic system because it determines which nutrients are actually available to the plant. Oklahoma State University Extension emphasizes that EC and pH together drive nutrient performance in hydroponic setups. For aloe, keep pH between 5.5 and 6.5, with 6.0 being a reliable target. Check pH every 2 to 3 days, especially in the first few weeks when the system is still stabilizing. Small pH swings are normal as the plant uptakes nutrients unevenly, but anything outside the 5.5 to 6.5 range needs correcting before it locks out key nutrients.
Day-to-day care: what to actually do each week
Hydroponic aloe is lower maintenance than most hydroponic crops, but it is not set-and-forget. Here is a simple care routine that keeps things running without overcomplicating it.
- Every 2 to 3 days: Check and adjust pH. Top off the reservoir with plain pH-adjusted water if the level has dropped. Evaporation concentrates nutrients, so top off with water rather than fresh nutrient solution between full reservoir changes.
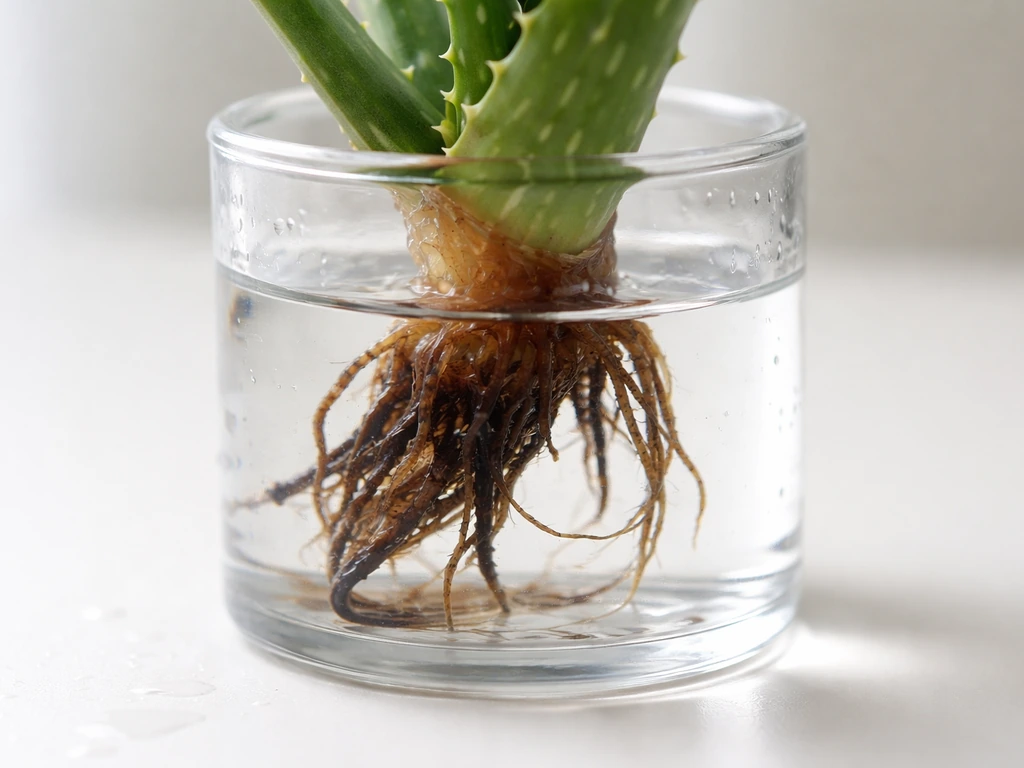
- Weekly: Check EC and compare with your target range. Look at roots through the reservoir wall or by lifting the net pot. Healthy roots are white or light tan. Dark, slimy, or mushy roots mean rot is starting.
- Every 2 to 3 weeks: Do a full reservoir change with fresh nutrient solution. This prevents salt buildup and nutrient imbalances from accumulating.
- Monthly or as needed: Clean the reservoir with a dilute hydrogen peroxide solution (food-grade) to kill algae, biofilm, and pathogens before they get established. Rinse thoroughly before refilling with nutrient solution.
- Pruning: Remove dead or damaged outer leaves at the base. Do not prune aggressively. Aloe puts energy into leaves for gel storage, and removing healthy leaves setbacks growth.
- Container management: As the plant grows, roots will expand. If roots are circling heavily in a DWC net pot or becoming compacted in a wicking container, move up to the next size container. Aloe grows slowly, so you likely will not need to repot more than once a year.
Algae control in the reservoir
Light hitting your nutrient reservoir is the main cause of algae growth. Wrap the reservoir in opaque material, use a dark-colored reservoir lid, or cover any openings with light-blocking tape. Algae competes with roots for oxygen and nutrients, and once a bloom takes hold it is hard to reverse without a full clean. Block the light first and the problem mostly prevents itself.
Troubleshooting: what goes wrong and how to fix it
Root rot
Root rot is the number one killer of hydroponic aloe. It shows up as brown, slimy roots and often starts at the stem base, which will look water-soaked, translucent, or brown. Crown rot, where decay reaches the central growing point, is usually fatal. Catch it early by catching the mushy root stage first. If you see brown roots, pull the plant, rinse the roots under clean water, trim all mushy root tissue with sterilized scissors, and let the cut ends air dry for 30 minutes before returning to a clean, freshly oxygenated reservoir. Lower your reservoir level and increase air stone output. If the base of the stem itself is soft, the plant may not recover, but it is worth trying.
Stem base issues
Even without full root rot, moisture trapped around the stem base causes gradual decay. Keep the stem base above the waterline and make sure no water pools where the plant sits in the net pot. If you are using perlite as a medium, check that it is not staying permanently wet at the crown level. Good airflow around the plant also helps dry surface moisture off the base between watering cycles.
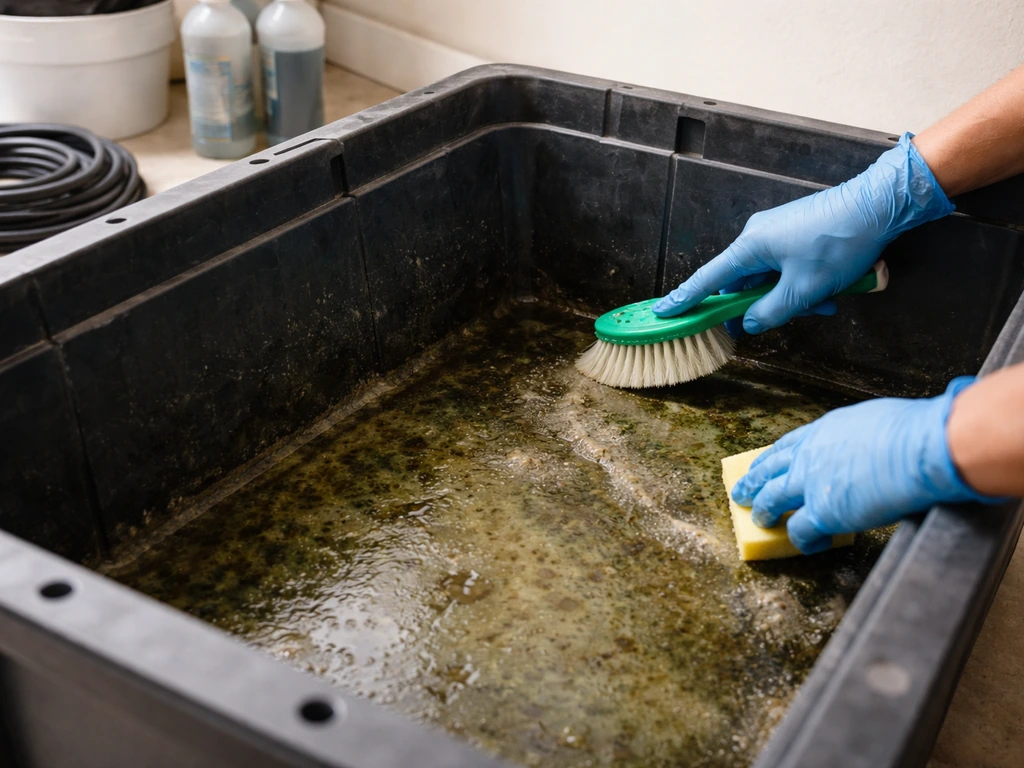
Algae and biofilm in the reservoir
Green or brown slime in the reservoir means algae or biofilm has colonized. Drain the reservoir completely, scrub with a dilute food-grade hydrogen peroxide solution, rinse multiple times with clean water, and refill with fresh nutrient solution. Block all light exposure going forward. If this keeps recurring, check whether your reservoir lid or net pot holes are letting light in.
Nutrient deficiency
Yellowing leaves that start at the tips usually indicate nitrogen deficiency or pH-related nutrient lockout. Check pH first, since pH outside the 5.5 to 6.5 range can block uptake even when nutrients are present. If pH is fine, slightly increase your nutrient concentration (bump EC up by 0.2 mS/cm) and monitor over a week. Pale, washed-out leaves without tip burning may indicate iron or magnesium deficiency, both of which are pH-sensitive. Correct the pH before adding more nutrients.
Nutrient toxicity
Brown leaf tips with crispy edges, especially combined with overall leaf darkening, often signal nutrient burn. This usually means EC is too high. Do a full reservoir change with a lower-strength solution, around 0.5 mS/cm, and let the plant recover for a week before slowly raising EC back up. Aloe burns before most other hydroponic plants because it is adapted to low-nutrient desert soils.
When to harvest and what to expect
Aloe is a slow grower regardless of the system. In hydroponics with good light and proper nutrients, you can expect visible new leaf growth within 4 to 8 weeks of establishment. A mature leaf suitable for harvesting gel will take 6 to 12 months from a young plant. Do not expect the same speed you would get from growing watercress or fenugreek hydroponically. Fenugreek is much faster to establish than aloe, so the timing and nutrient approach are easier to dial in for most beginners fenugreek hydroponically. Watercress hydroponically is much faster and works especially well with systems like DWC or NFT that keep roots well oxygenated. Aloe is a long game.
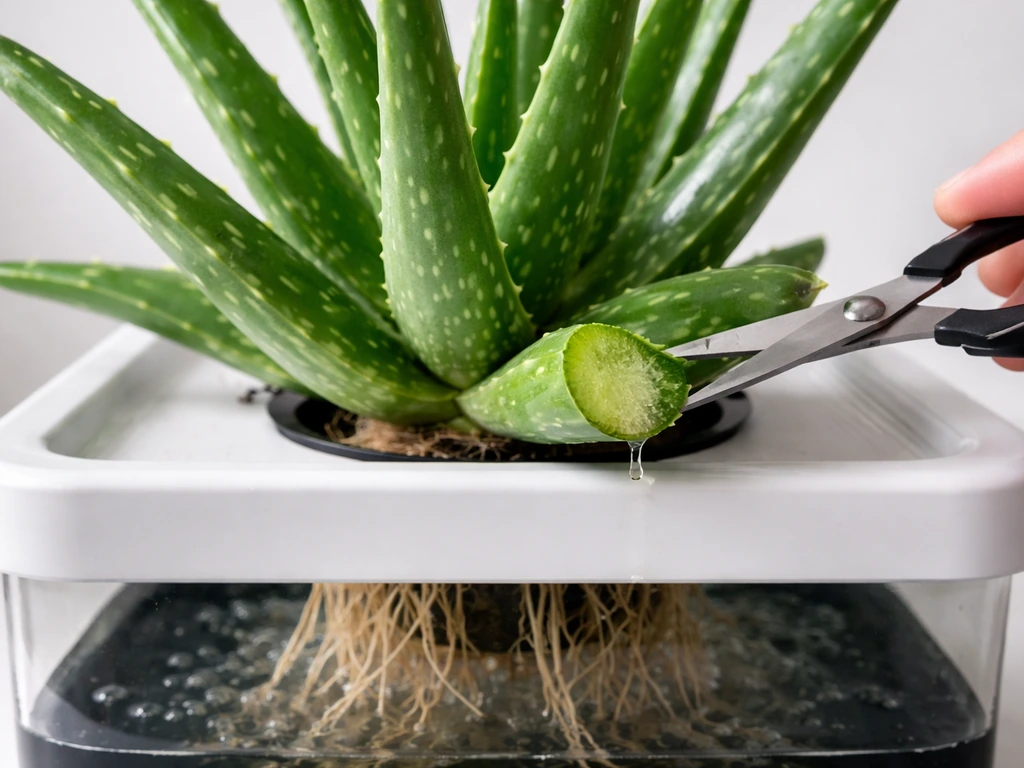
When a leaf is thick, plump, and at least 7 to 8 inches long, it is ready to harvest. Cut it at the base close to the stem with a clean, sharp blade. The leaf will not regenerate, but the plant will push new growth from the center. After cutting, stand the leaf upright for 10 to 15 minutes to let the yellow aloin sap (which can irritate skin) drain out before you fillet the gel. Rinse the gel before using it. For skin and wound applications, fresh gel from a mature leaf is far more potent than anything from a very young plant.
The long-term payoff with hydroponic aloe is a plant that produces pups (offsets) reliably, which you can root up and expand your system with, or share. Once you have one healthy hydroponic aloe going, you have a self-replenishing source of propagation material. That first successful plant is the hardest part. After that, scaling up gets much easier.
FAQ
Can you grow aloe hydroponically from a leaf cutting (no roots)?
Yes, but only if the crown stays dry and oxygenated. For aloe, avoid simple “leaf in water” setups where the stem base sits submerged. Use a callused cutting, keep the crown above the reservoir waterline, and ensure airflow around the base so the wound does not stay wet.
Do I use the same fertilizer as lettuce or tomatoes for hydroponic aloe?
No. If you have a specific nutrient mix meant for leafy greens, use it only at much lower strength and watch for burn. Aloe can tolerate general-crop fertilizers better than high-EC mixes, but always start around half to quarter strength and adjust by EC, not by following the label rate for other hydroponic plants.
How often should I change the nutrient solution for aloe hydroponics?
Aloe can do well on regular hydro schedules, but you still need to keep the reservoir conditions stable. In practice, check pH and EC more often during the first 2 to 3 weeks, then weekly once readings become consistent. Also confirm your system is actually oxygenating if you are using DWC (for example, airflow rate and air stone performance).
My wicking medium stays wet for days, is that okay for aloe?
If you use wicking or semi-hydroponics with perlite, do not let perlite remain saturated right at the crown level. If the medium stays wet for days, it behaves like a wet-soil situation and increases rot risk. Lift the plant slightly higher or reduce wicking height so moisture reaches roots without pooling at the stem base.
How do I tell nutrient deficiency from early root rot in hydroponic aloe?
If roots are brown and slimy, you likely need to treat it as root rot, not a minor adjustment. Remove the plant, trim all mushy tissue, and let the cut ends air dry before reintroducing it to a freshly cleaned, oxygenated reservoir. If the stem base is soft, survival is unlikely because the rot has already reached the crown.
My aloe is bleaching or turning orange-red, should I lower nutrients or light?
Cutting back light intensity too abruptly can slow recovery, because aloe needs enough irradiance to restart healthy growth. If you see bleaching or orange-red stress, reduce light gradually over several days and keep it bright but not harsh. Also keep the reservoir covered, since algae can worsen root oxygen problems under high light.
What is the best hydroponic system for one aloe plant vs scaling up?
For most people, a single plant in a trial setup can work with passive or simple methods, but long-term reliability usually improves with active oxygenation. If you plan to scale, choose a system that maintains oxygen and prevents the stem base from contacting nutrient water, and consider DWC with strong aeration or semi-hydroponics designed to keep roots humid but not flooded.
Can I grow aloe hydroponically in warm rooms?
Yes, but treat “water temperature” as a root-oxygen problem. If your reservoir warms, dissolved oxygen drops and rot becomes more likely. Use insulation, keep the reservoir out of direct sun, and consider a small water chiller or a temperature-stable location if your room often exceeds the mid-to-high 70s °F (around 26 to 27 °C).
Is hydroponic aloe gel safe to use on skin after harvesting?
Harvesting can irritate skin, because aloe latex or sap can cause sensitivity. Stand leaves upright after cutting to drain sap, rinse the gel well, and avoid using gel from plants showing active rot or slime in the root zone. If you are using aloe for skin, let the plant be mature and healthy, not recently stressed.