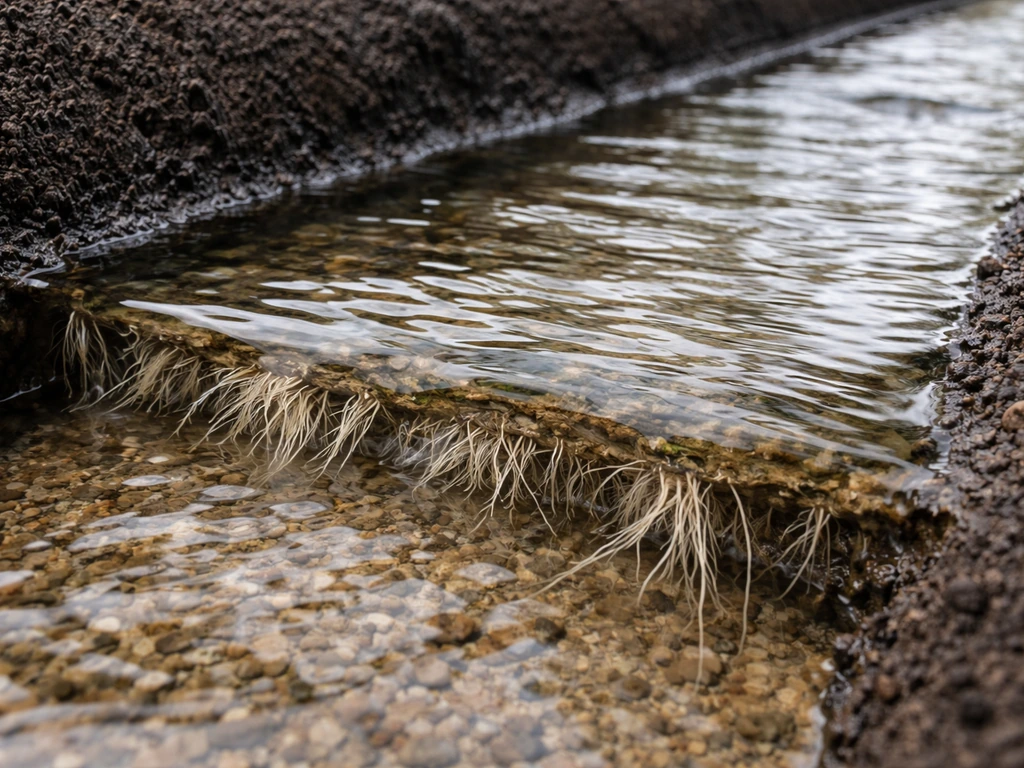
Yes, you can grow wasabi hydroponically, but let's be honest about what that actually means. Wasabi is not lettuce. It is not a plant you drop into a standard DWC bucket and harvest in six weeks. It is a semi-aquatic species that naturally grows in cool, shaded, fast-moving mountain streams in Japan, and every successful hydroponic system for it is really just a careful reproduction of those stream conditions.
How to Grow Wasabi Hydroponically: A Step-by-Step Guide

Marcus Holloway
14 Apr 2026
Call it semi-hydroponic, call it constant-flow culture, call it sawa-style indoor growing. Whatever label you use, the core goal is the same: cool, oxygenated, gently flowing water, the right pH and nutrients, serious shade, and a whole lot of patience. Wasabi takes 18 to 24 months from planting to harvestable rhizome, so this is a long-game crop. If you go in with the right setup and realistic expectations, though, it absolutely works.
Is hydroponic wasabi actually possible (and what system to use)
The short answer is yes, but the system design is what separates success from a pile of rotting crowns. Classic static deep water culture or slow drip setups fail with wasabi because stagnant or low-flow water drops dissolved oxygen (DO) levels fast, and wasabi roots are brutally sensitive to low DO. Research from in vitro hydroponic culture studies has shown directly that depressed plantlet growth in wasabi is caused by reduced root water and nutrient uptake when dissolved oxygen is low. That is not a minor factor. That is the reason most beginner attempts fail.
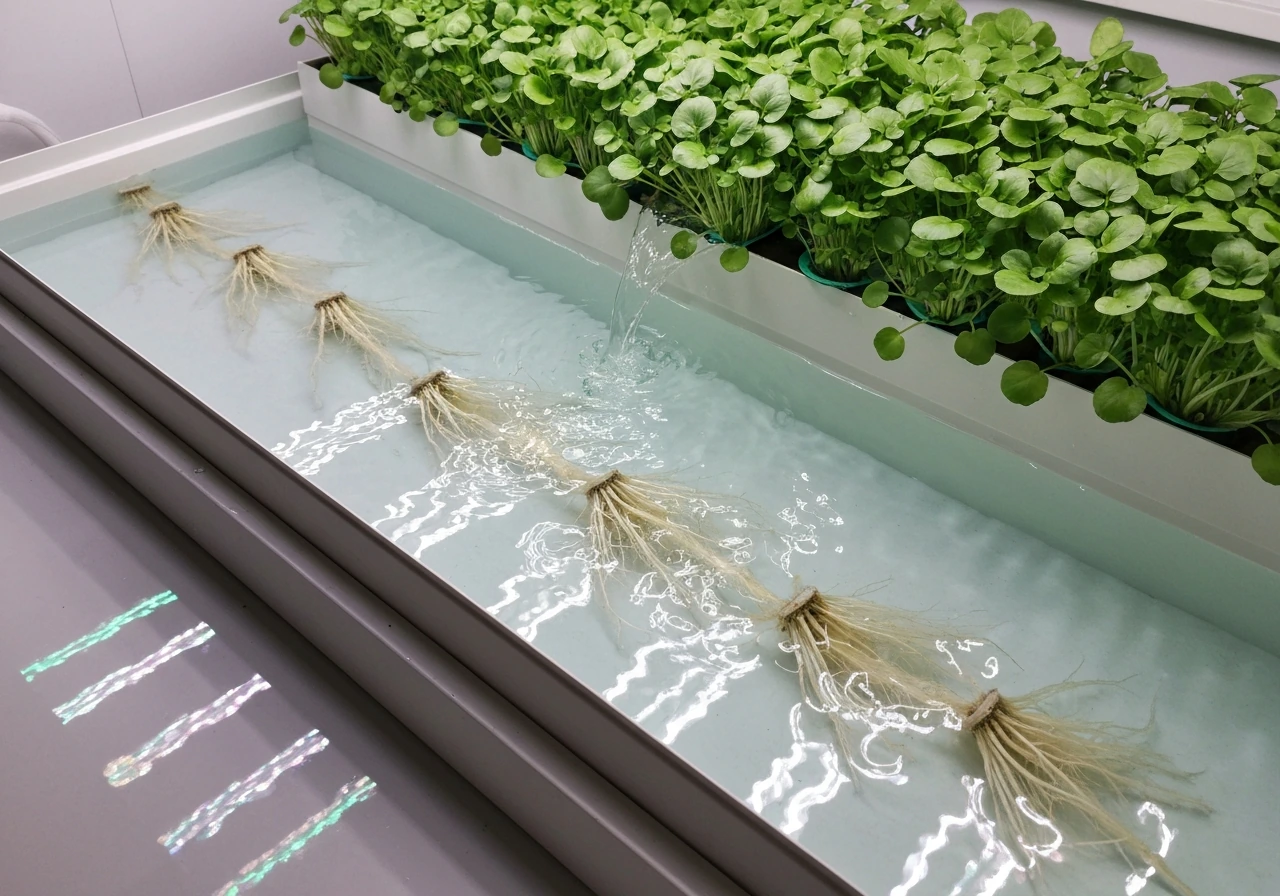
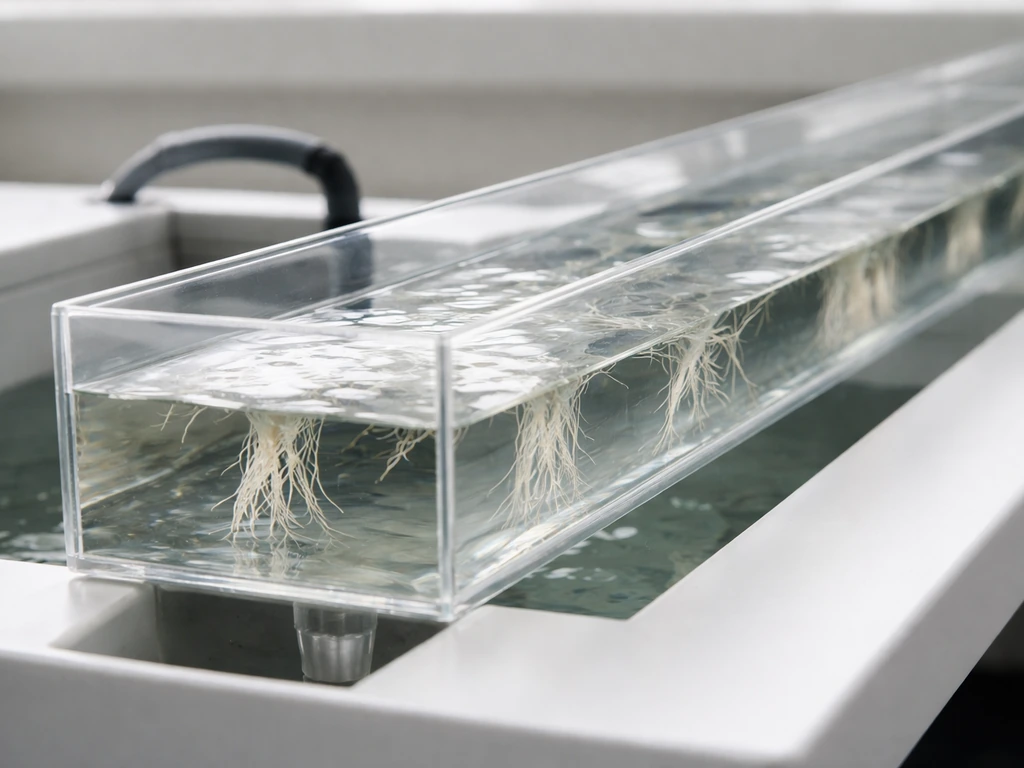
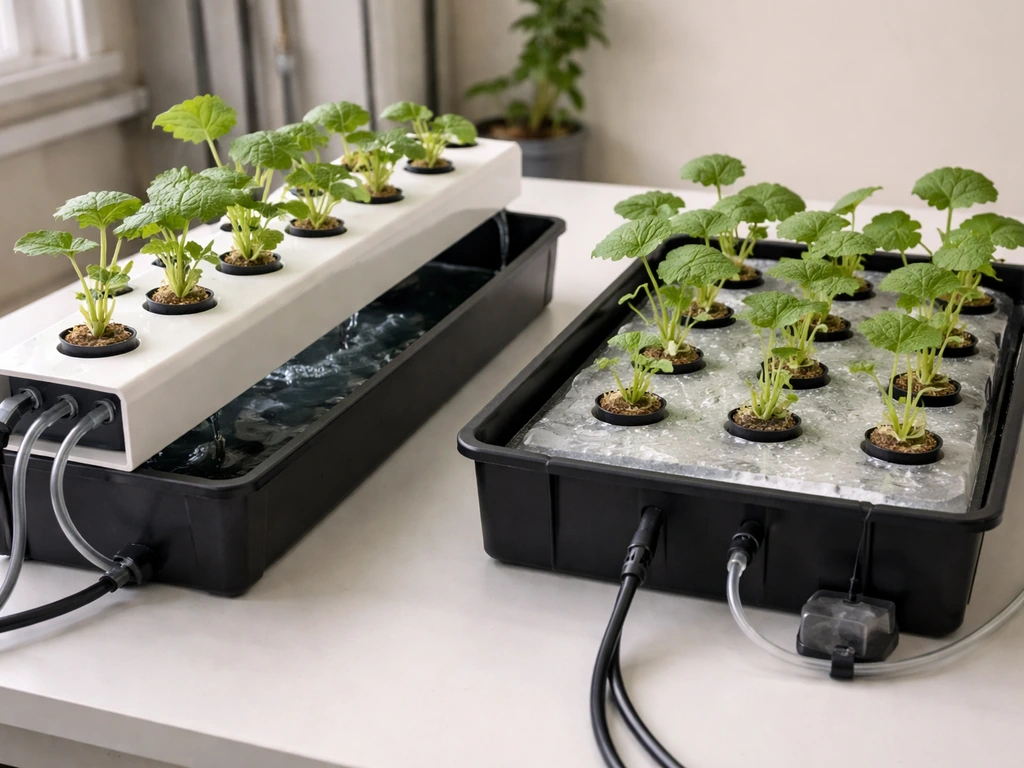
The system types that actually work for wasabi fall into two practical categories. The first is a constant-flow recirculating channel, essentially an NFT-adjacent setup where water moves continuously over the root zone at a shallow depth with high oxygenation. The second is a modified raft or flood-style bed with aggressive aeration and a recirculating pump that never lets water sit still. Think of it less like traditional hydroponics and more like a miniature indoor stream. Washington State University's wasabi research frames the whole cultivation model around cool, clear, running water with high dissolved oxygen, and that framing is the right mental model for designing your system.
If you already grow aquatic or semi-aquatic plants and understand how recirculating water systems behave, wasabi fits naturally into that knowledge base. If you want to see how this kind of system compares to other water-based growing approaches, the article on how to grow watercress hydroponically is a useful reference point, since watercress shares wasabi's preference for cool, oxygenated, flowing water and is a good beginner calibration crop before committing to a two-year wasabi project.
Start materials and what to buy
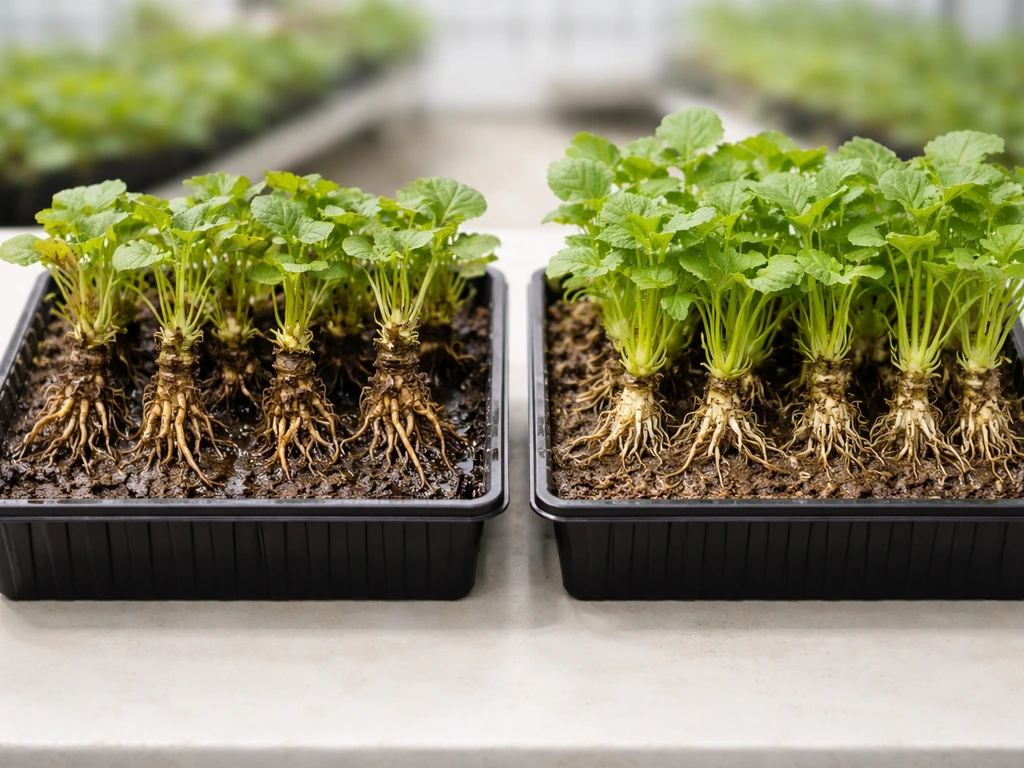
Your starting material matters more with wasabi than almost any other crop. You have three options: rhizome cuttings, crowns (the growing tip of an existing plant with some stem tissue), or nursery transplants. A US supplier of fresh wasabi rhizomes, such as Half Moon Bay Wasabi, is a commercial source for planting material in rhizome form. Seed is not a realistic option for most growers. Wasabi seeds have very short viability, are hard to source, and germination is unreliable. Skip them.
Crowns and rhizome cuttings from a reputable supplier are the most accessible starting point for hobbyists. Look for material that is firm, green, and free of soft spots. Soft or brown tissue is already compromised and will rot in your system before it establishes. Nursery transplants, usually grown via tissue culture in controlled lab conditions, are the most reliable option if you can source them. Commercial wasabi production in controlled environments increasingly relies on tissue-cultured planting material for uniformity, and if you are serious about a productive setup rather than an experiment, paying more for clean tissue-culture transplants is worth it.
In North America, Real Wasabi and a handful of specialty herb nurseries sell crowns and transplants. Expect to pay significantly more than you would for a standard herb start. One crown can cost anywhere from $15 to $40 depending on size and supplier. Buy at least three to five plants for your first run so you have redundancy if one or two struggle to establish. When your plants arrive, inspect every piece carefully, trim any soft or dark tissue with a sterile blade, and get them into the system the same day.
System design and setup
Water depth, flow, and channel design
For a constant-flow channel system, keep water depth shallow, around 2 to 4 cm at the root zone. You want water moving across the roots, not drowning them. A slight slope in the channel (1 to 2 percent grade) helps flow stay consistent. Flow rate should be strong enough that water never pools or stagnates but gentle enough that it does not physically disturb the plant crowns. A recirculating pump cycling the full reservoir volume every 15 to 30 minutes is a reasonable starting target.
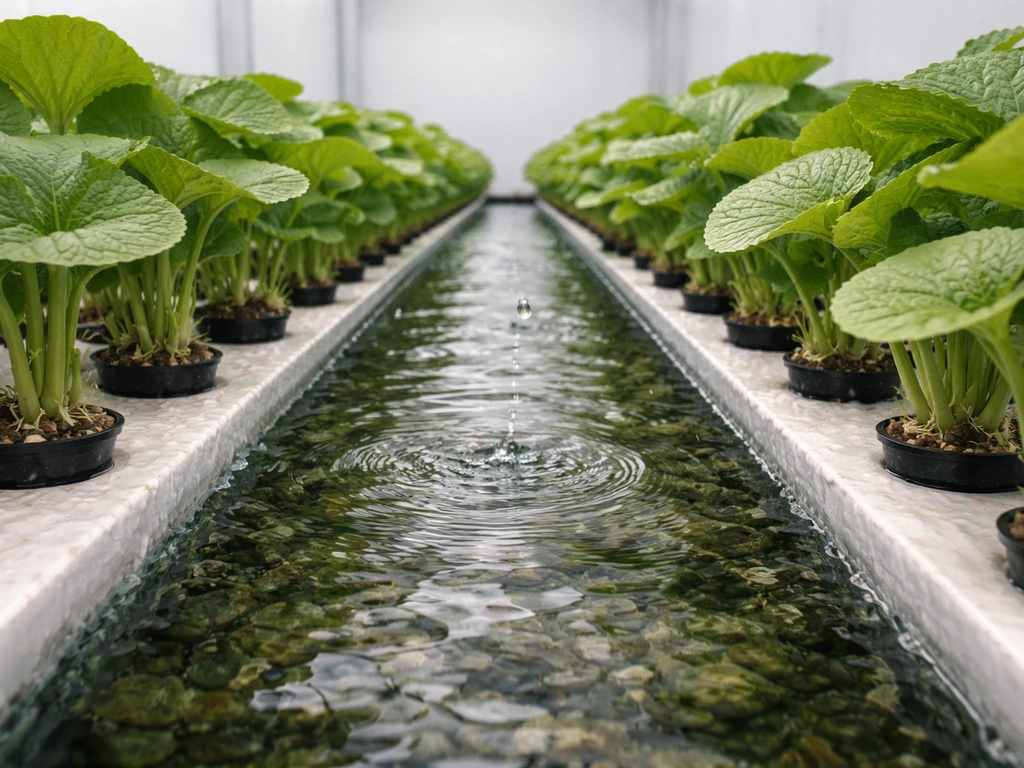
If you prefer a bed-style setup, use a shallow container (10 to 15 cm deep) filled with an inert medium like pea gravel, coarse sand, or a mix of both. This replicates the streambed substrate that traditional sawa wasabi growers use. Plants sit with their crowns just above the medium surface. Water flows in at one end of the bed and drains from the other, continuously recirculating. Washington State University's cultivation guides describe this kind of sand-and-gravel bed approach as a standard production method.
Oxygenation and filtration

This is not optional: you need active aeration in your reservoir. Air stones, venturi injectors, or a waterfall-style return from your pump all help keep dissolved oxygen high. Target DO above 7 mg/L, and ideally closer to 8 to 10 mg/L. The cooler your water, the easier this is to maintain, since cold water holds more oxygen than warm water. Run a quality air pump continuously. Do not cut corners here. Low DO is the single most common reason wasabi roots fail to develop or rot out.
Filtration matters too. Wasabi is sensitive to debris, algae, and microbial buildup in the water. Use a mechanical pre-filter (a simple sponge filter or sediment screen) to catch particulates before they cycle through your root zone. UV sterilizers are worth considering if you are running a larger system, since they knock down pathogen load without chemicals that could stress wasabi roots.
Water parameters and environment
Getting these numbers right is the difference between wasabi that grows and wasabi that slowly dies. There is not a lot of wiggle room with this plant.
| Parameter | Target Range | Notes |
|---|---|---|
| Water temperature | 10–15°C (50–59°F) | Above 20°C growth stalls; above 28°C causes heat damage and soft rot |
| Air temperature | 8–20°C (46–68°F) | Below 8°C inhibits growth; above 28°C causes leaf damage |
| pH | 6.0–6.5 | Adjust toward 6.2 actively; drift above 7.0 causes nutrient lockout |
| EC | 1.2–2.0 mS/cm (hobby); up to 3.0 in research settings | Start low; wasabi is sensitive to salt stress |
| Dissolved oxygen | 7–10 mg/L | Critical; low DO directly depresses root function |
| Light (PPFD) | 50–80 µmol m⁻² s⁻¹ | Wasabi is a shade plant; high light causes leaf burn and heat stress |
| Photoperiod | 12–14 hours | 12 h is sufficient; longer days used in some commercial schedules |
| Humidity | 70–85% | High humidity prevents leaf desiccation; avoid stagnant air |
Water temperature is the hardest parameter to manage indoors. If your ambient room temperature is above 20°C, you will need an aquarium chiller or a water chiller inline with your recirculating pump. There is no workaround. Wasabi tolerates air temperatures up to around 28°C before heat damage sets in, but the root zone water must stay cool. Running warm water through this system will trigger soft rot and kill plants within days. This is the one piece of equipment most beginners skip and then regret.
For light, wasabi is a shade plant. In plant factory experiments, it was grown successfully at just 60 µmol m⁻² s⁻¹ with a 12-hour photoperiod. Full-spectrum LED grow lights set to low intensity work fine. Do not try to push wasabi with high light like you might with tomatoes or peppers. You will bleach the leaves and raise leaf-zone temperature, both of which cause problems. If you are growing near a north-facing window with supplemental light, that is actually a reasonable setup.
Nutrient strategy for wasabi
Wasabi does not need a heavy nutrient load. In fact, one of the insights from running-water sawa cultivation is that the constant flow of fresh, lightly mineralized water reduces the need for heavy fertilization compared to more intensive crops. In a recirculating semi-hydroponic system, you are essentially replacing that dilution effect with careful EC management.
For a starter nutrient solution, use a balanced hydroponic base formula (Hoagland-based products work well, and research studies on wasabi have used Hoagland solutions at fractions of full strength, from 1/10 to 1/2 strength). Start at EC 1.2 to 1.5 mS/cm for establishing plants. Once the plant is actively growing with new leaf production, you can nudge EC up toward 1.8 to 2.0. Research settings have used up to 3.0 mS/cm, but hobby systems with less precise control should stay conservative. If you see tip burn or leaf margin browning, EC is likely too high.
Nitrogen form matters. Studies evaluating different ammonium-to-nitrate (NH4-N:NO3-N) ratios found that the balance of nitrogen forms affects wasabi rhizome and shoot development. Lean toward nitrate-dominant formulas (higher NO3-N relative to NH4-N) for root development and overall plant health. High ammonium in the root zone can cause toxicity symptoms in wasabi, especially at the low pH you are targeting.
For pH, target 6. 0 to 6. In hydroponic research on Japanese wasabi cultivars, Hoagland solution was evaluated across pH conditions including 5. 0, 6.
0, 7. 0, 8. 0, and 9. 0, illustrating how pH management was experimentally varied and important in wasabi hydroponics [6.
0 to 6. ](https://www. tandfonline. com/doi/abs/10.
1080/00380768. 2023. 2276716). 5 and check daily, especially in the first few weeks.
Wasabi systems tend to drift upward in pH as roots absorb nutrients. If your source water is alkaline, you will need to acidify it actively, typically with pH-Down (phosphoric acid). Some aquaponics-based wasabi systems have been managed by gradually bringing pH down from higher values to around 6. 2 as a target.
Do not let pH climb above 7. 0 or you will get nutrient lockout, especially for iron and manganese, which shows up as interveinal chlorosis on new leaves.
If you want to explore a leaner nutrient approach that mimics the low-input water-flow model, it is worth reading about how to grow fenugreek hydroponically for comparison, since fenugreek is another herb that responds well to dilute nutrient solutions and gives you useful hands-on experience managing EC and pH in a recirculating system before scaling up to wasabi.
Step-by-step growing process
- Set up and cycle your system before planting. Run your pump, aeration, and chiller for at least 48 hours. Confirm water temperature is stable at 10–15°C, pH is dialed to 6.0–6.5, and EC is set to 1.2 mS/cm with your starting nutrient solution. Do not plant into an uncycled or thermally unstable system.
- Prepare your planting material. Inspect crowns or transplants carefully. Trim any soft, brown, or mushy tissue with a sterile blade. Let cut surfaces air-dry for 15 to 30 minutes before placing in the system (this reduces immediate rot risk at cut points).
- Place crowns or transplants in the growing medium (gravel, coarse sand, or rockwool blocks work well). Position the crown just above the medium surface with roots down into the substrate or hanging into the water flow. Do not bury the crown itself or it will rot.
- Reduce flow slightly for the first week to minimize physical stress on roots that are not yet anchored. Then increase to your target flow rate once you see the plant has settled and new leaf growth begins.
- Monitor daily for the first two weeks: check temperature, pH, and DO every day. Adjust pH if it drifts. Watch for any soft or mushy tissue at the crown or root base and remove it immediately.
- Once plants show active new leaf growth (usually weeks 3 to 6), increase EC gradually toward 1.5 to 1.8 mS/cm if growth seems slow. Do not rush this. Wasabi grows slowly by nature.
- At months 2 to 4, you should see established leaf canopy and root development into the substrate. This is the vegetative growth phase. Maintain all parameters consistently. Do partial water reservoir changes (about 20 to 25 percent) every two weeks to prevent nutrient salt buildup.
- From month 6 onward, the rhizome begins to develop more substantially. Continue monitoring and maintaining water quality. Do not disturb roots unnecessarily during this phase.
- At months 18 to 24, rhizomes should be harvest-ready (roughly pencil-thick to finger-thick, firm, and bright green inside when cut). Leaves are harvestable at any point throughout the grow and are usable fresh for their wasabi flavor.
The timeline feels long, and it is. But here is the honest upside: wasabi leaves are usable the entire time. You can harvest outer leaves for cooking or grating from month two onward without harming the plant. The rhizome is the slow payoff, but you are getting a productive edible crop well before you get there.
Troubleshooting common problems
Crown and root rot
This is the most common failure mode and almost always traces back to one of three causes: water temperature too high, DO too low, or a crown that was already compromised when you planted it. If you see soft, mushy tissue at the crown base, act immediately. Remove the plant, cut away all affected tissue with a sterile blade, let the wound surface dry for 20 to 30 minutes, and replant. If the rot is too extensive, the plant is a loss. Prevent this by keeping your water chilled and aerated, and by never burying the crown below the medium surface.
Slow or stalled growth
Wasabi is genuinely slow, but if you are seeing zero new leaf production after 6 to 8 weeks, something is off. Check DO first (most growers do not check this enough). Then check water temperature. Then look at pH, which may have drifted into a range that locks out key nutrients. If all parameters look correct and growth is still stalled, try a modest EC bump from 1.2 to 1.5 and see if that prompts a response over the following two weeks.
Algae in the system
Algae thrives in the same cool, nutrient-rich water that wasabi likes, so this is a constant management challenge. Block light from your reservoir and water channels completely. Wasabi needs low light on its leaves, but zero light should reach the water surface. Opaque reservoir lids, covered channels, and light-blocking medium surface coverage all help. If algae is already established, a UV sterilizer in the return line will clear it up without chemicals that might stress wasabi. This is similar to the algae management challenge that comes up when you grow hydro crops in any recirculating system with nutrient-rich water.
Leaf browning and tip burn
Brown leaf tips usually mean EC is too high or calcium uptake is being blocked. Check EC and lower it slightly if it is above 2.0. Yellow or pale new leaves (interveinal chlorosis) point to pH drift above 7.0 causing iron or manganese lockout. Bring pH back down to 6.0 to 6.5. Soft, dark patches on leaves (not at margins) that spread quickly usually mean the ambient temperature is too high or humidity is too low, creating fungal conditions. Improve airflow and lower air temperature.
Temperature spikes
A single day above 25°C water temperature can set your plants back weeks. If you do not have a chiller and your room heats up in summer, your wasabi will suffer. Short-term emergency fixes include adding frozen water bottles to the reservoir, but these are not substitutes for a proper chiller. If you are in a climate where indoor temperatures regularly exceed 22°C, factor the cost of a chiller into your system budget from day one. It is not optional for wasabi.
Pests and pathogens
Spider mites and aphids occasionally target wasabi leaves, especially in lower-humidity environments. Keep humidity at 70 to 85 percent and inspect leaves regularly. Neem oil or insecticidal soap sprays work, but rinse leaves afterward to keep any runoff out of your water system. Pythium (water mold) is the main systemic pathogen risk and is best prevented with high DO, clean filtration, and avoiding organic material buildup in the system.
Maintenance checklist and planning for next cycle
Daily tasks
- Check water temperature (target 10–15°C)
- Check and adjust pH to 6.0–6.5
- Visually inspect crowns and visible roots for soft spots or discoloration
- Confirm pump, aeration, and chiller are running correctly
Weekly tasks
- Measure EC and adjust if outside target range
- Check dissolved oxygen with a DO meter (target 7–10 mg/L)
- Inspect leaves for pests, tip burn, or chlorosis
- Remove any dead or yellowing leaves from the system to reduce organic debris
- Check filtration and clean pre-filters if flow has reduced
Bi-weekly and monthly tasks
- Partial reservoir change of 20–25% to prevent nutrient salt accumulation
- Check and clean pump intake and any UV sterilizer components
- Inspect roots for development progress and any signs of Pythium
- Photograph plants to track growth over time (useful for diagnosing slow periods)
Harvesting and planning your next cycle
Wasabi leaves can be harvested throughout the grow. Snap off outer, fully developed leaves cleanly at the petiole base. The plant will continuously produce new leaves from the center. Do not strip more than a third of the leaf mass at once.
Rhizomes are ready at 18 to 24 months when they are firm, consistently green, and roughly the diameter of your finger or larger. To harvest, lift the plant carefully from the medium, cut the rhizome from the root mass, and use fresh immediately or refrigerate for up to two to three weeks. Freshly grated homegrown wasabi has a noticeably brighter, more complex flavor than anything you buy in a tube.
For your next cycle, use the side shoots (offshoots growing from the base of a mature plant) as your new planting material. These are essentially free crowns from your existing grow and will establish faster than purchased material. Wasabi plants produce these offsets throughout their life, so a well-managed system becomes largely self-propagating over time.
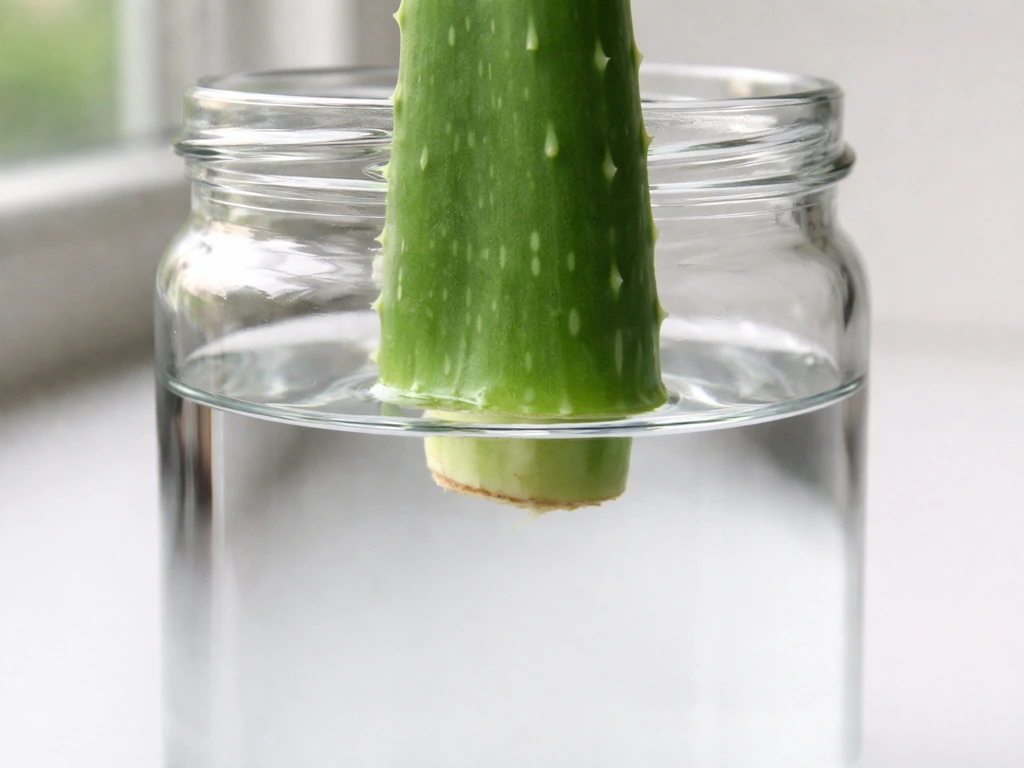
If you want to experiment with propagating from non-root material while you wait for your wasabi to mature, techniques used with other semi-aquatic plants are worth exploring. For example, learning how to grow aloe vera in water without roots gives you hands-on practice with water-based propagation timing and rooting indicators that translate to managing wasabi crown health in your recirculating system.
System comparison: which setup works best
If you are deciding between system types, here is a practical breakdown:
| System Type | Pros | Cons | Best For |
|---|---|---|---|
| Constant-flow NFT-style channel | High oxygenation, easy DO management, scalable | Requires precise slope and flow control; roots may dry if pump fails | Experienced growers with stable setups |
| Shallow gravel/sand bed with recirculating flow | Mimics natural streambed, stable root zone, forgiving | Harder to inspect roots; gravel needs cleaning over time | Beginners and hobbyists |
| Raft/DWC with aggressive aeration | Simple build, low cost | DO management is more demanding; temperature harder to control at scale | Small test grows or single-plant experiments |
| Aquaponics hybrid (fish + wasabi) | Fish waste provides some nutrients; natural system feel | More complex to balance; fish health adds variables | Experienced aquaponic growers |
For most hobbyists starting out, the shallow gravel bed with a recirculating pump, inline chiller, and air stone aeration is the most reliable path. It is forgiving, close to wasabi's natural habitat, and does not require the precision of a dialed-in NFT channel. If you are already comfortable running more complex recirculating setups (the kind of experience you might build by working through whether you can grow aloe hydroponically and other semi-aquatic crops first), then an NFT-style channel is worth the upgrade for better root oxygenation and easier monitoring.
Wasabi is one of the most rewarding crops you can grow in a water-based system, precisely because it is difficult. Getting the parameters right and watching a rhizome develop over 18 months in a system you built yourself is genuinely satisfying. Start with clean planting material, keep the water cold and moving, protect your DO, and do not rush the nutrient load. That is the whole game.
FAQ
How do I know whether I actually need a water chiller for wasabi?
If your room stays above 20°C, you should assume you need active water cooling. Wasabi can tolerate warm air for short periods, but the root-zone water temperature must stay cool to prevent soft rot. A chiller sized for your reservoir volume and turnover, not just your room temperature, is the reliable approach.
What should I do if a new wasabi crown arrives with minor rot or soft spots?
Use a sterile blade to trim down to firm, green tissue, then let the wound dry briefly before replanting (about 20 to 30 minutes). After you replant, run stronger aeration and keep EC and pH stable, because injured crowns are more sensitive to nutrient burn and drifting pH during recovery.
Can I grow wasabi under grow lights near a window?
Yes, but only at a low intensity and with full light blockage from the reservoir. Wasabi can handle shade, so avoid bright direct light on leaves, especially heat-producing LEDs. The reservoir surface must stay unlit to prevent algae, even if the plant canopy is in dim light.
My wasabi stopped growing, should I increase nutrients immediately?
Start with lower nutrients and add gradually, EC 1.2 to 1.5 for establishment. If growth stalls, make one change at a time, first verify dissolved oxygen and temperature, then adjust EC modestly. Repeated large nutrient swings are more likely to trigger tip burn or nutrient lockout than to “wake up” stalled plants.
How often should I test and adjust pH, and what if my tap water keeps pushing it up?
Aim for pH 6.0 to 6.5, but also consider your water source alkalinity. If your tap water has high buffering, it may push pH up fast, requiring more frequent acid dosing or a pre-treatment approach. Check daily early on, then at least a few times per week once stable.
Do I really need a dissolved oxygen meter, or can I rely on aeration alone?
Measure dissolved oxygen in addition to “air pumping.” An air stone that runs continuously can still under-deliver oxygen if water is too warm, flow is too slow, or the system has dead zones. If you cannot measure DO, treat cooler water, strong aeration, and continuous circulation as non-negotiable safeguards.
What’s the best way to clear algae without harming the wasabi?
If algae is already established, mechanical cleaning plus UV sterilization in the return line usually works better than adding chemicals. Also block light completely from the reservoir and cover the channel surfaces, because algae will return if light reaches the water.
How should I position the crown in the bed or channel so it does not rot?
A good rule is to never bury the crown below the medium surface. Crown positioning affects both oxygen exposure and rot risk. If you see frequent crown issues, check that crowns sit just above the medium and that the water is moving past the root zone, not pooling around the crown.
How much leaf harvesting can I do before it slows rhizome growth?
Harvesting leaves is fine for months, but do not strip too aggressively. Stick to taking outer, fully developed leaves and avoid removing more than about one third of the leaf mass at once. Over-harvesting forces the plant to spend energy on regrowth instead of rhizome development.
When is it safe to propagate wasabi using offshoots?
Use side shoots from a mature plant after they naturally form off the base, those are usually the fastest to establish. If you attempt propagation from anything that is not a true offset, expect lower survival and longer recovery times, which can be risky while your main rhizome is still developing.
Is it worth trying to grow wasabi from seed or non-root pieces while waiting for rhizomes?
Yes, but it is not instant and it is not uniform. Wasabi tissue is slow to root and establish, so cold, stable oxygenation and gentle handling matter more than “try harder.” Keep expectations realistic, and treat it as a longer, higher-failure experiment compared with crowns or transplants.
How can I tell whether the problem is EC, pH, or root rot?
Look for pattern-based diagnosis. Tip burn and browning often point to EC being too high, while interveinal chlorosis on new leaves suggests pH drifting upward and iron or manganese lockout. If you see soft rot on the crown, treat it as an oxygen or temperature problem first, then adjust water parameters.
What does it mean if my wasabi develops brown leaf tips?
Brown leaf tips after you recently changed inputs usually correlate with EC or calcium-related uptake disruption. First confirm EC is not above about 2.0, then stabilize pH back to 6.0 to 6.5. If symptoms persist, review filtration and circulation, because uneven nutrient delivery can mimic nutrient imbalance.