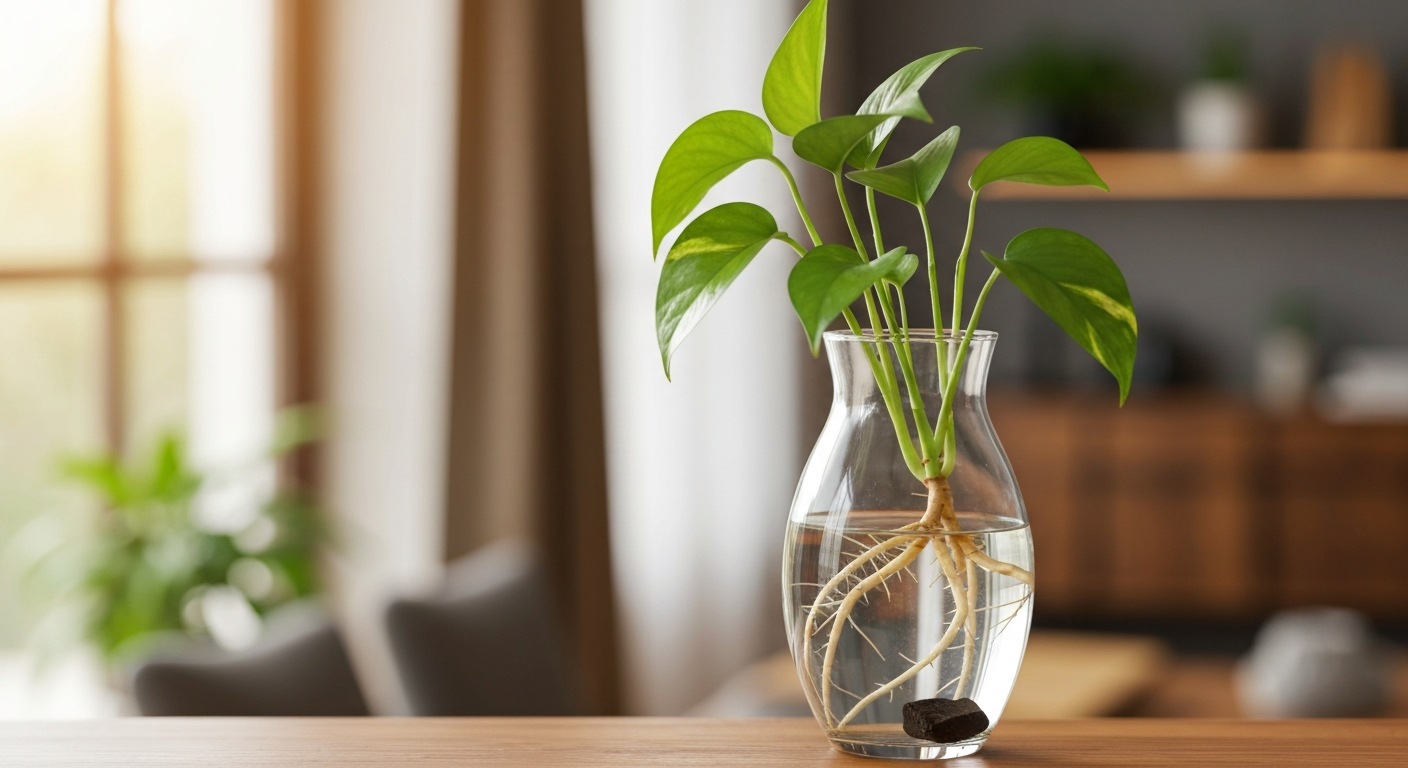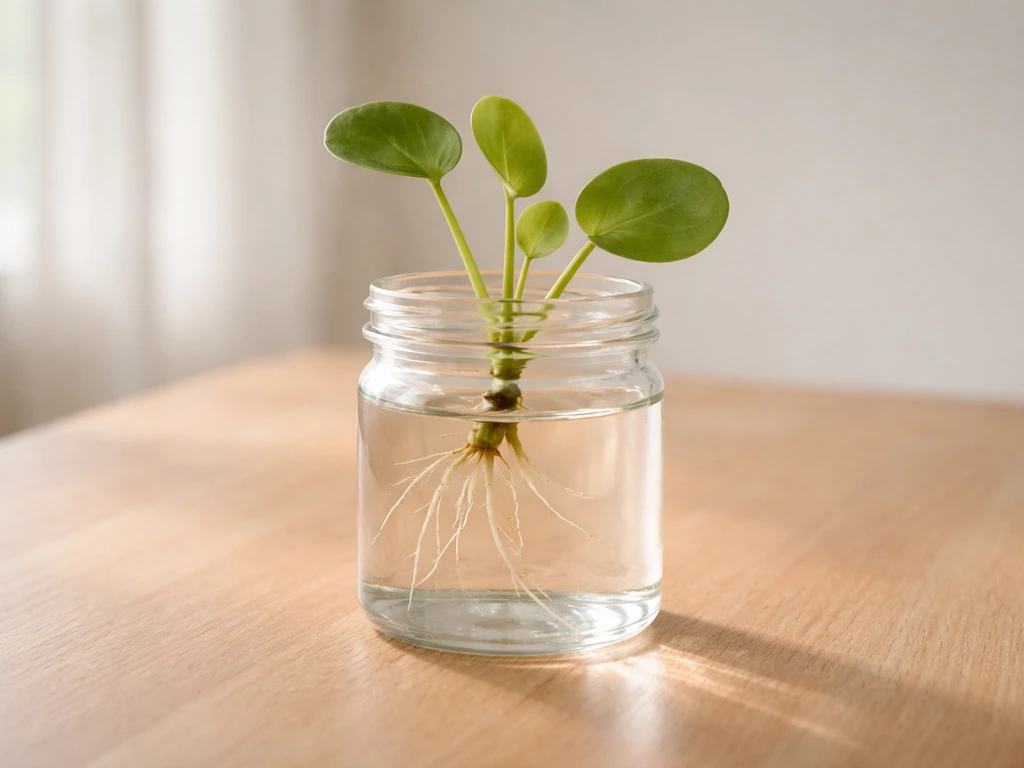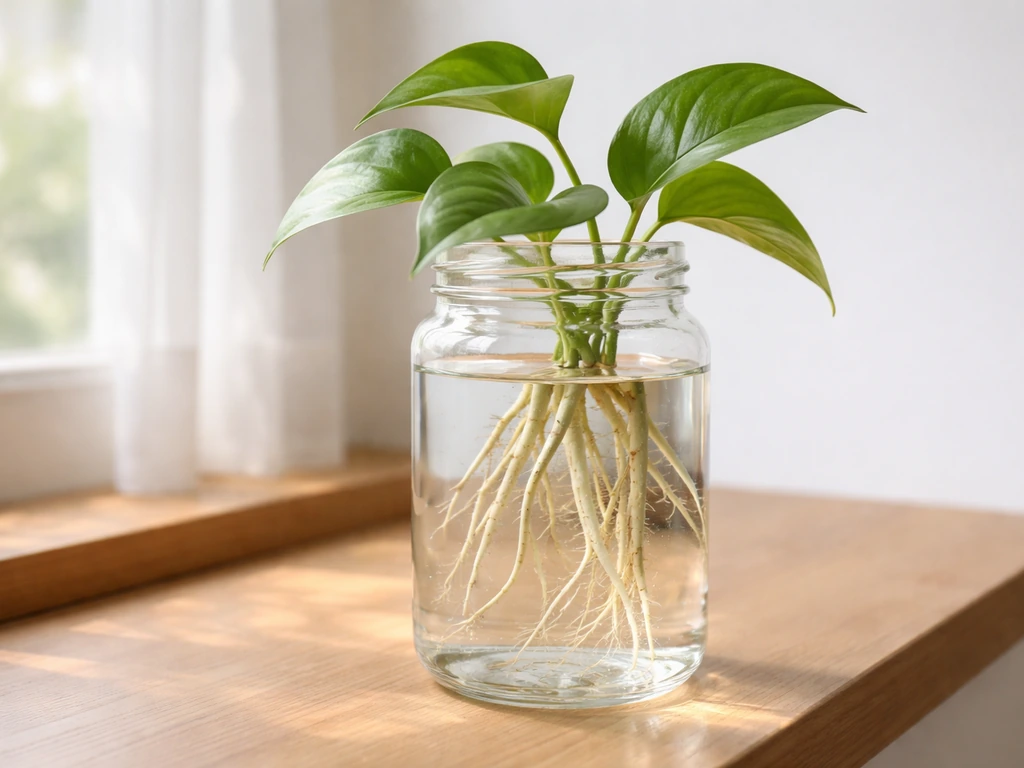
You can root most common houseplant cuttings in a jar of plain water in as little as 7 to 21 days. Trim a 5–15 cm stem section just below a node, strip the lower leaves so no foliage sits underwater, drop it in a clean container with dechlorinated water, and set it somewhere warm with bright indirect light. Extension guidance (Propagating Houseplants, University of Nevada, Reno Extension) recommends taking 5–15 cm stem sections that include at least one node, making clean angled cuts with sterile shears, removing lower leaves so the node will be submerged, and taking cuttings while the plant is actively growing Propagating Houseplants — University of Nevada, Reno Extension. That is genuinely the whole setup for beginner-friendly plants like pothos, coleus, tradescantia, philodendron, and mint. The rest of this guide covers the details that separate a tangle of healthy white roots from a jar of rotting stems.
How to Grow Plant Clippings in Water: Step‑by‑Step Guide
Quick start: 5-step water propagation for busy hobbyists
If you have 15 minutes and a clean jar, you can get cuttings into water today. Here is the streamlined version for easy-rooting species. Everything else in this article is an expansion of these five steps.
- Pick a healthy stem and cut 5–15 cm (2–6 inches) just below a node using clean, sharp scissors or a blade sterilized with 70% isopropyl alcohol.
- Strip all leaves from the bottom third of the stem so no leaf material will be submerged. Leave two or three leaves at the top.
- Fill a clean glass or jar with dechlorinated tap water (let tap water sit uncovered for 24 hours, or use collected rainwater). The node must be submerged; the remaining leaves must not be.
- Place the jar in a warm spot (20–25°C / 68–77°F) with bright, indirect light. Avoid direct sun on the jar, which heats water and drives algae.
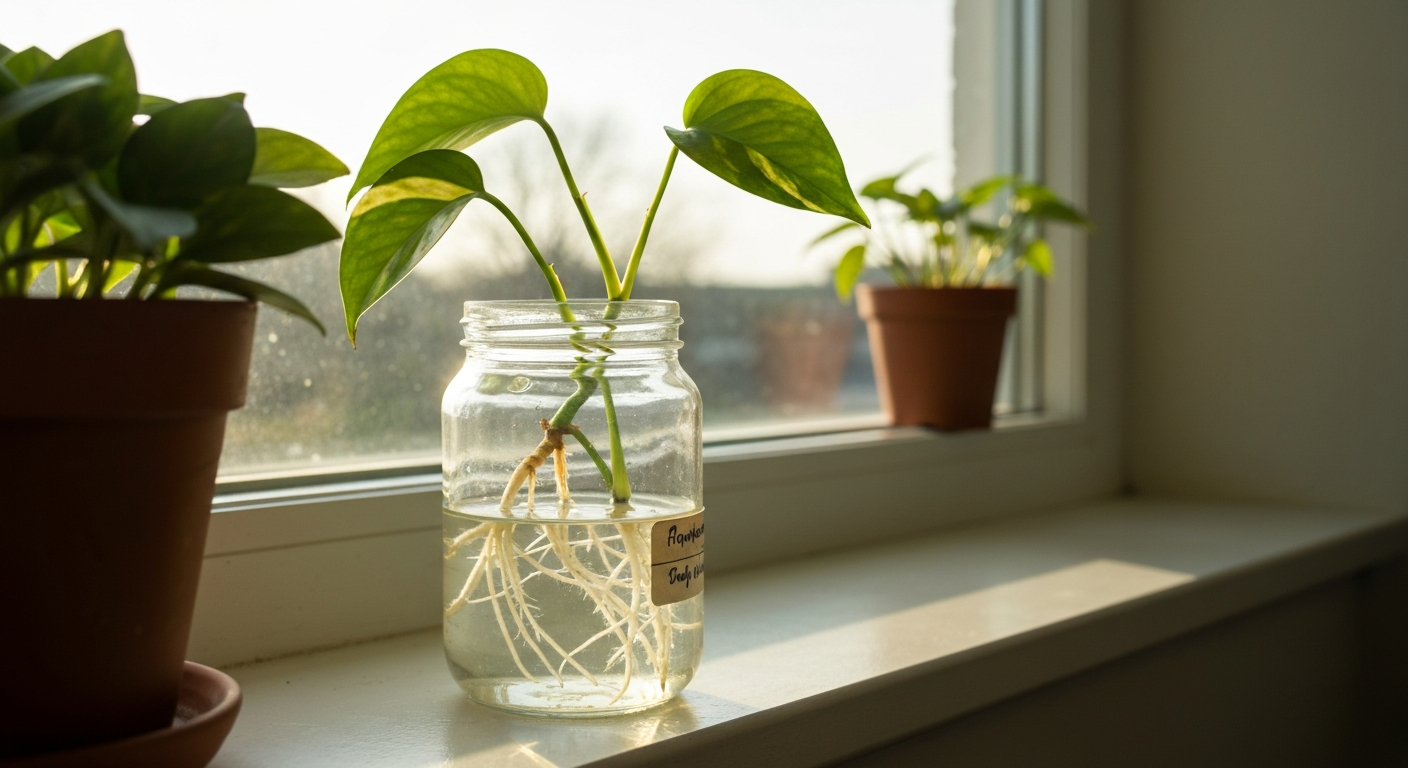
- Change the water fully every 3–7 days. Roots typically appear in 7–21 days depending on the species. Once roots are 2–5 cm long, you can pot up or leave in water long-term with dilute nutrients.
I have done this on a kitchen windowsill with second-hand jelly jars and nothing else, and it works reliably for the plants listed in the next section. The more advanced setups later in this guide just improve speed and consistency.
Which plants root reliably in plain water
Not every plant will cooperate. Water propagation works best for soft-stemmed and semi-woody plants that form adventitious roots easily from stem tissue. These plants produce white, tender 'water roots' relatively quickly under the right conditions. Succulents and most cacti are the main exceptions: they need to callus on dry media first, and sitting in water almost always leads to rot. Stick to the species below and you will rarely fail.
| Plant | Scientific name | Typical rooting time in water | Notes |
|---|---|---|---|
| Golden pothos | Epipremnum aureum | 14–21 days | One of the most forgiving; buds break in 2–3 weeks in warm, bright-indirect conditions |
| Philodendron (vining) | Philodendron hederaceum and related spp. | 14–21 days | Use 7–15 cm cuttings with at least one node; water rooting is well established |
| Coleus | Plectranthus scutellarioides | 7–14 days | Roots extremely fast; change water every 3–5 days to prevent rot |
| Tradescantia / wandering spiderwort | Tradescantia zebrina, T. pallida | 3–10 days | Among the fastest-rooting houseplants in water |
| Mint | Mentha spp. | 7–14 days | Very reliable; roots visible quickly; standard hobbyist method |
| Chinese money plant / coin plant | Pilea peperomioides | 14–21 days | Separate offsets/pups from the mother plant; root in water or moist soil |
| Syngonium / arrowhead vine | Syngonium podophyllum | 14–21 days | Similar care to pothos; needs a node submerged |
| Devil's ivy / pothos variants | Epipremnum / Scindapsus spp. | 14–21 days | Multiple cultivars all root well; same protocol as golden pothos |
Money plant, coin plant, and fortune plant all deserve a specific mention because they are among the most searched propagation topics in this niche, and the naming can be genuinely confusing. Depending on where you are, any one of these common names might refer to Epipremnum aureum (pothos), Pilea peperomioides, Pachira aquatica (braided money tree), or even Lunaria annua. The propagation method differs slightly for each, so identifying your plant by scientific name before you start saves frustration.
Regional note: identifying these plants locally
If you are sourcing a cutting locally in Tamil Nadu or elsewhere in South India, the common English names used in garden centres rarely match what is sold in markets. Below is a quick reference that maps the scientific names, English trade names, and widely used Tamil/regional names so you can confirm you have the right plant before propagating.
| Scientific name | Common English name(s) | Tamil / regional name (common usage) | Verify by |
|---|---|---|---|
| Epipremnum aureum | Golden pothos, money plant, devil's ivy | Panam chedi (பணம் செடி), pothos | Heart-shaped waxy leaves with yellow-green variegation on long vining stems |
| Pilea peperomioides | Chinese money plant, coin plant, pancake plant | Nāṇaya chedi (நாணய செடி) — newer usage | Round, pancake-shaped leaves on long individual petioles attached to central stem |
| Pachira aquatica | Money tree, braided money plant, fortune plant | Paṇa marathu (பண மரம்) — in some nurseries | Braided trunk with palmate compound leaves; slow to root from cuttings |
| Lunaria annua | Honesty plant, silver dollar plant, money plant (UK) | Rarely sold in South India | Flat, papery, translucent seed pods resembling coins |
| Dracaena braunii | Lucky bamboo, fortune plant | Aṭṭi chedi — occasionally | Straight hollow-looking green stems sold in bundled arrangements, aquatic/semi-aquatic |
A reliable way to confirm the identity of any plant you buy locally: photograph the leaf shape, stem structure, and any variegation, then cross-check against an authoritative botanical database or ask at a university extension nursery. Tamil names are not standardised across nurseries, so the scientific name is always the safest common ground. If you are working with money plant or coin plant propagation specifically, the sibling guides on this site go deeper into species-specific care and faster-rooting techniques for those varieties. For details on additives and exact dosages for money plant varieties, see our guide on what to add in water to grow money plant. See our guide on how to grow fortune plant in water for detailed, species-specific instructions. See our guide on how to grow coin plant in water for species-specific steps and long-term care. See our guide on how to grow money plant in water faster for species-specific steps and accelerated rooting tips. See our step-by-step guide on how to grow money plant in water for species-specific propagation tips and schedules.
Materials and equipment checklist
You do not need much to start, but having the right items on hand before you cut prevents fumbling around while cuttings dry out or get contaminated. Here is what I keep on the bench.
Core (required for any setup)
- Sharp, clean scissors or pruning snips (sterilized with 70% isopropyl alcohol or a 10% bleach solution before use)
- Glass jars or clear/opaque containers of suitable depth (mason jars, old jam jars, or repurposed bottles all work)
- Dechlorinated tap water, collected rainwater, or aquarium water
- A warm, well-lit indoor spot away from direct sun on the container
- Permanent marker and tape for labelling containers with species and cutting date
Helpful additions (improves success rate and monitoring)
- Opaque wrap or dark paper to cover clear jars and block light from reaching the water (reduces algae)
- Activated charcoal (horticultural grade) — a small pinch per litre of water keeps the water fresh between changes
- IBA (indole-3-butyric acid) rooting powder or liquid — optional for easy species, useful for slower-rooting or semi-woody cuttings
- Small aquarium air pump and airstone — aeration speeds rooting and dramatically reduces rot risk at higher temperatures
- Basic liquid hydroponic fertilizer (e.g., a balanced N-P-K formula) — for feeding once roots reach 2–5 cm
- Thermometer — water temperature between 20–25°C is the target; anything over 28°C dramatically increases bacterial activity
- pH test strips or a basic pH meter — target pH 6.0–7.0 for most common houseplant cuttings
Optional hydroponic gear (for intermediate and advanced setups)
- Net pots and a small hydroponic reservoir or tote with lid (for growing on cuttings long-term after rooting)
- Hydroponic nutrient solution (two-part or three-part formulas are easiest for beginners)
- TDS/EC meter — tells you nutrient concentration in the water (target 300–600 ppm EC for rooting phase, 800–1,400 ppm for established plants in water culture)
- LED grow light with a timer (14–16 hours for vegetative growth, 12 hours for maintenance) if natural light is inconsistent
- Small submersible water pump or recirculating reservoir for larger setups
Choosing and preparing cuttings
The quality of the cutting is the single biggest variable in whether you get roots in two weeks or a rotting stem in one. I have lost batches by rushing this step, so it is worth slowing down here.
Selecting the right stem
- Take cuttings from actively growing stems, not yellowing, stressed, or pest-damaged material.
- Cutting length: 5–15 cm (2–6 inches) is the practical range for most houseplants. Shorter cuttings have less energy reserve; longer ones are more prone to wilting.
- The cutting must include at least one node (the point on the stem where a leaf attaches or a root can emerge). Without a node, no roots will form regardless of what you add to the water.
- Cut in the morning if possible, when plant turgor is highest and stems are most turgid and hydrated.
- For vining plants like pothos and philodendron, aim for a section with one to two nodes and two to four leaves.
Making the cut and prepping the stem
- Sterilize your cutting tool with 70% isopropyl alcohol. Wipe and let dry before cutting.
- Make a clean, angled cut about 0.5–1 cm below the lowest node. An angled cut increases the surface area available for root emergence and prevents water from pooling on the cut surface.
- Remove all leaves that would sit below the waterline. Submerged leaves decay fast and introduce bacteria that cause stem rot.
- Leave two to four healthy leaves at the top. More leaves mean more photosynthesis during rooting, but also more water loss, so remove any oversized or damaged leaves.
- Do not let the cut end dry out. Place the cutting in water within a few minutes of cutting, or wrap it in a damp paper towel if there is any delay.
One mistake I made repeatedly early on: leaving too many leaves on coleus cuttings. The stems wilted because leaf surface area was too high relative to the non-existent root system. Once I started stripping extra leaves aggressively, coleus rooted in under 10 days consistently.
Container and water choices
Glass vs plastic containers
Both work, but they have real trade-offs. Clear glass is easy to monitor and looks good on a shelf, but light passing through the water accelerates algae growth. Plastic is lighter and easier to find in opaque versions, but some low-grade plastics can leach compounds over time, especially with warm water. My default recommendation: use clear glass for short-term propagation (under 6 weeks) and either wrap it with opaque paper or tape, or use a dark-coloured container. For long-term water culture, opaque containers are worth the minor inconvenience of not being able to see roots directly.
| Factor | Clear glass | Opaque glass or ceramic | Clear plastic | Opaque plastic |
|---|---|---|---|---|
| Root visibility | Excellent | None without removing cutting | Good | None without removing cutting |
| Algae risk | High | Low | High | Low |
| Durability | Fragile | Fragile to moderate | Durable | Durable |
| Cost | Low (repurpose jars) | Moderate | Very low | Very low |
| Best for | Short propagation runs, display | Long-term water culture | Budget rooting setups | Ongoing hydroponic systems |
Size and depth
The container only needs to be deep enough to submerge the node while keeping upper leaves above water. For most cuttings, 8–15 cm of water depth is sufficient. A narrow-necked bottle (like a wine bottle or laboratory flask) is ideal for vining cuttings because it holds the stem upright naturally. Wide-mouthed jars work better for multiple cuttings or short, bushy stems like coleus. Avoid very large containers for single cuttings: a large volume of stagnant water with a single tiny stem changes poorly and creates an environment where bacteria can multiply faster than you can keep up with water changes.
Best water sources
- Dechlorinated tap water: let tap water sit in an open container for 24 hours to off-gas free chlorine, or run it through an activated carbon filter. This is the most accessible option and works well for the majority of plants.
- Collected rainwater: excellent choice — soft, low in salts, and free of chlorine or chloramine. If you collect it, store it in a clean covered container to avoid contamination and use within a week.
- Aquarium water: genuinely useful for cuttings because it contains dilute nutrients, beneficial microbes, and natural hormones. Water from a healthy, established (not overcrowded or diseased) aquarium can accelerate rooting noticeably. Avoid water from tanks with active disease outbreaks.
- Distilled or reverse-osmosis water: chemically clean but lacks buffering minerals and traces of nutrition. Safe to use, but if you are keeping cuttings in water for more than 3–4 weeks, you will want to add a small amount of dilute fertilizer or transition to a nutrient solution.
- Avoid: water from chloraminated municipal supplies without proper treatment (chloramine does not off-gas like chlorine; use a dechlorinator such as sodium thiosulfate or a carbon block filter).
Additives, dosages, and schedules
For the easy-rooting plants in the list above, you genuinely do not need to add anything to the water except patience and fresh changes. But for slower species, or when you want to improve consistency across a big batch of cuttings, a few additives make a measurable difference. Here is what I use, why, and at what concentrations.
Rooting hormones (IBA and NAA)
IBA (indole-3-butyric acid) is the most widely used rooting hormone for cuttings and is available in powder, gel, and liquid forms. For water propagation specifically, the approach differs by product type. Powder formulas are designed for direct stem dipping before placement in a medium, but you can apply them to water-propagated cuttings: dust the cut end, tap off excess, and place immediately in water. Liquid IBA solutions offer more flexibility. For a dilute aqueous soak before placing cuttings in plain water, concentrations in the range of 50–500 ppm IBA for a 12–24 hour soak are used in research and hobbyist settings. High-concentration quick-dip formulas (1,000–5,000 ppm IBA, 5–10 second dip) are used commercially for difficult woody species and are documented in nursery and USDA propagation literature, but they are generally unnecessary for the soft-stemmed plants in this guide. Always follow the specific product label. Skip rooting hormone entirely for pothos, tradescantia, coleus, and mint: these root so readily that auxin rarely changes the outcome.
Dilute liquid fertilizer
Do not fertilize at the rooting stage. Nitrogen in particular can encourage leaf growth at the expense of root development, and any nutrient salts increase electrical conductivity in ways that can stress a cutting with no roots to manage uptake. Start adding a dilute balanced hydroponic nutrient once roots are at least 2–3 cm long and clearly white and healthy. At that point, mix nutrient solution to roughly 300–600 ppm (EC 0.6–1.2 mS/cm) and change the solution fully every 7 days. As the plant establishes, you can increase to 800–1,200 ppm for long-term water culture.
Activated charcoal
A small amount of horticultural activated charcoal added to the water absorbs dissolved organic compounds, controls minor odours, and generally keeps the water fresher between changes. Use approximately 1–2 grams per litre of water. Replace it when you do a full water change, or at least every 2 weeks. This is one of the low-effort additives I recommend to most beginners because it costs very little and reduces the 'cloudy, smelly water' problem that discourages people from sticking with water propagation.
Hydrogen peroxide (H2O2)
A very dilute H2O2 solution can suppress bacterial and fungal growth in the water and provide a small oxygen boost to the root zone. Use 3% food-grade or standard pharmacy H2O2 at a rate of about 1–3 ml per litre of water. Add it at each water change, not as a continuous addition. Do not increase the concentration: higher amounts will damage developing root tissue. I use this mainly in summer when water temperatures climb above 24°C and bacterial activity increases.
Aquarium water
Using 25–50% aquarium water mixed with plain dechlorinated water is one of the most underrated propagation techniques for anyone who already keeps a freshwater aquarium. Fish waste water contains dilute ammonia (which nitrifying bacteria in the tank convert to nitrates), trace minerals, dissolved organics, and microbial populations that appear to support root initiation. I have consistently seen faster first-root emergence in pothos and philodendron when using aquarium water versus plain tap, though it is an informal observation rather than a controlled trial. Use water from a healthy, established tank and avoid mixing it at more than 50% of total volume.
| Additive | When to use | Dosage / concentration | Change schedule |
|---|---|---|---|
| IBA rooting powder / gel | Before placing cutting in water; optional for easy species | Dust cut end (powder) or 50–500 ppm aqueous soak for 12–24 h | Single application at cutting prep |
| Activated charcoal | Throughout rooting and early water culture | 1–2 g per litre | Replace at every full water change |
| Hydrogen peroxide (3%) | When bacterial odour develops or in warm conditions (>24°C) | 1–3 ml per litre of water | At each water change; do not dose continuously |
| Dilute hydroponic nutrient | After roots reach 2–3 cm | 300–600 ppm (EC 0.6–1.2) initially; increase to 800–1,200 ppm as plant establishes | Full solution change every 7 days |
| Aquarium water | Throughout rooting phase | Mix 25–50% aquarium water with dechlorinated tap water | Refresh with each water change |
Step-by-step propagation protocol
The three setups below map to beginner, intermediate, and advanced skill levels. Start with the beginner setup if this is your first time, and upgrade only when you are comfortable with the basics and want faster results or more cuttings at once.
Beginner setup: one jar, a windowsill, no extras
Best for: pothos, coleus, tradescantia, mint, philodendron. No equipment purchases required.
- Day 0 — Prep: Sterilize a glass jar with hot water and a rinse of 10% bleach solution. Rinse thoroughly. Fill with dechlorinated tap water to about two-thirds depth.
- Day 0 — Cut: Take a 5–12 cm stem cutting with at least one node. Make a clean angled cut. Remove all leaves below the waterline. Drop cutting into the jar so the node is submerged.
- Day 0–7 — Placement: Set the jar in a bright spot with indirect light at 20–25°C. Keep it away from heating vents (dries air) and cold draughts.
- Day 3–5 — First check: Look for the start of small white bumps or nubs at the node. This is early callus or root primordia forming. Change the water if it looks cloudy.
- Day 7 — First full water change: Pour out all the water, rinse the jar, refill with fresh dechlorinated water. This is the most important maintenance step.
- Days 7–21 — Monitor and change: Continue changing water every 5–7 days. Roots should be visible by day 14–21 for easy species. A root 1–2 cm long is a success milestone.
- Day 21+ — Decision point: Roots are 2–5 cm long. You can pot the cutting into soil or continue growing in water (add dilute nutrients at this point if staying in water).
Intermediate setup: aeration, opaque container, and aquarium water
Best for: larger batches, slower-rooting species, warm climates where water quality degrades quickly.
- Day 0 — Container prep: Use an opaque container (or wrap a clear one in black paper). Add 1–2 g activated charcoal per litre. Mix 25–50% aquarium water with dechlorinated tap water to fill to working depth.
- Day 0 — Cut prep: If using IBA rooting powder for semi-woody or slower species, dust the cut end and tap off excess before placing in water. For easy species, skip this.
- Day 0 — Aeration: Drop a small aquarium airstone connected to a basic air pump into the water. This increases dissolved oxygen in the root zone and significantly reduces bacterial load. Set it to run continuously or on a timer for 12 hours per day.
- Days 1–14 — Maintenance: With aeration and activated charcoal, you can extend water changes to every 7 days. Check water clarity at days 4 and 7. If it clouds early, change sooner.
- Day 7 — First water change: Refresh the full volume. Replace activated charcoal. Re-mix aquarium water if available.
- Days 10–18 — Root emergence: Aeration and aquarium water together typically speed root appearance compared to a plain static jar. Expect visible roots at 10–14 days on easy species.
- Day 21+ — Nutrient transition: Once roots are 2–3 cm, add dilute hydroponic nutrient to 300–600 ppm. Continue weekly full water changes with fresh nutrient solution.
Advanced setup: net pots, hydroponic reservoir, grow light
Best for: propagating large numbers of cuttings, growing plants in water long-term without soil, or integrating water-propagated plants into an existing aquaponic or hydroponic system.
- Day 0 — System prep: Set up a lidded reservoir (a 20–40 litre tote works well). Cut holes in the lid sized for net pots (5 cm net pots are standard for cuttings). Fill reservoir with dechlorinated water plus activated charcoal at 1 g per litre. Install a submersible pump or air pump with airstone. Set water level so the bottom 2–3 cm of net pots are submerged.
- Day 0 — Cutting placement: Wrap cutting stems in a small piece of rockwool cube or clay pebbles (LECA) to hold them in net pots. Ensure the node is at or just below the waterline. The upper leaves should be well above the lid.
- Day 0 — Light: Position an LED grow light 30–50 cm above the cuttings. Run at 14–16 hours per day on a timer. Maintain water temperature at 20–25°C using a small aquarium heater if ambient temperature drops at night.
- Days 1–7 — Monitoring: Check water level daily and top up with fresh dechlorinated water. Check for stem rot at the waterline. Remove any cutting that shows soft, dark, foul-smelling stem tissue immediately.
- Days 7–14 — First nutrient addition: At the first full reservoir change (day 7), add hydroponic nutrient to 300 ppm. Increase to 500–600 ppm at the second change (day 14) if roots are visible.
- Days 14–28 — Root development: Under controlled light and temperature with aeration, most soft-stemmed cuttings produce substantial root systems by day 21. Target roots of 5–10 cm before transitioning to full nutrient strength.
- Day 28+ — Long-term water culture: Increase nutrient concentration to 800–1,200 ppm as the plant establishes. Monitor pH weekly (target 6.0–6.5 for most houseplants in hydroponics). Maintain full reservoir changes every 7–14 days.
Stage checklist at a glance
| Stage | Timing | What to check | Action if problem found |
|---|---|---|---|
| Cutting prep | Day 0 | Clean cut, node intact, lower leaves removed, no submerged foliage | Re-cut stem if end looks crushed or ragged; remove missed submerged leaves |
| Early rooting | Days 1–7 | Water clarity, no odour, no stem softening at waterline | Change water immediately if cloudy or foul-smelling; remove rotten cuttings |
| First water change | Day 5–7 | Water replaced fully, container rinsed, no algae on glass walls | Scrub algae from container; wrap with opaque material if persistent |
| Root emergence | Days 7–21 | White nubs or roots 1–5 mm visible at node | If no roots by day 21 on easy species, check temperature and light; try adding aquarium water |
| Root establishment | Days 14–28 | Roots 2–5 cm long, white or pale, branching | If roots are brown or mushy, check for rot; H2O2 treatment at 1–2 ml per litre may help |
| Nutrient transition | Day 21–28 | Roots 2–3 cm+; plant not showing yellowing | Start dilute fertilizer at 300–600 ppm; increase gradually over following weeks |
| Long-term water culture | Week 4+ | pH 6.0–6.5, EC 0.8–1.4 mS/cm, healthy white roots, no foul odour | Full water change and nutrient refresh every 7–14 days; trim dead roots if found |
Troubleshooting common problems
Algae in the water
Green or brown algae on the walls and in the water is caused by light reaching the water. It is not immediately fatal to the cutting, but algae compete for dissolved oxygen and nutrients, and thick algae blooms can significantly reduce water quality. Fix: wrap the container in black tape or paper, move it away from direct sun, and increase water change frequency. A pinch of activated charcoal helps slow re-establishment between changes.
Stem rot at the waterline
Soft, dark, mushy tissue at the point where the stem meets the water is caused by anaerobic bacteria, usually accelerated by submerged leaves, too-warm water, or infrequent water changes. This is the most common cause of propagation failure. Remove the affected cutting immediately to prevent contamination of the whole batch. If caught early (just a small dark spot), you can re-cut the stem above the rot, sterilize the container with a bleach rinse, and start fresh with a clean water charge.
Yellowing leaves
Some lower leaf yellowing on a cutting is normal during the first week as the plant reallocates resources to rooting. If upper leaves are yellowing, check three things: light (too little), water temperature (too cold, below 18°C slows metabolism significantly), and whether the cutting has been in water for more than 3–4 weeks without any nutrients. After initial rooting, plants in plain water will exhaust available trace minerals and start to show deficiency symptoms, usually yellowing. This is the signal to start dilute fertilizer or move to soil.
Slow or no rooting after 3 weeks
- Check that the node is submerged. Roots emerge from the node, not from the cut end alone.
- Water temperature below 18°C significantly slows root initiation. Move the container to a warmer spot or use a small aquarium heater.
- Too little light prevents photosynthesis, reducing the energy available for root development. Move the cutting to a brighter location or add a grow light.
- The cutting may have been taken from a stressed or dormant plant. If the source plant looks unhealthy, wait until it is actively growing.
- For stubborn species, try adding 25–50% aquarium water or applying IBA powder at the next re-cutting attempt.
Brown, slimy roots
Healthy water roots are white or pale yellow and somewhat translucent. Brown, slimy, or foul-smelling roots are a sign of bacterial or fungal infection, usually from stagnant water, submerged organic matter, or too-warm conditions. Trim back affected roots cleanly with sterile scissors, treat with a brief rinse in very dilute H2O2 solution (1–2 ml of 3% H2O2 per litre of clean water, for 30 minutes), rinse with plain water, and return the cutting to a clean container with fresh water. Adding aeration at this point helps prevent recurrence.
After rooting: stay in water or move to soil?
Once your cutting has established roots 3–5 cm long, you have two real options: keep it in water long-term (permanent water culture), or transplant it to soil or a hydroponic medium. Neither is wrong. The choice depends on what you want from the plant.
Permanent water culture works well for pothos, philodendron, lucky bamboo (Dracaena braunii), and most vining Epipremnum and Scindapsus cultivars. These plants will grow indefinitely in water as long as you provide dilute nutrients and maintain water quality. The roots formed in water are anatomically different from soil roots (they are described in extension literature as 'water roots': white, tender, and adapted to low-oxygen aquatic conditions), but they are fully functional for water culture. One caveat: if you intend to eventually move a long-term water plant to soil, do it gradually. Transitioning a plant that has spent 6 months in water directly into dry potting mix is very stressful. Use a very moisture-retentive mix initially and water heavily until soil roots establish.
Transplanting to soil is the better long-term option for most plants if you want vigorous, large-scale growth. Pot up when roots are 3–8 cm long. Use a well-draining potting mix, water it in thoroughly, and keep it evenly moist for the first two weeks while the water roots adapt to soil conditions. Expect some minor transplant shock (a few yellow or wilting leaves) in the first week. Most healthy cuttings recover fully within two to three weeks.
If you are interested in keeping multiple species in water long-term or building out a recirculating hydroponic system, the guides on growing specific money plant, coin plant, and fortune plant varieties in water on this site cover the ongoing water culture requirements for those species in more detail, including additives and water management schedules. For step-by-step instructions in Tamil, see our guide on how to grow money plant in water in Tamil.
FAQ
What basic materials and equipment do I need to root plant cuttings in plain water?
Sterile sharp scissors or pruning shears, clean propagation jars or opaque containers (glass or plastic), dechlorinated tap or rainwater, small labels, rubbing alcohol or 10% bleach for tool/container sanitation, optional rooting hormone (IBA/NAA powder or liquid), activated charcoal (small amount), aquarium air pump with air stone (optional), thermometer, and a bright spot with indirect light or a grow light. For monitoring, a magnifier or phone camera helps check tiny root initials.
Which species reliably root in water, and what are their common/Tamil names?
Very reliable water-rooters: Epipremnum aureum (pothos / money plant; Tamil: பொத்தோஸ்/பணம்விட்டம்), Philodendron (vining philodendron; tamil: பிளரோதேன்றன்), Tradescantia spp. (wandering jew / წடுரப்பி; Tamil: டிரேட்ஸ்காந்தியா), Plectranthus scutellarioides (coleus; Tamil: கூலியஸ்), Mentha spp. (mint; Tamil: புதினா), Pilea peperomioides (Chinese/money plant; Tamil: சில இடங்களில் ‘காசுபிள்ளை’ என அழைக்கப்படும்). Avoid succulents/most cacti for water propagation (they usually rot).
How do I take and prepare a cutting for water propagation (step‑by‑step)?
1) Choose a healthy, actively growing stem. 2) Use sterile shears to cut 5–15 cm (2–6 in) sections including at least one node (preferably 1–2 nodes). 3) Make a clean angled cut just below a node. 4) Remove lower leaves so the node is submerged but keep top leaves. 5) Optionally dust the basal end with rooting hormone (see concentrations). 6) Place cuttings immediately into prepared container with dechlorinated water so node is submerged. 7) Label and position in bright, indirect light at 20–26°C (68–79°F).
What water type should I use and how often should I change it?
Use dechlorinated tap water (let sit 24 hours or use a dechlorinator), rainwater, or filtered water. Avoid pure RO/distilled long‑term without added minerals; if using it, add a weak nutrient once roots form. For un‑aerated clear containers, change water every 3–7 days to maintain oxygen and prevent anaerobic bacteria/algae. If you aerate with an air stone, you can extend change intervals to 7–14 days but still top up and replace periodically.
Should I use rooting hormone? Which concentrations and methods are appropriate?
Most easy water‑rooters (pothos, philodendron, coleus, tradescantia, mint) root fine without hormone. Use IBA/NAA when rooting slower or woodier stems. Typical methods: quick‑dip in 1,000–3,000 ppm IBA for several seconds for semi‑woody cuttings (follow product label), or a dilute soak of 50–500 ppm for several hours for softwood. Powdered IBA (0.1–0.5%) pressed on the cutting base or commercial 3,000 ppm quick‑dip for 5–10 seconds are common nursery practices. Always follow manufacturer instructions and safety data sheets.
What small additives can help (activated charcoal, H2O2, aquarium water) and what dosages/schedules are evidence‑based?
Activated charcoal: add a thin layer (1–2 tsp in a small jar) to help absorb organics and reduce odors; not a substitute for water changes. Hydrogen peroxide (3% household): dilute to 1–3 mL per liter (0.1–0.3% final) as a one‑time dip or occasional shock treatment to reduce bacteria; avoid repeated high doses which can damage delicate root initials. Aquarium water: 10–20% aquarium water mixed with fresh water can introduce microflora and low nutrients, helpful for established cuttings; avoid using water with fish medications or excessive nitrates. For fertilizers, wait until visible roots (1–3 cm) then use a very dilute complete fertilizer at 1/4–1/8 strength with water changes every 7–14 days.