Growing Amazon frogbit (Limnobium laevigatum) is genuinely one of the easier wins in the aquarium hobby. Drop a few rosettes on the surface, give them decent light and stable water, and within a few weeks you'll have a mat of floating greenery with long, feathery roots hanging below. That said, there are enough common mistakes, especially around flow, light, and nutrient balance, that plenty of beginners end up staring at yellowing, rootless plants wondering what went wrong. This guide walks you through the whole process from buying to culling, with specific numbers you can actually use.
How to Grow Frogbit in a Home Aquarium Step by Step

Marcus Holloway
17 Apr 2026
Choosing and sourcing the right frogbit
The first thing to sort out is which plant you're actually buying. "Frogbit" is one of those names that gets slapped on several different species, and the confusion is real. Amazon frogbit is Limnobium laevigatum (family Hydrocharitaceae). It is sometimes sold as "smooth frogbit" and both names refer to the same plant. In ecological risk screening, USFWS notes that dense mats of Limnobium laevigatum can obstruct waterways and contribute to reduced oxygen conditions, especially where high organic inputs load the receiving system It is sometimes sold as "smooth frogbit". What it is NOT is American frogbit, which is Hydrocharis spongia, a completely different species that looks similar but behaves differently in an aquarium. L. laevigatum is the one you want for aquarium culture because it is more adaptable than its North American relatives and handles a wider range of water conditions.
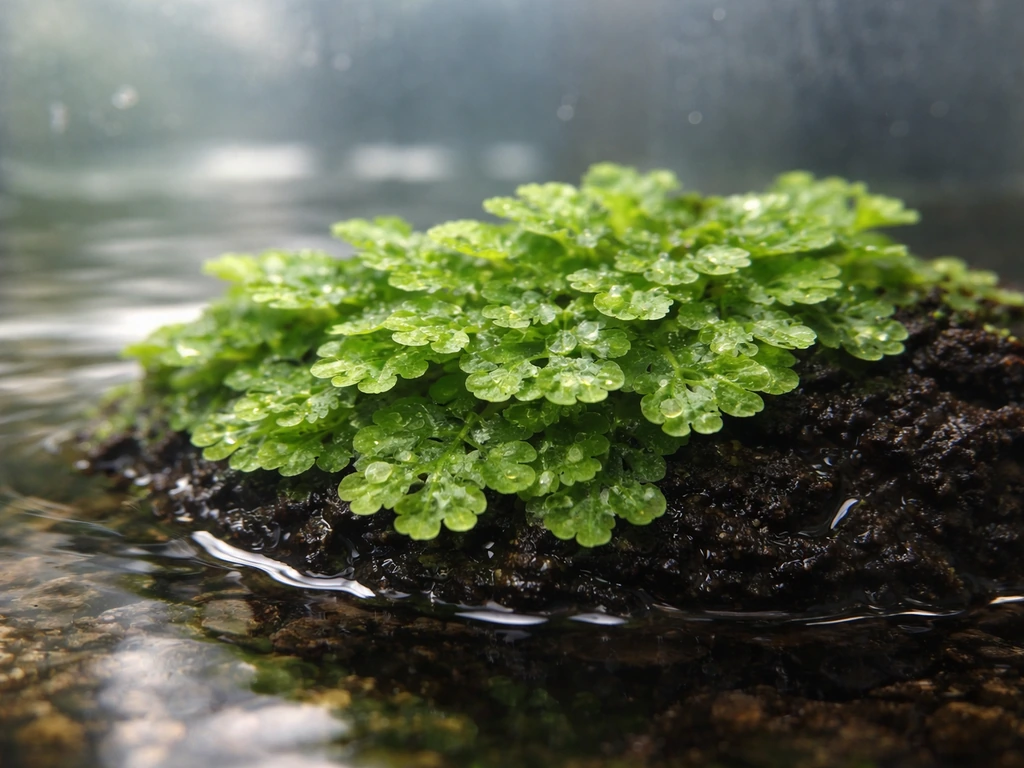
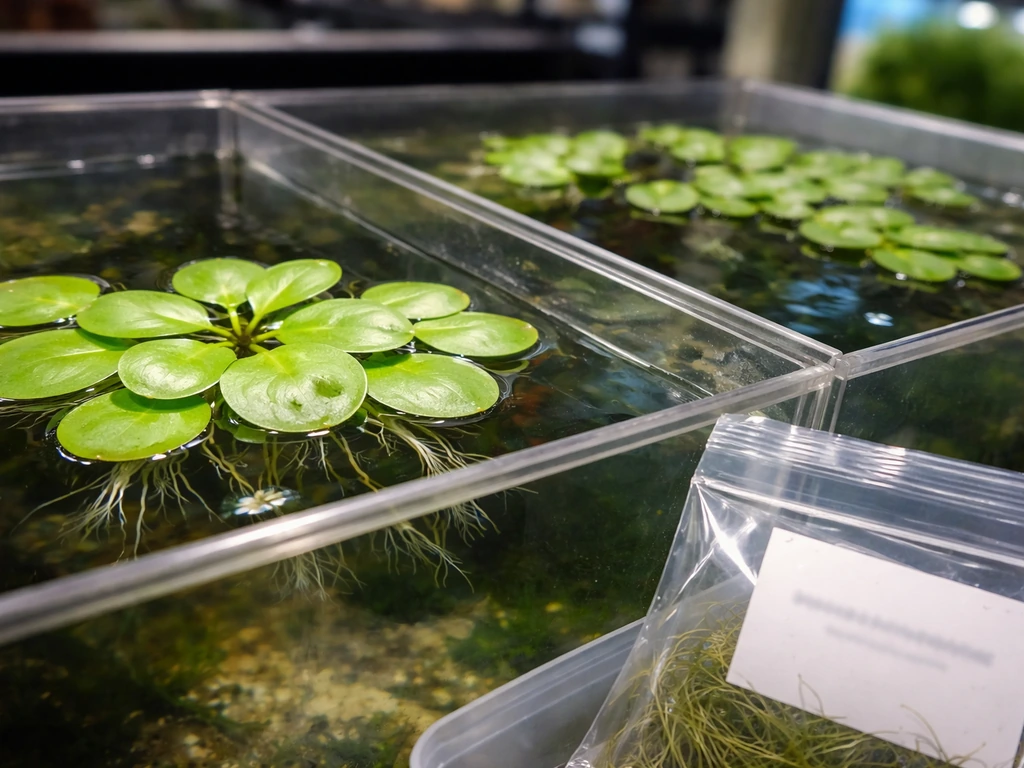
When you're browsing listings online or at a local fish store, check the scientific name on the label. Community reports confirm that plants sold as L. laevigatum are sometimes actually mixed with other floaters, so if your roots look dark instead of creamy white, that's a quick way to confirm whether you have the right plant since L. laevigatum produces pale, whitish roots rather than dark-colored ones. It's a small detail that saves you a lot of head-scratching later.
For sourcing, online aquarium retailers and dedicated planted tank shops are the most reliable. Look for listings that include the scientific name and offer plants with visible roots and multiple rosettes. Tissue culture cups are an option too, though even in vitro plants benefit from a careful introduction process. Avoid buying large batches from unfamiliar sellers until you've confirmed the plant is what it claims to be.
Once your plants arrive, quarantine before adding them to your display tank. This is the step most beginners skip and later regret. A simple separate container with clean, dechlorinated water works fine for a one to two week observation period. If you want to go further, a diluted hydrogen peroxide dip or a carefully timed bleach dip (followed by thorough rinsing and a dechlorinator rinse) can knock out hitchhiking algae and most common pests before they ever touch your main tank. Just be aware that frogbit leaves can be sensitive, so keep dip concentrations low and rinse well.
Aquarium setup: tank size, surface access, and float behavior
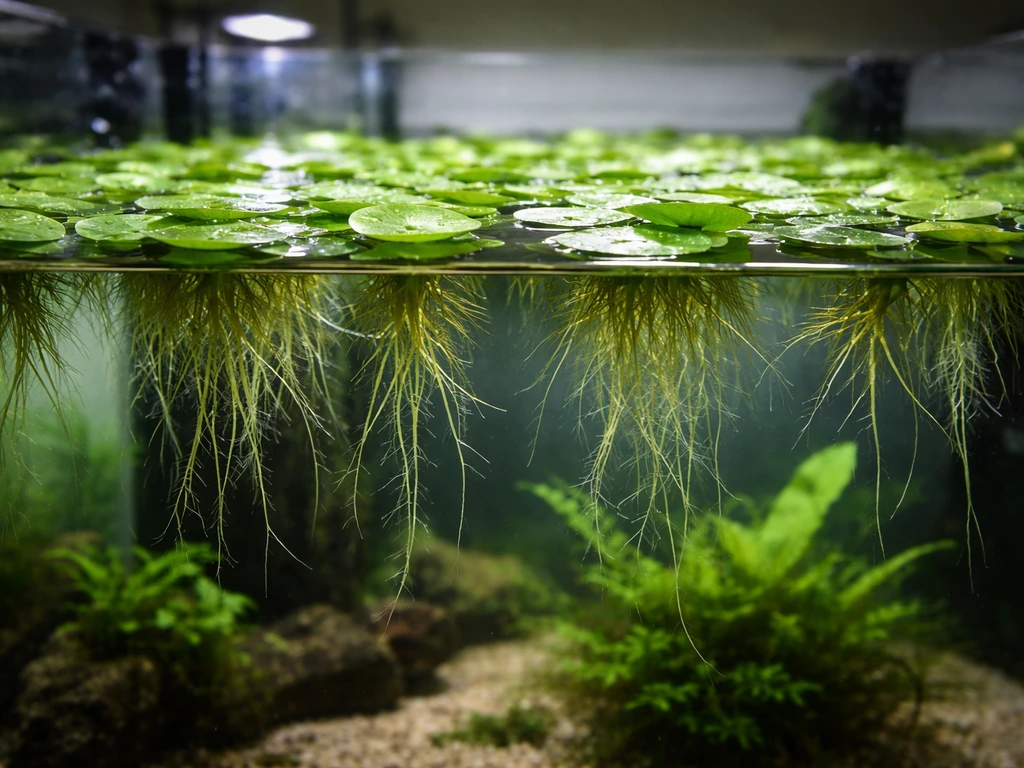
Amazon frogbit is a surface floater, which means your aquarium setup needs to accommodate life at the waterline. The plant spreads via stolons (horizontal runners) that produce new rosettes, and under good conditions it can cover an entire surface in surprisingly little time. That mat-forming behavior is part of its appeal, but it also means you need a tank large enough that you're not constantly fighting overgrowth from day one.
A 10-gallon tank is workable for getting started, but a 20-gallon or larger gives you more room to let the plant spread naturally before you need to start culling. The bigger concern is surface access: frogbit needs its leaves to sit on or just above the waterline, not submerged, not pinched under a tight-fitting lid. If your aquarium has a full glass or acrylic cover, you'll need to either leave a gap or switch to a canopy-style lid that allows open airspace between the light and the water surface. Humidity buildup under a sealed lid can cause the leaves to rot, especially during warm months.
Water flow is the other big setup factor. Strong surface agitation from a hang-on-back filter or powerhead will push frogbit rosettes into corners and against the glass, stressing the plants and preventing even coverage. You don't need to eliminate all surface movement, but you do want to reduce the flow at the surface. Pointing filter outlets downward or toward the glass rather than horizontally across the water surface makes a noticeable difference. Some hobbyists use a simple floating border or airline tubing barrier to keep a calm zone for floaters, which works well in community tanks with active filtration.
Light and temperature targets for fast, healthy growth
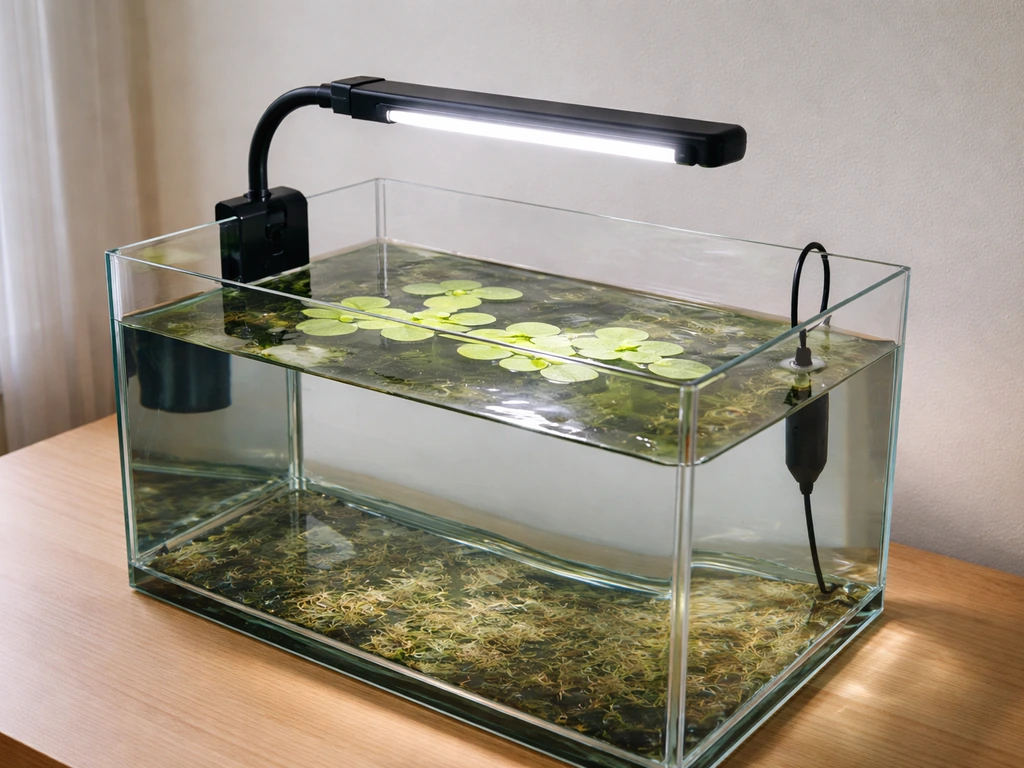
Frogbit wants high light. This is the single most important variable for getting strong growth and compact, healthy rosettes rather than leggy, yellowed ones. Very high light intensity, in the range typical for demanding planted tanks, gives you the best results. A good LED planted tank fixture running 8 to 10 hours per day is the baseline. Because the plant floats at the surface, it intercepts light before any submerged plants get a chance, so if you're running frogbit over a planted substrate you'll need to either trim coverage regularly or run a slightly higher output fixture than you otherwise would.
On temperature, the target window is 68 to 82°F (20 to 28°C), with an ideal sweet spot around 72 to 78°F (22 to 26°C). Growth noticeably slows below 68°F and can stall altogether if temperatures drop further. If you keep tropical community fish, you're probably already in that range, which is one reason frogbit works so well as a companion plant in those setups. Consistent temperature matters more than hitting a precise number: temperature swings stress the plant and are a common but overlooked cause of slow recovery after purchase.
One thing worth noting about CO2: frogbit does not need supplemental carbon dioxide injection to grow well. It pulls CO2 from the air at the surface. That said, growth speed, leaf compactness, and color intensity all improve when light and nutrients are dialed in together. So if you're not running CO2 and the plant still looks pale or slow, check light and nutrients first before reaching for a CO2 kit.
Water quality, nutrients, and flow
Amazon frogbit is adaptable when it comes to water chemistry. A pH range of 6.0 to 7.5 covers most community aquarium setups comfortably. Hardness is not a major limiting factor, so soft to moderately hard water both work. Where people run into trouble is nutrients, specifically not enough of them when light is high.
The plant feeds primarily through its roots, which hang down into the water column, so it is pulling nutrients directly from the water. If you have a heavily stocked tank with regular fish waste, you may not need to add anything extra. In a lightly stocked tank or one with frequent large water changes, nutrient deficiency becomes a real issue. A liquid all-in-one fertilizer added weekly after water changes is a practical starting point. Target nitrate in the 10 to 20 ppm range and phosphate around 0.5 to 1 ppm as a baseline, adjusting based on how your plants are responding.
One useful mental model for fertilizing is to think of some nutrients as needing consistent maintenance (nitrate, potassium, magnesium) while others like iron and phosphate are more reactive and spike-sensitive. Keeping levels steady rather than bouncing between zero and excess is what prevents algae blooms. This matters especially with frogbit because when it is growing fast it consumes nutrients quickly, and if supply drops suddenly the leaves yellow, which then causes inexperienced hobbyists to add more light, which triggers algae instead. Keep the nutrient supply consistent and match it to your light level.
Root tabs are not necessary for frogbit since it is a water column feeder, not a substrate feeder. However, if you're using this plant alongside substrate-rooted plants like moneywort in an aquarium, be aware that frogbit's surface coverage will compete for light with anything below it, so managing coverage is part of managing the whole tank's nutrient balance.
Getting started: planting and developing strong roots
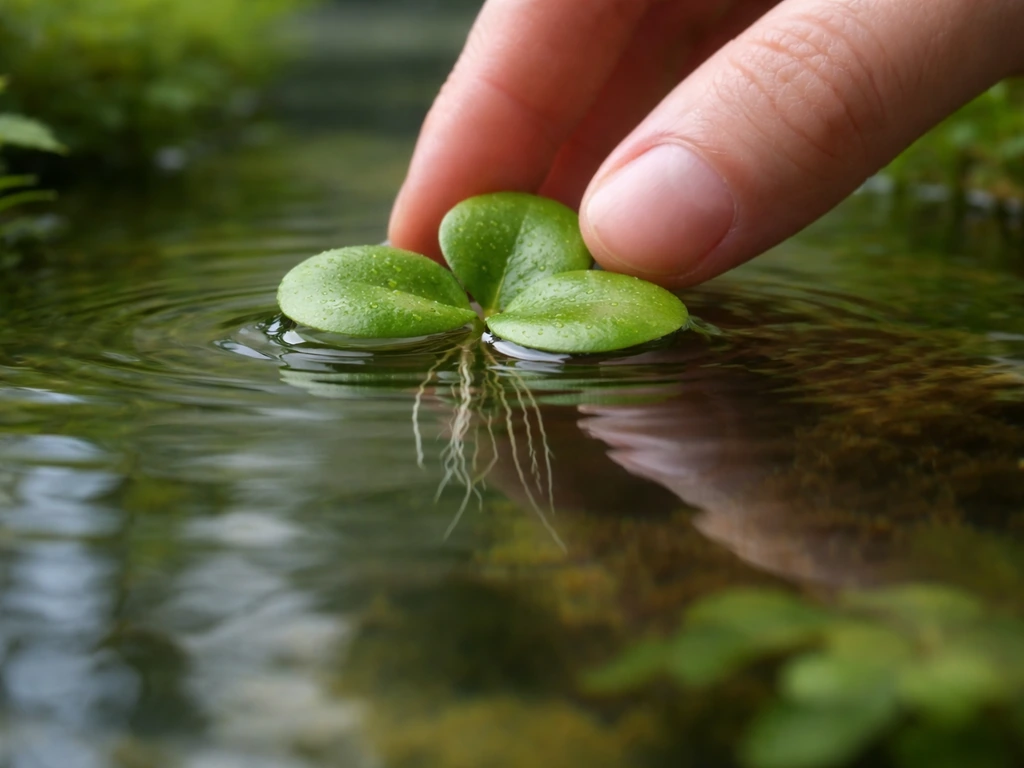
Starting frogbit is simple: place the rosettes gently on the water surface and let them float. There is no substrate planting involved. Each rosette will naturally orient itself with leaves up and roots hanging down once it settles. New plants often arrive with short or damaged roots, and it can take one to two weeks before you see significant root development in a new setup. This is normal and does not mean something is wrong.
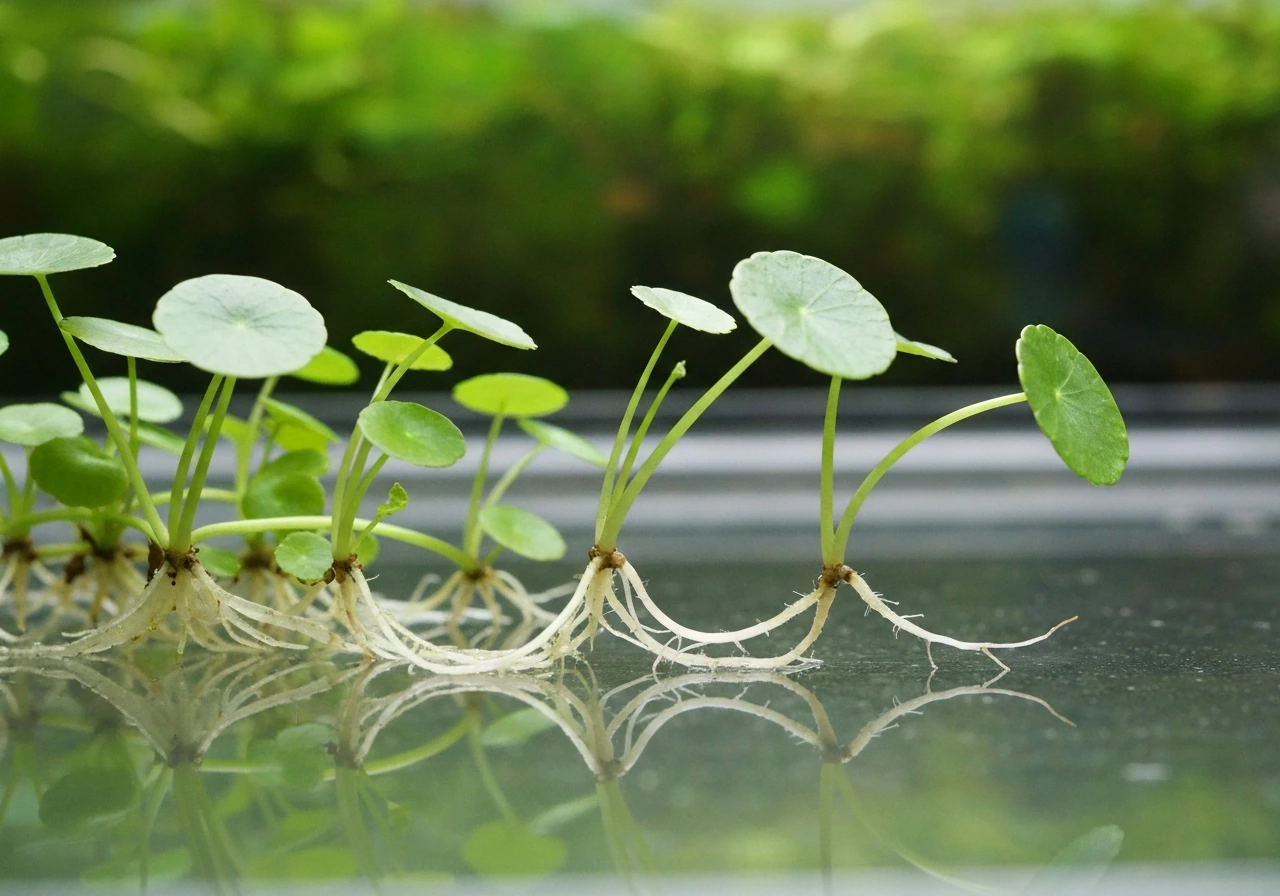
To help roots develop faster, keep the water still (low surface flow), maintain strong light above, and make sure nutrients are available in the water column. Once established, Amazon frogbit produces long, fine roots that can reach several inches in length, hanging like a curtain beneath each rosette. These roots are not just decorative: they are actively absorbing nutrients and also provide excellent cover for fry and shy fish.
Start with at least 5 to 10 rosettes rather than just one or two. A small starting group gives you redundancy in case a few don't adapt, and once the healthiest ones start producing runners the colony expands quickly. The stolons (runners) connect parent rosettes to new daughter plants, and once the cycle gets going you'll have new rosettes appearing every week in good conditions. This growth pattern is similar to what you'd see with pennywort, another fast-spreading aquatic plant that benefits from the same nutrient-aware approach.
Routine care and managing surface coverage
Once frogbit is established, your main ongoing job is managing how much of the surface it covers. Left unchecked, it will cover every inch of open water, which blocks light to submerged plants, traps gas at the surface, and eventually starts harming your tank's ecosystem rather than helping it. Culling is not optional once you hit the growth phase: plan on removing roughly one third of your frogbit every one to two weeks once it's thriving.
When you cull, pull out the smallest or most crowded rosettes and dispose of them (do not release them into natural waterways since this plant has significant invasive potential in warm climates). The U.S. Fish and Wildlife Service lists South American spongeplant (Limnobium laevigatum) as a high-risk invasive species of establishment concern for the contiguous United States and notes documented negative impacts such as obstruction of waterways, reduced water quality, and decreased biodiversity do not release them into natural waterways since this plant has significant invasive potential in warm climates. Keep the largest, healthiest rosettes with the best root development as your breeders. Regular culling actually encourages faster growth in the remaining plants because they have more light and nutrient access.
Weekly water changes of 20 to 30 percent keep nutrients cycling and waste products diluted. Do these consistently rather than skipping weeks and doing a large change. Frogbit responds well to stable, predictable conditions. After each water change, top up your liquid fertilizer dose. This routine is similar to caring for other fast-growing floaters and stem plants: if you're also maintaining hornwort in the same tank, you'll find both plants benefit from the same weekly nutrient reset.
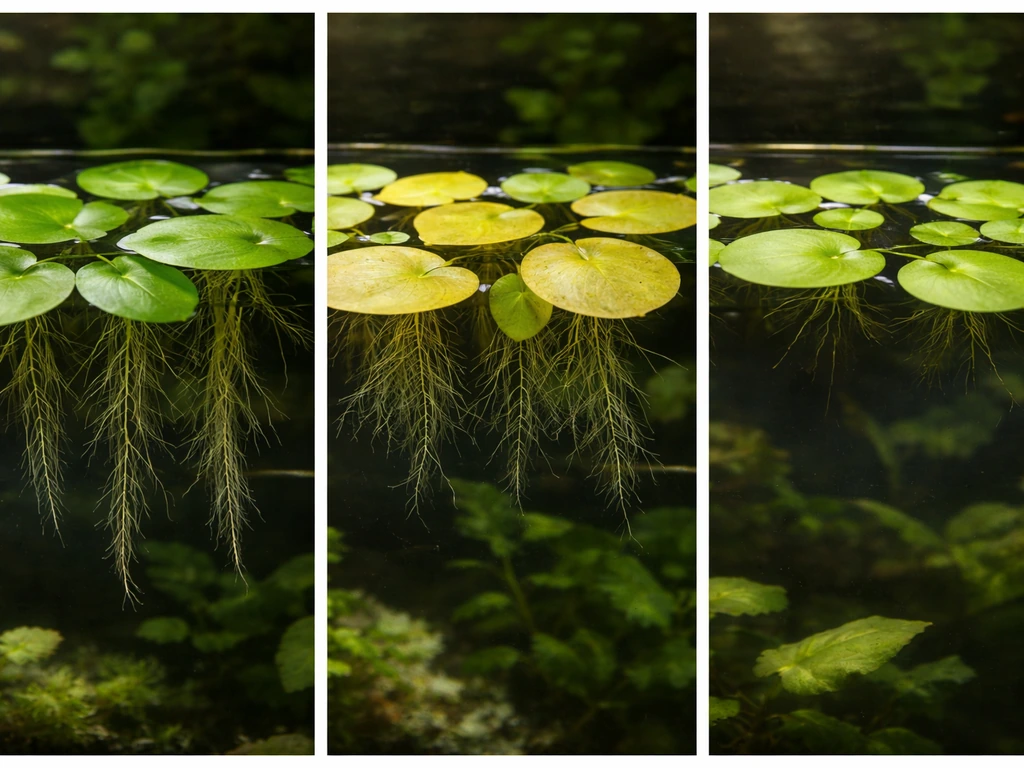
Check leaves weekly for signs of damage, pests, or discoloration. Healthy frogbit leaves are a bright, deep green with a slightly waxy or smooth surface. If leaves start looking pale, that's your nutrient or light signal. If they look brown or mushy at the edges, check for temperature fluctuations or damage from high humidity under a sealed lid.
Quick comparison: Amazon frogbit vs similar floaters
| Feature | Amazon Frogbit (L. laevigatum) | American Frogbit (H. spongia) | Hornwort (Ceratophyllum) |
|---|---|---|---|
| Aquarium adaptability | High | Moderate | High |
| Root type | Long, fine, creamy/white | Fine, darker | No true roots |
| CO2 required | No | No | No |
| Light requirement | High | Moderate to high | Moderate |
| Surface mat formation | Fast and dense | Moderate | Does not float flat |
| Temperature range | 68–82°F (20–28°C) | 59–77°F (15–25°C) | 59–86°F (15–30°C) |
| Beginner friendly | Yes | Yes | Yes |
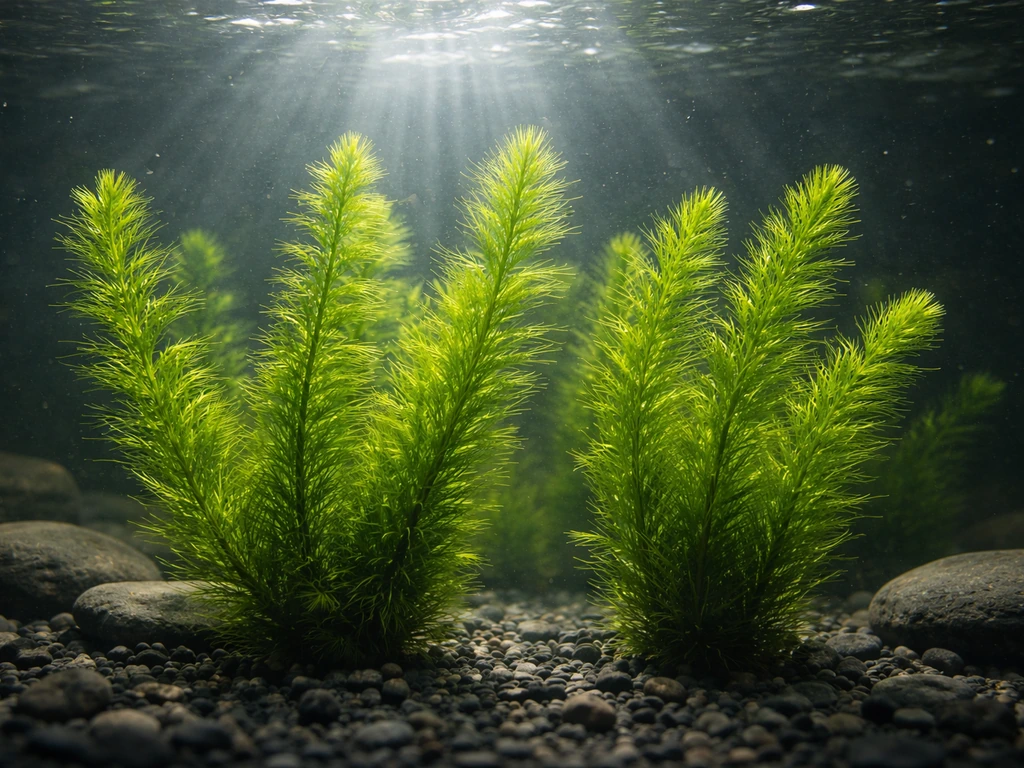
If you are choosing between these options for a tropical community tank, Amazon frogbit is the strongest recommendation. It adapts faster, spreads more predictably, and its long dangling roots make it uniquely useful for sheltering fry and small invertebrates. American frogbit prefers cooler water and is better suited to temperate setups. For a tank where you want a floating option that won't block as much surface light, growing hornwort in an aquarium is a good alternative since it can be kept as a free-floating mid-column plant rather than a surface mat.
Troubleshooting common frogbit problems
Yellowing leaves
Yellow leaves are the most common complaint, and the cause is almost always either insufficient light or a nutrient deficiency. The fix: first increase your photoperiod to 9 to 10 hours and confirm your light is strong enough for high-light plants. If that doesn't improve things within a week, add a liquid fertilizer with iron and micronutrients. Yellowing that starts at the oldest (outer) leaves first typically points to nitrogen or magnesium deficiency. Yellowing in new growth first often signals iron or micronutrient limitation.
No root growth
New plants often take a week or two to develop roots, but if you're three weeks in and still seeing tiny stubs, your water flow is likely too high at the surface. Roots need calm water to extend. Reduce surface agitation and check that the plants aren't getting pushed into corners where they pile on top of each other. Crowded rosettes also stop putting energy into root development. Spread the plants out and give each one open water underneath it.
Algae outbreaks after adding frogbit
Paradoxically, adding frogbit can trigger algae in some tanks. The mechanism: frogbit shades submerged plants, which then slow down and stop consuming nutrients efficiently, causing a nutrient surplus that feeds algae. If you see algae increasing after adding frogbit, reduce the coverage area immediately and make sure submerged plants still have adequate light. For stubborn algae that has already taken hold, a targeted hydrogen peroxide treatment can help reset the balance, though expect temporary lightening of leaves on sensitive plants.
Leaves rotting or turning brown
Browning leaf edges usually indicate either humidity damage (from a sealed lid trapping moisture against the leaves) or mechanical damage from flow. Open up the lid gap and redirect your filter outlet. Brown, mushy centers can signal bacterial rot, especially if the plant was stressed during shipping. Remove affected rosettes immediately, do a partial water change, and let healthy plants recover.
Pests
Frogbit can harbor aphids (specifically water lily aphids) and tiny snails. Aphids tend to cluster on the upper leaf surfaces and are usually introduced on new plants. Submerging the leaves briefly forces aphids off (they need air), and many fish will eat them. Snails are generally harmless unless in very high numbers. This is why the quarantine step matters: catching these pests in a separate container before they reach your display tank saves a lot of trouble. Plants like liverwort and other delicate aquatics kept in the same system benefit from that same quarantine discipline.
Quick fix checklist
- Yellow leaves: increase light to 9–10 hours daily, add liquid fertilizer with iron and micronutrients, check nitrate is 10–20 ppm
- No roots after 2+ weeks: reduce surface flow, spread rosettes so none are stacked, confirm temperature is above 68°F
- Plants bunching in corners: repoint filter outlet downward or use a gentle bubble wall/barrier to keep floaters centered
- Algae bloom after adding frogbit: thin coverage immediately so submerged plants get light, and do a 30% water change
- Rotting leaves: open lid gap for air circulation, check temperature isn't above 82°F, remove damaged rosettes promptly
- Slow or stalled growth: check all three factors together, light, nutrients, and temperature, since fixing only one rarely works
- Pest hitchhikers: quarantine new plants for 1–2 weeks, use H2O2 or diluted bleach dip if pests are confirmed, rinse thoroughly
A note on frogbit in different aquarium styles
Amazon frogbit works in a wide range of setups: standard community tanks, shrimp tanks, betta tanks, and even shallow paludariums. In shrimp tanks especially, the root coverage provides critical security for molting shrimp and shrimplets. In betta tanks, the surface cover reduces light intensity at the water surface (which bettas appreciate) and gives them resting spots just below the leaves. Just keep coverage to about 50 to 70 percent of the surface maximum in any stocked tank to maintain adequate gas exchange.
If you're running an outdoor tub pond or indoor species tank that leans more toward brackish or unusual chemistry, frogbit is less reliable. For unusual water chemistry setups it's worth exploring alternatives: saltwort is one option worth looking into for brackish systems, while water dropwort handles wetter marginal conditions well if you're building out a paludarium edge. For strictly freshwater setups, though, Amazon frogbit is hard to beat as a low-maintenance, high-impact floating plant.
The bottom line on growing frogbit: nail the light (high, 8 to 10 hours), keep the surface calm, stay on top of weekly nutrient dosing, and cull aggressively once it takes off. Those four things account for the vast majority of success or failure with this plant. Everything else, fine-tuning pH or tweaking CO2, is secondary. Start simple, watch how the plant responds, and adjust from there.
FAQ
How do I prevent frogbit from fully covering the surface and causing oxygen problems?
If your frogbit covers the surface too densely, you can create a clear, safe “funnel” for gas exchange by culling to roughly 50 to 70 percent coverage, then placing the remaining rosettes so they are spread out rather than clustered. This usually also helps if your fish are acting off (gasping) because it reduces the mat’s tendency to trap low-oxygen zones right at the surface.
My frogbit looks leggy and yellow. Should I add fertilizer or increase light first?
Yes, frogbit can handle some temporary low light, but recovery is slow when the issue is weak lighting rather than nutrients. As a practical check, watch the newest leaves: if they are small or yellow while older leaves look worse first, you likely have a light problem. Fix by increasing photoperiod toward 8 to 10 hours and confirming your fixture is strong enough for high-light floaters before adding more fertilizer.
What should I do if frogbit suddenly melts or gets brown and mushy at the edges?
A sudden melt or brown mushy patches are usually not a “slow growth” issue, they are stress or rot. Remove affected rosettes immediately, keep the remaining plants in calmer water, and do a partial water change to reset conditions. If the problem started after shipping or dips, the plant may be too damaged to recover quickly, so don’t wait weeks to cull.
How do I adjust my filter flow when frogbit keeps getting pushed into corners?
Frogbit can grow in tanks with power filters, but the surface needs to be calmer than the rest of the tank. Aim outlets downward or toward the glass, or use a barrier like airline tubing to form a still zone at the waterline. If you see plants pinned against corners or repeatedly flipped, your surface agitation is too high and roots will not extend.
How can I tell whether frogbit yellowing is nitrogen, magnesium, iron, or something else?
In many aquariums, the fastest way to confirm whether nitrogen or micronutrients are limiting is to correlate yellowing pattern with new growth. Old outer leaves yellowing first often points toward nitrogen or magnesium shortage, while yellowing that starts in new growth points more toward iron or micronutrients. Then adjust dosing rather than changing multiple variables at once.
Can I use hydrogen peroxide dips to treat new frogbit, and how do I avoid damaging the leaves?
Frogbit can be sensitive to strong chemical dips. If you use hydrogen peroxide, use a low concentration and limit contact time, then rinse thoroughly and remove any damaged leaves right after quarantine. If you are unsure, skip dips and rely on quarantine plus manual removal of obvious pests, because leaf burn from high strength dips can look similar to nutrient or light stress later.
Why does frogbit stop growing even when pH and hardness seem okay?
Even if your test kits show “fine” water chemistry, frogbit will still stall if nutrients are not matching the light level. A common failure mode is high light with inconsistent dosing, especially after large water changes. Keep nitrate and phosphate in a reasonable range, dose weekly after water changes as a baseline, and avoid big dosing swings.
Will adding frogbit help or hurt algae in a tank?
Yes. Frogs bit can be grown in a community tank alongside rooted plants, but its surface mat blocks light and can cause algae indirectly by reducing submerged plant nutrient uptake. If you already have algae, reduce frogbit coverage quickly, then keep it trimmed so submerged plants still get usable light below the mat.
My frogbit has been in the tank for weeks, but roots are still tiny. What’s the most likely cause?
If roots are not extending after you have had plants for several weeks, it is usually flow, crowding, or low light, not the lack of root tabs. Frogbit is a water-column feeder, so root tabs typically do nothing for it. Spread rosettes apart, reduce surface movement, and ensure high light above, then give it one to two more weeks to respond.
What coverage percentage is safe for frogbit in a shrimp tank?
In shrimp tanks, frogbit coverage can be beneficial for molting and fry, but you still need enough open surface for gas exchange. Keep the mat around 50 to 70 percent coverage, and cull small and crowded sections instead of letting it become a thick blanket. This balance protects shrimp while maintaining healthy water at the surface.
Is it bad if frogbit touches a lid or the underside of my aquarium cover?
Frogbit leaves can sit above the waterline, but a fully sealed lid that traps warm humid air against the leaves can lead to rot. Leave a gap or use a canopy-style lid with open airspace between the light and the surface, then monitor for brown, wet-looking edges.