Pennywort is one of the most forgiving aquatic plants you can get your hands on, and it grows in almost any setup you throw at it: a bucket of water, an aquarium, a damp pot of soil, or even a paludarium edge. The most commonly sold aquatic variety is Brazilian pennywort (Hydrocotyle leucocephala), a fast-growing creeper with round, bright-green leaves that can float, trail, or root depending on how you place it. There are other species in the Hydrocotyle genus, including the whorled pennywort (H. verticillata) and floating pennywort (H. ranunculoides), but if you bought it from an aquarium store, you almost certainly have H. leucocephala. This guide covers every practical setup you might want to use.
How to Grow Pennywort Plant: Water, Aquarium, Soil, Seed

Marcus Holloway
7 Apr 2026
What pennywort is and which growing method to choose
All Hydrocotyle species share the same basic growth habit: long creeping stems that root at nodes and form dense mats when they get enough nutrients and light. What changes between setups is whether those stems root into substrate, dangle from the surface, or spread across damp soil. The plant is genuinely versatile, so your choice of method should come down to what you already have, not what the plant demands.
Here is a quick decision guide. Choose the water-container method if you want the fastest results with the least equipment. Choose the aquarium method if you have a tank running and want a low-maintenance plant that doubles as cover for fish or shrimp. Choose the soil method if you are setting up a paludarium, a pond edge, or a semi-aquatic container garden. Choose seed only if you cannot source live cuttings, because cuttings are faster and more reliable by a wide margin.
One honest note before you start: pennywort is a bog-type plant that naturally wants to grow toward the surface and even out of the water. If you push it fully submerged in a low-light tank, it will struggle. That is the single most common reason people watch this plant melt and give up on it. Work with its natural tendency rather than against it and you will have more pennywort than you know what to do with inside a month.
How to grow pennywort in water
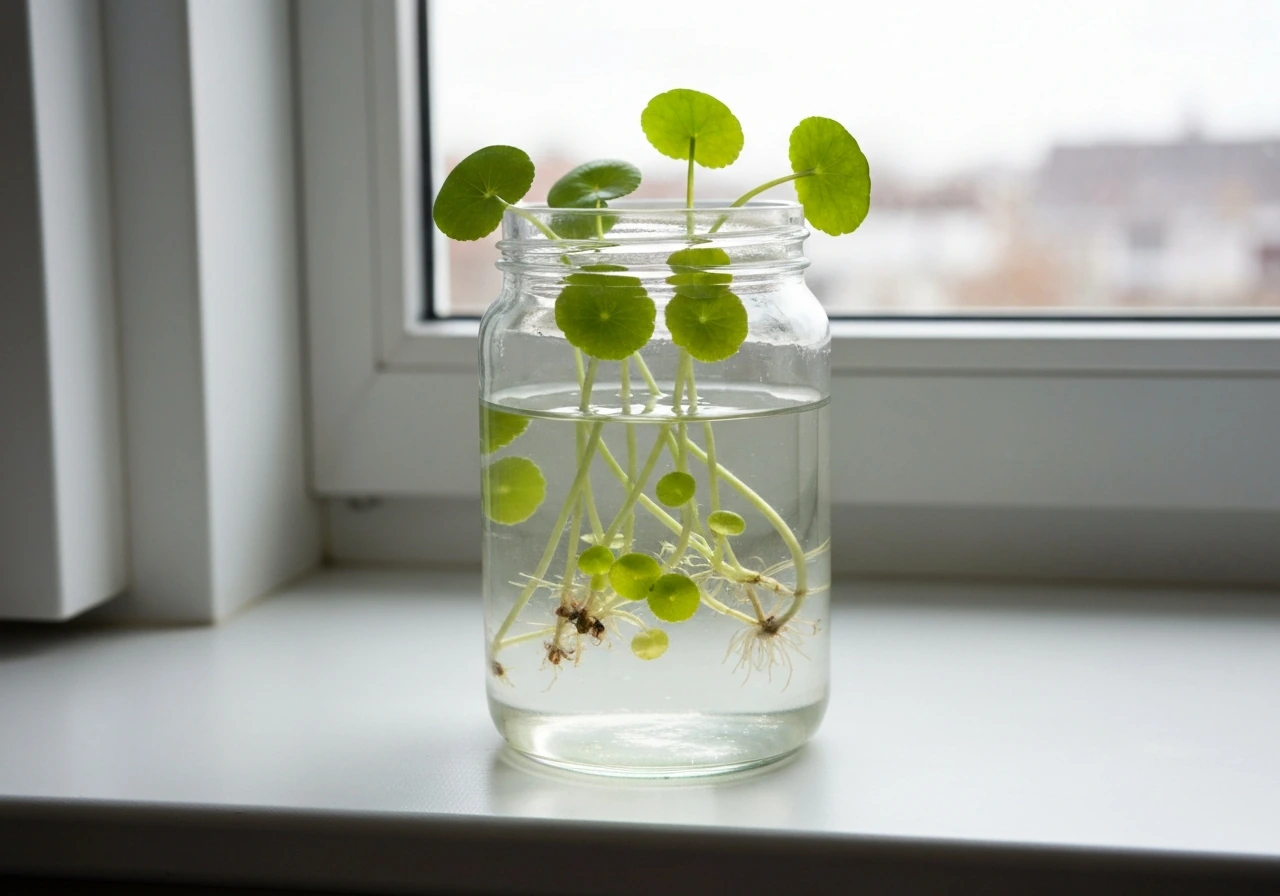
A water container setup is the easiest way to start. You just need a clear vessel, some water, light, and a few stem cuttings. I have used everything from a glass vase on a windowsill to a five-gallon bucket under a grow light, and all of them have worked.
Setup and water conditions
Fill your container with dechlorinated tap water or rainwater. Target a temperature between 20 and 28°C (68 to 82°F). Room temperature works for most homes, but if your space drops below 18°C at night, add a small aquarium heater. Water hardness is flexible: soft to moderately hard (2 to 15 dGH) is the documented sweet spot. pH between 6.0 and 7.5 is fine. You do not need a filter in a simple water container, but you do need to top up the water every few days as it evaporates and do a 25 to 50 percent water change once a week to prevent stagnation and nutrient depletion.
Planting and light
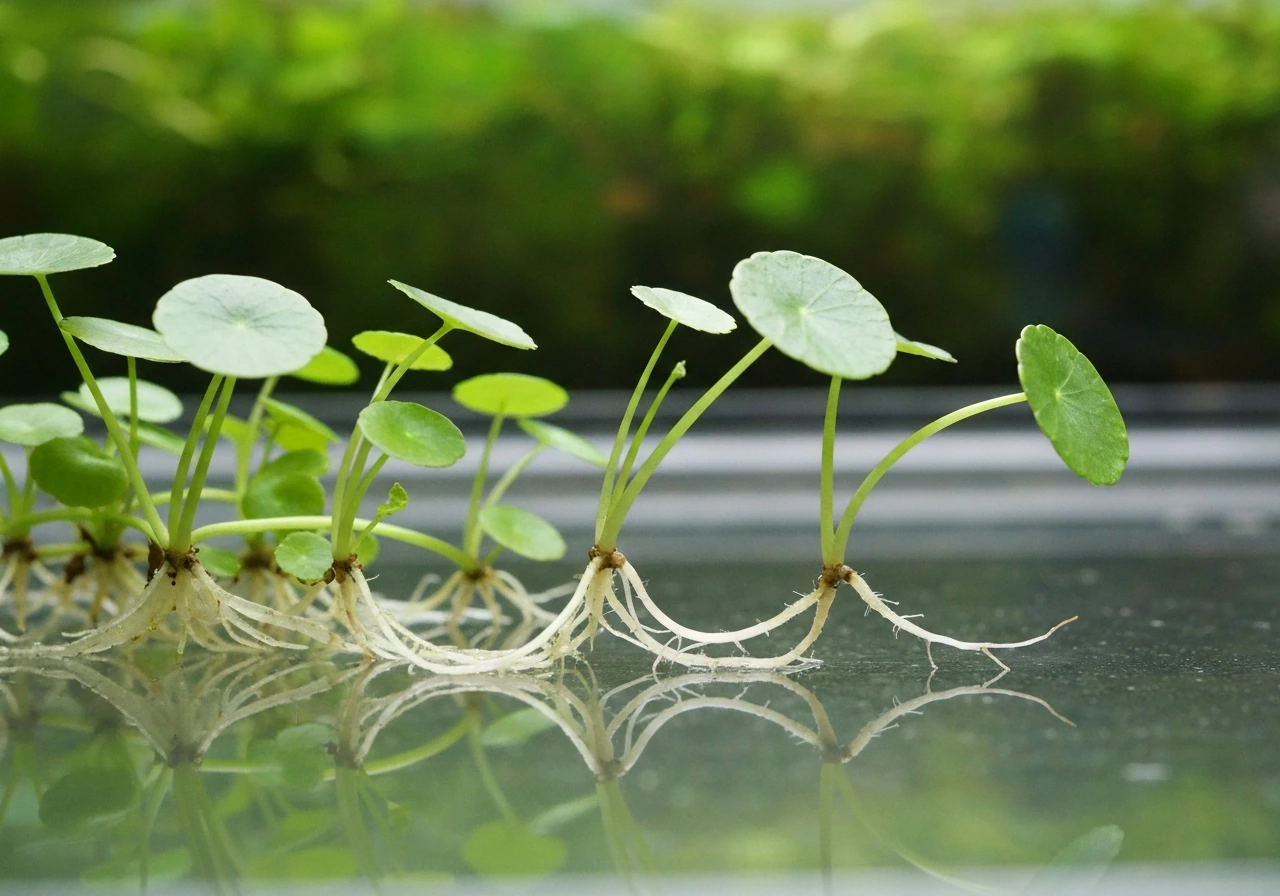
Take stem cuttings that are 2 to 4 inches long, cutting just below a node (the small bump where a leaf attaches). Remove the lowest leaf or two so the node is exposed. Drop the cuttings in the water so the bare nodes are submerged. They will start developing roots at those nodes within about a week. You can also weight the stems lightly with a small clip or tie them to a piece of driftwood to keep them from floating sideways while they root.
Light is the most important variable in a water setup. Aim for 8 to 12 hours of moderate to bright light per day. A sunny south-facing window works if it gets direct light for a few hours. A dedicated grow light set on a timer is more reliable. If the new growth is small and pale, the light is too weak. If you see algae blooming on the container walls within the first two weeks, the light is too intense or running too long, so cut back by an hour or two.
Feeding your water-grown pennywort
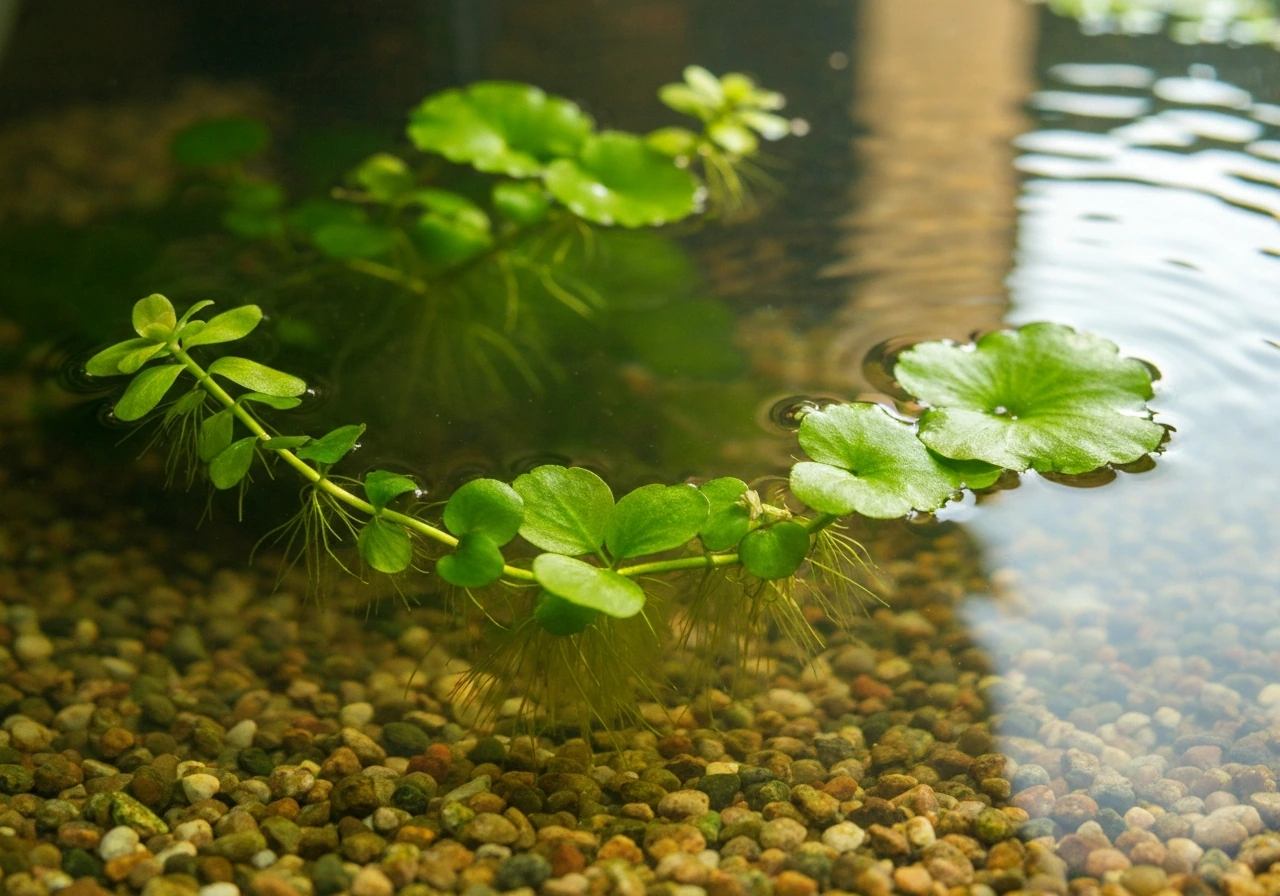
Pennywort is a hungry plant when it gets going. In a nutrient-free water container, add a diluted liquid aquatic fertilizer two to three times per week. Use about half the dose recommended on the bottle to start and increase if growth slows. Within two to three weeks you should see rapid upward stem extension. Once stems reach the surface they will try to grow over the edge of the container, which is completely normal behavior for this species. This matches the way Brazilian pennywort develops roots at nodes and tends to “strive for the water surface,” so stem growth and depth can vary with how deep it is try to grow over the edge of the container.
How to grow pennywort in an aquarium
The aquarium setup is where most hobbyists will spend the most time with this plant. Brazilian pennywort is commonly listed as a beginner-friendly aquarium plant, and it earns that label, but it does have a few non-negotiable requirements. Growing moneywort in an aquarium follows a similar logic for stem plants, so if you have done that, pennywort will feel familiar.
Tank conditions
Keep temperature between 22 and 28°C (72 to 82°F). A standard tropical aquarium heater handles this easily. Use the same water chemistry targets as the water container setup: pH 6.0 to 7.5, 2 to 15 dGH. Moderate to high light is essential for submerged growth. If you only have a basic low-watt LED hood, the plant will survive but grow slowly and may eventually melt as it runs out of energy. Upgrade to a higher-output plant light if you can, running it for 8 to 10 hours a day. CO2 injection is not required but will noticeably accelerate growth.
Planting in the tank
You have three placement options and all of them work. You can root the stems in the substrate (push the bottom 1 to 2 inches of stem, node-first, into sand or fine gravel), let them trail over hardscape like rocks and driftwood, or simply leave them floating at the surface. Many aquarists do all three in the same tank because the plant just grows wherever it ends up. If you root it in substrate, do not bury the leaves, only the bare node section of the stem.
Dosing and fertilization
A planted aquarium substrate provides some baseline nutrients, but pennywort grows fast enough that it will exhaust those quickly. Dose a liquid all-in-one fertilizer two to three times per week to keep up with demand. This is the same feeding frequency that works well for other rapidly growing stem plants like hornwort. Watch the oldest leaves: if they turn yellow, you likely have a nitrogen or iron deficiency and need to increase fertilizer dose or frequency.
Tank compatibility
Pennywort is an excellent choice for tanks with shrimp and small fish. The dense mat it forms (whether floating or submerged) provides cover, reduces stress, and gives fry places to hide. Larger herbivorous fish like goldfish or large cichlids will munch on it aggressively, so stick to community fish if you want the plant to stay intact. One practical upside of fast-growing pennywort: it competes with algae by soaking up the same nutrients algae would otherwise use. Dennerle specifically notes H. leucocephala's ability to help suppress algae in established tanks, which lines up with what I have seen in my own setups.
How to grow pennywort in soil
Pennywort grown semi-aquatically in soil is the same plant in a different outfit. It thrives in this setup because, as noted by Australian aquatic plant researchers, Hydrocotyle is naturally a stoloniferous herb that grows on damp land and out over water. The Weeds Australia profile for Hydrocotyle describes Hydrocotyle (for example Hydrocotyle ranunculoides) as a stoloniferous herb that grows on damp land and out over water, rooting at nodes and forming dense mats Hydrocotyle is stoloniferous and grows on damp land and out over water, rooting at nodes to form dense mats. You are essentially mimicking its native riparian habitat.
Choosing and preparing your substrate
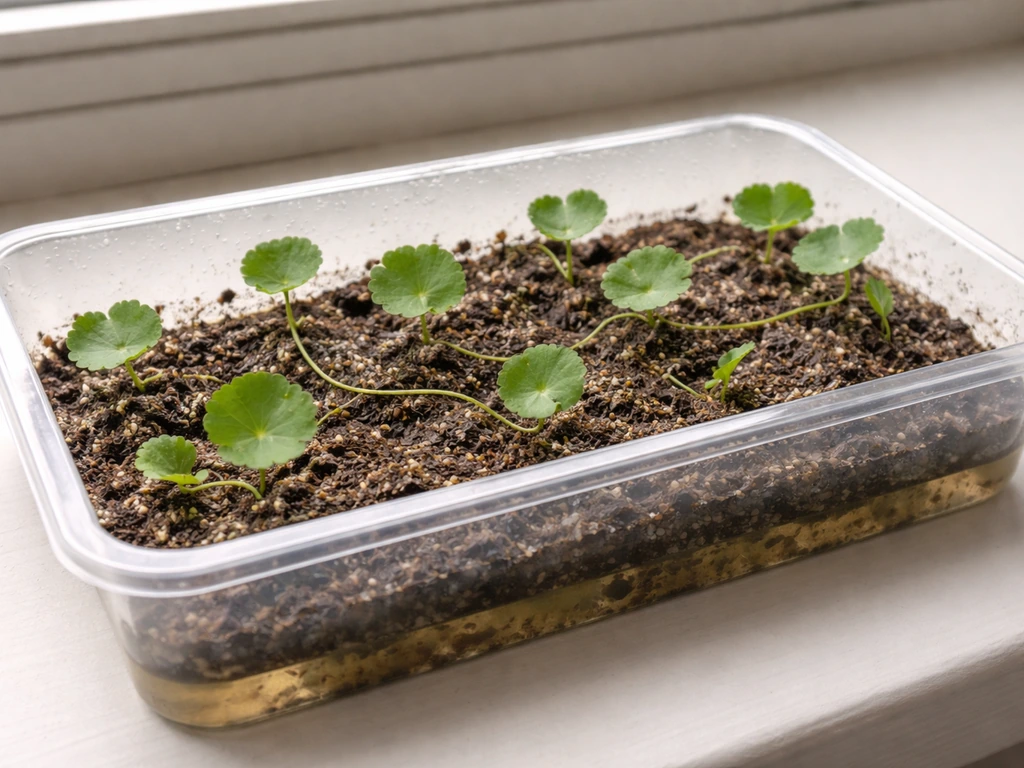
Use a mix of potting soil and horticultural sand or perlite at roughly 70/30. This gives moisture retention without waterlogging. Avoid soils with large amounts of slow-release fertilizer pellets, which can cause algae problems if the pot is partially submerged. A shallow container (4 to 6 inches deep) works better than a deep pot because pennywort's roots are shallow and it spreads horizontally, not vertically.
Moisture and placement
Keep the soil consistently moist to waterlogged. The easiest method is to set the pot in a tray with 1 to 2 inches of water and let the substrate wick moisture from below, refilling the tray whenever it runs dry. Alternatively, partially submerge the pot in a pond or paludarium so only the top inch of soil stays above the waterline. The stems will creep over the edge and can extend out over the water surface, which looks excellent in paludarium builds.
Place the setup in bright indirect light or under a grow light for 8 to 10 hours a day. Temperature follows the same range as aquatic culture: 20 to 28°C is ideal. Outdoor placement works in warmer climates during spring and summer. If you are using pennywort as a pond-edge plant, it will handle partial shade, but growth will be noticeably slower than in full light.
Unlike fully submerged aquatic setups, soil-grown pennywort benefits from occasional misting of the leaves, especially in low-humidity indoor environments. The plant is much more forgiving in semi-aquatic soil than fully terrestrial conditions, so as long as the roots stay wet, the plant will stay happy. If you also want to explore a similar semi-aquatic approach with another round-leafed plant, the guide on how to grow frogbit covers a related floating-leaf setup worth checking out.
How to grow pennywort from seed
I will be honest with you: growing pennywort from seed is the least reliable method and most hobbyists never bother because cuttings root so quickly and easily. Seed is possible, and some sellers do offer Hydrocotyle seed, but germination rates are inconsistent and academic literature on the subject is thin. One thesis reviewing Hydrocotyle seed behavior notes that viable seed performance can decline at lower temperatures and that germination protocols are not well established for the genus. If you have live cuttings available, use those instead. But if seed is what you have, here is how to give them the best shot.
Sowing and germination
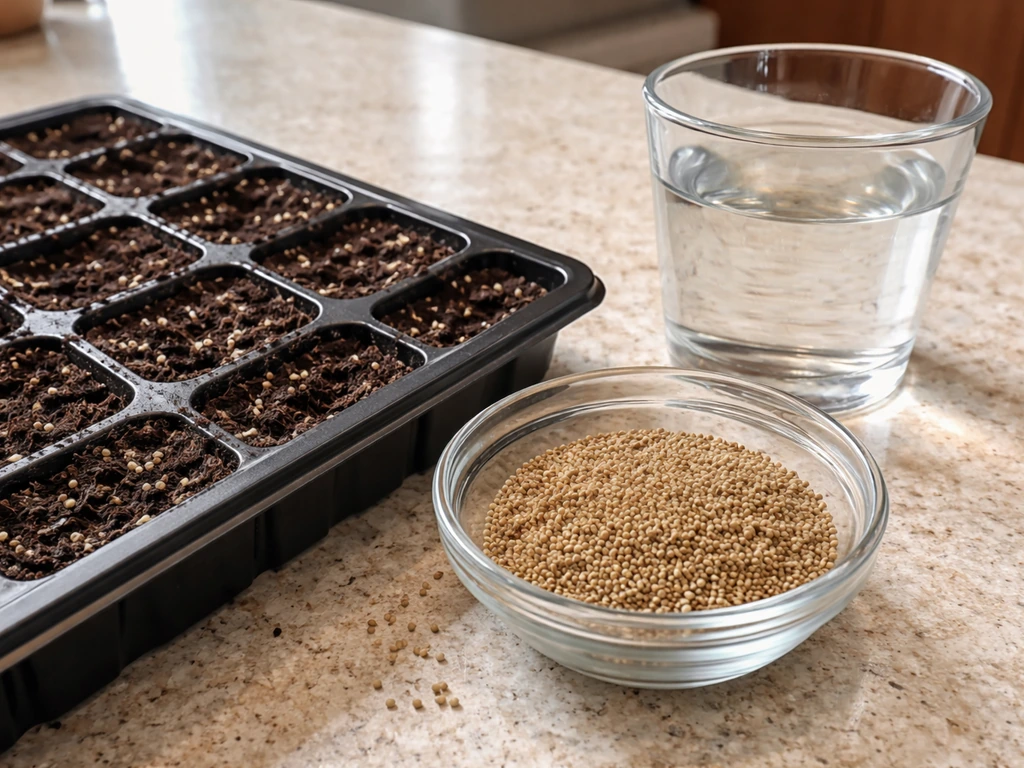
- Soak seeds in cool water for 6 to 12 hours before sowing. This softens the seed coat and can improve germination rates, especially for seeds that may have a light dormancy.
- Fill a shallow tray with fine, damp potting mix or a mix of coco coir and sand. Press seeds gently onto the surface without covering them deeply. A light dusting of substrate (about 1 to 2 mm) is enough.
- Mist the surface with a spray bottle and cover the tray with a clear plastic lid or cling film to hold humidity.
- Place under a warm grow light or on a heat mat. Target soil temperature of 22 to 26°C. Avoid cold rooms because germination rates drop noticeably below 20°C.
- Check daily and mist as needed to keep the surface moist but not waterlogged. Expect to wait 2 to 3 weeks for the first sprouts. Some batches take longer, and some may not germinate at all.
- Once seedlings have two to three leaves, transplant carefully into individual small pots with damp substrate, or float them in a shallow water container while the roots develop further.
If seeds are slow to germinate, do not assume they have failed until week four. Pennywort seeds from hobby suppliers can be inconsistent. Fragmentation and cuttings are far more predictable, which is exactly why stem propagation is the standard in aquatic plant hobbyist circles, as discussed in communities like the UK Aquatic Plant Society. For comparison, growing liverwort also relies on vegetative propagation rather than seed for consistent results.
Maintenance and pruning
Pennywort is one of those plants where the main maintenance challenge is not keeping it alive but keeping it under control. In good conditions, it grows fast enough that it will shade out lower plants, mat the surface of a tank, or spill out of a container within weeks. Regular trimming is how you manage it and keep the rest of your setup healthy.
How and when to trim
Trim stems just below a node using sharp scissors. This matters because the node is where new growth and roots emerge. Cut above a node if you are trimming for size control, and cut below a node if you want to replant the cutting. The Shrimp Farm notes that even in nano tanks, regular trimming keeps pennywort manageable, which is good news if you are working with a smaller setup. In a typical tank, plan to trim every one to two weeks once the plant is established.
Any trimmings you take can become new plants. Drop them into a propagation container, replant them in the substrate, or give them away. This is one of the more satisfying things about growing pennywort: once you have one bunch, you effectively have unlimited stock. Growing hornwort in an aquarium follows the same generous propagation logic if you want another fast-growing plant to pair with it.
Weekly care checklist
- Top up water levels in containers or check aquarium levels for evaporation
- Do a 25 to 30 percent water change in standalone water containers
- Dose liquid fertilizer two to three times per week
- Remove any yellowed or decaying leaves promptly to prevent rot spreading
- Check light timer and confirm 8 to 10 hour photoperiod is consistent
- Trim any stems reaching the surface in aquariums or extending beyond the desired footprint
- Replant or discard trimmings depending on how much stock you want to maintain
Troubleshooting common problems
Most pennywort problems trace back to one of three things: not enough light, not enough nutrients, or temperature stress. Here is how to diagnose and fix the most common issues.
Melting and leaf drop
Melting (where leaves become translucent, soft, and fall off) is most common when cuttings are first introduced to an aquarium and adjusting from emersed (above water) growth to submerged growth. This is normal and not necessarily a sign of failure. The plant is shedding leaves that were grown in air and regrowing submersed-adapted leaves. Keep the light consistent, maintain temperatures above 22°C, and do not uproot the plant during this phase. New growth should appear within one to two weeks. If the melting continues past three weeks, check that your light is strong enough and that you are dosing fertilizer regularly. Pennywort is described as needing at least moderately strong light and active feeding to succeed submerged, so those are your first two levers to pull.
Slow or stunted growth
If pennywort is not growing noticeably within two weeks of planting, the most likely culprits are low light and nutrient deficiency. Increase your light duration or intensity first. Then increase fertilizer dosing. If you are in a water container with no substrate and minimal fertilizer, the plant will stall. Also check temperature: anything below 20°C consistently will slow growth significantly. If you have checked all of these and growth is still sluggish, check whether floating plants or duckweed are blocking light from below-surface stems. Competitive surface plants are a documented cause of light-blocking that stalls submerged growth.
Algae on leaves and in the container
Algae on pennywort leaves usually means your light period is too long or too intense relative to the nutrients available. Shorten the photoperiod by one to two hours first. If you see green water or green film algae on container walls, it is often because there is nutrient imbalance (too much light, not enough plant uptake). In an aquarium, a healthy growing pennywort actually helps suppress algae by outcompeting it for nutrients, but only once it is established and actively growing. Until then, algae may get a head start. Remove affected leaves, reduce light slightly, and ensure the plant is growing actively. Growing water dropwort faces similar algae-competition challenges in water setups, and the same photoperiod adjustments apply.
Stem rot at the base
Rot at the base of planted stems usually means the substrate is too compacted, anaerobic, or that dead leaves got buried. Keep substrate loose, remove decaying matter promptly, and avoid burying stems too deep. Two inches of stem in the substrate is enough. If you notice a blackened or mushy stem base, pull the cutting, trim off the rotten section back to healthy tissue just below a clean node, and replant or float the healthy portion.
Propagation failures from cuttings
If cuttings are not rooting within two weeks, check that they were cut below a node and not just mid-stem. Mid-stem cuttings without a node will not root reliably. Also check that the node is actually submerged or in contact with damp substrate: a node suspended in air above the waterline will not root even if the rest of the stem is in water. Once you nail the node contact rule, propagation failures with this plant become very rare. It is worth noting that a similar node-focused cutting approach works well when you grow saltwort and other creeping aquatic stem plants, so it is a broadly useful technique to internalize.
| Problem | Most likely cause | Fix |
|---|---|---|
| Melting after planting | Emersed-to-submersed transition, temperature below 22°C | Keep light consistent, raise temperature, wait up to 2 weeks for new growth |
| Slow or no growth | Low light, nutrient deficiency, cold water | Increase light hours/intensity, dose fertilizer 2–3x per week, check heater |
| Yellow leaves | Nitrogen or iron deficiency | Increase fertilizer dose, check water change schedule |
| Algae on leaves | Excess light or low plant uptake | Shorten photoperiod by 1–2 hours, remove affected leaves |
| Stem rot at base | Compacted substrate, buried leaves, anaerobic conditions | Remove rot, trim to healthy node, replant shallower in loose substrate |
| Cuttings not rooting | No node in contact with water or substrate | Re-cut below a node, ensure node is submerged or in damp soil |
Pennywort rewards consistency more than anything else. Get the light and temperature right, feed it regularly, and trim it before it takes over, and it will outperform almost any other aquatic plant you could choose for a beginner setup. Whether you are running a simple jar on a windowsill, a full planted aquarium, or a semi-aquatic paludarium edge, the same core principles apply. Start with live cuttings if you can get them, anchor a node, give it light, and the plant will do the rest.
FAQ
Can I grow pennywort fully submerged, or do I need it to reach the surface?
It can live fully submerged, but it usually struggles in low light because it naturally grows toward the surface. If you want reliable growth, aim for moderate to bright lighting, and consider letting some stems float or trail upward so at least part of the plant is near the surface.
What’s the safest way to prevent pennywort from taking over my tank or container?
Treat trimming as routine maintenance. Cut stems just below a node every 1 to 2 weeks once it is established, then replant or float healthy cut sections elsewhere. Also physically remove floating mats before they thicken, since dense mats reduce light penetration to lower plants.
How do I know my pennywort is getting enough light in a water container?
Watch both new growth and algae. If new stems are pale, short, or slow after about 2 weeks, light is likely too weak. If you get heavy algae on the walls early, your light is likely too intense or the photoperiod is too long, reduce by 1 to 2 hours.
Do I need CO2 for pennywort, or will it grow without it?
CO2 injection is not required, pennywort can grow without it. However, adding CO2 typically increases growth rate and leaf size under strong lighting. Without CO2, prioritize light and regular liquid feeding to avoid stalling.
Can I propagate pennywort from leaves instead of cuttings?
Not reliably. Pennywort propagation depends on nodes on the stem, since roots and new growth form at those node points. Mid-stem sections without an attached node generally do not root well.
If my cuttings are rooting, should I bury the leaves when planting in substrate?
No. Only the bare node portion should be in the substrate. Burying leaves increases the chance of rot and reduces oxygen around the growing tissue.
How much fertilizer should I use, and what if I overdo it?
Start at about half the label dose and feed 2 to 3 times per week. If you see green water or film algae while the plant is not clearly outpacing it, reduce light or photoperiod first, then slightly back off fertilizer until pennywort is actively growing.
Why does pennywort melt when I first add it to an aquarium, and when should I worry?
Melting is common right after transitioning from emersed growth to submerged life, it is usually the plant discarding air-grown leaves. New growth should appear within 1 to 2 weeks. If melting continues beyond 3 weeks, reassess light strength and whether fertilizer dosing is happening regularly.
What should I do if pennywort is not rooting or staying afloat in a bucket setup?
Make sure the cutting is cut just below a node and that the node is submerged or pressed into damp substrate. If stems float sideways while rooting, use a small clip or tie to driftwood to keep the node under water long enough to root.
Are there shrimp or fish that will eat pennywort?
Many shrimp and small fish leave it alone, and pennywort can provide cover for fry. Larger herbivorous fish, like goldfish or big cichlids, may aggressively nibble or destroy it, so pairing depends heavily on the species in your tank.
Is there a specific soil mix ratio I should use for semi-aquatic pennywort?
A common successful mix is roughly 70% potting soil with 30% horticultural sand or perlite. The key is moisture retention without waterlogging, since consistently waterlogged soil can contribute to rot even though pennywort likes wet conditions.
How deep should the pot be for paludarium or pond-edge growth?
A shallow container, about 4 to 6 inches deep, usually works best because pennywort spreads horizontally and does not root deeply. Deep pots can stay waterlogged longer and raise the risk of anaerobic conditions near the base.
Can I grow pennywort outdoors, and how should I handle seasonal temperature changes?
Yes in warm climates during spring and summer, but you may need to bring it back indoors or protect it if temperatures drop. Pennywort growth slows significantly below about 20°C, and consistent cold stress can cause leaf drop or stalling.
What’s the best way to deal with algae when pennywort is newly planted?
In early stages, algae can get a head start before pennywort becomes established. Remove affected leaves, reduce the photoperiod by 1 to 2 hours, and ensure the plant is actually growing (adequate light and fertilizer). Once actively growing, pennywort usually competes better for nutrients and light.
How long should I wait before deciding seed is failing?
Do not discard seed too early. If germination is slow, give it up to about four weeks before concluding it failed, and expect inconsistency compared with stem cuttings.