The most important realistic expectation is this: most aquatic seeds need warmth, the right water depth, and patience. Research on Vallisneria germination, for example, shows that at 25 to 30 degrees Celsius in a nursery-flat setup, seeds can sprout in under a week. Drop the temperature to 20 to 25 degrees Celsius in a larger tank and you are looking at two to four weeks. Get the temperature wrong and nothing happens. That single variable trips up more beginners than any other.
The other expectation to set: germination rates vary a lot depending on how seeds were stored before you got them. Seeds stored submerged tend to outperform dry-stored ones for several aquatic species. One study comparing storage methods for Potamogeton lucens found submerged-stored seeds hit about 69% germination versus roughly 55% for dry-stored seeds. So if you are sourcing seeds, ask how they were kept, and if you are storing them yourself before planting, keep them wet and cool rather than dried out in a packet.
Which seeds and plant types actually work in an aquarium

The single biggest mistake people make is buying mystery "aquarium plant seed" packs from online marketplaces. Most of those contain grass, clover, or ornamental plants that look great for a few weeks then melt away underwater. Stick to species with a documented aquatic lifecycle. Here are the best candidates for hobbyists starting from seed:
- Vallisneria (tape grass): one of the most reliable from seed, with well-documented germination protocols and strong tank performance once established
- Potamogeton species: true submerged aquatics that germinate well, especially when seeds have been stored in water rather than dried
- Hydrocharis (frogbit and relatives): research shows these can germinate fully submerged at water levels up to 40 cm, making them genuinely tank-friendly
- Sagittaria subulata: a close relative of arrowhead plants, commonly available and straightforward from seed under warm conditions
- Eleocharis (hairgrass): slower to grow from seed but achievable; best started in a shallow moist setup before transitioning to full submersion
- Cryptocoryne species: possible from seed but slow and rarely sold as seed commercially; worth trying if you have a producing plant
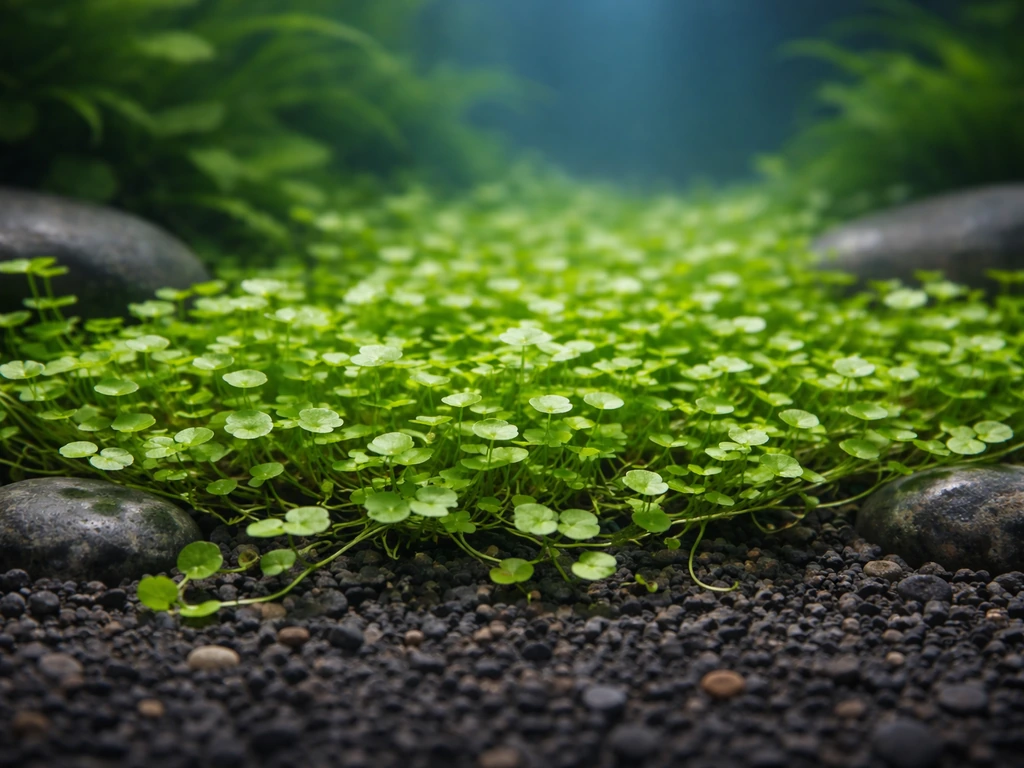
If you want a planted tank with color and variety, pairing seed-grown background plants like Vallisneria with mid-ground and foreground species you propagate by other means is a smart approach. You can read more about species selection in this guide on how to grow freshwater aquarium plants, which covers the full spectrum of propagation methods including division and cuttings alongside seeds.
One thing worth noting: some of the most visually striking aquarium plants, including red-pigmented species, are rarely sold as seeds and are better sourced as cuttings or tissue culture. If red plants are your goal, check out the dedicated guide on how to grow red aquarium plants after you get your seed-grown foundation established.
Setting up your seed-starting system
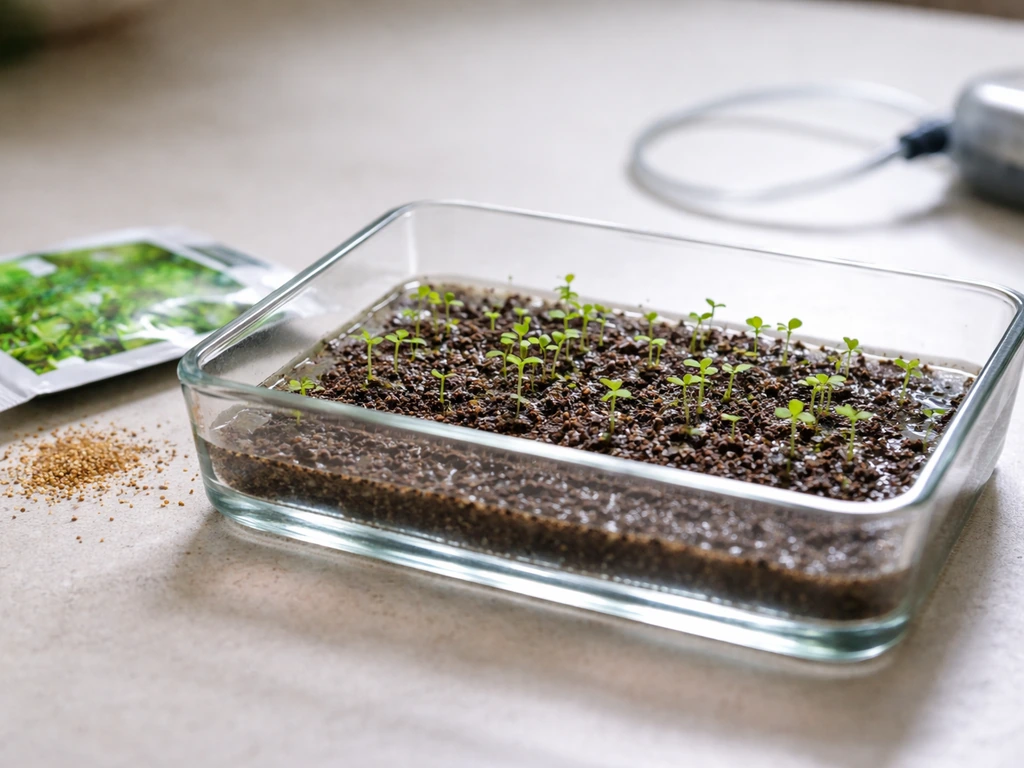
You do not need a separate aquarium to start seeds. A shallow nursery flat, a clear plastic storage bin, or even a seed tray with a humidity dome works well. The goal is to control temperature and moisture tightly, which is harder to do in a large display tank full of fish.
Containers and substrate
Use a container that holds two to five centimeters of water above the substrate. Shallow is better at first because it warms faster and makes it easier to monitor seedlings. For substrate, fine-grain aquatic soil or a layer of washed play sand over a nutrient-rich base works well. Avoid coarse gravel for seed starting because seeds fall into gaps and fail to make contact with the growing medium.
If you want to skip soil entirely, an inert medium like rockwool cubes or a thin sand layer can work too, though you will need to compensate with liquid nutrients earlier. This ties in closely with the concept of growing aquarium plants without soil, where liquid dosing and water column nutrition replace what a nutrient-rich substrate provides.
Water parameters
Target these conditions for germination:
| Parameter | Target Range | Why It Matters |
|---|
| Temperature | 25–30 °C (77–86 °F) | Below 25 °C significantly slows or prevents germination for most aquatic species |
| pH | 6.5–7.5 | Neutral to slightly acidic suits the broadest range of aquatic species |
| Water depth over substrate | 1–3 cm initially | Shallow water warms faster and reduces the risk of seed rot before germination |
| Ammonia / Nitrite | 0 ppm | Seedlings are extremely sensitive; use dechlorinated water |
| Lighting | 10–14 hours per day | Consistent photoperiod triggers and sustains germination without overheating |
Lighting for seed starting
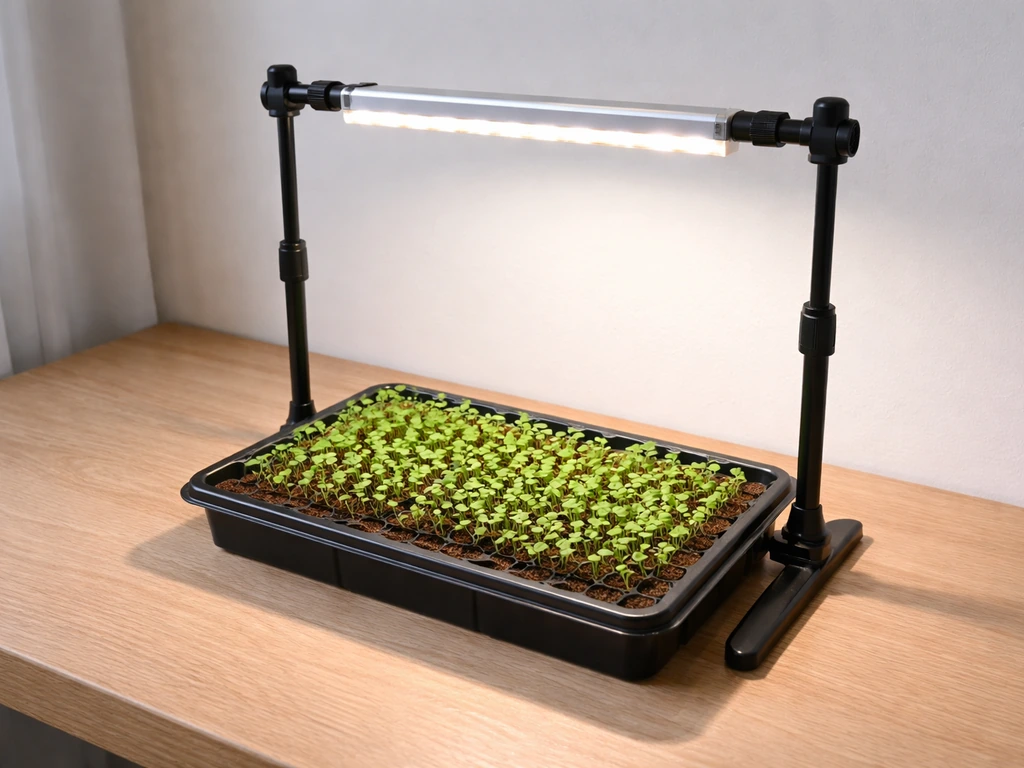
A simple LED grow light or a T5 fluorescent fixture positioned 15 to 20 cm above the container is enough. You want moderate intensity, not the high-powered reef lighting some planted tank hobbyists use. Running 10 to 14 hours per day on a timer is the most consistent approach. Avoid placing the setup in direct sunlight since this creates temperature swings and algae blooms that can smother seedlings before they establish. If you are eventually aiming for a high-tech planted tank with demanding tropical plants, building your lighting knowledge now will pay off later; the guide on how to grow tropical aquarium plants goes deep on light intensity and spectrum for species that need more.
Step-by-step: from seeds to seedlings
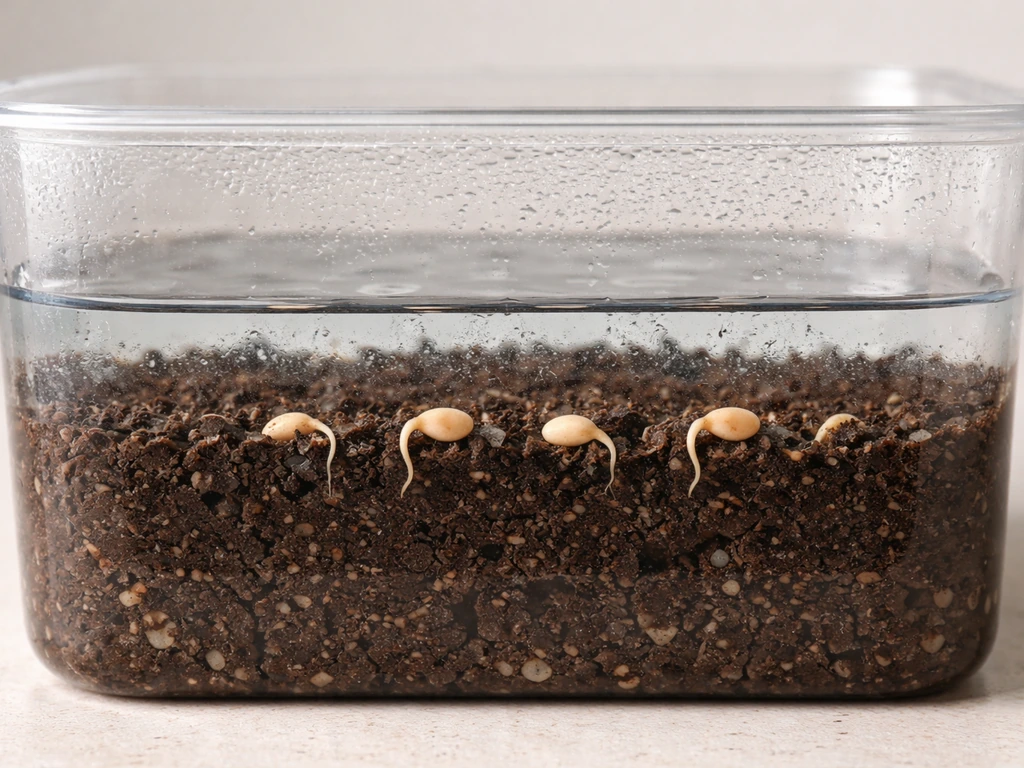
- Prepare your seeds: if you have dry-stored seeds, soak them in room-temperature dechlorinated water for 24 to 48 hours before planting. This rehydrates the seed coat and jumpstarts the germination signal. For seeds that have been stored cold (1 to 3 °C for 30 days), move them directly to warm planting conditions after the cold period; research shows this can push germination rates as high as 82 to 86% within six to ten days.
- Wet your substrate thoroughly before placing seeds. Press seeds gently into the top 2 to 3 mm of substrate, making firm contact without burying them deep. Most aquatic seeds germinate better at or very near the surface.
- Add dechlorinated water slowly until the substrate is saturated and you have roughly 1 to 2 cm of standing water above it. Do not flood deeply at this stage.
- Cover loosely with a clear humidity dome or plastic wrap to maintain warmth and humidity while still allowing some gas exchange. Check daily and remove the cover for 15 to 30 minutes each day to prevent mold buildup.
- Maintain temperature at 25 to 30 °C consistently. A small submersible heater in the water or a heat mat under the tray works well. This is non-negotiable for fast germination.
- Within 3 to 14 days (faster at the higher end of the temperature range), you should see small green shoots or root hairs emerging. Once you see sprouting, remove the dome entirely.
- Gradually increase water depth over the next one to two weeks as seedlings grow, adding 1 to 2 cm at a time. This mimics natural flooding cycles and helps seedlings adjust to submersion.
- At the four to six week mark from germination, most seedlings will have developed a small root system and two to four true leaves, making them ready for transplant.
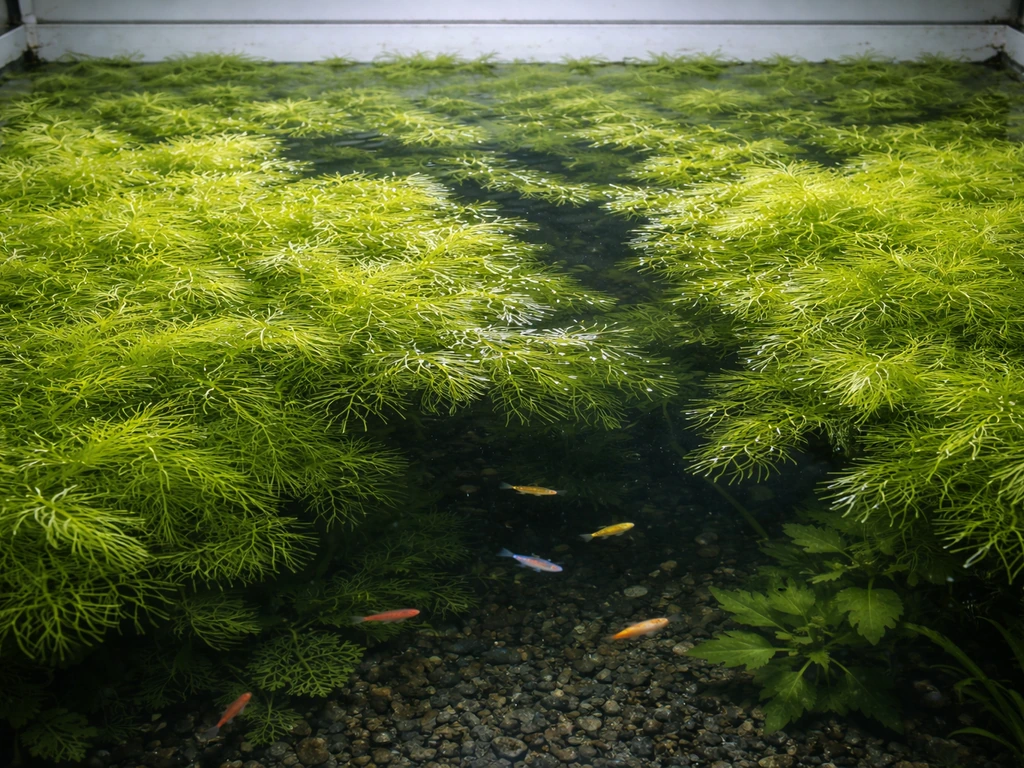
If you are working with beginners or want the lowest-risk first project, starting with easy-to-grow aquarium plants for beginners as companions to your seed-grown plants is a smart hedge. Fast-growing species like hornwort or java moss can outcompete algae in the main tank while your seedlings are still developing.
Moving seedlings into the aquarium

Transplanting is where a lot of growers lose seedlings that were otherwise healthy. The biggest mistake is dropping a seedling grown in shallow, warm, low-flow conditions directly into a cold, deep, heavily filtered display tank. The plant has to shift its internal chemistry almost overnight, and it often responds by melting back its leaves, which looks like failure but is usually just adaptation stress.
Acclimation before planting
Spend three to five days matching your seedling container's water to the display tank's parameters. Do this by adding small amounts of display tank water to the seedling container two to three times per day. Match temperature, pH, and hardness as closely as possible before the final move. This is the same logic behind drip acclimation for fish, and it works just as well for plants.
Planting depth, spacing, and rooting
When you plant seedlings in the display tank, bury roots just deep enough that the plant stays anchored, typically one to two centimeters of substrate coverage over the root base. Burying the crown (the point where roots meet stem or leaves) will rot the plant. For rooting plants like Vallisneria or Sagittaria, space individual plants five to eight centimeters apart to allow runners to develop. Use planting tweezers for anything delicate to avoid crushing fragile roots.
Some aquatic plants do best when grown partially above the water surface before full submersion, a technique called emersed growing. If your seedlings were started in shallow water and still have aerial leaves when you transplant, keep the water level lower for a week and then gradually raise it. For a full breakdown of this approach, the guide on how to grow emersed aquarium plants explains the transition in detail.
Ongoing care for your seed-grown plants
Fertilization
Once seedlings are established in the tank (usually two to three weeks after transplant), start a regular fertilization routine. Seed-grown plants often start in nutrient-poor conditions and need a bump of macronutrients (nitrogen, phosphorus, potassium) plus key micronutrients. Watch for early deficiency symptoms: overall yellowing usually points to nitrogen, yellowing at leaf edges and tips suggests potassium, and new growth that emerges pale or yellowish with green veins is a classic sign of iron deficiency. Iron is worth treating separately because high concentrations are hard to incorporate into balanced all-in-one fertilizers, so a dedicated iron supplement added alongside your regular dose often gives better results than doubling up on an all-in-one formula.
CO2 injection
Most aquatic plants germinated from seed will grow in a low-tech setup without CO2 injection, but if you want faster growth and denser planting, injected CO2 makes a significant difference. The target range most hobbyists and planted tank references agree on is 20 to 30 ppm of dissolved CO2 in the water column. Below that range, plants can show stress symptoms like yellowing and stunted growth. Push much above 35 to 40 ppm and you risk stressing fish by reducing their blood's oxygen-carrying ability. A drop checker with reference solution is the easiest way to monitor CO2 in the right ballpark without expensive equipment.
Light schedule and pruning
Once plants are in the display tank, run your lights eight to ten hours per day. More than that does not help growth but it does encourage algae. As your seed-grown plants mature and fill in, prune regularly to keep them from shading each other out. For tall background plants like Vallisneria, trim the tips if they start spreading horizontally across the surface and blocking light to shorter foreground plants. Trim cuttings can often be replanted directly, giving you free new plants.
When things go wrong: troubleshooting common failures
No germination after two or three weeks
First, check temperature. This is the number one culprit. If your water is below 23 degrees Celsius, germination will stall for most aquatic species. The [US Forest Service FEIS species review](https://research.
fs. us. gov/feis/species-reviews/elepal) for common spikerush (Eleocharis palustris) reports that a 15 °C temperature with 9 hours dark and 15 hours light produced 0% germination in the cited study. Raise it to 25 to 30 degrees and give it another week.
If temperature is fine, the seeds may have been stored dry and lost viability. Old, dry-stored aquatic seeds often have significantly lower germination rates than fresh or water-stored ones. If you suspect bad seeds, try a [cold stratification trick](https://vuir. vu.
edu. au/15848/): place seeds in cold water at 1 to 3 degrees Celsius for 30 days, then move them to warm planting conditions. Research on aquatic plant seeds shows this can dramatically revive dormant seeds and produce 80-plus percent germination within a week.
One Reddit discussion in r/NativePlantGardening notes that seed packets commonly imply temperature regimes, and that germination performance can vary strongly depending on the conditions you provide Research on aquatic plant seeds shows this can dramatically revive dormant seeds and produce 80-plus percent germination within a week. .
Algae smothering seedlings
Algae in the seed-starting tray is almost always caused by too much light combined with low plant biomass. Reduce your light period to eight hours per day until seedlings establish, and keep the tray out of any direct sunlight. Adding a few fast-growing floating plants or stem plant cuttings to the tray helps outcompete algae for nutrients. A small nerite snail or a few bladder snails can also help control algae without damaging seedlings.
Seedlings rotting at the base
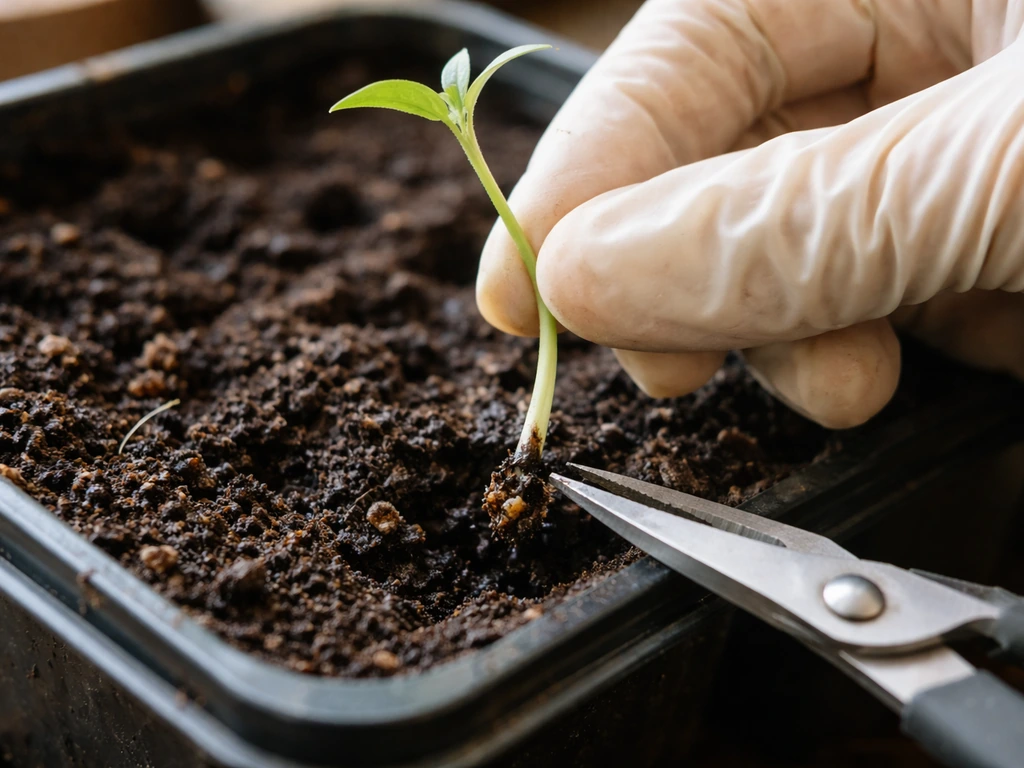
Rot at the base usually means the crown is buried too deep, the water is stagnant, or the substrate is anaerobic. Dig up the affected seedlings, trim any rotted tissue with clean scissors, and replant shallower with the crown at or just above the substrate surface. Add gentle water movement with a small airstone or a very low-flow pump to prevent stagnant pockets. If the substrate smells sulfurous when disturbed, it needs to be refreshed.
Plant melting after transplant
Melting is the most alarming-looking problem and usually the least serious. When a plant transitions from emersed or shallow-water conditions to a fully submerged display tank, it often drops its existing leaves and regrows aquatic-form leaves from the root system. This can look catastrophic but is normal. Do not pull the plant up.
Leave it in place, keep nutrients stable, and watch the base for new growth, which usually appears within one to three weeks. The important thing is not to overreact by adding more fertilizer in a panic: melting right after transplant is usually environmental stress, not a nutrient deficiency. Once new leaves emerge and the plant stabilizes, then evaluate whether fertilization adjustments are needed based on actual leaf symptoms.