Yes, you can grow your own luffa sponges at home, and it is genuinely rewarding, but it requires real planning. Luffa is a tropical vine that needs a long, warm season (120 to 200 days frost-free depending on your variety and climate), so starting early and setting up your space correctly makes the difference between a sponge and a compost pile. Here is everything you need to get from seed to usable sponge, in the order you actually need it.
How to Grow Luffa Sponge: Seed to Harvest Guide

Marcus Holloway
4 Apr 2026
Where you can realistically grow luffa sponges

Luffa (Luffa aegyptiaca or Luffa acutangula) is a cucurbit, like squash or cucumber, and it shares their appetite for heat, sun, and moisture. The core requirement is a long frost-free window. Most sources put this at 120 to 150 days minimum for warm climates, and growers in zones 5 to 7 often cite 150 to 200 days to reliably produce mature sponges. If your growing season is on the shorter end, you compensate by starting seeds indoors 4 to 6 weeks before your last frost date.
Full sun is non-negotiable, meaning at least 8 hours of direct sunlight per day. Luffa will grow in partial shade but won't fruit well. Outdoors is the preferred setup for most growers because the vines get enormous (easily 10 to 15 feet or more) and need the air circulation and pollinator access that outdoor environments provide. If you're curious whether loofahs are easy to grow in a marginal climate, the honest answer is: they can be, but only if you're willing to start seeds early indoors and commit to consistent watering and heat through the season.
Indoor growing is possible for seed starting but not practical for the full growing cycle unless you have a very large, very bright space. A heated greenhouse is the realistic indoor alternative for cooler climates. Container growing works for the early stages, but luffa wants to sprawl, so plan to move plants outdoors once temperatures stabilize above 60°F at night.
From a water-aware growing standpoint (which matters a lot on this site), luffa is not a hydroponic candidate in the traditional sense. Its root system is expansive and prefers well-draining soil rather than standing water. That said, drip irrigation is actually the ideal delivery method, especially during flowering and fruit set, because it maintains consistent moisture without wetting foliage. Moisture swings, either too dry or waterlogged, are a primary cause of flower drop and poor fruit set. Think of luffa's relationship with water the same way you'd manage a semi-aquatic environment: stable, consistent, and never stagnant.
Starting your seeds: scarification, soaking, and heat
Luffa seeds have a notoriously hard seed coat, and skipping the prep steps is the number one reason people report zero germination. Do both of these before you plant:
- Scarify the seed by rubbing it lightly on sandpaper or a nail file on both flat sides. You're just breaking through the outer coat, not grinding the seed down. A few seconds per side is enough.
- Soak the scarified seeds in warm water for 48 hours. Refresh the water if it cools. Seeds that are viable will often swell visibly.
- Plant immediately after soaking, before seeds dry out again.
For germination medium, use moist potting soil or peat pods. Plant seeds about half an inch deep, one per cell or small pot. The most important factor after this is heat. Luffa needs soil temperatures of at least 70 to 73°F (21 to 23°C) to sprout, and a heat mat set to 75 to 80°F (24 to 27°C) is the most reliable way to hit that consistently. Germination typically occurs in 7 to 14 days under these conditions. Without consistent warmth, expect spotty germination or nothing at all. Temperature fluctuations are the second most common cause of germination failure after insufficient seed prep.
Keep the germination medium consistently moist but not soggy. A humidity dome helps retain heat and moisture during this stage. Once seedlings emerge and show their first true leaves, remove the dome and move them under grow lights or into a sunny south-facing window.
Planting setup: soil, spacing, and the trellis you actually need
Soil and media
Luffa wants well-draining, organically rich soil with a pH between 6.0 and 6.5. Some sources nudge toward neutral to slightly alkaline, so anywhere in the 6.0 to 7.0 range works. What it absolutely cannot handle is waterlogged soil. If your ground tends to hold water, amend it with compost and coarse perlite, or raise your bed. Poor drainage leads to root rot faster than almost any other mistake. This is one area where the water-management instincts from aquatic growing actually transfer directly: drainage matters as much as moisture availability.
Spacing and transplanting
Transplant seedlings outdoors after your last frost date, once nighttime temperatures are consistently above 60°F. Space plants 12 to 18 inches apart in rows, with rows at least 5 to 6 feet apart to accommodate the spread. Harden seedlings off over 5 to 7 days before transplanting by setting them outside in a sheltered spot for increasing amounts of time each day.
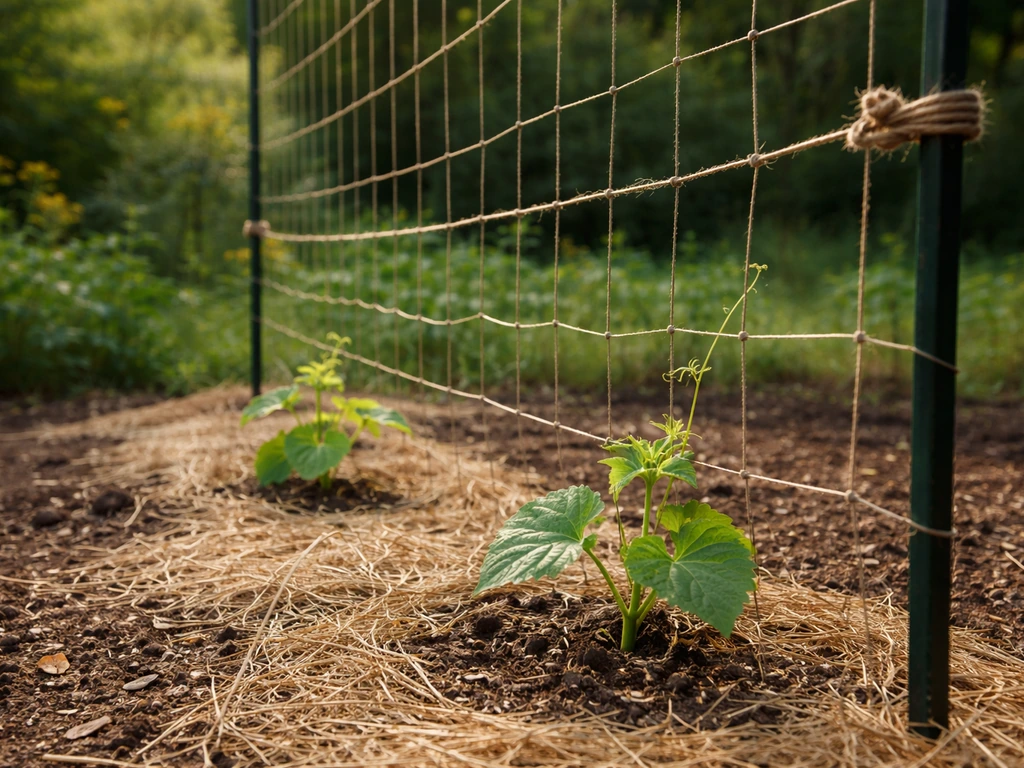
Trellising
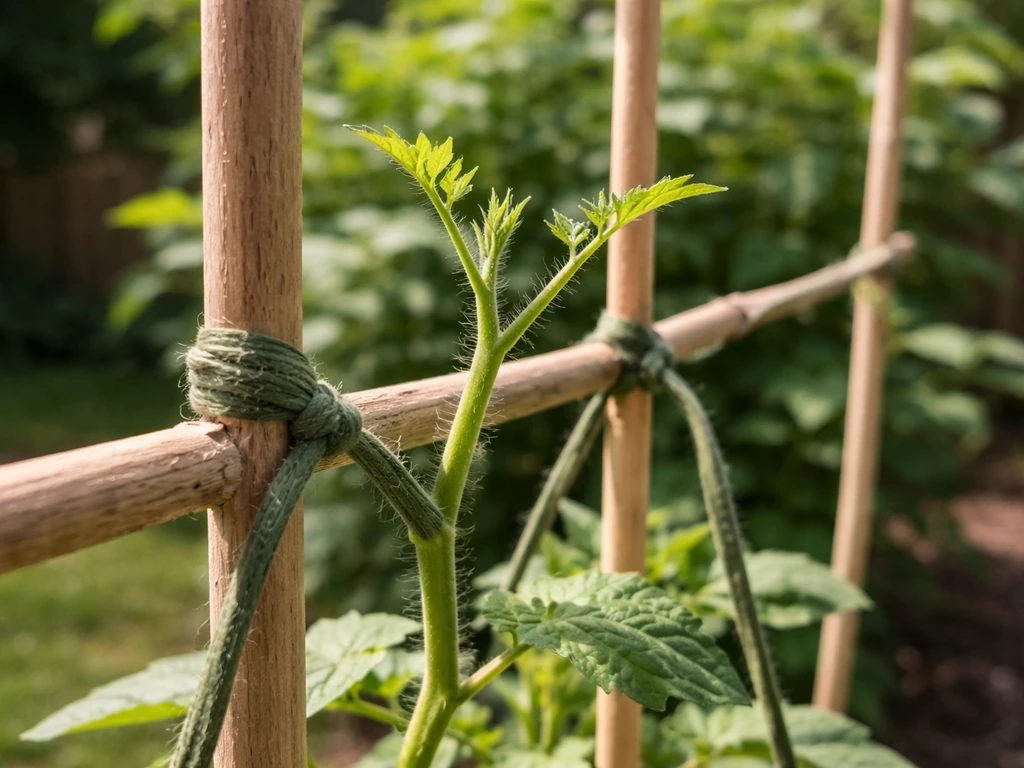
This is not optional. Luffa vines can reach 15 to 30 feet in a good season. More importantly, any luffa fruit that touches the ground will rot, discolor, or develop into a misshapen sponge. Build your trellis before or at the time of transplanting. A sturdy structure at least 6 feet tall, made of cattle panels, wire fencing, or a pergola, is ideal. Guide the main vine up the trellis as it grows and use soft ties or clips to secure it. The fruit will hang vertically, which produces straighter, more uniform sponges.
Daily and weekly care: watering, feeding, light, and humidity
Watering
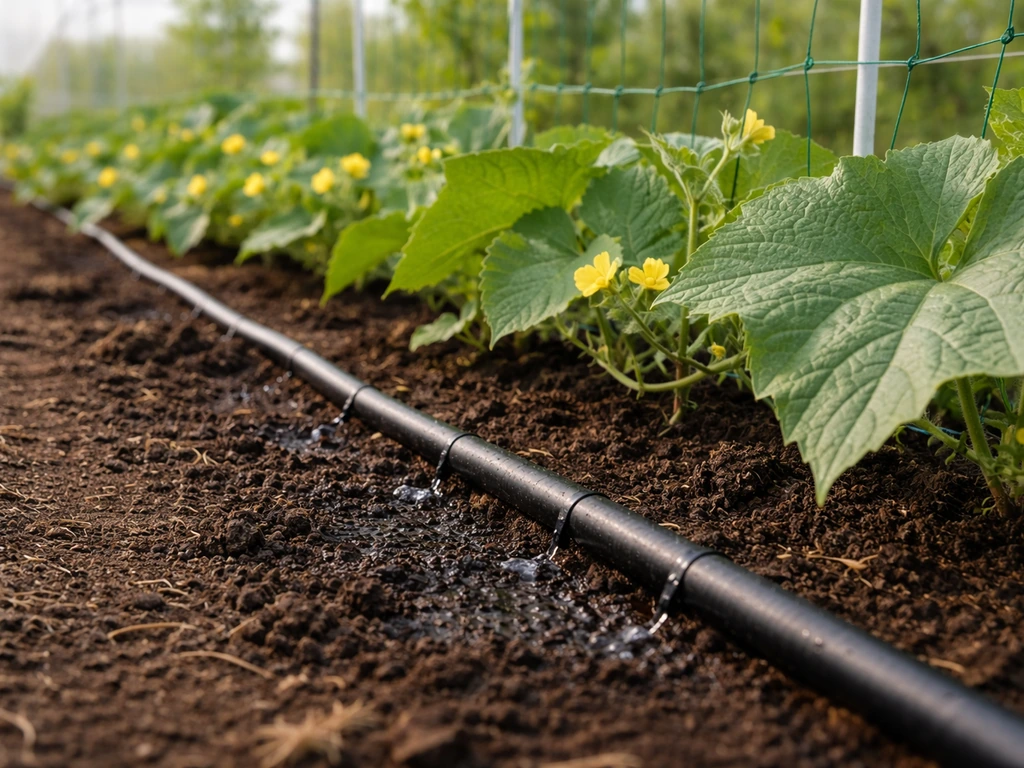
Consistent moisture is the single most important care factor during flowering and fruit set. Drip irrigation is the best delivery method because it keeps soil moisture steady without wetting leaves (which promotes fungal issues). Aim for about 1 inch of water per week minimum, more during hot, dry stretches. Never let the soil dry out completely when plants are flowering or setting fruit. Inconsistent watering at this stage causes flower drop and can result in no fruit at all.
Feeding
Luffa is a heavy feeder, but nitrogen management is where most home growers go wrong. Use a balanced fertilizer early in the season to support vegetative growth, then switch to a lower-nitrogen, higher-phosphorus and potassium formulation once flowering starts. Too much nitrogen after flowering causes the plant to keep producing leaves and vines instead of fruit. UF/IFAS extension research specifically flags nitrogen levels exceeding 6.0% as a driver of excessive vegetative growth and reduced fruit yield. If your vine is enormous but not setting fruit and you've been heavy-handed with a high-N fertilizer, back off. Sidedress with compost two or three times during the growing season as a gentler alternative to synthetic fertilizers.
Light and temperature
Luffa needs full sun and warm temperatures every day. Daytime temperatures in the 80s to low 90s°F are ideal for flowering and fruiting. Below 60°F at night slows growth significantly. If you're growing in a borderline climate, black plastic mulch over the soil can help retain ground heat and push soil temps up by several degrees. High humidity in the range of 60 to 80% generally suits luffa well, consistent with its tropical origin. In very dry climates, mulching also helps retain soil moisture and moderate temperature swings.
Training vines and fixing fruiting problems
Once your main vine reaches the top of your trellis, you can pinch the growing tip to encourage lateral branching, which produces more flowering sites. Allow two or three strong lateral branches and remove weak or crowded ones. This is similar in principle to the kind of targeted pruning you'd do with any fast-growing aquatic vine like rotala, where managing structure leads to better overall growth and resource distribution.
Luffa produces separate male and female flowers on the same plant. Male flowers appear first, often weeks before female flowers. Female flowers are identifiable by the small proto-fruit at the base of the bloom. If you see flowers but no fruit forming, the most likely causes are lack of pollination, poor pollinator access, or inconsistent watering. Hand-pollination is straightforward: use a small paintbrush or cotton swab to transfer pollen from a male flower to the center of a female flower in the morning when flowers are open. This is especially useful for indoor or greenhouse setups where bees have limited access. Avoid using any pesticides during flowering, as even low-toxicity products can harm the bees and other pollinators doing the heavy lifting for your fruit set.
Troubleshooting common growth and fruiting issues:
- Lots of vine, no flowers: plant is too young (male flowers come first, female flowers follow weeks later), or nitrogen levels are too high. Cut back on feeding.
- Flowers dropping before fruit sets: inconsistent watering or heat stress are the main causes. Check soil moisture and mulch to stabilize temperature.
- Female flowers present but not setting fruit: pollination failure. Hand-pollinate in the morning.
- Yellowing leaves: could be nitrogen deficiency early in the season or overwatering/root stress later. Check drainage and feeding schedule.
- Pest basics: aphids and cucumber beetles are the most common threats. Inspect the undersides of leaves weekly. For aphids, a strong spray of water or insecticidal soap works well. For cucumber beetles, row covers before flowering, then remove when flowers open for pollination.
How to tell when luffa is ready to harvest
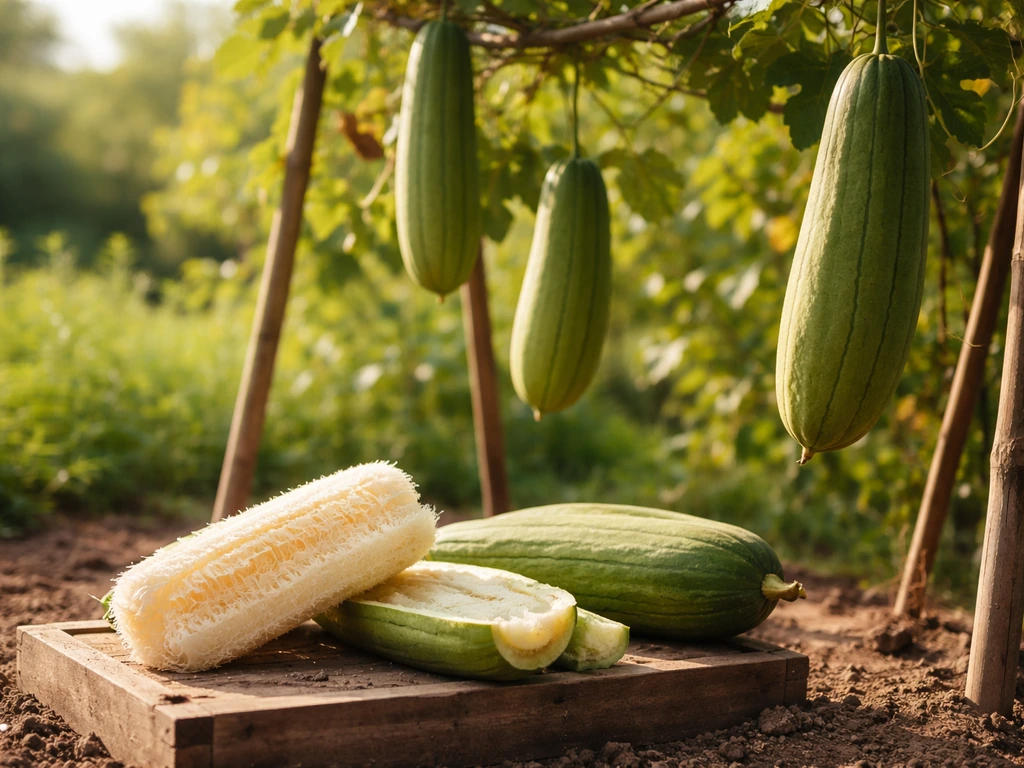
This is where patience pays off. Harvesting too early is the most common processing mistake. A luffa meant for use as a sponge must be fully mature on the vine before picking. The signs of readiness are:
- The outer skin turns from green to tan or brown and starts to pull away from the fibrous interior.
- The gourd feels light for its size, significantly lighter than an immature fruit.
- When shaken, you can hear the seeds rattling inside.
- The stem connecting the fruit to the vine begins to dry out and brown.
If frost is coming before your fruit reaches this stage, harvest what you have, but know that immature green fruits without a developed fiber network won't produce usable sponges. There's no shortcut around the maturity requirement. Think of this the way you'd approach harvesting a slower-growing aquatic plant like riccia fluitans: timing the harvest to actual maturity, not calendar date, is what determines quality.
Processing luffa into a usable sponge
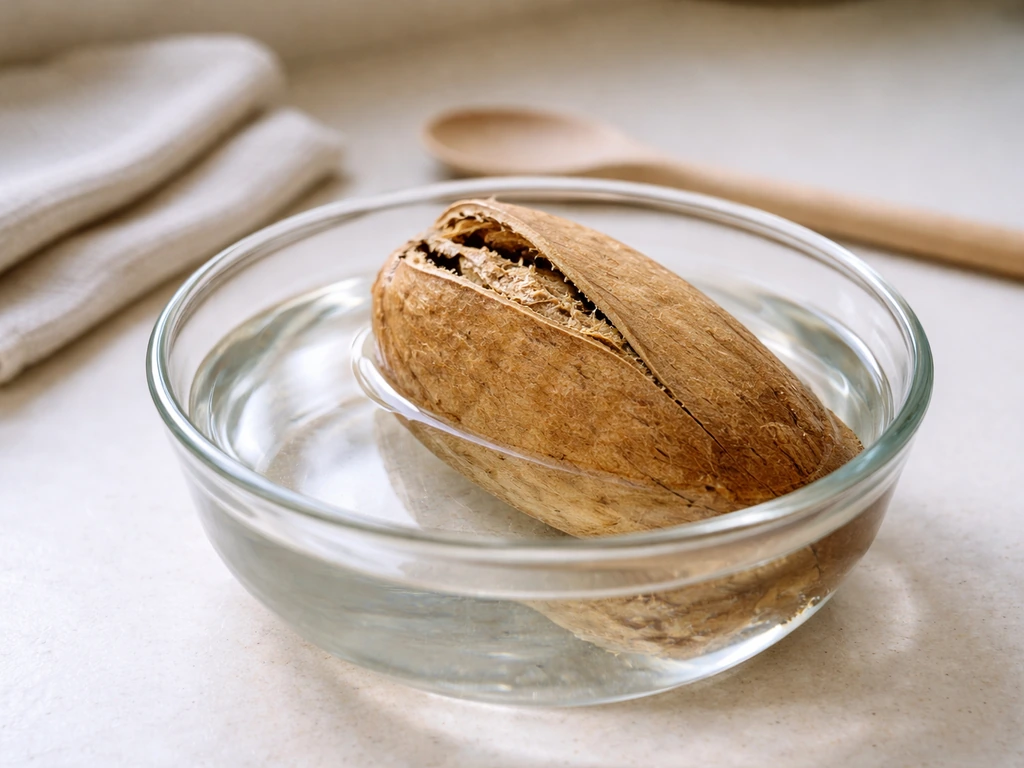
- Soak the dried gourd in water for 15 to 30 minutes to soften the outer skin. The skin will loosen and crack, making it easy to peel off by hand.
- Peel the skin completely. It should come off in sections once softened.
- Shake out the loose seeds from one end. Save seeds from your best, most mature fruits for next year's planting.
- Rinse the fiber skeleton under running water, squeezing repeatedly, until the water runs completely clear. This removes the sticky, staining interior pulp.
- Optional bleaching: soak the rinsed sponge in a diluted bleach solution (roughly 1 tablespoon bleach per gallon of water) for 10 to 15 minutes to reduce staining and improve sanitation. Rinse thoroughly afterward.
- Dry the sponge completely in full sun or a well-ventilated space for 2 to 5 days. It must be bone dry before storage.
Avoiding the most common processing and storage mistakes
Storing a sponge that isn't fully dry is the fastest way to ruin your harvest. Moisture trapped inside the fiber network leads to mold within days, especially in humid environments. Squeeze and press the sponge after rinsing to remove as much water as possible before air drying, and do not rush the drying phase. If you're in a humid climate, a fan directed at the drying sponges or a dehydrator on a low setting can help.
Other processing mistakes worth avoiding: The NCSU Extension Gardener guide also recommends soaking processed loofah fruit in warm water for about 5 to 20 minutes and using a chlorine bleach solution to lighten the sponges.
- Skipping the soak before peeling: trying to peel without softening the skin first tears the fiber and leaves behind stuck skin fragments.
- Not rinsing thoroughly: leftover pulp causes discoloration and smell over time. Keep rinsing until the water is genuinely clear.
- Harvesting too early: a sponge that hasn't fully matured on the vine will have a weak, incomplete fiber network and won't hold its shape.
- Storing before fully dry: any residual moisture causes mold. When in doubt, dry for another day.
Once dry, store finished sponges in a breathable bag or open container, not an airtight one. Airflow keeps them in good condition for months. A well-processed, properly dried luffa sponge should last a year or more in storage.
Soil vs. hydroponic/water-based: which setup actually works for luffa
Given this site's focus on water-based and alternative growing systems, it's worth addressing directly: luffa is not a great candidate for traditional hydroponics. Its roots are extensive, it needs structural support for a large vine, and its relationship with water is about consistent drainage and moisture, not immersion. Deep water culture or NFT systems aren't practical for a plant of this size and root behavior. That said, drip-fed raised beds or wicking beds come closer to a hybrid approach: you're controlling moisture delivery precisely, managing drainage carefully, and creating a stable root environment, which is as water-aware as luffa cultivation gets.
For comparison, growing something like ludwigia in an aquatic system is a fundamentally different challenge from growing luffa, which belongs firmly in the soil-and-trellis category. And while the question of whether rotala rotundifolia is easy to grow in aquatic setups is a whole different conversation, both examples illustrate how much growing environment shapes your method choices. Luffa's method is soil-based, and trying to force it into a submerged or semi-aquatic setup will create more problems than it solves.
| Setup type | Pros for luffa | Cons for luffa | Verdict |
|---|---|---|---|
| In-ground soil bed | Best root space, natural drainage, easy trellising | Harder to control soil moisture precisely | Best overall choice |
| Raised bed with drip irrigation | Excellent drainage control, consistent moisture, warmer soil | Requires setup investment | Best for most home growers |
| Large container (25+ gallon) | Portable, controllable soil, good for short seasons | Dries out quickly, needs frequent watering | Works with effort |
| Hydroponic/water-based system | Good moisture control in theory | Wrong root environment, vine size unmanageable, no practical benefit | Not recommended |
If you've been exploring water-based growing methods and are curious about what other natural sponge-like organisms can be cultivated in aquatic environments, it's worth reading about how to grow sponges in a more aquatic context, which is a genuinely different discipline from the soil-and-trellis world of luffa cultivation.
Your action plan starting today
If today is early spring (and if you're in the Northern Hemisphere, April is right in the window), here is exactly what to do right now:
- Buy luffa seeds if you haven't already. Standard Luffa aegyptiaca (smooth luffa) is the most common and widely available. Order now so you have them within the week.
- Scarify and soak your seeds for 48 hours in warm water.
- Plant in small pots with moist potting mix on a heat mat set to 75 to 80°F.
- Set up a germination station with a humidity dome under grow lights or in a sunny window.
- While seeds germinate, plan your trellis and prepare your bed or containers. Test and amend soil pH to 6.0 to 6.5.
- Transplant outdoors after your last frost date, once nights are consistently above 60°F.
- Install trellis before or at transplant time. Begin drip or consistent hand-watering from day one.
- Feed with balanced fertilizer early, then shift to lower nitrogen once flowering starts.
- Hand-pollinate female flowers if needed. Monitor for pests weekly.
- Harvest when fruits are brown, light, and rattling. Process immediately or store dry whole gourds until ready.
The whole process asks for patience more than skill. The vines are vigorous once they get going, the flowers are beautiful, and the first time you peel a dried luffa and hold a sponge you grew yourself, it genuinely feels worth the 150-plus days you put into it.
FAQ
How do I know my luffa will become a real sponge and not just a tender green fruit?
Not all luffa is a sponge. If you want usable fiber, choose varieties commonly sold for sponges, and leave fruit on the vine until the skin dries and the inside network looks fully developed. If you peel when the fruit is still soft or translucent-green, you will usually get a weak, non-fibrous result.
What’s the safest way to water luffa if it keeps raining or my soil drains slowly?
For each fruit, aim to keep the flower area evenly moist but never soggy. Use drip and check the soil 2 to 3 inches down, if it is dry at that depth, water. During heavy rain or frequent irrigation, pause watering and watch for waterlogged conditions, because root rot can stop fruiting even when the surface looks wet.
Can I plant luffa seeds directly in the ground, or do I have to start them indoors?
Yes, but only if you start with the right temperature plan. First, soak or scarify seeds before sowing, then keep soil 70 to 73°F and use a heat mat around 75 to 80°F. If your nights are cool, germination often stalls even when days are warm.
My luffa flowers appear but no fruit sets, what should I check first?
The main fix is improving pollinator access. If you are growing outdoors and fruit set is poor, check that vines have early male flowers and that female flowers are actually opening, also make sure you are not using any insecticides near bloom time. If you see open female flowers but no fruit, hand-pollinate in the morning and repeat the next day.
Can I grow luffa sponge in a small garden or balcony, and how do I manage the vine size?
Spreading vines can still be trained even in small spaces, use a tall trellis and prune aggressively for manageable laterals. Choose fewer plants per area, tie the main vine upward, and remove weak side shoots so energy goes to fruiting branches. Still keep at least 12 to 18 inches between plants so airflow and light reach the fruit zone.
When is the best time to pinch or prune luffa for more sponge production?
You can pinch the top once the vine reaches the trellis height, but do it selectively. If your plant is already flowering heavily, avoid repeated pinching because it can temporarily reduce the number of active blossoms. Instead, remove only crowded or weak laterals and keep 2 to 3 strong branches.
My vine is huge but not fruiting, could my fertilizer choice be the problem?
Avoid overfeeding after flowering begins. If your leaves are very lush and you have little to no fruit, switch strategy to lower nitrogen and focus on potassium and phosphorus, then stop any high-N fertilizer. Compost sidedressing can continue, but reduce frequency if you see excessive vine growth.
If frost is coming, can I harvest early and still get usable sponges?
Harvest timing is maturity-based, look for a dried, tan outer color and fiber development, also the fruit should detach more easily. If frost is coming before maturity, you can harvest early, but expect that some will not fiber properly, and they may turn to compost rather than usable sponges. After an early harvest, store fruit somewhere warm and dry so it finishes drying.
How do I dry luffa sponges without getting mold?
Yes, the drying stage is where most failures happen. Rinse and squeeze to remove water, then dry with airflow until the sponges feel very light and the fibers are crisp. If you see fuzzy mold or smell sourness, discard rather than trying to “rescue” it, because mold can persist inside the fiber network.
What’s the best way to store dried luffa sponges so they last a long time?
Airflow matters more than time. Store in breathable containers like a paper bag, mesh bag, or open bin, and keep them in a dry spot away from humid basements. If you live in a very humid area, you may need periodic re-drying every few months to prevent musty odor.
Can luffa be grown hydroponically, or is it strictly soil-based?
Not as a traditional hydroponic crop. Luffa needs extensive, branching roots and a large trellis system, immersion or shallow-water systems typically fail due to oxygen and drainage issues. If you want a “hybrid” approach, use a raised bed or container with controlled irrigation, and still prioritize well-draining media and consistent drip delivery.
Why did only a few of my luffa seeds germinate, and how can I improve germination next season?
Older or poorly stored seeds are often the culprit. Use fresh seed when possible, and do the seed-coat prep steps so water can penetrate. Even with perfect conditions, very old seeds can germinate weakly, so plan extra seeds per cell and thin later to your strongest seedlings.