Yes, you can grow taro in water, and it works surprisingly well. Taro (Colocasia esculenta) is naturally a bog and wetland plant, which means it adapts to water-based growing more readily than most vegetables. The basic approach is this: you partially submerge a taro corm or cormel in water, keep the crown and developing leaves above the waterline, provide warmth and decent light, and the plant takes off on its own. With a few adjustments for nutrients and oxygenation, you can push it all the way to a harvestable corm without a single handful of soil.
How to Grow Taro in Water: Step-by-Step Root Guide

Marcus Holloway
7 Apr 2026
Choosing your taro planting material
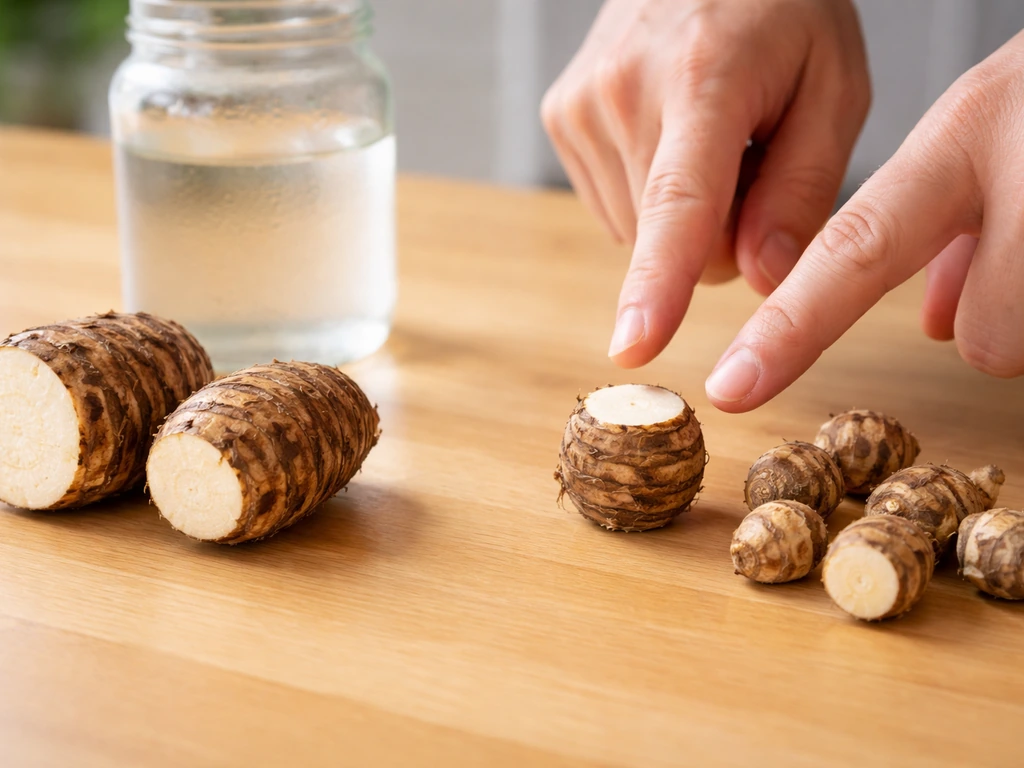
The planting material you start with determines almost everything about how quickly the plant roots and how large the corm grows. You have two main options: whole corms or cormels (the smaller daughter tubers that develop off the sides of the main corm).
For water growing, cormels in the 150 to 200 gram range are the sweet spot. They're compact enough to sit in a jar or net pot without taking up your whole container, but large enough to have stored energy for a strong start. Anything smaller than a golf ball tends to rot before it roots, and anything larger than your fist is usually better suited for a soil bed. If you're sourcing from a grocery store or farmer's market, look for firm corms with no soft spots, no mold, and ideally a visible growing tip (the pale, slightly pointed end). That tip tells you the corm is still viable and hasn't gone dormant beyond recovery.
You can also propagate taro by separating offsets (the daughter corms that form around an established mother plant). This is actually one of the fastest ways to get a new plant going in water because the offset already has a head start on root development. If you have an established taro anywhere nearby, separating those offsets gives you propagules that are ready to root almost immediately.
One thing I learned the hard way: avoid supermarket taro that's been sitting in cold storage for weeks. Chilling injury makes them look fine on the outside but rot from the inside once you put them in water. If you can, buy from a local Asian grocery with high turnover, or better yet, get your corms from a grower or garden center.
Setting up your water or hydroponic system
You don't need fancy equipment to get taro going in water. Here's what actually matters:
Container size and type
Use a container that holds at least 1 to 2 gallons of water per plant. A 5-gallon bucket works great for a single corm and gives room for root expansion. Wide, shallow containers (like storage totes) are good if you want to grow multiple plants side by side. Opaque containers are strongly preferred over clear glass or plastic because they block light from reaching the water, which dramatically reduces algae growth. If you only have a clear container, wrap it in dark fabric or tape.
Oxygenation
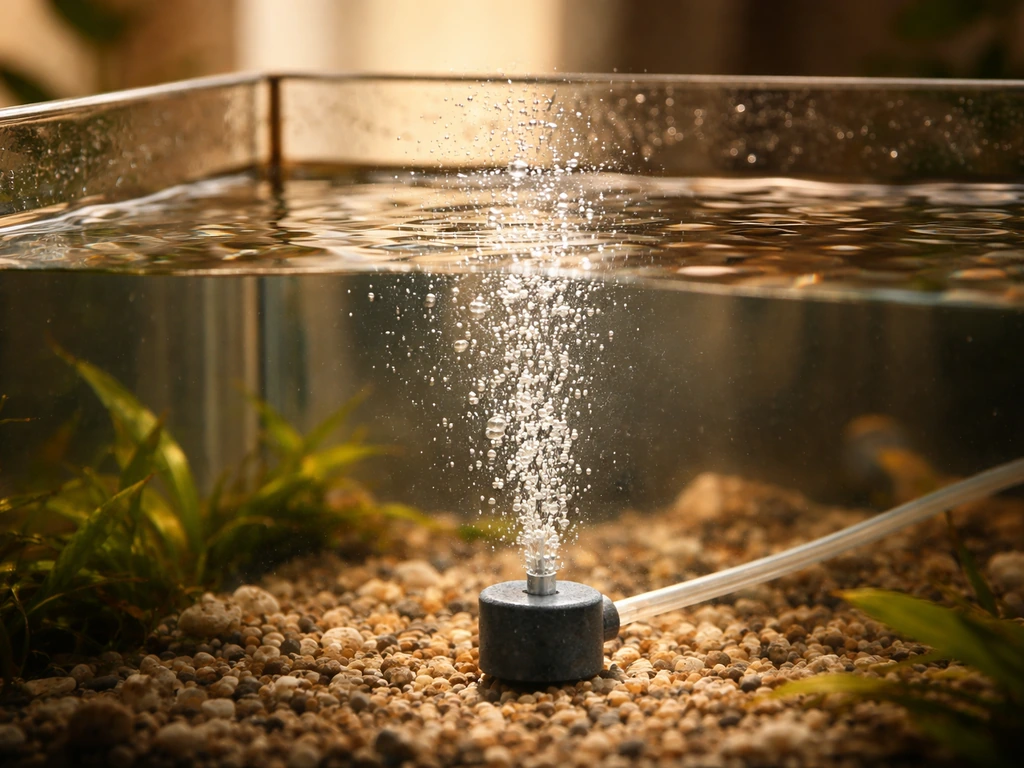
Taro roots need oxygen. Still, stagnant water leads to root rot within days, especially in warm conditions. The simplest fix is a cheap aquarium air pump with an air stone dropped into the bottom of your container. Run it continuously. If you're building a slightly more serious setup, a recirculating deep water culture (DWC) system with a submersible pump works even better and keeps roots thriving. This is the same principle used in aquaponic and hydroponic systems, and it makes a significant difference in root mass and overall plant health.
Lighting
Taro wants full sun outdoors, which translates to 6 to 8 hours of direct or bright indirect light indoors. A south-facing window often works for the leafy phase, but for serious corm development you'll want supplemental lighting. A full-spectrum LED grow light (anything in the 3000K to 6500K range) set 12 to 18 inches above the plant for 14 to 16 hours per day does the job. Taro is a tropical plant and responds well to long photoperiods during the vegetative growth phase.
What to submerge and what to keep above water
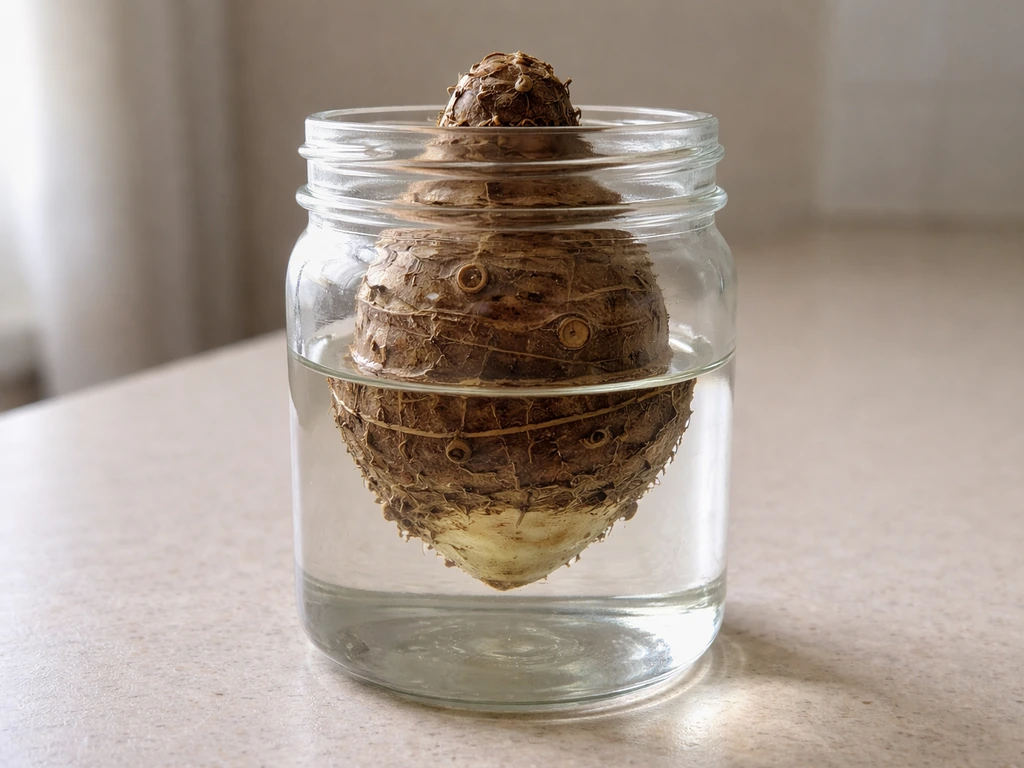
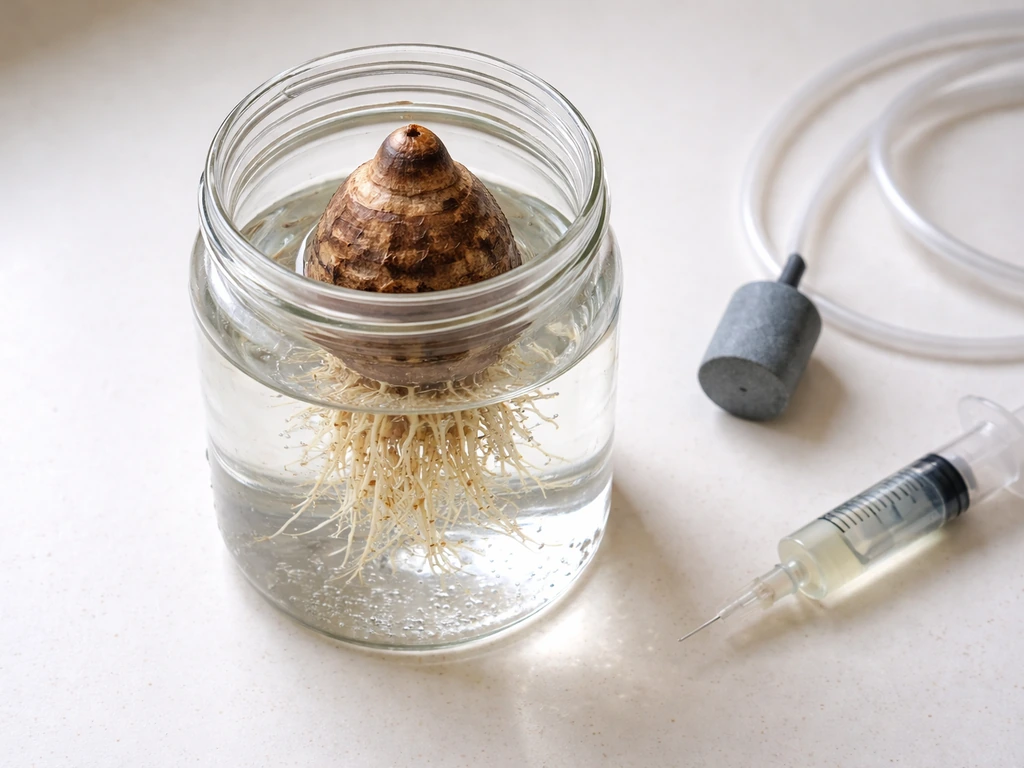
This is where most beginners make their first mistake. Taro is not a fully aquatic plant, and drowning the entire corm is the fastest route to rot. Here's the correct setup:
- Submerge the bottom third to half of the corm. The roots will emerge from the basal plate (the flat, slightly rough bottom) and the sides of the corm, and these need to be in or near the water.
- Keep the crown (the growing tip where leaves emerge) above the waterline at all times. Even partial submersion of the crown causes rot within a week.
- If you're using a net pot and hydroponic setup, position the corm so the bottom of the net pot sits just at or slightly below the waterline. The water wicks up through the growing medium (clay pebbles, lava rock, or gravel) and keeps roots moist without saturating the crown.
- As roots develop (usually within 1 to 3 weeks), they'll hang down into the water reservoir. At that point, you can let the water level drop slightly so the upper portion of the root zone gets some air exposure, which further reduces rot risk.
If you're using a simple jar or bowl without a net pot, try propping the corm on a small platform (a few stacked stones, a plastic grid, or even a few toothpicks pushed into the sides of the corm like a bromeliad) so the base sits just in the water while the crown stays dry. It looks low-tech but it works perfectly.
Water quality and ongoing maintenance
Temperature
Taro is a tropical plant and it needs warm conditions to thrive. Keep water temperature between 65°F and 85°F (18°C to 29°C). Below 60°F, root development stalls badly. Above 90°F, the water holds less dissolved oxygen and roots start to suffer. If you're growing indoors in a cool space, a small aquarium heater set to 72°F to 78°F keeps things in the ideal zone.
pH and top-offs
For hydroponic taro, aim for a pH of 5. FAO EcoCrop lists a soil pH suitability range for Colocasia esculenta of approximately 5.5 to 6.5 blank" rel="noopener noreferrer">soil pH suitability for Colocasia esculenta is about 5.5 to 6.5. 5 to 6.5. Check it every 3 to 4 days when the plant is young and weekly once it's established. Hydroponic University recommends monitoring and managing pH and EC rather than guessing, because water chemistry changes and directly affects nutrient uptake and plant performance blank" rel="noopener noreferrer">Check it every 3 to 4 days when the plant is young and weekly once it's established.. pH creeps up in still systems and drops in recirculating ones, so a cheap pH pen and a bottle each of pH-up and pH-down solution is worth having. Top off evaporated water with plain, pH-adjusted water (not fresh nutrient solution) to avoid building up salt concentrations in the reservoir. Do a full reservoir change every 10 to 14 days to reset nutrient levels and keep the water fresh.
Algae control
Algae in your reservoir competes for nutrients and oxygen. Using an opaque container handles most of this. If you still see green slime forming, do your full reservoir changes more frequently and make sure no light is leaking in through lids or joints. Avoid adding anything to the water to "kill" algae, since most algaecides will also harm your taro roots. Physical removal and light blocking are your best tools.
Feeding your taro: when to use nutrients and when plain water is enough
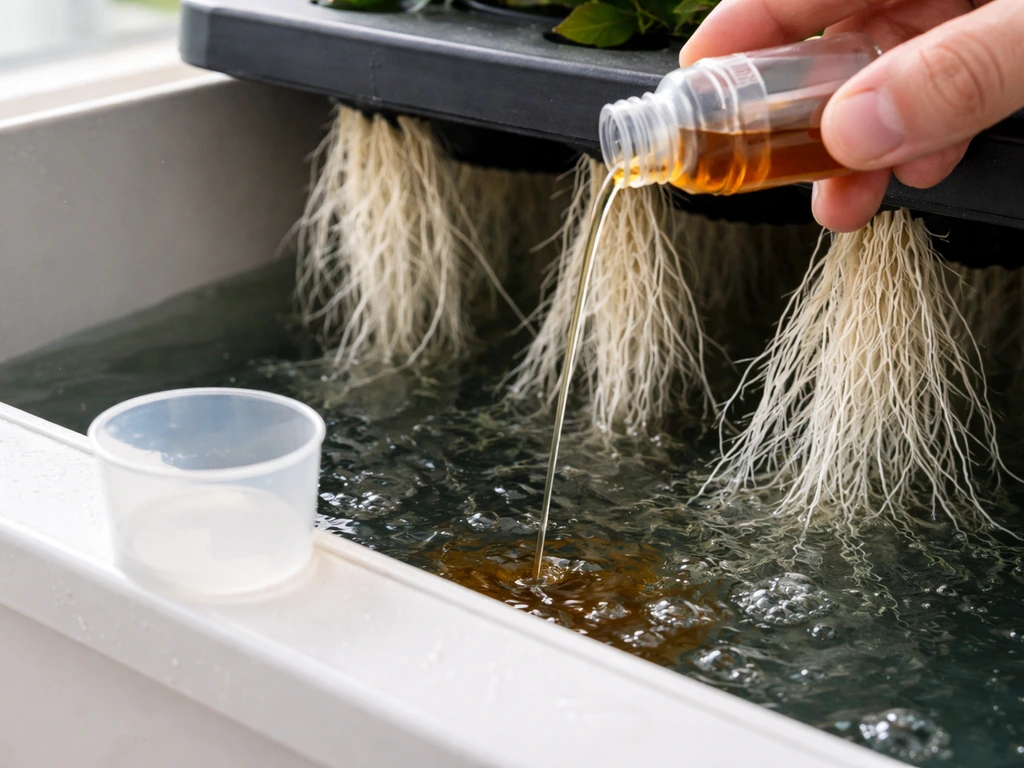
Taro corms contain enough stored energy to get the plant rooted and push out the first two or three leaves on plain water alone. For the first 2 to 3 weeks, plain water (dechlorinated tap water or well water) is actually preferable because it lets you see how the corm is reacting without the added stress of nutrient salts.
Once you see roots actively growing and the second leaf is unfurling, introduce a balanced hydroponic nutrient solution at half strength. A general-purpose hydroponic formula with an NPK ratio around 3-1-2 works well for the vegetative phase. As the plant matures and you're pushing toward corm development (roughly 4 to 6 months in), shift to a formula with more potassium and phosphorus relative to nitrogen. Something like a bloom or root-building formula (lower N, higher P and K) encourages the plant to put energy into root/corm mass rather than leaf production.
Aim for an electrical conductivity (EC) of 1.2 to 2.0 mS/cm during the growth phase, and back off to 0.8 to 1.2 mS/cm for the final corm-fattening phase. Overfeeding is a real risk with taro in water because salts concentrate quickly, so less is more.
What to expect week by week
| Phase | Timeframe | What you'll see | What to do |
|---|---|---|---|
| Sprouting | Week 1 to 2 | Growing tip swells, first pale shoot emerges, root nubs appear at base | Plain water, check for rot daily, maintain warmth |
| Early rooting | Week 2 to 4 | Roots extend 2 to 4 inches into water, first leaf unfurls | Switch to half-strength nutrients, check pH |
| Active vegetative growth | Month 2 to 5 | New leaf every 1 to 2 weeks, roots thicken and multiply, corm begins to swell slightly | Full-strength nutrients, increase light if growth slows |
| Corm development | Month 5 to 8 | Leaf production slows, corm noticeably enlarges, cormels may appear | Shift to low-N, high-K formula, reduce water changes slightly |
| Maturation and harvest | Month 8 to 12 | Oldest leaves yellow and die back, corm is firm and full-sized | Reduce or stop nutrients, harvest when 3 to 4 outer leaves have died back naturally |
Taro grown in water under good hydroponic conditions can reach harvest in 8 to 9 months for faster cultivars, and up to 12 months for slower varieties or cooler indoor setups. The timeline mirrors traditional field production: some upland taro cultivars hit maturity around 8 to 9 months, while others need a full year. Water growing doesn't dramatically speed this up, but it does give you control over conditions that often slow things down in soil.
Fixing the most common problems
Rot and foul smell
If the corm turns soft and the water smells like sulfur, you have anaerobic rot. Remove the corm immediately, cut away all soft tissue with a clean knife, dust the cut surfaces with food-grade hydrogen peroxide or powdered cinnamon (both have mild antifungal properties), let it air-dry for a few hours, then return it to fresh water with an air stone running. If more than half the corm is soft, it's not worth saving. Start over with fresh material.
No roots after 3 weeks
The corm is either too cold, too deeply submerged, or was already dead when you started. Check water temperature first. If it's below 65°F, add heat. If the crown is submerged, raise the corm. If neither fixes it after another week, the corm is likely not viable and should be replaced.
Yellowing leaves
The oldest (lowest) leaves naturally yellow and die as the plant grows, which is normal. If new or mid-canopy leaves are yellowing, it usually signals a nutrient deficiency. Nitrogen deficiency shows as uniform yellowing starting from older leaves. Iron deficiency (common when pH is too high) shows as yellowing between the veins of new leaves while the veins stay green. Fix iron deficiency by lowering pH to 5.5 to 6.0 and adding chelated iron to your nutrient solution.
Slow growth
Slow growth almost always comes down to insufficient light, water that's too cold, or inadequate oxygenation. In a Reddit DWC troubleshooting thread, commenters also describe common failure modes like precipitation, pH swings, and nutrient imbalance as likely causes when water-based root systems slow down or stall common DWC failure modes like precipitation, pH swings, and nutrient imbalance. Run through all three before adjusting nutrients. Adding more fertilizer to a plant that's struggling from low light or cold water just increases salt stress without helping.
Pests
Taro grown indoors in water is generally less pest-prone than soil-grown plants, but aphids and spider mites can still move in from nearby plants. Check the undersides of leaves weekly. A strong spray of water knocks aphids off, and insecticidal soap (diluted to 1 to 2%) handles mild infestations. Keep water-grown taro away from soil plants if you're dealing with fungus gnats, since the larvae can migrate into your reservoir.
Harvesting and what to do next

Taro is ready to harvest when the outer three or four leaves have naturally yellowed and died back, the overall leaf production has slowed significantly, and the corm feels firm and heavy when you lift the plant. In a hydroponic setup you can actually see the corm directly, which is a big advantage over soil growing. Reach in and feel it: a mature corm is dense and solid, while an immature one feels lighter and the skin is still very thin.
To harvest, lift the entire plant from the container, rinse the corm and roots under cool water, and use a clean knife to cut the corm free from the stalk. The cormels (the small daughter corms attached around the base) can be removed and used immediately as your next round of planting material. This is a closed loop that serious growers appreciate: you never need to buy planting stock again once you've got a healthy mother plant producing cormels.
The harvested main corm must be cooked before eating. Raw taro contains calcium oxalate crystals that cause intense mouth and throat irritation. Boiling, steaming, roasting, or pressure-cooking for at least 20 minutes neutralizes this effectively.
For replanting, move the saved cormels back into fresh water immediately after harvest, or let them cure in a dry spot for a day or two before restarting the process. Cured cormels tend to have slightly better rot resistance in the early stages. A postharvest white paper from the International Society for Postharvest Technology (ISPT) on curing and storage of starchy tropical crops notes that storage losses and handling conditions vary with curing and environmental method, which helps explain why cured cormels can show better early rot resistance blank" rel="noopener noreferrer">cured cormels tend to have slightly better rot resistance in the early stages. If you're curious how this water-based propagation approach translates to other starchy vegetables, the same partial-submersion method is worth exploring: growing a yam in water follows a similar logic and runs into many of the same challenges around rot prevention and crown placement.
A few more things worth knowing
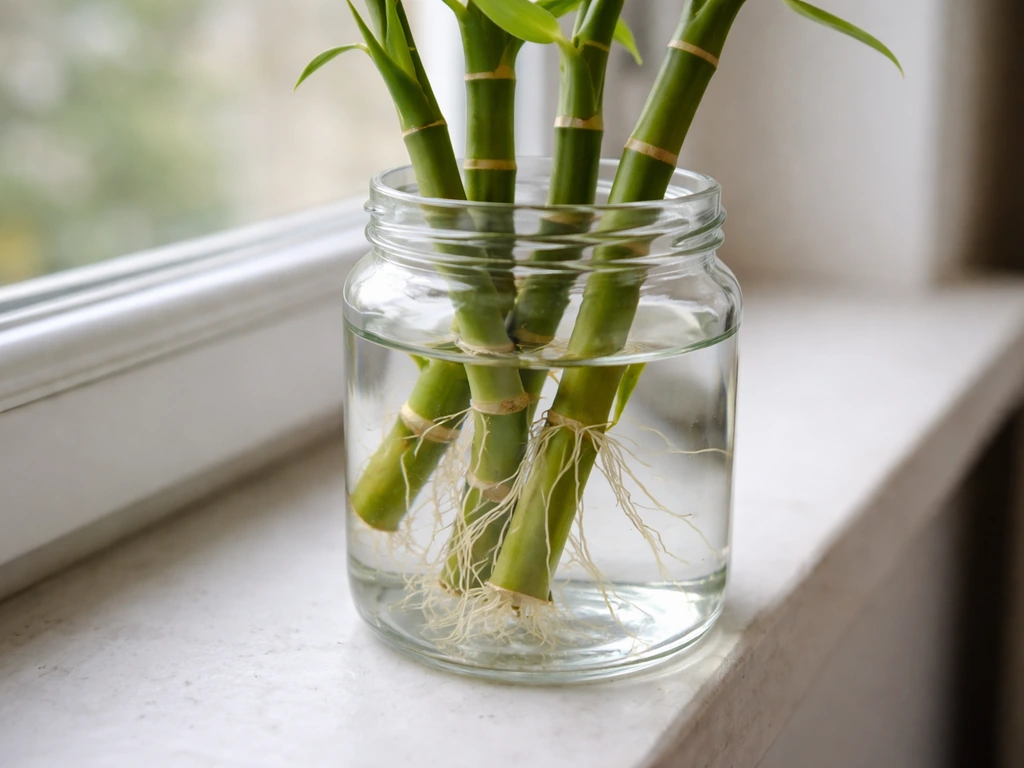
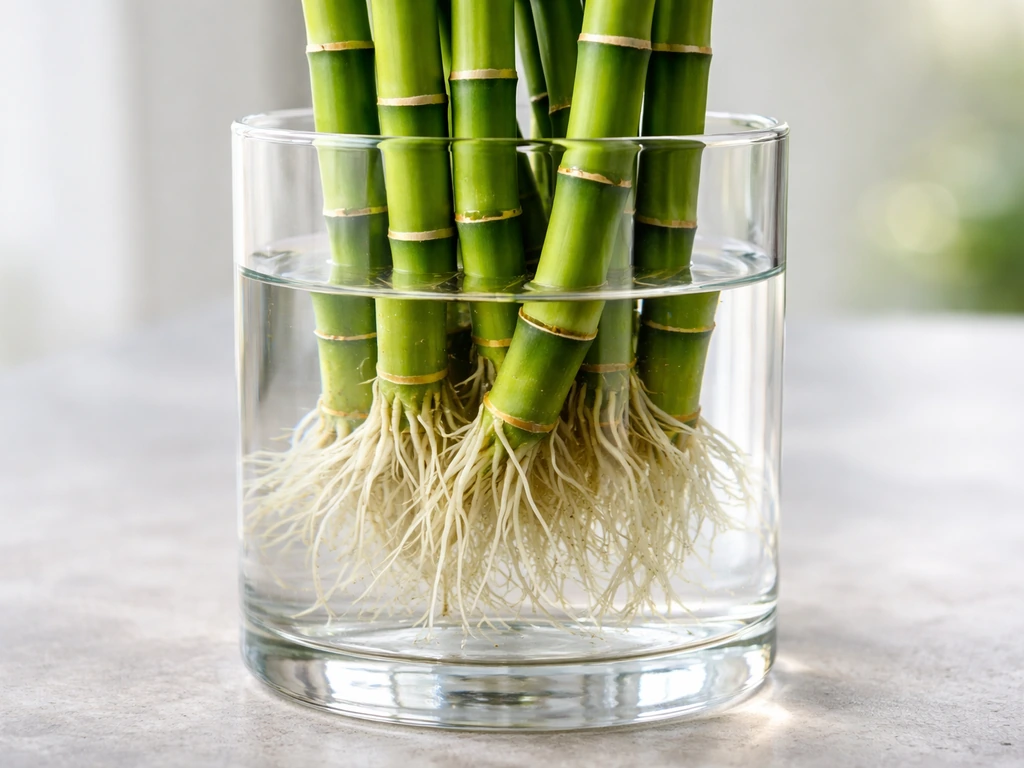
If you're expanding your water-based growing beyond taro, the principles here transfer well. Growers who have success with growing a bamboo plant in water already understand the importance of water freshness and partial submersion. Similarly, the patience required to grow taro in water is comparable to what you'd experience when you grow lucky bamboo in water, where slow, steady progress is the norm and rushing with more nutrients usually backfires.
There's also something historically satisfying about growing taro in a water-based system. Taro has been cultivated in flooded and semi-aquatic environments for thousands of years. Ancient agricultural innovations like chinampas, the floating garden beds of Mesoamerica, relied on exactly this kind of water-integrated plant growing. How chinampas were used to grow crops is a fascinating parallel to modern aquaponic and hydroponic methods, and it's a reminder that water-based cultivation isn't a new idea at all.
Taro in water is one of the most beginner-friendly water-based crops you can grow, mainly because the plant itself wants to grow this way. Get the temperature right, keep the crown above water, run some oxygenation, and start nutrients only after roots are visible. Do those four things and you'll have a healthy plant. Everything else is refinement.
FAQ
Can I grow taro in water during winter (indoors or on a balcony)?
Yes, but only if you can keep the corm base warm and oxygenated. Skip deep submersion, and instead use a net pot or platform so the crown stays dry while the bottom of the corm sits in water. Check water temperature frequently in winter, since cool water is a bigger limiter than light for root start.
How often should I change the water when I am growing taro hydroponically?
If the water stays clear, you likely do not need daily changing. Evaporated water should be topped up with plain dechlorinated water, but do full reservoir swaps every 10 to 14 days (or sooner if you see odor, cloudiness, or heavy biofilm). Sudden frequent changes can also stress the corm if temperature swings.
Do I need an air pump, and should it run all the time?
For a jar or bowl, running air 24/7 is the safest default. A periodic on-off schedule can still lead to oxygen dips, which increases the chance of soft rot. If you use an air stone, keep it in the bottom and do not let it clog, since reduced bubbling often precedes root browning.
When should I start checking pH, and what happens if I ignore it at first?
pH can still matter even if you start on plain water. If you wait until you switch to nutrients, pH usually becomes a bigger issue then, and letting pH drift too high can trigger iron lockout and yellowing between new-leaf veins. If growth is slow after nutrients start, recheck pH first before adding more fertilizer.
What signs tell me a taro corm is likely to rot in water before I plant it?
Look for the pale pointed tip and firmness, avoid any corm with wet spots, visible mold, or a hollow or rubbery feel. Also pay attention to storage temperature history, cold-stored supermarket corms can look OK externally but still rot internally once warmed and submerged.
My taro is turning black or mushy near the top. Could it be because the crown is in the water?
If the crown (where leaves emerge) is submerged, it is much more likely to rot than if only the base is in water. Raise the plant so the crown is above the waterline, and use a simple stand (stones, a grid, or toothpicks for support) if your jar lacks a net pot.
Should I move the corm to a larger container once it starts growing, and how do I avoid shocking it?
Repotting usually means you transfer without damaging roots, but in water systems the better move is to keep the oxygenation and water chemistry stable. If you must move the plant, do it quickly, keep the water temperature similar, and restart with fresh water plus an air stone immediately to avoid a short oxygen starvation period.
What is the safest way to deal with algae in the reservoir?
Yes, but not by using a “dead algae” product. Most algae killers can also harm your taro roots, and you can end up compounding root rot. Instead, block light using an opaque container, physically remove slime, and shorten the interval between full reservoir changes if algae persists.
Can I reduce light hours to speed corm formation?
You can, and it can even help corm development, but only if you provide enough light to prevent leaf-only growth. Use a full-spectrum LED and aim for 14 to 16 hours initially, then watch whether new leaves stall. If you reduce light too much, slow growth will look like “nutrient deficiency,” and adding more fertilizer can worsen salt stress.
How do I tell normal aging leaf yellowing from a real nutrient problem?
If the corm is firm and smells fine but leaves are yellowing, treat it as a diagnosis problem. Older-leaf yellowing and dieback is normal, while new-leaf yellowing between veins suggests iron issues that you fix by lowering pH and adding chelated iron rather than increasing overall fertilizer.
How can I tell if my taro in water is ready to harvest, without cutting it too early?
Harvest is not based on leaf length or number alone, use the combination. When outer leaves (typically the bottom three or four) yellow and die back, overall leaf production slows, and the corm feels dense and heavy when lifted, it is ready. If it feels light or the skin is very thin, wait longer and keep oxygenation steady.
Should I cure cormels before starting them in water again, or plant immediately after harvest?
You can replant right away using the small cormels attached around the base. Move them into fresh water immediately after harvest for the fastest start, and if you get frequent early rot, try a one to two day dry cure first to improve early rot resistance.