Yes, paperwhites grow beautifully in plain water. You don't need soil, and you don't need any fancy hydroponic equipment either. A glass jar or vase, some pebbles to hold the bulbs upright, and tap water are genuinely all it takes to get fragrant white flowers indoors in about 4 to 6 weeks. The catch is in the details: how high the water sits relative to the bulb, where you place the container, and a couple of small interventions that prevent the most common failures (floppy stems, rot, and bulbs that just sit there doing nothing). This guide covers all of it, start to finish.
How to Grow Paperwhites in Water Indoors: Step by Step

Marcus Holloway
8 Apr 2026

What 'growing in water' actually means for paperwhites
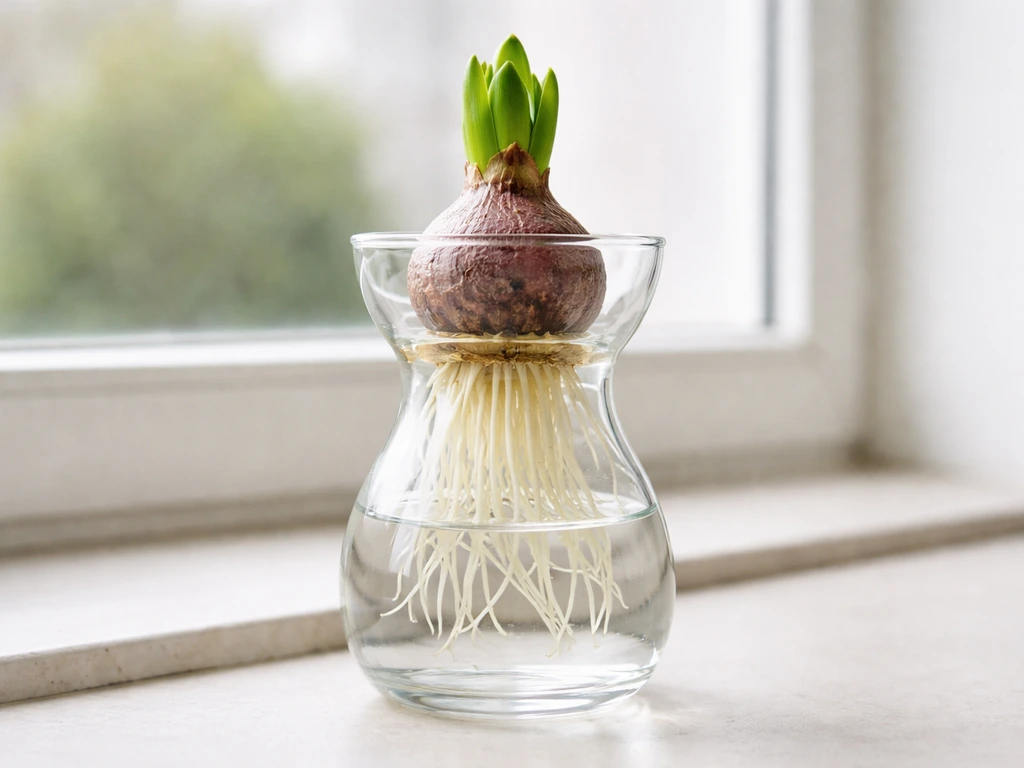
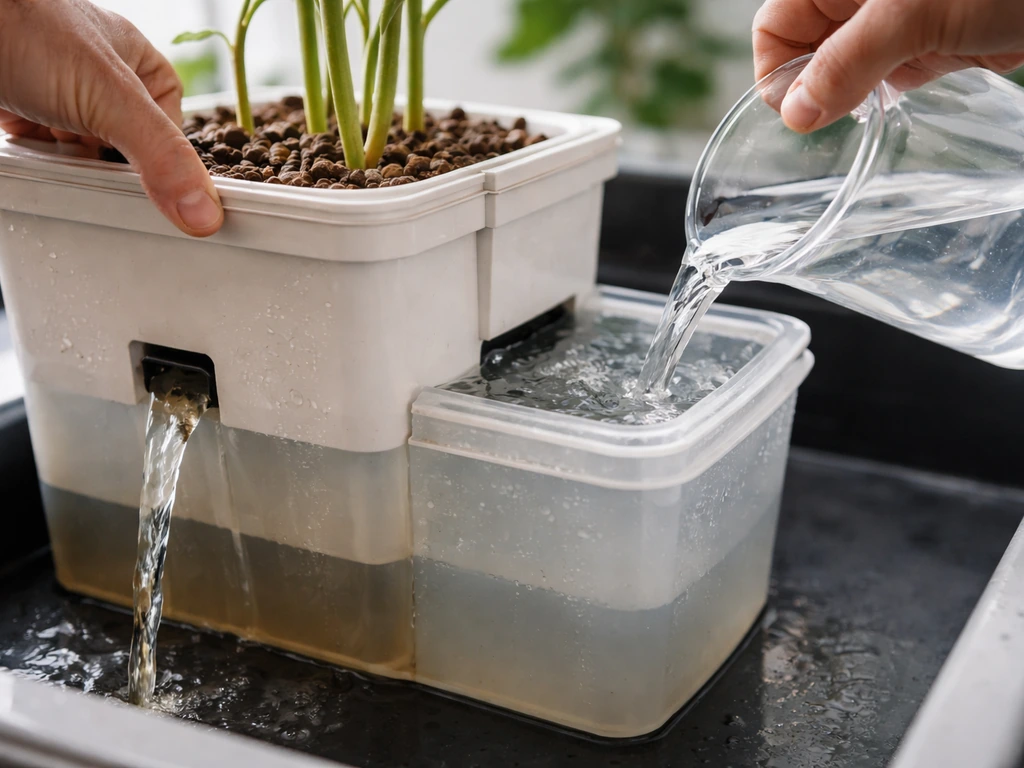
When people say they're growing paperwhites "in water," they mean a water-forcing method where the roots sit in water but the bulb itself stays dry above the waterline. This is a true hydroponic-style approach: no soil, no drainage, just an inert support medium (pebbles, gravel, glass marbles) to anchor the bulb and hold it at the right height. The bulb provides all the stored energy needed to produce roots, shoots, and flowers. Water delivers moisture to the roots, and that's essentially the whole system.
The single most important rule in this method is keeping the bulb base just above the waterline, not submerged in it. Sitting the actual bulb in water is the fastest route to rot. You want the water level to just reach the base of the bulb so roots can grow down into it, while the bulb itself stays dry. Get that one detail right and you're most of the way there. If you've ever tried a similar method with other bulbs, the approach is close to how to grow a hyacinth in water, where that same principle of roots-in-water, bulb-above applies.
Picking the right bulbs and timing your blooms
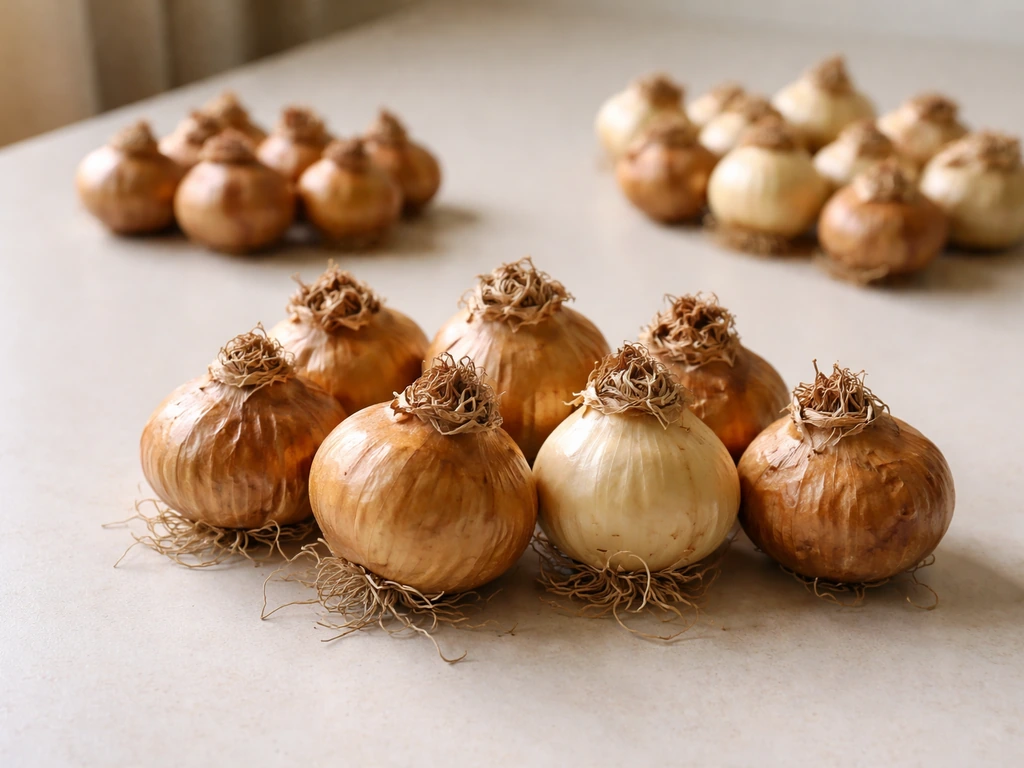
Bulb selection matters more than most guides admit. Larger bulbs consistently produce more blooms and stronger stems. When you're buying paperwhites, look for the biggest bulbs available and don't compromise on size to save a few dollars. The cultivar 'Ziva' (Narcissus papyraceus 'Ziva') is the one I'd recommend for water forcing. It's an early bloomer, reliably fragrant, and widely available. Fedco's catalog specifically highlights 'Ziva' as a white paperwhite that blooms early and performs better when you choose larger bulbs, and that tracks with my own experience.
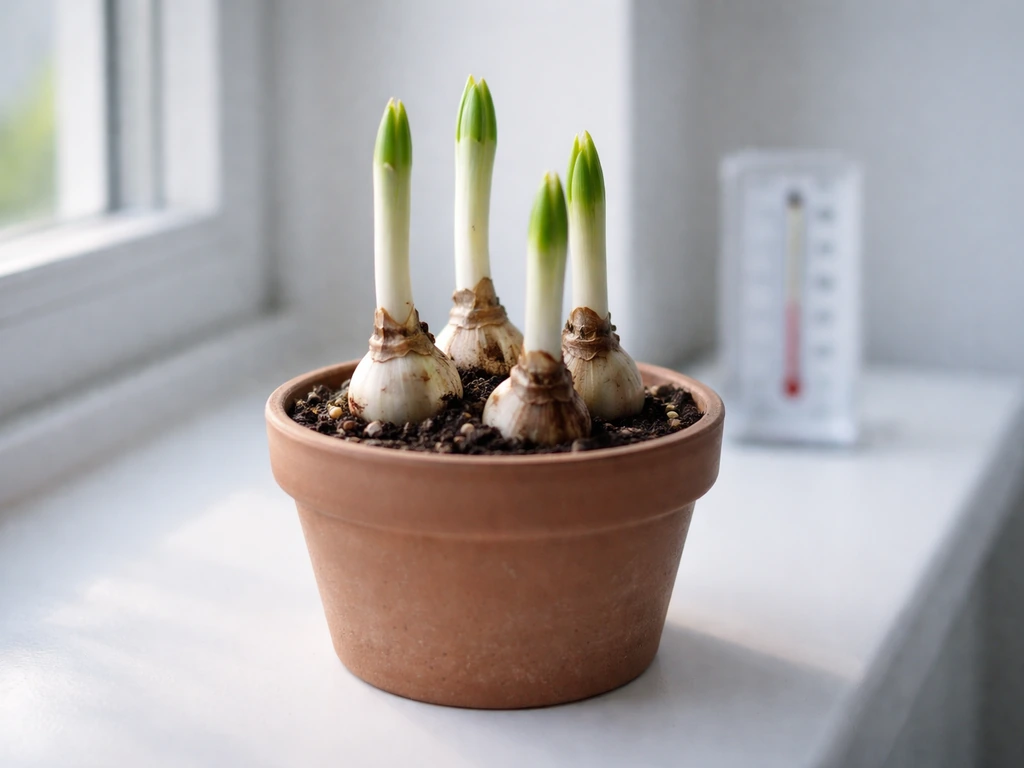
For timing, paperwhites don't need a cold period before forcing, which is what makes them so easy compared to tulips or daffodils. You can pot them up and start the clock right away. Figure 4 to 6 weeks from planting to first flowers under good conditions, though K-State extension puts the realistic range at 4 to 8 weeks depending on your home environment. K-State Research and Extension also notes that paperwhites can be expected to bloom within eight weeks of planting. If you want blooms for a specific date, count back 5 to 6 weeks to be safe. For example, if you want flowers in mid-May, start your setup in early to mid-April.
Setting up your water-forcing container step by step
The container you choose shapes your whole experience. A tall, narrow glass vase is the best option, not just for looks but because it physically supports the stems as they get taller. Shorter, wide bowls let paperwhites tip over once they reach 12 to 18 inches, and they will reach that height. A clear glass container is genuinely useful here because you can see the water level and root development without guessing or disturbing the setup.
- Fill your container with 2 to 3 inches of washed pebbles, gravel, or glass marbles. This gives the roots something to grip and holds the bulbs at the right height.
- Nestle the bulbs into the pebbles with the flat (root) end down and the pointed tip facing up. Pack them close together if you want a full display, but make sure each bulb has contact with the pebble layer below.
- Pour water into the container until it just reaches the base of the bulbs. The goal is to wet the bottom of the bulb and let roots grow down into the water, without letting the bulb sit in it.
- Check the water level and make sure no part of the bulb body is submerged. Slide a pebble under any bulb that's resting too low.
- Place the container in a cool spot, around 50 to 60°F, out of direct sunlight. A north-facing windowsill, a cool room, or even a garage that doesn't freeze works well for the first week or two.
- Once you see 1 to 2 inches of green shoot growth, move the container to a bright spot with indirect light to encourage steady, compact growth.
If you're comparing this water setup to growing paperwhites in a coarser medium, the mechanics are nearly identical to what's described in how to grow paperwhites in gravel: inert support, water below the bulb, and roots doing the work. The main difference is that a pure water setup with pebbles gives you more visual control over what's happening underground.
Keeping your paperwhites healthy as they grow
Light and temperature
Cool temperatures in the 50 to 60°F range produce the best results, especially at night. Warmth speeds up growth but creates taller, weaker stems that flop over. If your home runs warm (above 65°F consistently), your blooms will arrive faster but the stems will likely be lanky. Once the shoots are a couple of inches tall, move them to your brightest indirect light source. A spot near a sunny window where they get several hours of bright (but not scorching direct) light each day keeps growth compact and sturdy.
Changing the water and fertilizing
Change the water every three days. This isn't optional if you want to avoid the murky, slightly-off smell that comes from stagnant water in a warm room. Pour off the old water carefully, rinse the container if there's any film forming, and refill to just below the bulb base. As for fertilizer: skip it. Paperwhite bulbs contain all the energy they need to bloom, and adding fertilizer to a water-only forcing setup actually encourages excessive leafy growth at the expense of flowers. Plain, clean water is the right call here.
The alcohol trick for controlling stem height
This one is backed by Cornell Flower Bulb Research and it genuinely works. Once your green shoot is about 1 to 2 inches tall (usually 1 to 2 weeks after you set up the container), pour off the plain water and replace it with a diluted alcohol solution.
The target concentration is around 4 to 6% alcohol in water, and you never want to go above 10% or you'll damage the roots. For a standard 40% spirit like vodka or gin, mix one part spirit with seven parts water to get roughly 5% alcohol. This stunts stem elongation without affecting flowering, and the difference is noticeable: you end up with plants 1/3 shorter than untreated ones, which means they stand up on their own.
Don't skip this step if leggy stems have been a problem for you before.
Troubleshooting the most common problems
| Problem | Likely Cause | Fix |
|---|---|---|
| Bulb rot or mushy base | Water level too high; bulb sitting in water | Lower water level so only roots are submerged; trim any rotted tissue and move bulb to fresh pebbles |
| Mold on bulb surface or pebbles | Stagnant water; warm humid conditions | Change water every 3 days; rinse pebbles; improve air circulation around container |
| Leggy, floppy stems | Too warm; not enough light; no alcohol treatment | Move to cooler room (below 65°F); increase light hours; apply dilute alcohol solution at the 1-2 inch shoot stage |
| No roots or shoots after 2+ weeks | Bulb is dormant or damaged; too warm at setup stage | Check bulb firmness (soft = discard); start setup in a cooler 50-55°F location for the first week |
| No blooms after 8 weeks | Insufficient light; bulb was too small or poor quality; too much heat | Increase light exposure; next time buy larger bulbs and confirm cultivar is a reliable forcer like Ziva |
| Green algae in water | Clear container plus light exposure | Wrap lower portion of container with paper to block light, or switch to an opaque vessel; change water more frequently |
The rot problem is worth dwelling on for a second because it's the most discouraging failure. I've had entire setups go wrong because the water crept up a bit too high and I didn't notice for a few days. Once the base of the bulb turns soft and brown, you can't reverse it. Prevention is the only answer: check the water level every time you change it, and when in doubt, keep it slightly lower than you think it needs to be. Roots are long, they'll find the water.
After the blooms: what actually happens next
Once flowering begins, expect blooms to last about two weeks. After that, the flowers fade and the foliage starts to yellow. At this point, you have a decision to make about the bulbs. The honest answer is that water-forced paperwhite bulbs are generally spent after one bloom cycle. Unlike soil-grown bulbs that can be dried, stored, and replanted, bulbs forced in water typically don't have enough stored energy left to bloom again. Most experienced growers, and most university extension programs, recommend composting them after bloom rather than trying to save them.
If you do want to attempt saving them (worth trying once out of curiosity), cut back the faded flower stalks, keep the foliage growing in a sunny window, and move the bulbs to a pot of actual soil to let them rebuild energy. Don't expect a repeat performance indoors the following season. Replanting outdoors in a warm climate (USDA zones 8 to 11) is a better bet, but even then, reflowering isn't guaranteed after water forcing. The practical advice from Rural Sprout and Epic Gardening is consistent: treat water-forced paperwhites as a seasonal thing, discard after bloom, and simply start fresh with new bulbs next time.
Staggering your planting for extended blooms
One approach that makes the "discard and restart" model less frustrating is staggering your bulb setups. Instead of planting all your bulbs at once, start a new container every two weeks through the fall and winter. Since each setup takes 4 to 6 weeks to bloom, you end up with a rotating cycle of flowers rather than one big flush followed by nothing. Buy bulbs in bulk in the fall when they're available, keep unused ones in a cool dry place (not the refrigerator), and pull out the next batch when the current one starts blooming. It's low-effort and it means you always have something coming.
A few thoughts on the method as a whole
Water forcing is one of the most satisfying entry points into water-based growing because the results are fast, visible, and genuinely impressive. Watching roots push through pebbles and into water over the course of a week is the kind of thing that pulls people deeper into hydroponic and water-based cultivation. If you enjoy watching systems like this work, it's worth exploring other projects in a similar vein. The same curiosity that drives a clean water-forcing setup often leads people to more involved projects, like understanding how to grow hydroids in controlled aquatic environments, where water chemistry and structure matter just as much.
For paperwhites specifically, the method is hard to beat for its simplicity. No soil, no drainage holes, no fertilizer schedule, and no cold stratification. A glass vase, clean water changed every three days, cool temperatures, good light, and the Cornell alcohol trick at the right moment: that's the whole playbook. Follow those steps and you'll have fragrant blooms indoors in about a month, reliably, without much that can go wrong as long as you keep the water level where it belongs.
If you find yourself wanting to push the method further or experiment with different container formats, a small enclosed vessel can be an interesting variation. The principles explored in how to grow hydroids in a water bottle show just how much you can do in a self-contained water environment, and some of those containment and water-quality ideas translate directly to compact bulb-forcing setups. And if you're curious about water-based microorganism culture as a parallel hobby, how to grow Haematococcus pluvialis is a fascinating rabbit hole that shares the same core logic: controlled water conditions producing reliable, measurable results.
FAQ
How can I tell if my paperwhite bulb is too submerged (before rot sets in)?
Use the clear container to watch the bulb base. If any part of the bulb itself starts touching the waterline, even briefly, lower the water immediately at the next change. Softening and browning are late signs, so catch it early by keeping the bulb dry above the water.
What water should I use, tap water or distilled, and does it matter?
Tap water is fine for water forcing as long as you change it every three days. Distilled water can reduce mineral buildup and film, which can help if your tap water leaves residue, but it is not required for good blooms.
Can I grow paperwhites in water without pebbles, just in a jar?
You can, but it is harder to keep the bulb upright and at the correct height. Pebbles (or other inert supports) help anchor the bulb and prevent the base from drifting into the water as the roots grow.
Why did my stems get floppy even though my water level was correct?
Two common causes are warmth (above about 65°F) and light that is too dim. Provide cooler temperatures (50 to 60°F) when possible, then once shoots are a few inches tall, move to your brightest indirect light so stems stay shorter and sturdier.
Is the alcohol solution step absolutely necessary for every batch?
No, but it is useful if you regularly get leggy plants. If your home is cool and you give good light, stems may stay upright without it. Use the alcohol when you want predictable shorter growth, and keep it below 10%.
How do I apply the alcohol solution without harming the bulb base?
Wait until the shoot is about 1 to 2 inches tall, then pour off the plain water and replace it with the diluted alcohol solution. Keep the bulb base just above the waterline, and do not exceed the target concentration (about 4 to 6%, never over 10%).
Should I fertilize if I want bigger blooms or stronger fragrance?
Avoid fertilizer in a water-only setup. The bulb stores enough energy for bloom, and added nutrients often push extra leaf growth instead of more flowers. Stick to clean water changes for best results.
What causes the slightly sour or unpleasant smell, and how do I prevent it?
That smell usually comes from stagnant water and microbial film building up in a warm room. Prevent it by changing the water every three days, rinsing if there is film, and refilling to just below the bulb base.
My paperwhites sprouted but never flowered. What went wrong?
Most often the bulb was not large enough, the bulb sat too warm for too long, or light was insufficient after shoots emerged. Also check that roots were actually able to reach the water, meaning the bulb base should sit just above the waterline, not dry and cut off.
Can I reuse the same pebbles or container for another forcing cycle?
Yes, but clean matters. After a batch, rinse out residue and wash the container thoroughly, then dry. If pebbles hold onto film, scrub and rinse until water runs clear before starting the next bulbs.
What should I do if my water level rises as roots grow?
Roots can shift the support and affect the waterline. Recheck the level at every water change, and if it has crept up, top off less or remove some water so the bulb base stays just above the water and the bulb remains dry.
Once they bloom, can I store the bulbs and force them again indoors later?
Typically no, water-forced bulbs are spent after one bloom cycle. The practical approach is composting after flowering. If you try to save them, move the bulbs to soil afterward and do not expect a reliable repeat bloom indoors.
How far ahead should I start if I have a specific bloom date?
A safe planning window is 5 to 6 weeks before your target date. Count backward based on your home conditions, because timing can vary within the roughly 4 to 8 week range.
Will paperwhites reflower outdoors after water forcing?
Sometimes, especially in warm climates, but it is not guaranteed. If you try outdoors, focus on letting the foliage rebuild energy in good sun before expecting any chance of reflowering.
Why do some bulbs bloom early but others in the same setup flower later?
The bulbs can differ in size, maturity, and cultivar behavior. Even if you plant at the same time, mixing sizes can create staggered flowering, so for more even timing choose uniformly large bulbs and similar cultivars.