Growing paperwhites in gravel is one of the simplest water-based forcing methods you can do indoors. If you’re growing Haematococcus pluvialis instead, the basics are quite different from forcing paperwhites how to grow haematococcus pluvialis. If you are instead wondering how to grow hydroids, the approach and needs are different, so start by matching the species to the right water and light conditions paperwhites. Fill a 3 to 5 inch deep container halfway with clean pebbles or gravel, set your bulbs on top with the bottom of the bulb just barely touching the water surface (not submerged), and keep the water level there throughout the process. Roots will appear in about three weeks, flowers follow in four to eight weeks total, and you never need soil or a chilling period to make it happen.
How to Grow Paperwhites in Gravel: Step-by-Step Guide

What you're actually setting up here
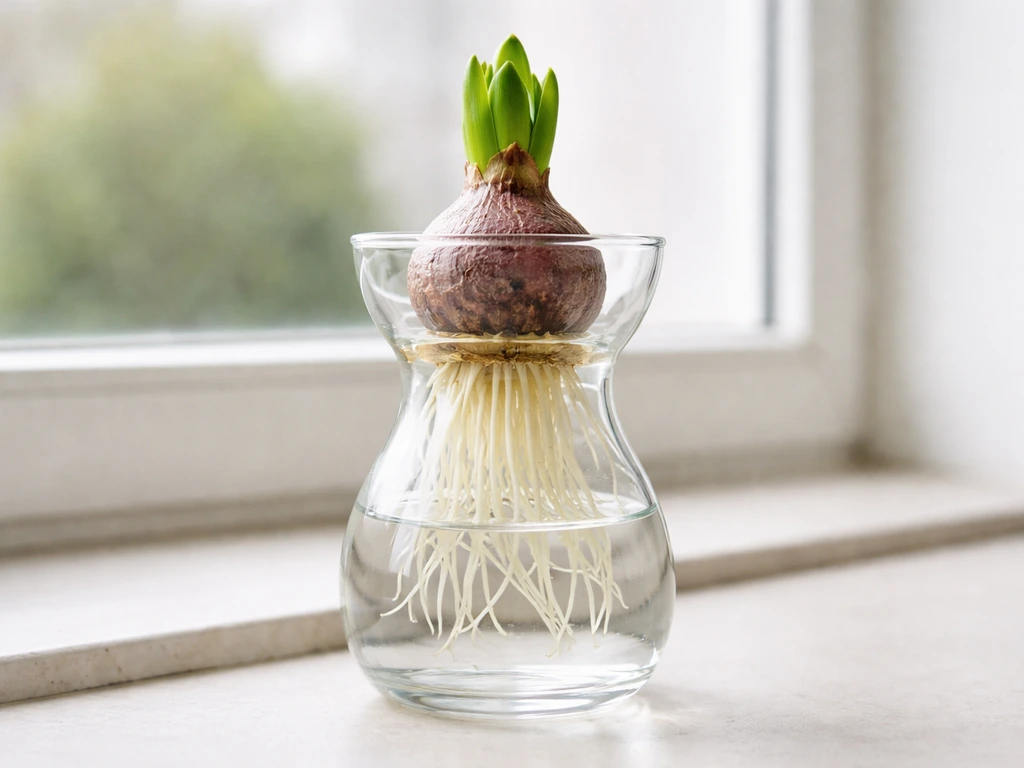
This is a semi-hydroponic forcing method. The gravel or pebbles do two things: they physically anchor the bulbs upright, and they create a buffer zone that keeps the bulb body itself out of standing water while letting roots reach down into moisture. Think of it like a passive hydroponics setup where the growing medium holds structure but the plant feeds from the water reservoir below. Unlike most spring bulbs, paperwhites (Narcissus tazetta) require zero pre-chilling. You can pull a bulb out of a bag today and have it blooming in your window within weeks. That makes them one of the most beginner-friendly water-based growing projects you can start right now.
The single biggest mistake people make with this method is letting the bulb body sit in water. To grow paperwhites in water, focus on keeping the bulb base just at the water line, not submerged, and maintain the water level as roots develop. The bottom of the bulb can touch the water surface initially to kick off root development, but blank" rel="noopener noreferrer">once roots have sprouted and are extending into the water below, the water level should actually drop slightly so only the roots are in contact with moisture. Keeping the bulb wet leads to rot, and that's the most common reason this project fails.
Supplies checklist before you start
- Paperwhite bulbs: choose firm, heavy bulbs with no soft spots or visible mold; larger bulbs typically produce more flower stems
- Container: 3 to 5 inches deep, no drainage holes needed; clear glass or a clear-sided vessel is ideal so you can see the water level without guessing
- Gravel or pebbles: clean, washed stones up to about half an inch (1.3 cm) in diameter; river pebbles, aquarium gravel, or decorative stones all work
- Water: tap water is fine; room temperature is better than cold straight from the tap
- Optional: a small cup or measuring tool to check how high water sits before adding bulbs
On the container: clear glass is genuinely worth it here. When you're managing water level through a layer of gravel, it's almost impossible to judge where the water line sits from the top. I've ruined a batch before because I thought I was keeping the water low and didn't realize I'd been sitting the bulbs in a full inch of water for two weeks. A clear container removes that guesswork entirely. A simple glass vase, a wide mason jar, or an aquarium-style rectangular dish all work perfectly.
Step-by-step setup: getting the bulbs and water level right
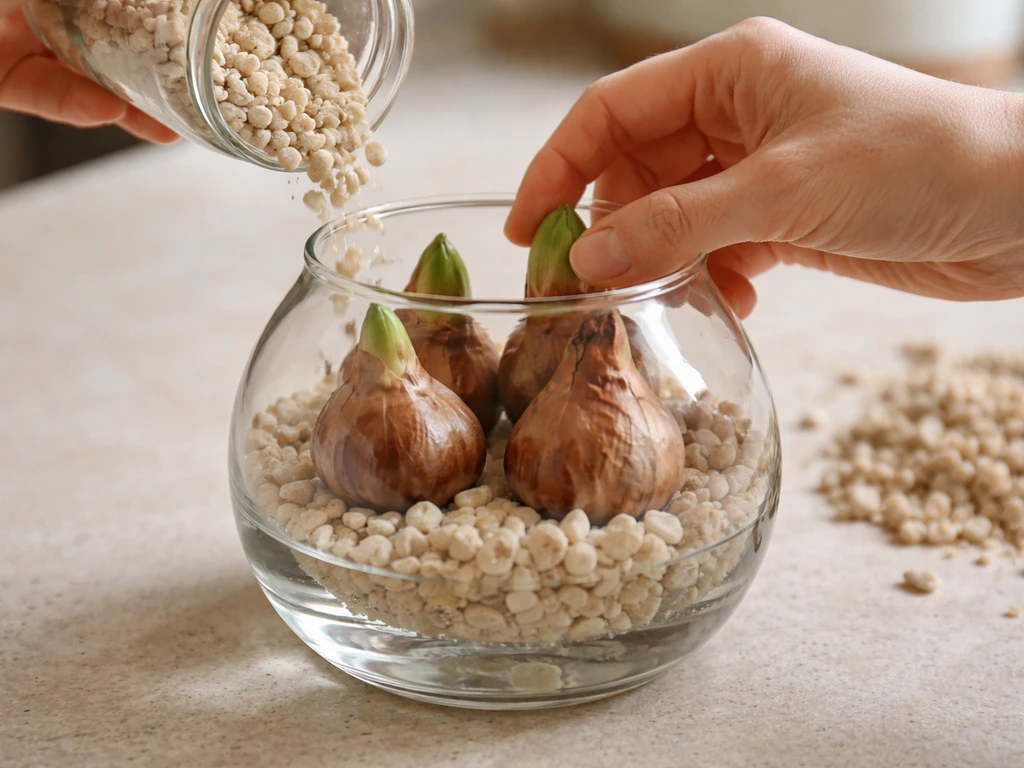
- Rinse your gravel thoroughly under running water until the water runs clear. Dirty gravel introduces bacteria and can promote mold right from the start.
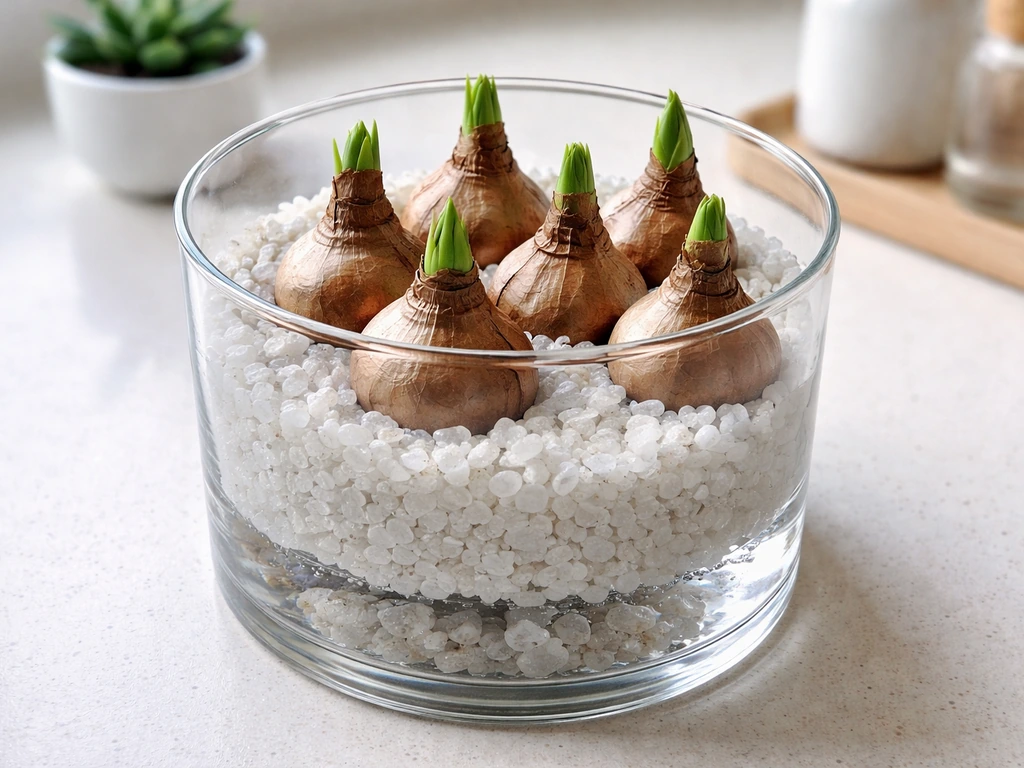
- Fill your container about halfway with the rinsed gravel. For a 4-inch deep container, that means roughly 2 inches of stones.
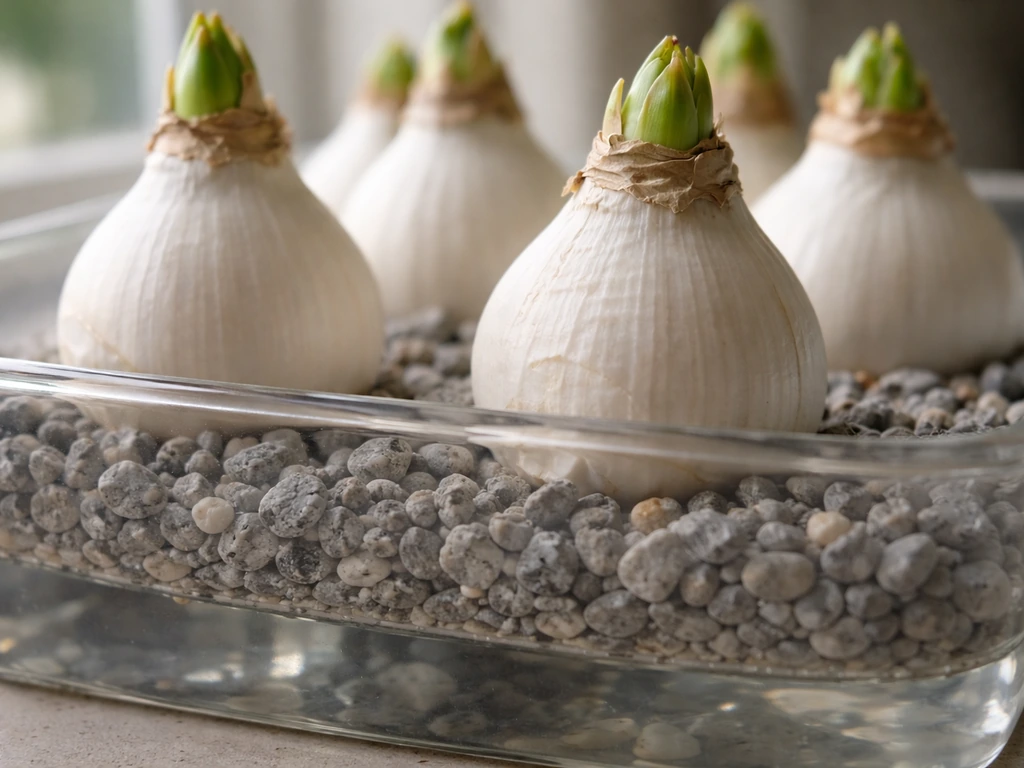
- Press each bulb gently into the gravel, pointed end up, with the flat base resting on or just slightly into the stone layer. Pack gravel snugly around the sides to hold the bulb upright. You can place bulbs within about an inch of each other if you want a dense display.
- Add water slowly until it just reaches the bottom of the bulbs. The water should barely kiss the base of each bulb. If using a clear container, you should be able to see the water line sitting right at the base.
- Once roots develop and start extending downward into the gravel, lower your water maintenance level slightly so the water sits just below the bulb base. At that point, only the roots should be in contact with water, not the bulb body itself.
- Top up the water every few days to maintain that level. Check it at least every two to three days, especially in a warm room where evaporation is faster.
On spacing: if you're planting multiple bulbs (which looks great and gives you more blooms), they can sit close together. Just make sure each one is stable in the gravel and none are tipping at an angle, because a leaning bulb will produce a crooked stem.
Light, temperature, and the watering schedule
Phase 1: the rooting stage (first one to two weeks)
After setup, move the container to a cool, dark location, around 50 to 60 degrees Fahrenheit (10 to 15 degrees Celsius). A basement, a cool closet, or even a garage that doesn't freeze all work well. The cool and dark conditions push the plant's energy into root development rather than top growth. Keep it there for about a week. Check the water level every two to three days and top it up as needed, always keeping it just at or barely below the base of the bulb.
Phase 2: moving to light (weeks two through four)
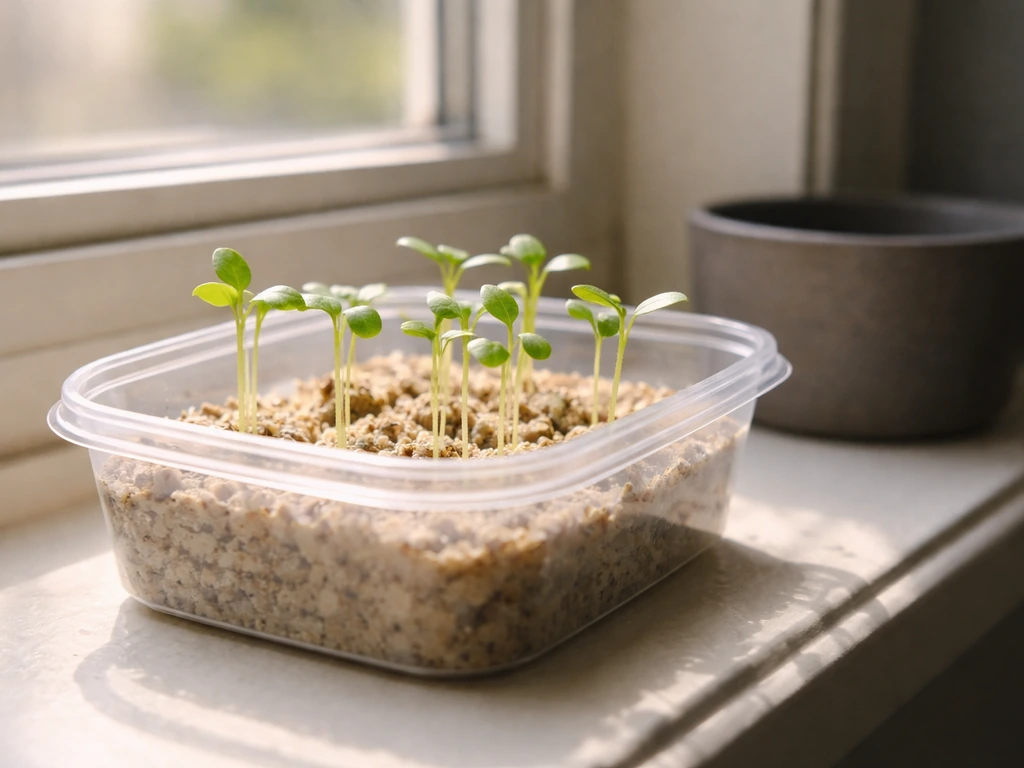
Once shoots appear and reach about 1 to 2 inches tall, bring the container out into bright indirect light. A south or east-facing windowsill works well. At this stage, normal room temperature (60 to 70 degrees Fahrenheit) is appropriate. Cooler is better if you want compact, sturdy growth rather than tall floppy stems. Avoid direct harsh midday sun, which can stress the leaves. Continue checking water every two to three days, now maintaining the level just below the bulb base since roots should be actively growing down into the gravel and water zone.
Phase 3: flowering (weeks four through eight)
Flower stalks will develop and buds will appear. Expect blooms starting around four weeks after planting, though five to seven weeks is the more common range. Each bloom period lasts roughly two weeks. Jackson & Perkins notes that flowering should begin in about 4 to 6 weeks and typically lasts for around 2 weeks, with each stem producing multiple small white flowers Each bloom period lasts roughly two weeks.. Keep the water level consistent. At this stage, your main jobs are topping up water and enjoying the flowers.
Troubleshooting the most common problems
Bulb rot
This is almost always caused by the bulb body sitting in standing water. If you notice a soft, mushy texture on the bulb or a foul smell coming from the container, the bulb is likely rotting. Once rot sets in significantly, the bulb won't recover. Prevention is everything here: keep the water level at the base of the bulb initially, then drop it below once roots appear. If you catch rot early on a part of the bulb, you can sometimes remove the affected outer layer and move forward, but don't count on it.
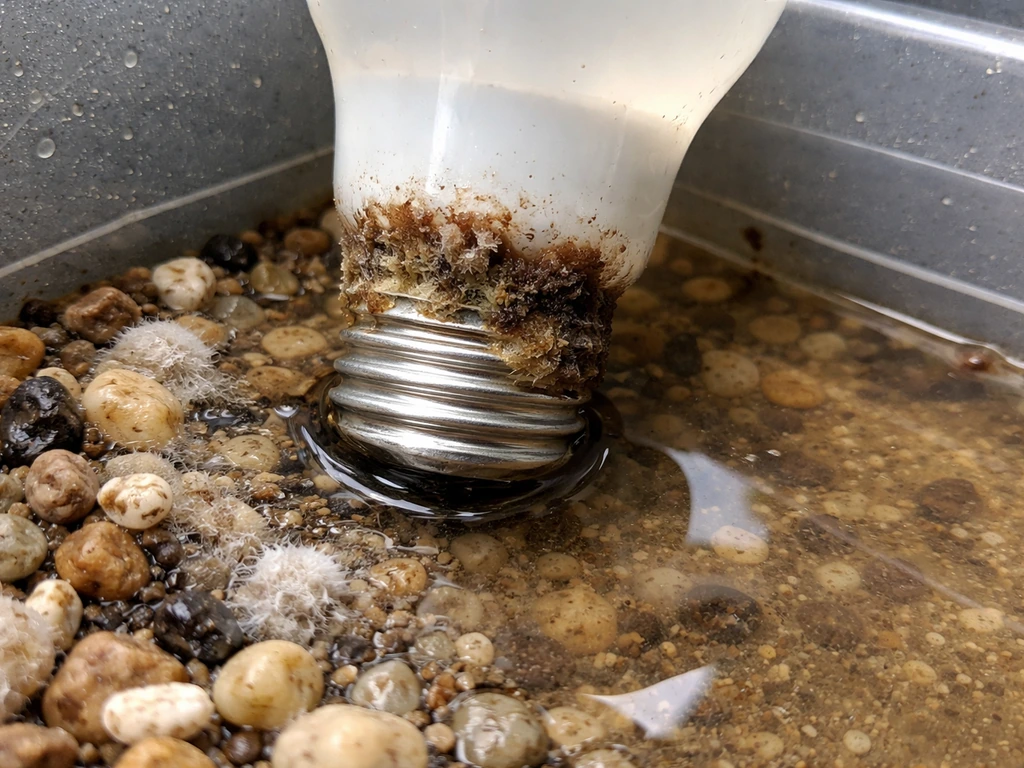
Mold or white fuzzy growth on gravel or bulb
White mold on the surface of the gravel or around the base of the bulb is usually a sign of poor air circulation combined with too much moisture at the surface. First, make sure your container is in a space with some airflow and is not enclosed. Change the water completely if it looks cloudy or smells off. You can rinse the gravel and the bulb gently under cool water, remove any visibly affected gravel, and start fresh with clean water. Adding a tiny pinch of horticultural charcoal to the gravel layer can help suppress mold long-term.
No roots appearing after two to three weeks
If you're not seeing root development after two to three weeks, check two things. First, is the water actually reaching the base of the bulb? In a gravel setup, it's easy to think you've added enough water when the gravel appears wet but the actual water level is sitting an inch below where it needs to be. Second, is the bulb firm? A bulb that has gone soft or dried out before planting won't root. If the bulb is firm and water contact is correct, give it another week in a cool dark spot before worrying.
Leggy, floppy, or weak stems
This is the most common complaint with indoor paperwhites, and it almost always comes down to too much warmth and too little light during the growth phase. If stems are shooting up fast and flopping over, move the container to a brighter, cooler spot (ideally under 64 degrees Fahrenheit). The alcohol trick is also worth knowing: once shoots are about an inch or two tall, replace the water with a dilute solution of rubbing alcohol in water, using a ratio of about 4 to 6 percent alcohol by volume. A rough recipe is one part plain rubbing alcohol (70 percent isopropyl) to 10 to 11 parts water. This has been shown to slow stem elongation by 30 to 50 percent without harming the plant. Don't use beer or wine, as the sugars cause problems.
Yellowing leaves
Yellow leaves during early growth usually mean the plant moved into bright light too quickly before rooting was established, or that it's sitting in water that's gone stagnant. Change the water, move to a slightly more shaded spot for a few days, then reintroduce to brighter conditions gradually.
Odor from the container
Paperwhites naturally have a strong scent, but a foul or sulfurous smell from the water or gravel means bacterial growth or early rot. Do a full water change, rinse the gravel, and inspect the bulb. If the bulb looks and feels firm, the smell is likely bacterial in the water and will resolve with fresh water and better airflow. Keeping the water level low and changing it every one to two weeks prevents most odor issues.
How to time your blooms and keep them from flopping
Paperwhites take four to eight weeks from planting to bloom, with most landing closer to five to six weeks under average indoor conditions. If you want flowers for a specific date, count back five to six weeks and plant then. Want blooms staggered over several months? Plant a new batch every two weeks. Because these bulbs need no chilling, you can start them any time from fall through early spring, and the forcing season typically runs November through March for most home growers.
| Week | What to expect | What to do |
|---|---|---|
| 1 to 2 | Little visible activity; roots beginning to form below gravel | Keep in cool (50 to 60°F), dark spot; check water every 2 to 3 days |
| 2 to 3 | Shoots emerge, 1 to 2 inches tall | Move to bright indirect light; maintain water just below bulb base |
| 3 to 4 | Stems elongating, leaves greening up | Keep in bright light; apply alcohol solution now if you want shorter stems |
| 4 to 6 | Buds visible; first flowers opening | Maintain water level; enjoy blooms; cooler temps extend flower life |
| 6 to 8 | Full bloom; flowers lasting about 2 weeks | Continue watering; discard bulbs after flowering as they won't rebloom indoors |
One practical tip for sturdier plants: keep the room temperature on the cooler side throughout the entire process, not just during rooting. Paperwhites grown in rooms around 60 to 65 degrees Fahrenheit consistently produce shorter, stronger stems than those forced in a warm 72-degree living room. If your space runs warm, position the container near a cool window rather than near a heat source.
After blooming, paperwhite bulbs forced indoors in gravel won't rebloom the following year when treated this way, so don't feel obligated to save them. Toss them on the compost and start fresh with your next batch. If you enjoy this style of water-based bulb forcing, the same approach works well with hyacinths in water, though those do require a cold pre-treatment period before forcing, which makes the gravel-and-water paperwhite method uniquely low-effort by comparison.
FAQ
Can I use sand instead of gravel to grow paperwhites in gravel (or will it work the same)?
Yes, but sand is riskier because it can compact and reduce airflow around the bulb base. Use coarse, clean sand and do the water-line control carefully, since the water level can sit higher than you think. Gravel or pebbles are more forgiving because they keep the bulb upright and maintain small air pockets.
What size container should I use, and how deep should the gravel be for best results?
A stable container that allows about 3 to 5 inches of gravel depth works well. Too shallow can limit root reach and make water-line control difficult, while very deep gravel can slow progress by reducing how quickly the bulb base is in consistent contact with moisture.
How much water should I add at the start, and when should I lower it after roots appear?
Start with enough water so the bulb base just barely touches the surface, typically wetting the base but not submerging the bulb body. After roots extend into the moisture zone, lower the water so only the roots contact moisture, leaving the bulb itself out of standing water.
Should I add fertilizer or bulb food when growing paperwhites in gravel?
You usually do not need fertilizer for indoor forcing because bulbs carry stored energy. If you choose to feed, use a very dilute solution and only after roots are established, and avoid letting feed concentrate contact the bulb body, since it increases rot risk. Many growers get better results by skipping fertilizer and focusing on light and temperature control.
Is it okay to rotate the container toward the light to prevent leaning?
Rotate every couple of days, but gently. Rotation helps symmetry, yet leaning can still happen if bulbs were not stable in the medium. Rotating won't fix a bulb that was tipping at placement, so make sure each bulb is seated firmly and upright before you start.
Can I grow paperwhites in a decorative bowl that has no drainage or is very narrow at the bottom?
Avoid shapes where water can pool higher than the bulb base, or where you cannot easily verify the water line. Narrow bottoms can also make water contact uneven across multiple bulbs. If you use a decorative vessel, use a clear option or monitor water line carefully and ensure the bulb body never sits in standing water.
Why are my paperwhites growing very fast but still not blooming, even after several weeks?
This often indicates the plants are getting too warm and not enough light during the early to middle phase, leading to excessive top growth without proper flowering development. Move to brighter indirect light and reduce warmth (around the mid-60s Fahrenheit). Also confirm the water level is correctly supporting root contact, not just wet-looking gravel.
My bulbs look fine, but the flower buds are small or aborting. What should I check first?
First check temperature and light. Bud problems commonly come from warm, dim conditions or sudden light changes after a dark storage phase. Stabilize conditions, keep water level consistent at the root zone, and avoid moving the container repeatedly once buds start forming.
What’s the best way to prevent white mold or slime from recurring?
Improve airflow and reduce surface moisture. Keep the container in a space with some circulation (not sealed and stagnant), and change cloudy or off-smelling water promptly. If mold keeps returning, refresh the gravel (or rinse thoroughly) and start with clean water, since biofilm can persist on the same medium.
How can I tell early whether my bulb is rotting versus just developing roots?
Healthy bulbs remain firm. Early warning signs include a soft or mushy bulb body, foul sulfurous odor, or rapidly worsening blackening at the bulb base. Root growth is typically firm and pale, and it should happen while the bulb body stays dry above the moisture line.
Should I transfer the bulb or pot it after the flowers fade?
For the gravel forcing method, these bulbs typically will not rebloom reliably indoors the following year. If you want to keep the bulb for a future attempt, let foliage yellow naturally after flowering and move it to brighter conditions, but expect lower odds of a dependable repeat. Many people compost and start fresh.
Can I plant paperwhites in gravel more than once from the same bulb over time?
Not in the same forcing cycle. Once a bulb has bloomed indoors using this method, it generally needs a rest and proper conditions to rebuild strength, and it usually won’t produce another full set of blooms the next season when treated the same way. For reliable results, plan multiple batches by timing new bulbs.
What’s the safest alcohol approach if I want shorter stems, and what should I avoid?
Only apply when shoots are about 1 to 2 inches tall, replace the water first, then use a dilute mix (about 4 to 6 percent alcohol by volume). Avoid stronger concentrations, and do not use beer or wine because sugars can encourage microbial growth. Stop adjusting if you see any softening at the bulb base.