Yes, you can grow aloe vera hydroponically, and it works better than most people expect. The catch is that aloe is a succulent, and succulents were not exactly designed to sit in Yes, you can grow aloe vera hydroponically, and it works better than most people expect. The catch is that aloe is a succulent, and succulents were not exactly designed to sit in water.
How to Grow Aloe Vera Hydroponically: Step-by-Step Guide

Marcus Holloway
24 Mar 2026
The whole process comes down to one thing: keeping roots oxygenated and the system clean enough that rot never gets a foothold. Get that right, and aloe thrives in a hydroponic setup. Get it wrong, and you will have a mushy stem in about two weeks. This guide walks you through the exact setup, water targets, and routine you need to pull it off from day one..
The whole process comes down to one thing: keeping roots oxygenated and the system clean enough that rot never gets a foothold. Get that right, and aloe thrives in a hydroponic setup. Get it wrong, and you will have a mushy stem in about two weeks. This guide walks you through the exact setup, water targets, and routine you need to pull it off from day one.
What hydroponic aloe vera actually means
Before you buy anything, it helps to know what you are actually trying to do. True hydroponics means the roots are suspended in or periodically flooded with a nutrient solution, with no soil involved. A lot of people search for this topic and end up reading about semi-hydroponic setups (a pot of perlite or LECA with a water reservoir at the bottom) or simple water propagation (just a cup of water on a windowsill).
Those methods work fine, but they are not what this guide covers. Here we are talking about a proper DWC (deep water culture) system, where aloe roots hang directly into an oxygenated, nutrient-dosed solution. It is the most beginner-accessible true hydroponic method for aloe, and it is easy to DIY.
Choosing the right hydroponic setup for aloe vera
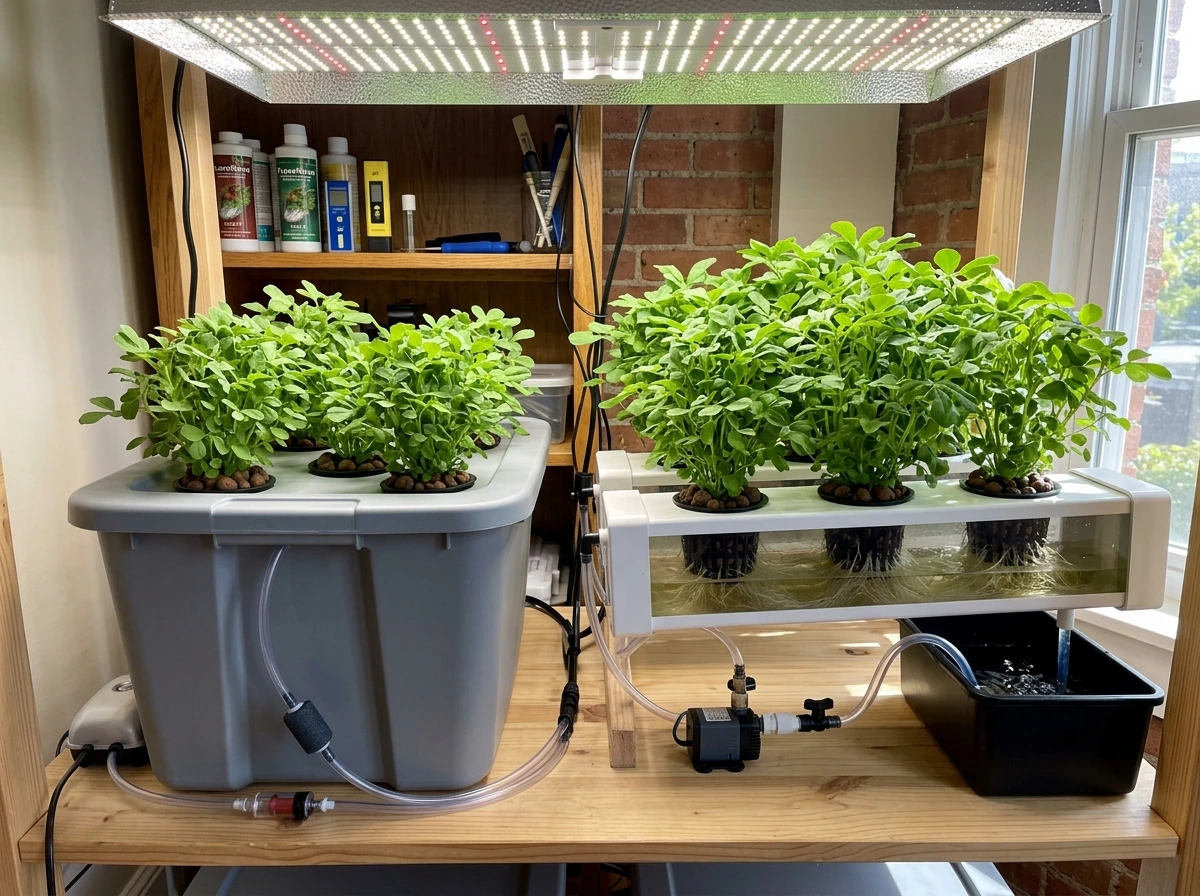
Deep water culture is the best fit for aloe vera hydroponics, and I say that after trying a few alternatives. In a DWC system, your plant sits in a net pot above a reservoir, and the roots hang down into a continuously aerated nutrient solution. This setup is also called floating raft or deep flow technique in commercial settings, but for home growers it is just a bucket or tote with an air pump running underneath. The reason DWC works for aloe specifically is control: you can dial in water temperature, aeration, and nutrient concentration more precisely than in flood-and-drain or NFT (nutrient film technique) systems.
Here is why the alternatives are less ideal for aloe. Flood-and-drain (ebb and flow) systems cycle nutrient solution in and out of a tray, which can waterlog succulent root systems during flood periods. NFT runs a thin stream of solution across roots continuously, which sounds gentler but leaves little margin for error if your pump fails even briefly. Wick systems are the semi-hydroponic option I mentioned above, fine for beginners who want low risk but not true hydroponics. For someone starting out and wanting real results, build a small DWC bucket setup. It is the cheapest, most forgiving system for this application.
| System Type | How It Works | Suitability for Aloe | DIY Difficulty |
|---|---|---|---|
| Deep Water Culture (DWC) | Roots hang in aerated nutrient solution | Best choice with proper aeration | Easy |
| Ebb and Flow (Flood & Drain) | Tray floods then drains on a timer | Risk of waterlogging during flood | Moderate |
| NFT (Nutrient Film Technique) | Thin stream flows over root tips | Low buffer if pump fails; tricky for succulents | Moderate |
| Wick System (semi-hydro) | Wick draws water up to roots passively | Works but not true hydroponics | Very easy |
| Kratky (passive DWC) | No pump; roots access air gap above solution | Possible for small plants, less control | Very easy |
If you want something even simpler than a full DWC pump-and-reservoir setup, a Kratky-style passive system (no pump, just a jar or tote with a gap between the solution surface and the net pot) can work for a single small aloe. how to grow aeroponics The trade-off is that you have almost no control over dissolved oxygen, so you need to be more careful about water temperature and reservoir cleanliness. For anything beyond one plant, stick with active DWC. how to grow pechay in hydroponics
System components and container design
Reservoir
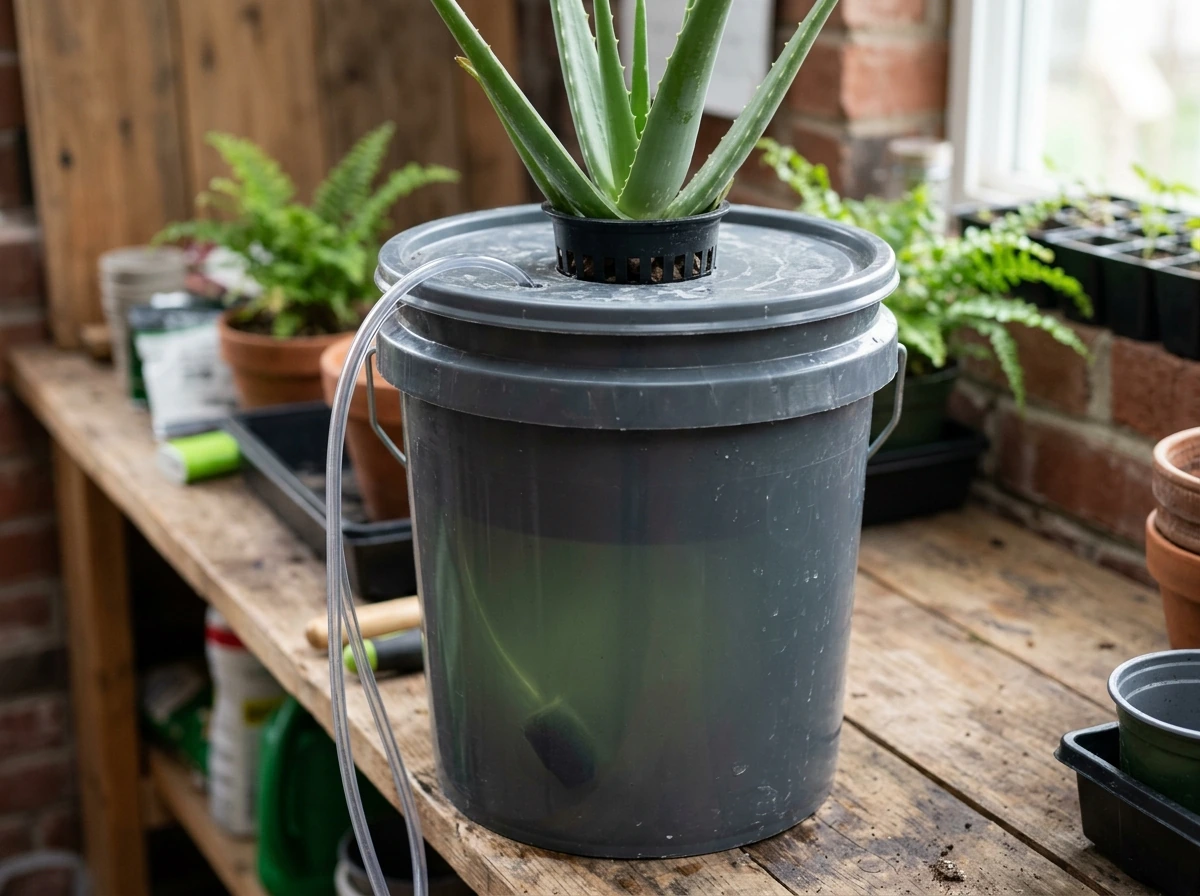
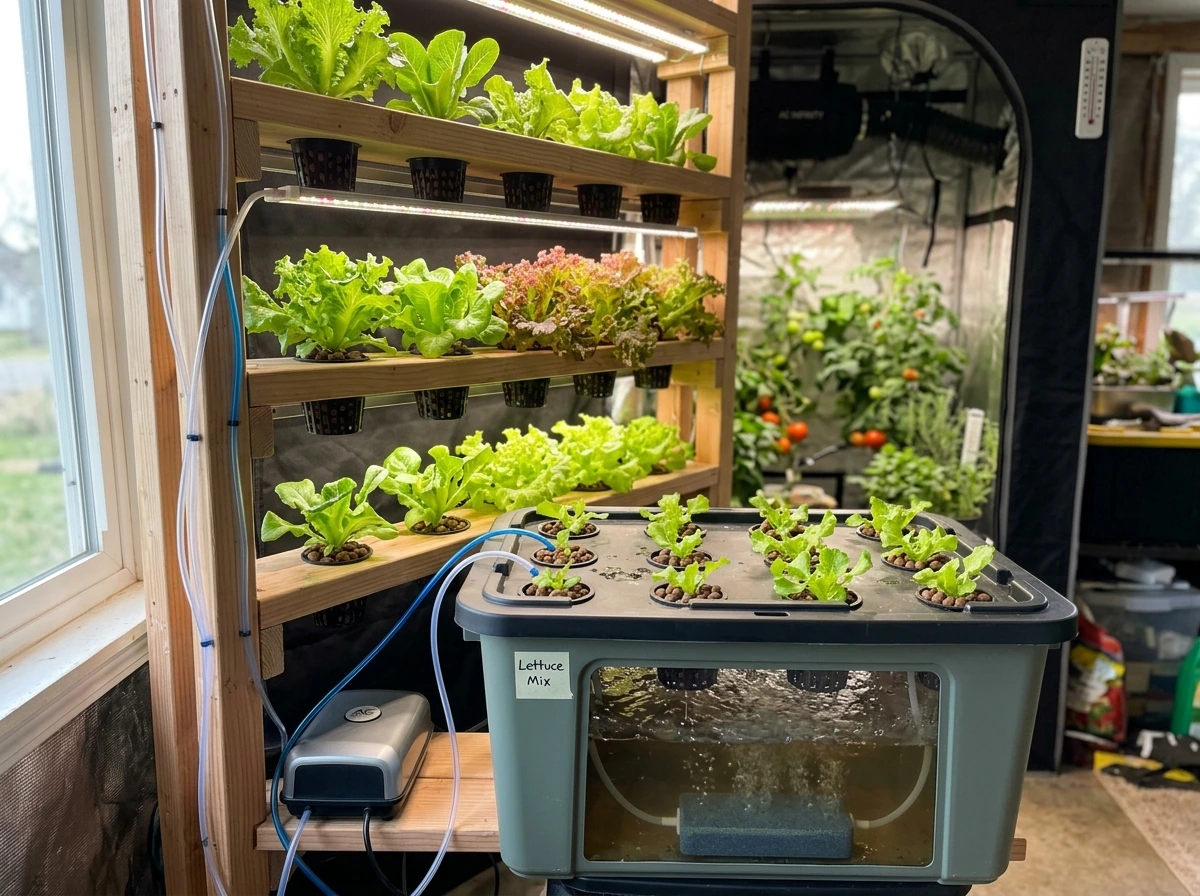
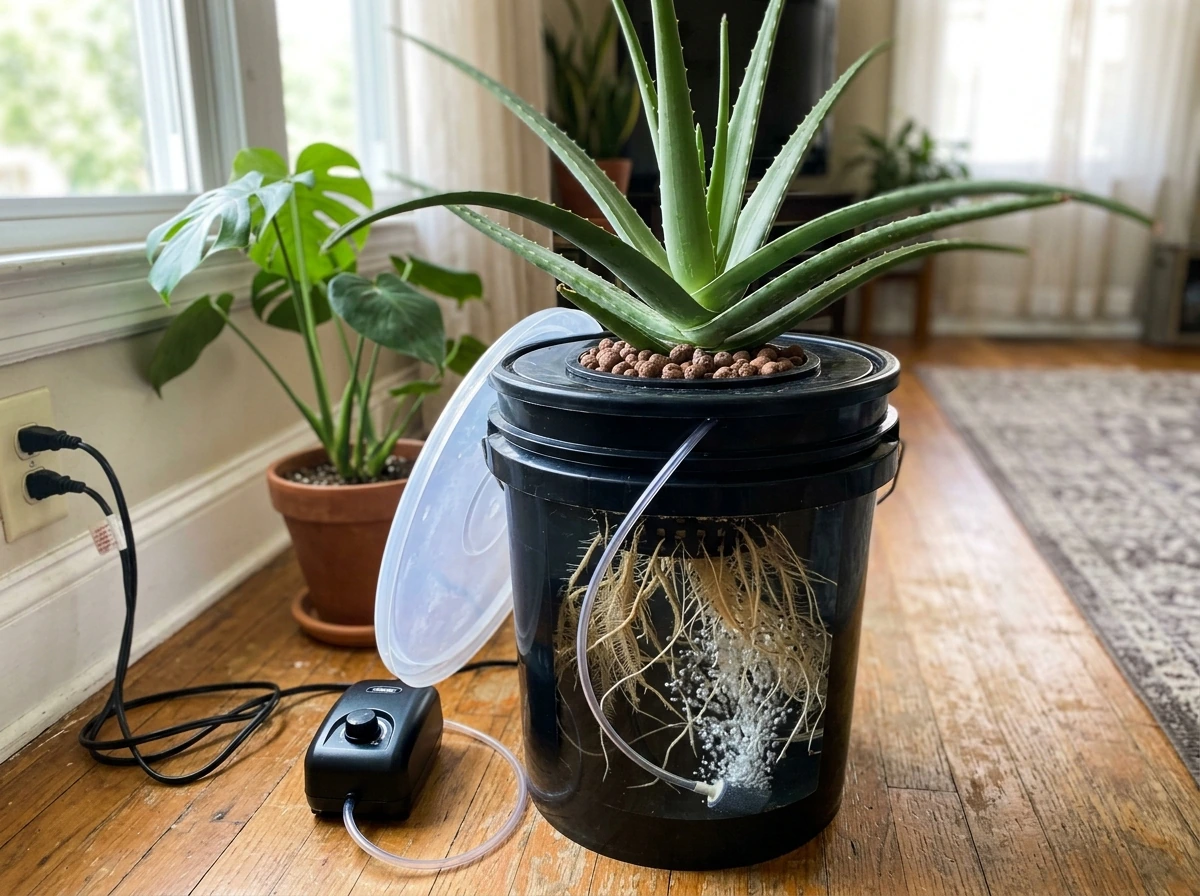
Your reservoir is the heart of the system. For a single aloe plant, a 3-to-5-gallon opaque bucket works well. For multiple plants, a 10-to-20-gallon opaque storage tote lets you cut multiple net pot holes in the lid and run one air pump for the whole system. Opacity is non-negotiable: any light that hits the nutrient solution will trigger algae growth, which will clog your root zone fast. Use black buckets or wrap clear ones in black tape or paint.
Net pots and grow media
Use 2-inch or 3-inch net pots for younger aloe plants, stepping up to 4-inch or larger as the plant matures and the root system gets thick. Fill net pots with a coarse, fast-draining grow media. Hydroton (expanded clay pebbles), coarse perlite, or a 50/50 mix of the two are all solid choices. Avoid rockwool or coco coir for aloe, as they retain moisture too well and press tightly against roots. The media is there purely to anchor the plant and support the stem, not to hold water around the roots.
Plumbing and aeration
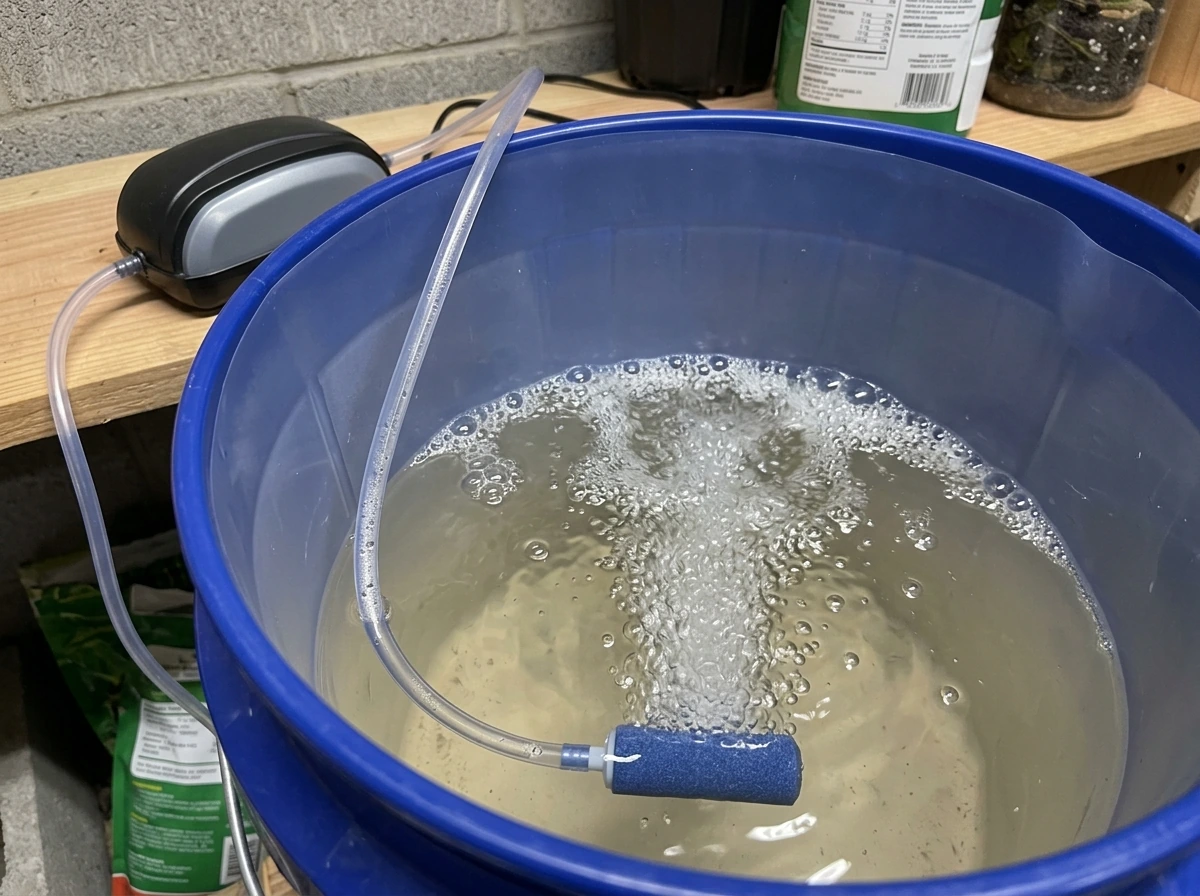
Aeration is where most beginners underinvest and then wonder why their roots rot. You need an aquarium air pump strong enough to keep the solution visibly bubbling. For a 5-gallon bucket, a pump rated at 1-2 watts with a single air stone is enough. For a 20-gallon tote with 4-6 plants, step up to a dual-outlet pump and two or three air stones distributed across the bottom of the reservoir.
Connect the pump to air stones with standard airline tubing, and add a check valve to the tubing so the water cannot siphon back into the pump if the power cuts out. Keep the pump above the waterline or use a check valve. That is it for plumbing. There is no need for recirculating pumps or elaborate tubing in a simple DWC build.
Water level management
This is one of the most important details for aloe specifically. Do NOT fill the reservoir so that the bottom of the net pot sits in the solution. You want an air gap of at least 1 inch, ideally 1.5 to 2 inches, between the solution surface and the bottom of the net pot. The roots will grow down through the media, hit the moist air in that gap, and then reach down into the solution on their own. This air gap gives the upper root zone a chance to breathe, which is critical for a succulent that is used to dry conditions between waterings.
Starting your aloe: pups, cuttings, and that crucial first week
The best way to start aloe hydroponically is from pups, which are the small offsets that healthy aloe plants produce around the base. If you are looking for a complete hydroponic how to grow workflow, the same step-by-step approach applies to setting up your system, dialing in water quality, and keeping roots oxygenated start aloe hydroponically. You can also start from a stem cutting, though aloe does not produce stem cuttings quite the way a leafy herb does. Either way, the single most important step before anything goes near water or media is callusing.
- Separate a pup from the mother plant (or take your cutting) with a clean, sterilized blade.
- Let the cut end sit out in a warm, dry, shaded spot for a minimum of 3 to 5 days. For thicker stems, give it up to 7 days. You are waiting for the wound to dry and form a callus, which is a protective skin that prevents bacteria and water from entering the tissue.
- Once callused, place the pup into a net pot filled with your dry grow media. Hold off on adding water to the reservoir for the first 3 to 5 days after planting.
- After those first few days, slowly raise the water level in the reservoir until it is within about 1.5 to 2 inches below the bottom of the net pot, then let the roots find the solution on their own.
- Keep nutrients at half strength for the first two weeks while the plant adjusts.
I skipped the callusing step on my first attempt and put a freshly separated pup straight into a damp media setup. Within 10 days the cut end was completely rotted and the plant was gone. The callus step feels like unnecessary waiting, but it is genuinely the difference between success and failure in the first month.
If you are starting from an established aloe plant you bought in a soil pot, gently wash every bit of soil off the roots under lukewarm water. Any residual soil in a hydroponic reservoir will cloud your solution, promote bacterial growth, and dramatically increase rot risk. Let the cleaned roots air dry for a couple of hours before placing the plant in your system.
Nutrient solution, pH, EC targets, and water changes
Which nutrients to use
Use a balanced hydroponic nutrient formula designed for general or vegetative growth. Aloe is not a heavy feeder, so you do not need anything specialty. A standard 3-part hydroponic nutrient system (grow, micro, bloom) or a simple 2-part formula works well. The key is using it at a fraction of the recommended dose. Start at one-quarter to one-third strength for the first two weeks, then step up to half strength for the rest of the plant's life. Full-strength nutrients are almost always too concentrated for aloe and will cause tip burn or nutrient lockout.
pH targets
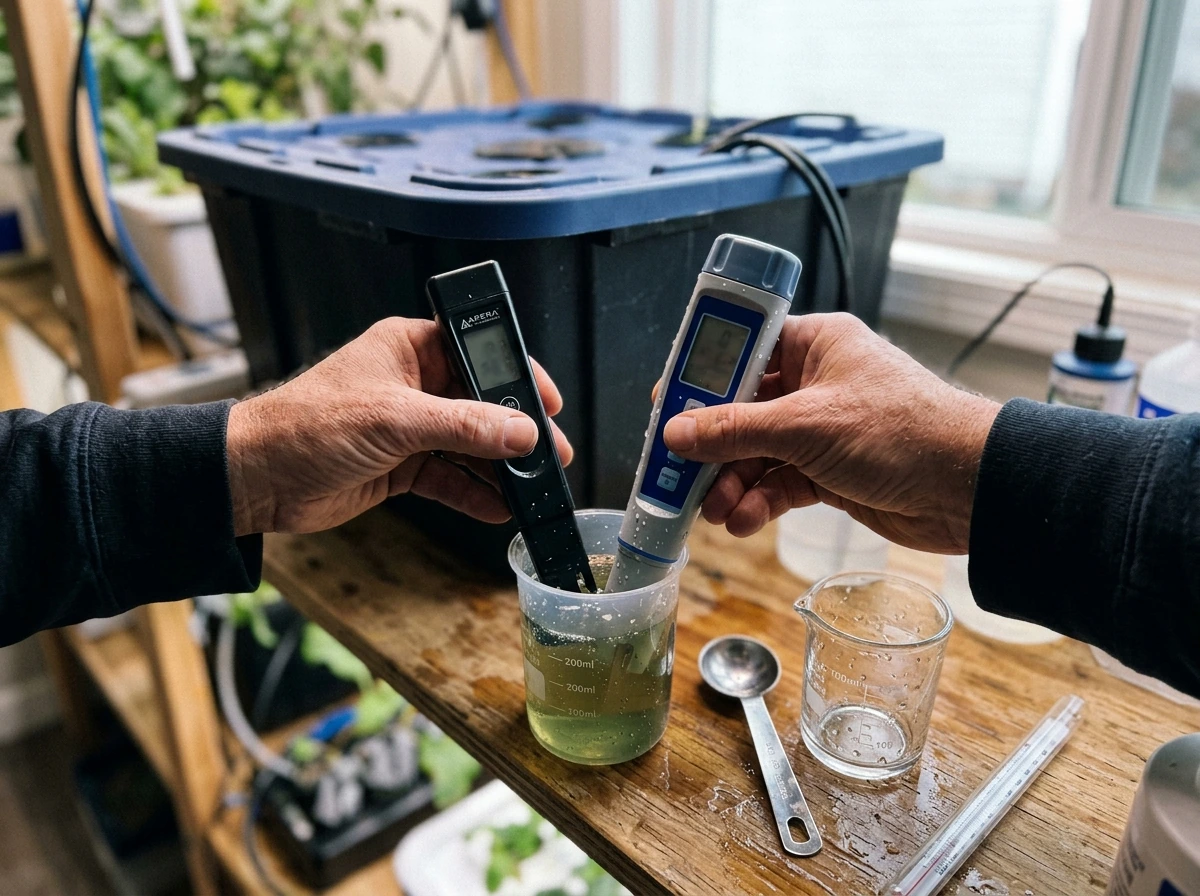
Keep solution pH between 5.5 and 6.0. This is a standard hydroponic range that keeps all major nutrients accessible to roots. Check pH every 2 to 3 days using a digital pH meter (not strips, which are not accurate enough for dialing in hydroponics). If pH drifts above 6.2, roots will start struggling to absorb iron and manganese. Below 5.3 and you risk nutrient toxicity and root damage. A small bottle of pH Up and pH Down solution is all you need to stay in range.
EC and PPM targets
EC (electrical conductivity) is the standard way to measure how concentrated your nutrient solution is. For aloe vera, target an EC of 0.8 to 1.4 mS/cm (roughly 560 to 980 ppm on a 700-scale meter). Stay on the lower end of that range, around 0.8 to 1.0 mS/cm, during the first month and when the plant is smaller or stressed. You can push toward 1.2 to 1.4 mS/cm for a well-established plant with a strong root system. If you see tip browning or general leaf discoloration, drop the EC first before chasing other explanations.
| Growth Stage | Target EC (mS/cm) | Target PPM (700 scale) | Target pH |
|---|---|---|---|
| First 2 weeks (establishing) | 0.6 – 0.8 | 420 – 560 | 5.8 – 6.0 |
| Weeks 3–8 (early growth) | 0.8 – 1.0 | 560 – 700 | 5.5 – 6.0 |
| Established plant (ongoing) | 1.0 – 1.4 | 700 – 980 | 5.5 – 6.0 |
Water change schedule
Between full changes, top off the reservoir with plain pH-adjusted water (not fresh nutrient solution) to replace what the plant consumes and what evaporates. A good rule of thumb: when the total amount you have added in top-offs equals the full volume of your reservoir, it is time for a complete reservoir change. For most home setups with one or two aloe plants, that works out to a full reservoir change every 1 to 2 weeks.
At each full change, wipe the inside of the reservoir with a clean cloth, rinse the air stones, and inspect the roots before refilling with fresh nutrient solution. More frequent changes are always better than less frequent ones when it comes to preventing biofilm and bacterial buildup.
Light, temperature, airflow, and getting aloe acclimated
Light requirements
Aloe vera needs bright light but not intense, direct midday sun. In a controlled indoor setup, target a PPFD (photosynthetic photon flux density) of 80 to 160 µmol/m²/s and a daily light integral (DLI) of 4 to 14 mol/m²/d. For most growers using a full-spectrum LED grow light, that means positioning the light 18 to 24 inches above the plant canopy and running it for 12 to 14 hours per day. If you are growing near a south-facing window, that may be sufficient during summer months, but supplemental lighting helps in winter.
If you are moving aloe from an outdoor or high-light environment into a controlled indoor setup, acclimate it gradually. Start with 6 to 8 hours of light and increase by an hour every few days. Aloe that goes suddenly from low light to high intensity will sunburn (white or brown patches on the leaf faces), and that damage is permanent.
Water and air temperature
Water temperature in your reservoir is one of the most critical variables in keeping aloe healthy hydroponically. Keep it between 60 and 68°F (15 to 20°C). Above 70°F, dissolved oxygen drops fast and root rot risk increases sharply. Many growers who wonder why their DWC roots turn brown despite good aeration find that their reservoir is sitting in a warm room and the water has crept above 72°F. If your space runs warm, consider a small aquarium chiller or wrap the reservoir in insulating foam. The ambient air temperature around the plant can be warmer, ideally 70 to 85°F (21 to 29°C), which is comfortable room temperature for most people.
Airflow
A small USB fan running at low speed near (not directly blasting) your aloe does two things: it strengthens the stem over time and it reduces the surface humidity around the plant, which lowers the risk of fungal issues. Aloe does not need high humidity, and in a DWC setup where the reservoir is open and evaporating constantly, the area around the plant can get more humid than you might expect. Aim for ambient relative humidity between 40 and 60 percent.
Keeping roots healthy and avoiding rot
Root rot is the single biggest risk when growing succulents hydroponically, and it is almost entirely preventable if you address the four main causes: low oxygen, high water temperature, poor sanitation, and roots sitting in standing water without an air gap. Penn State Extension (Pythium) notes that Pythium can cause severe root rot in hydroponic systems, with root tips being attacked and killed first. Here is how to stay ahead of all four.
- Run your air pump continuously, 24 hours a day. Never turn it off, even at night. Stagnant water grows biofilm fast.
- Maintain water temperature between 60 and 68°F. Get a cheap aquarium thermometer and check it weekly.
- Keep that 1.5 to 2 inch air gap between the solution surface and the bottom of the net pot. If you flood it too high, drop the level.
- Sanitize your reservoir at every full water change. Wipe down the interior walls with a diluted bleach solution (1 part bleach to 9 parts water), then rinse thoroughly before refilling.
- Use hydrogen peroxide (H2O2) as a periodic treatment or if you suspect early rot. A dose of 2 to 3 ml of 3% H2O2 per liter of reservoir water will add dissolved oxygen and kill pathogens without harming healthy roots. Do not use it every change, just as a spot treatment when needed.
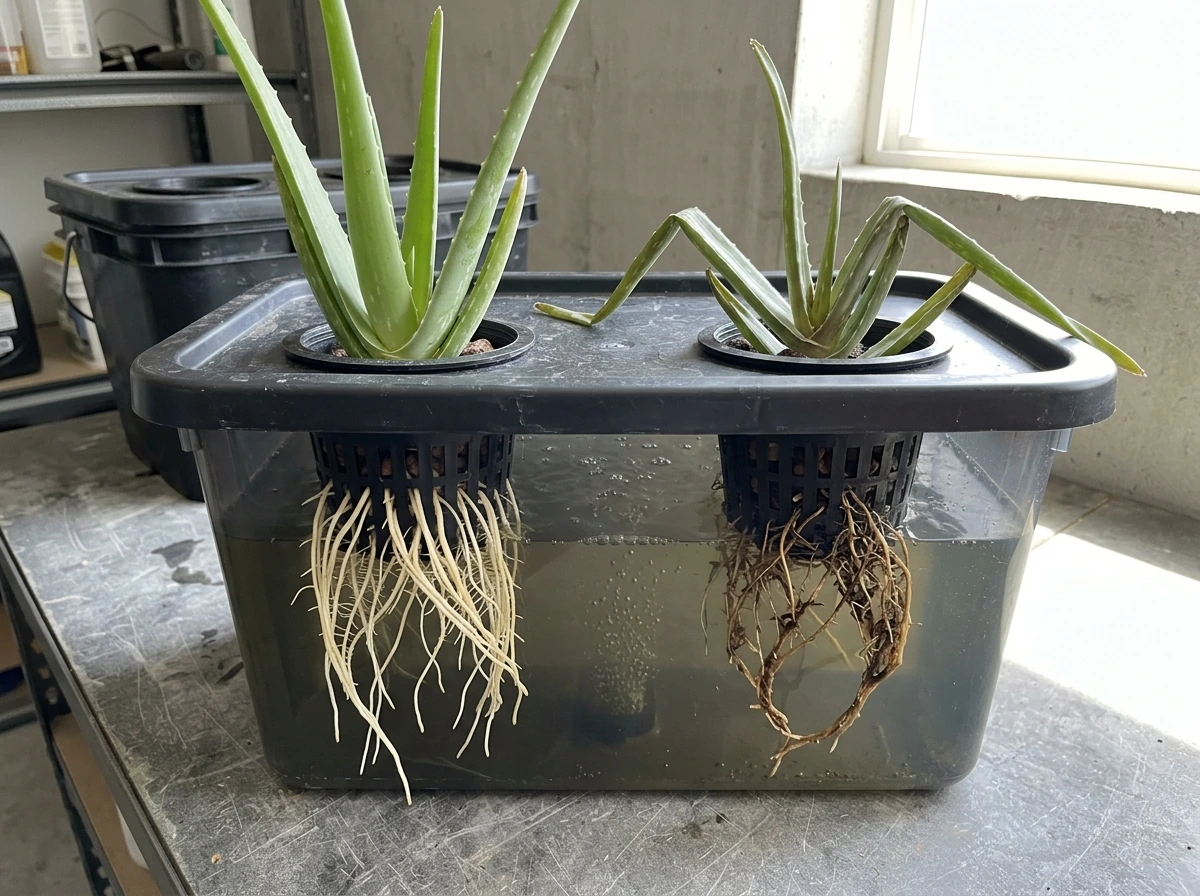
- Inspect roots every time you do a reservoir change. Healthy roots are white or light tan and firm. Brown, slimy, or mushy roots with a bad smell signal rot that needs to be dealt with immediately.
- If you find rotted roots, remove the plant, trim off all diseased root tissue with sterile scissors, let the roots air out for 30 minutes, then treat with diluted H2O2 before returning to a freshly cleaned and refilled reservoir.
Ongoing maintenance and troubleshooting common problems
Your weekly maintenance routine
- Check water level every 2 to 3 days and top off with plain pH-adjusted water as needed.
- Measure pH every 2 to 3 days and adjust if outside the 5.5 to 6.0 range.
- Measure EC once or twice per week to confirm nutrients are in the right range.
- Check water temperature weekly with a thermometer.
- Do a full reservoir change every 1 to 2 weeks: drain, wipe, rinse, refill with fresh nutrient solution.
- Inspect roots at every full change. Look for color, texture, and smell.
- Check for pests on leaves during each inspection.
Troubleshooting the most common issues
| Symptom | Likely Cause | Fix |
|---|---|---|
| Yellowing or soft, mushy leaves | Root rot or overwatering (solution too high, no air gap) | Lower water level, increase aeration, check root health, treat with H2O2 if needed |
| Brown leaf tips | Nutrient concentration too high (EC too high) | Dilute solution; target lower end of EC range |
| Pale or washed-out leaf color | Nutrient deficiency or pH out of range | Check and correct pH to 5.5–6.0, then check EC |
| Roots turning brown/slimy | Root rot from low oxygen or high water temperature | Cool the reservoir, increase aeration, trim dead roots, sanitize system |
| Green or brown algae/biofilm in reservoir | Light entering the reservoir | Inspect all seals and coverings; ensure reservoir is 100% opaque |
| White crust on net pot or media | Nutrient salt buildup (EC too high or infrequent changes) | Flush media with plain water, lower EC, change reservoir more frequently |
| Wilting or shriveling leaves (not mushy) | Not enough water uptake, possibly root damage or very low EC | Check roots, check water level, verify EC is adequate |
| Spider mites or fungus gnats | Low airflow, high humidity, or contaminated media | Increase fan airflow, lower humidity, inspect and treat with neem oil or insecticidal soap on leaves only, never in reservoir |
| Solution cloudy or smelly | Bacterial bloom from biofilm or decomposing root matter | Full reservoir change immediately, sanitize, trim any dead roots |
Scaling up as your aloe grows
Aloe vera is a slow grower compared to leafy greens or herbs you might run in a hydroponic system. Do not expect dramatic changes week to week. What success looks like over the first few months is firm, upright leaves with a healthy green color, visible white root growth into the reservoir, and new leaf growth emerging from the center of the plant. If you are seeing all three of those things, you are doing it right.
As the plant gets larger, the root mass will grow substantially. You will need to either move it to a larger net pot or a bigger reservoir to avoid the roots becoming so dense that they restrict water flow and oxygen around themselves. A plant that has been in your system for 6 to 12 months may produce pups, which you can separate (let callus, then restart in their own net pot) and grow on. You can harvest individual outer leaves for gel at any point once the plant has at least 8 to 10 mature leaves, just cut from the outermost leaves at the base and let the cut site dry before the plant goes back into the system.
The longer-term maintenance routine does not change much from what you are doing in the first weeks. Keep the water cold enough, keep the air pump running, change the reservoir regularly, and check your pH and EC consistently. Aloe in hydroponics is genuinely low-maintenance once it is established; it just requires that you do not skip the fundamentals.
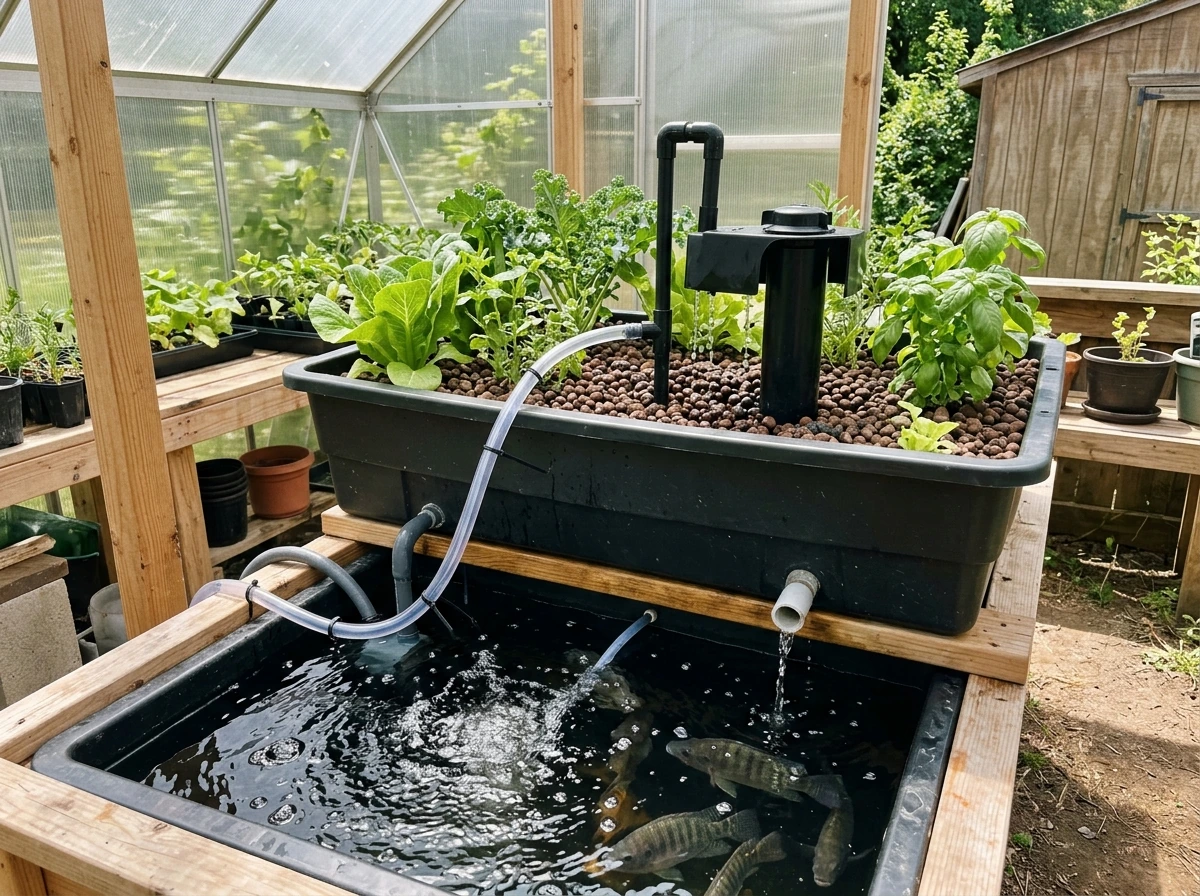
Once you have your aloe dialed in, you can use the same hydroponic thinking to learn how to grow flowers hydroponically with the right nutrients and airflow. If you are also exploring other water-based growing methods on this site, the principles around aeration and reservoir sanitation carry directly over to aquaponics setups and other hydroponic crops, so the habits you build here will serve you well across every system you run.
FAQ
Can I use rainwater or softened water for my aloe hydroponic reservoir?
You can, but only if you test and adjust pH and EC. Rainwater often has very low EC (almost no minerals), and softened water can contain excess sodium salts that can push EC up or skew nutrient balance, so always bring nutrients to your target EC after mixing and confirm pH stays in range.
What should I do if my reservoir water looks cloudy or smells bad even with an air gap?
Cloudiness usually means biofilm or bacterial activity. Do an immediate full reservoir change, wipe the reservoir walls, rinse or replace air stones, and inspect the roots for browning mush. Then reduce how often you top off without fully changing, and avoid adding any extra organic material (like plant debris) into the system.
Is it okay if the pump stops for an hour during a power outage?
An hour can be enough to cause oxygen starvation in DWC. Use an air-pump check valve plus a power backup (UPS for the pump or a simple battery aerator) if outages are common. The goal is keeping aeration continuous, because aloe roots can rot faster than many growers expect.
How do I know whether my EC is “too high” versus my pH being off?
If EC is high, you often see salt-related stress like tip browning or gradual leaf edge burn while pH readings may still look acceptable. If pH is off, you can see slowed growth or chlorosis patterns that do not improve after you dilute. The quickest approach is to check both with working meters, then correct pH first into 5.5 to 6.0 and only then fine-tune EC down.
Can I start aloe hydroponically from a leaf cutting instead of pups or a stem cutting?
Leaf-only starts usually fail in hydroponics because the cut leaf does not reliably form roots and a new crown. Pups (offsets with a growing point) are far more dependable. If you must try a leaf, use it only for gel production after it roots naturally, not as a primary method to grow a whole plant.
How long should I wait after callusing before placing the cutting or pup into the hydroponic setup?
Callused aloe generally needs the cut to be fully dry and sealed, no wet or soft spots at the end. In practice, many growers wait about 3 to 7 days depending on humidity and thickness, then place it so the bottom of the media does not stay in standing solution. If the callus looks glossy-wet, wait longer.
Do I need a separate “breather zone” or is the air gap enough?
The air gap between nutrient surface and the bottom of the net pot is the breather zone. Do not extend the air gap so far that roots struggle to reach the solution, and do not lower the net pot so roots sit submerged. A gap of 1 to 2 inches is a good operational range to preserve oxygen exchange.
What grow media can I use if I do not have hydroton or perlite?
Any inert, coarse, fast-draining medium works best as long as it anchors the plant without holding water tightly against roots. Coarse pumice can substitute for hydroton, and you can use a small amount of inert gravel mixed with a coarse fraction for structure. Avoid fine, water-retentive mixes that stay wet for long periods.
Should I harvest gel in the early months, or will it weaken the plant?
Harvesting can slow growth if the plant is still building roots. If you want to take gel, wait until you have at least 8 to 10 mature leaves and cut only from the outermost leaves, then let the cut site dry before returning it to the system. Frequent harvesting on young plants can also increase the chance of softening at the cut.
Do I need to rinse roots when I do reservoir changes?
Usually you only inspect and rinse if you see root debris or obvious algae or slime. Over-handling roots can create new entry points for rot. At each full change, wipe the reservoir interior, rinse the air stones, and gently look for browning or mush, then only rinse roots lightly if they are coated with biofilm.