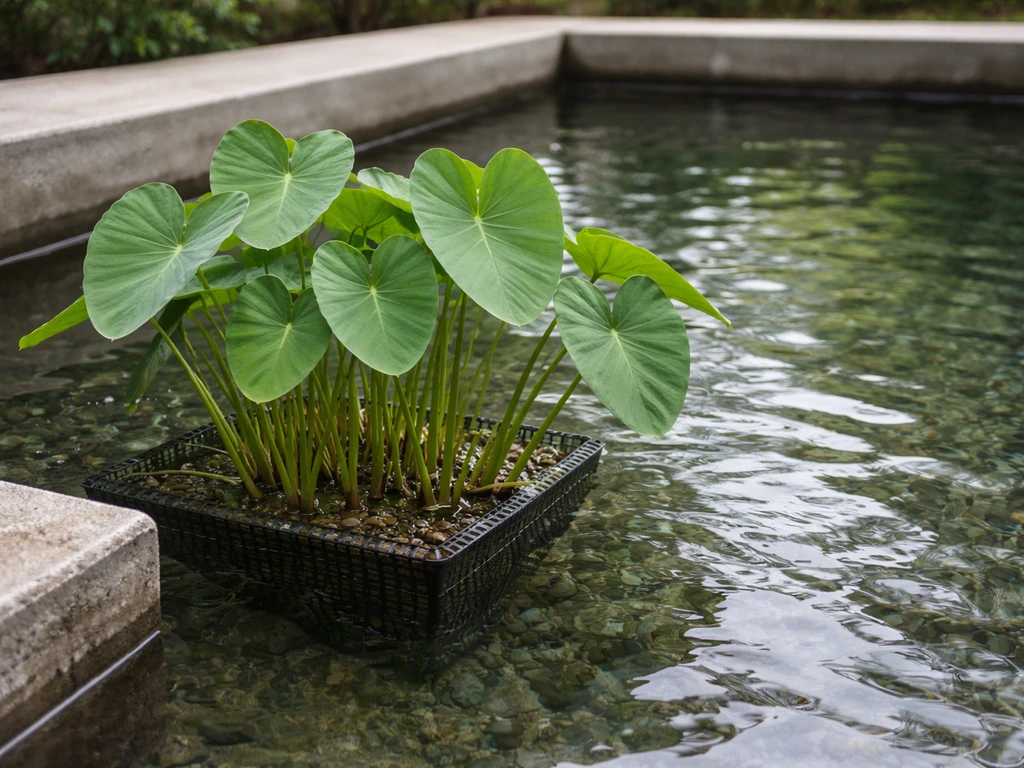
Yes, you can absolutely grow edible taro (Colocasia esculenta) in a pond, and it actually does better in shallow aquatic conditions than most people expect. The key is positioning it as a marginal plant along the pond's edge rather than submerging the whole corm in deep water. Keep the crown just at or slightly above the waterline, plant into 0 to 12 inches of standing water, give it full sun to partial shade, and you will get healthy foliage and harvestable corms without the rot problems that frustrate most first-timers.
How to Grow Taro in a Pond: Step-by-Step Guide

Marcus Holloway
15 Jun 2026
Is pond taro actually doable (and which type should you use)

The taro you want for a pond is Colocasia esculenta, sometimes called water taro or elephant ear. This is the same species grown for its edible corms across Asia, the Pacific, and parts of Africa. It is not just tolerant of wet conditions, it actively thrives in them. Mississippi State University Extension actually classifies it as a water-tolerant pond plant, and the Missouri Botanical Garden lists it under medium-to-wet water requirements. That is different from the ornamental aroids sometimes sold as 'elephant ears,' which can include Alocasia and Xanthosoma types that prefer drier conditions.
One thing to flag upfront: Colocasia esculenta is invasive along the Gulf Coast of the U.S. and can escape into natural wetlands. If you are in the Southeast, grow it in containers within the pond rather than letting it root freely into the sediment, and never dump pond water or plant material into natural waterways. Responsible management matters here.
For edible production, stick with standard Colocasia esculenta rather than ornamental cultivars. Varieties bred for leaf color or ornamental size often sacrifice corm size and eating quality. If you want both good looks and edible corms, look for dual-purpose varieties that are explicitly described as productive for root harvest.
Setting up your pond: location, depth, and water conditions
Where to place the pond or growing area
Taro wants sun, so site your pond where it gets at least 4 to 6 hours of direct sunlight per day. Full sun produces faster growth and larger corms, but afternoon shade in very hot climates (zones 9 and above) prevents leaf scorch. Morning sun with afternoon shade is a solid compromise if you are growing in a hot region. Avoid placing the pond under heavy tree cover, both for light reasons and because fallen leaves will mess with water quality.
Depth and zoning
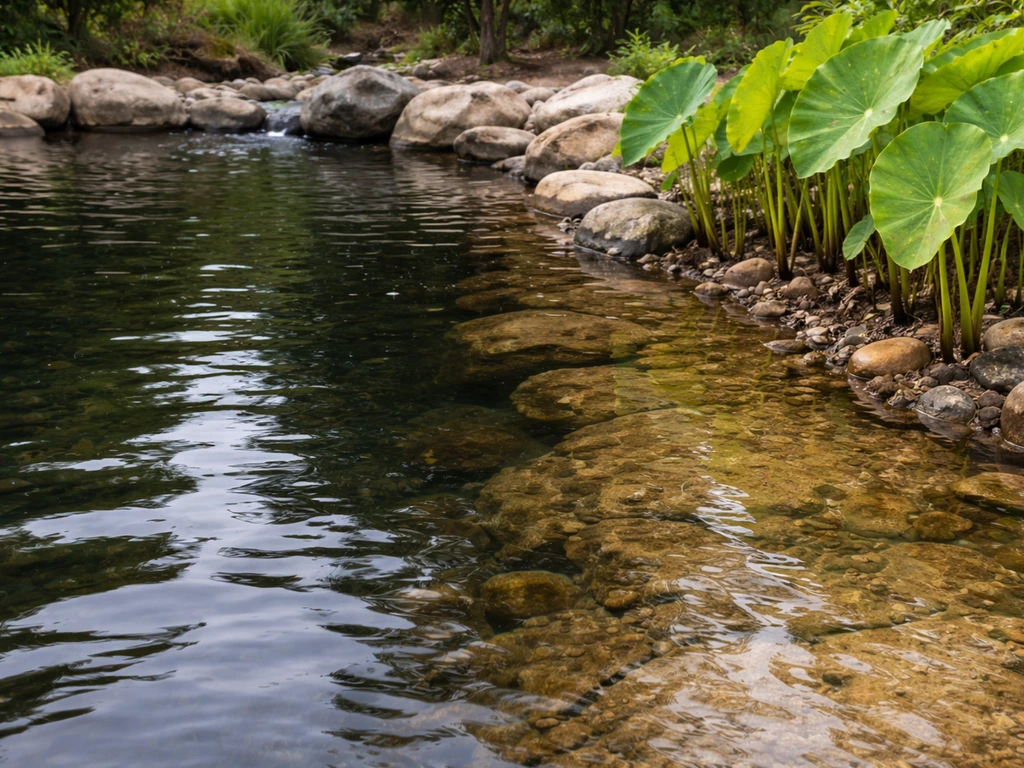
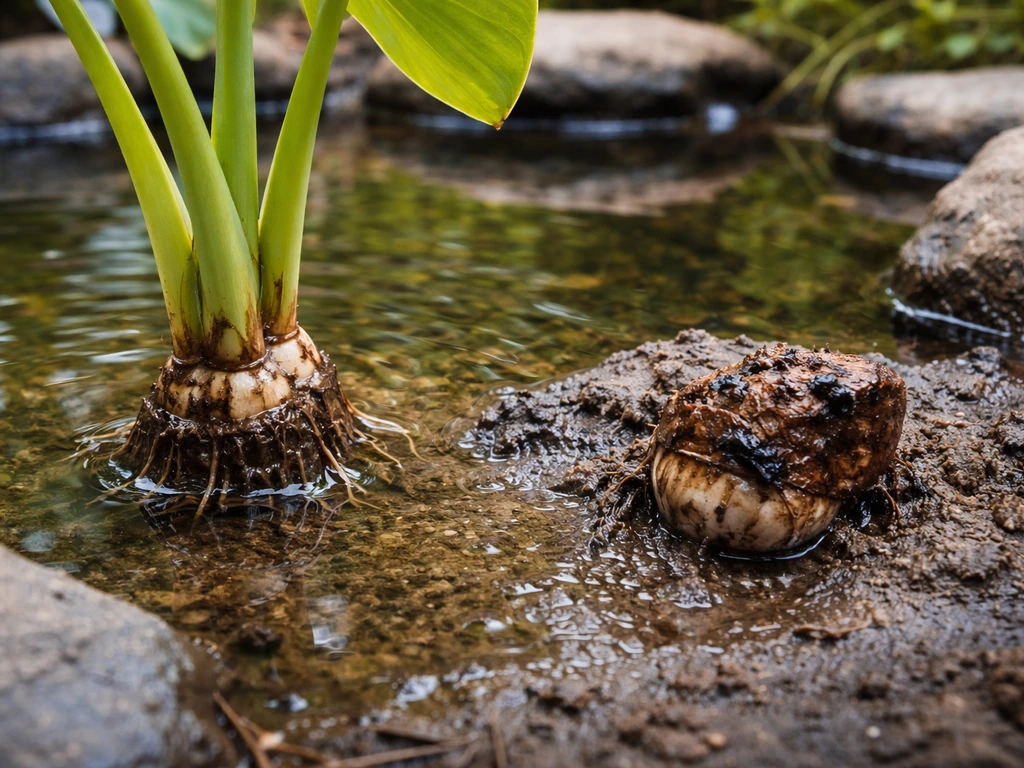
This is the part that trips people up most often. Taro is a marginal plant, meaning it belongs in the shallow transition zone around the pond's edge, not in the deep center. The sweet spot is 0 to 12 inches of standing water above the soil surface. Some varieties, like Colocasia esculenta 'Hawaiian Punch', are documented to handle up to around 6 inches of standing water comfortably. Going deeper than 12 inches consistently risks waterlogging the crown and inviting rot. If your pond does not have a built-in shelf, place the plant in a container and set it on bricks or a pond shelf to hit the right depth.
Water quality and flow
Stagnant, oxygen-depleted water is your enemy. Pythium water molds, which cause corm and root rot, thrive exactly where water sits still and anaerobic conditions develop. You do not need a rushing stream, but some gentle circulation, whether from a small pump, fountain, or waterfall, makes a real difference. Keep water pH between 5.5 and 7.0; taro does fine slightly acidic. Avoid extremes of very alkaline water, which will limit nutrient uptake.
Planting taro: corms, spacing, and getting roots established
Starting material: corms and tubers
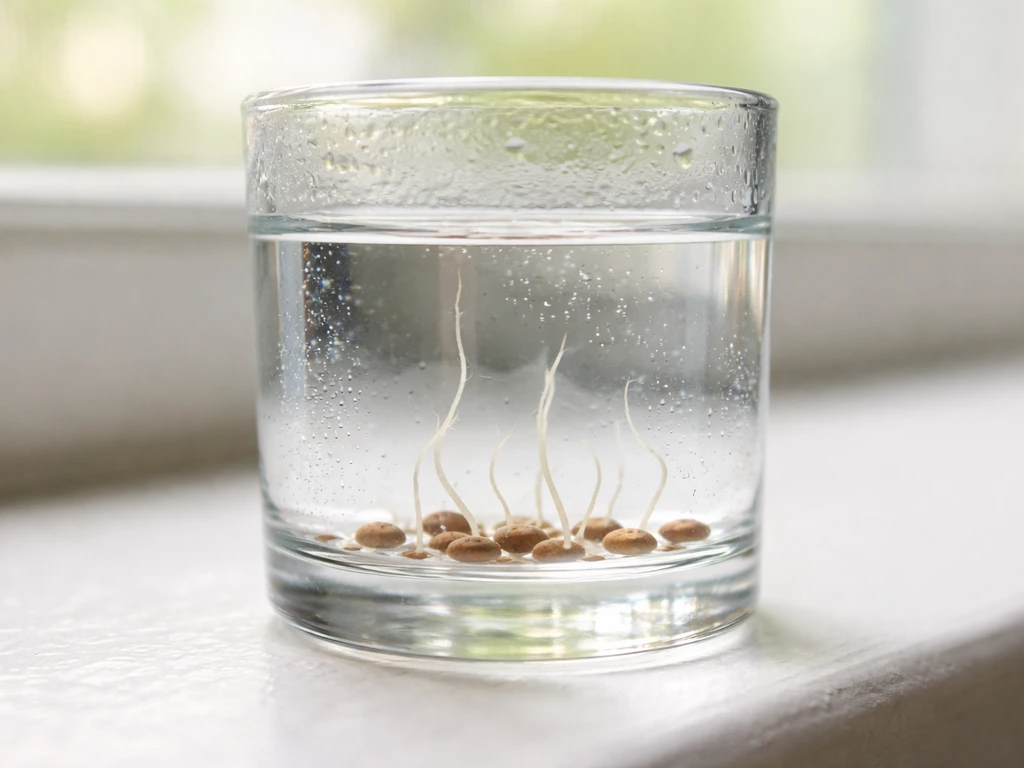
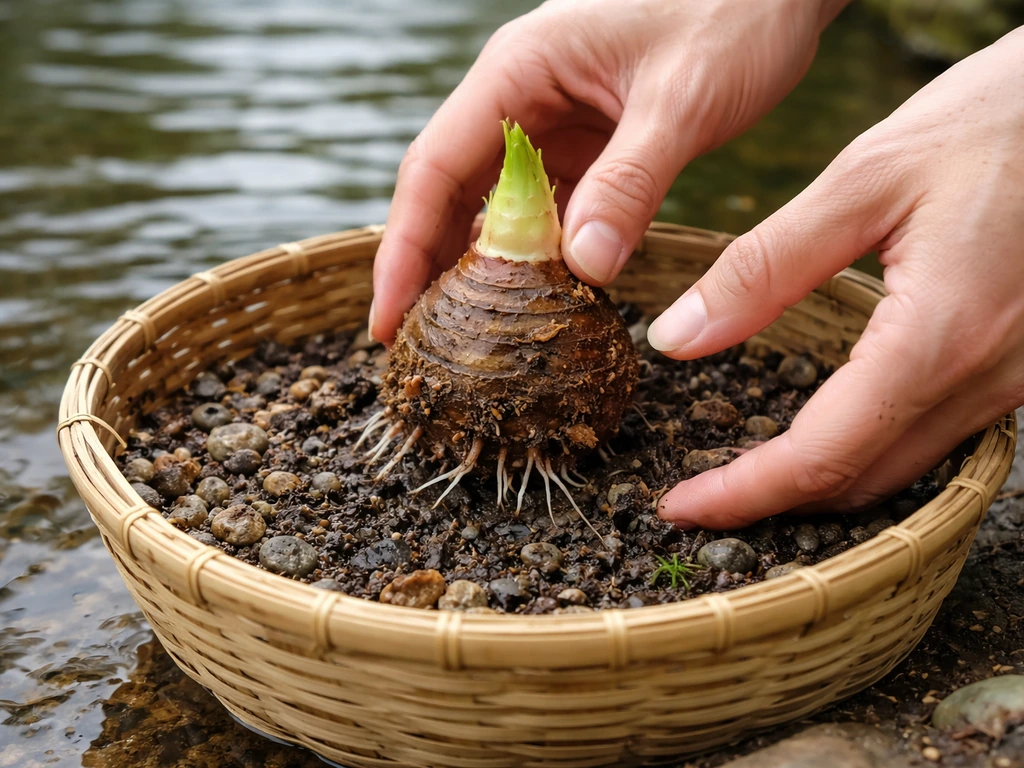
Start from corms or corm divisions rather than seed. Copper grass pilea can be grown in water by keeping the cuttings submerged while using fresh water and bright, indirect light. Taro corms are widely available from Asian grocery stores, farm markets, or aquatic plant nurseries. Choose firm, unblemished corms with a visible growing tip. Soft spots or mold on the corm before planting almost always mean failure later. If you are dividing from an established plant, cut the side cormels (smaller offshoots) away cleanly and let the cut surface air-dry for a day before planting to reduce rot risk.
How to plant in a pond
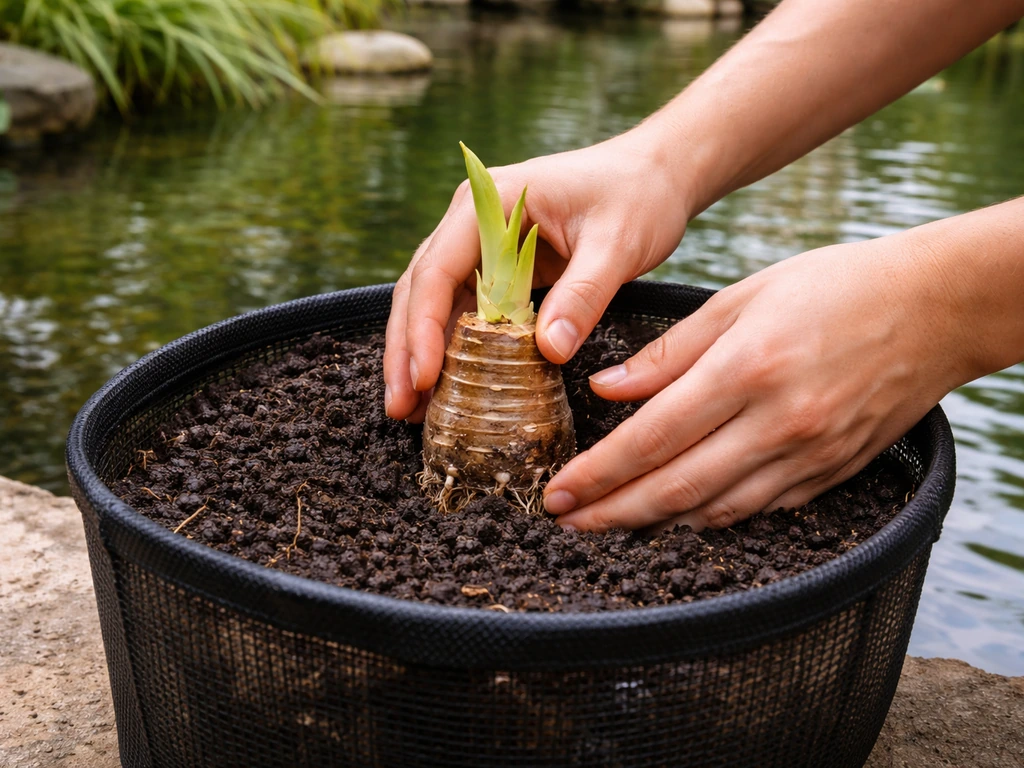
- Fill a planting container (a mesh pond basket or a solid pot with holes drilled in the sides) with a heavy loam or aquatic planting soil. Avoid light potting mixes that float out into the water.
- Plant the corm 8 to 15 cm (roughly 3 to 6 inches) deep with the growing tip pointing upward.
- Position the crown (where the stem meets the corm) just at or slightly above the soil surface, not buried under several inches of growing medium.
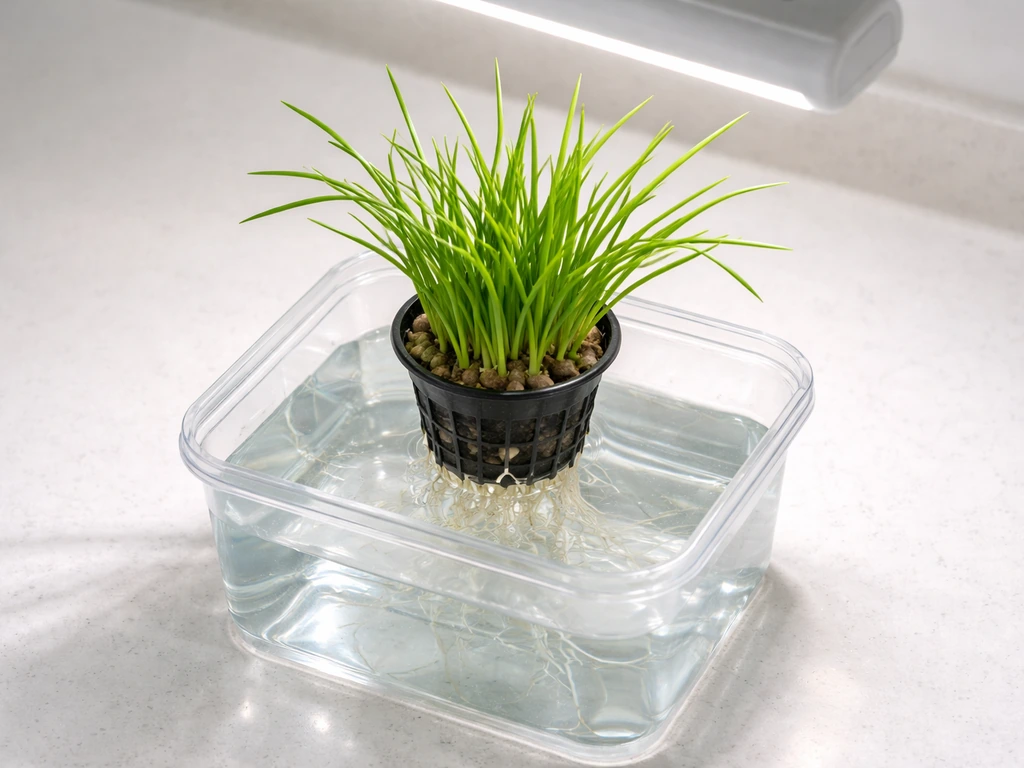
- Lower the container onto a pond shelf or bricks so the water surface sits at or just below the crown level, targeting 0 to 6 inches of water over the soil.
- If you want the plant in slightly deeper water as it matures, start shallow and lower the container incrementally once the plant is actively growing and roots are established.
Spacing
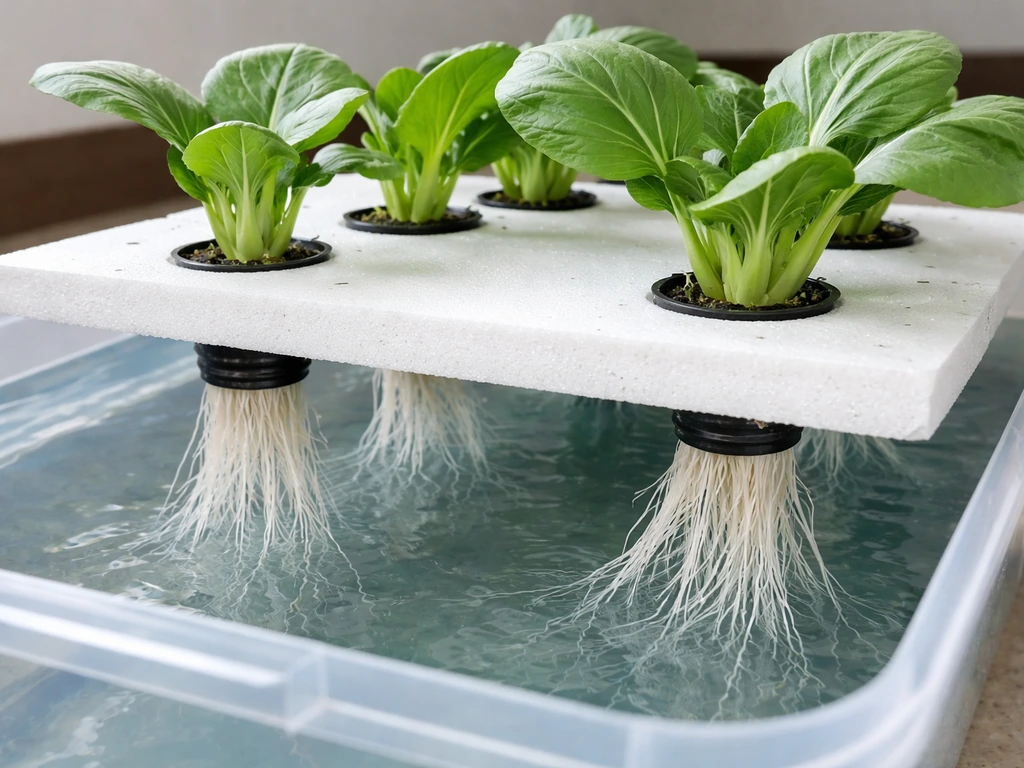
Give each plant at least 60 to 90 cm (2 to 3 feet) of space from its neighbors. Taro produces large leaves that shade out everything nearby, and crowding promotes the humid, stagnant-air pockets that encourage leaf blight. In a small pond, one or two plants along the margin is plenty for a first grow.
Feeding and growth management: light, temperature, and nutrients
Temperature and seasonal timing
Taro is a tropical plant and grows actively between 20°C and 35°C (68°F to 95°F). Below 15°C (59°F) growth stalls; frost will kill the top growth and can damage corms. In USDA zones 8 to 11, you can grow it as a perennial. In colder zones, treat it as an annual or lift the corms in fall and store them indoors above 10°C. Plant outdoors after your last frost date when water temperatures have stabilized above 18°C.
Fertilizing in a pond system
Feeding taro in a pond requires a bit more care than in a garden bed because you do not want excess nutrients leaching into the water and feeding algae blooms. The best approach is to use slow-release fertilizer tablets or spikes pushed into the planting container's soil, which delivers nutrients directly to the roots without much spillover into the water column. A balanced 10-10-10 NPK formulation (equal parts nitrogen, phosphorus, and potassium) works well at planting and again mid-season.
A University of Georgia Extension fact sheet explains that “10-10-10” is made up of equal percentages of nitrogen, phosphorus (as P2O5), and potassium, which helps interpret NPK ratios for pond taro feeding 10-10-10 NPK formulation.
Avoid liquid fertilizers applied directly to pond water; they will feed algae more than your taro.
Taro is a heavy feeder and rewards nitrogen particularly during its vegetative phase (the first few months when it is building leaf mass). Once you see robust leaf development and want to push corm bulking, ease back slightly on nitrogen and let phosphorus and potassium support root development. If you are running fish in the same pond, their waste provides a meaningful nitrogen source and you may need less supplemental feeding overall.
Light management
Full sun gives you the fastest growth and biggest corms. If you are in a climate where the sun is intense midday, partial shade in the afternoon is fine and will not meaningfully hurt yield. What genuinely hurts production is less than 4 hours of direct sun per day. I made the mistake once of planting taro on the shaded side of a larger plant and got impressive foliage height but tiny, disappointing corms at harvest. The plant puts energy into reaching for light at the expense of root storage.
Day-to-day pond care: weeds, harvesting, and replanting
Weed and algae control
Once taro is established, its large leaves shade out most pond-edge weeds around the plant itself. Your main weed problem will be aquatic plants trying to colonize the pond margins nearby. Remove them by hand regularly, and keep the pond edge clear so air can circulate around the taro stems. For algae in the water column, good water circulation and avoiding excess fertilizer runoff are your best controls. Barley straw rolls placed in the pond are a natural option that will not harm the taro.
When and how to harvest
Most Colocasia esculenta varieties are ready to harvest 6 to 12 months after planting, depending on your climate and growing conditions. Warmer, longer seasons produce larger corms. Harvest cues include leaves beginning to yellow and die back naturally (not from disease), and a noticeable swelling visible at the base of the stem just below the water or soil surface. To harvest, lift the entire container out of the pond, tip it out, and carefully dig away the growing medium to expose the corms. Separate the main corm and any side cormels. The side cormels can be immediately replanted for your next cycle.
Replanting after harvest
Refresh the container with new aquatic planting soil before replanting. The old substrate will be nutrient-depleted and may harbor disease pathogens from the previous season. Select the firmest, healthiest-looking cormels with clear growing tips, let cut surfaces dry briefly, and replant following the same depth and crown-positioning steps as the original planting. In warm climates you can cycle two crops per year.
Troubleshooting common pond taro problems
| Problem | Likely Cause | Fix |
|---|---|---|
| Corm rotting shortly after planting | Crown buried too deep or water level too high, promoting Pythium infection | Lift and reposition so the crown sits at or just above the waterline. Improve water circulation. Remove any soft tissue and let cut surfaces dry before replanting. |
| Leaves yellowing rapidly (not end-of-season) | Nutrient deficiency, waterlogged roots, or early Pythium root rot | Check water depth and crown position first. Add a slow-release balanced fertilizer tablet to the container. If roots are black and mushy, the corm is likely rotting. |
| Brown spreading lesions on leaves with water-soaked edges | Taro leaf blight (Phytophthora colocasiae) | Remove and dispose of infected leaves immediately. Do not compost. Improve air circulation by spacing plants wider. Avoid overhead watering or any splashing that wets the leaves repeatedly. |
| Slow or almost no growth after planting | Water too cold, insufficient light, or corm planted too deep | Check that water temperature is above 18°C. Confirm the plant gets at least 4 hours of direct sun. Lift and replant at the correct 8 to 15 cm corm depth. |
| Very tall leggy stems with small corms at harvest | Too much shade during the growing season | Reposition the pond or container to a sunnier spot for the next cycle. Prioritize morning sun. |
| Algae explosion in the pond after fertilizing | Fertilizer leaching from the container into the water | Switch entirely to solid slow-release fertilizer tablets pushed into the container substrate. Avoid any liquid feeding into the water column. |
| Taro spreading aggressively beyond the pond | Rhizomes or cormels escaping into adjacent wet soil | Keep all plants in solid-sided or mesh containers. Regularly inspect the pond edge and remove any volunteer shoots immediately. |
The single most common failure I hear about is rotting corms, and almost every time it traces back to crown depth. People bury the crown thinking deeper is more stable, but in wet pond conditions that is the fastest way to invite Pythium water molds. Get the depth right from day one and most other problems become much easier to manage.
Your starting plan for today
If you want to start right now, source a firm Colocasia esculenta corm from an Asian market or aquatic plant supplier. Grab a mesh pond basket and some aquatic loam or heavy garden soil. Find the sunniest edge of your pond or water feature, set up a shelf or bricks to put the container at the right height, and plant with the crown just at the waterline. Add one or two slow-release fertilizer tablets into the soil, then step back. Within two to four weeks you should see new leaf growth. From there, the main job is monitoring water depth, circulation, and light, and keeping an eye out for the early signs of leaf blight before it spreads.
Taro is genuinely one of the more rewarding aquatic food plants you can grow in a home pond setup. It produces impressive foliage, edible corms, and handles a range of conditions once it is properly established. If you are already experimenting with other water-based food growing, the principles here overlap nicely with other semi-aquatic crops that thrive in consistently moist or water-adjacent conditions.
If you want a different plant to add to your water setup, the same general approach can help you learn how to grow gotu kola in water as well semi-aquatic crops. If you are comparing options, pechay can also be grown in water-based systems for quick, space-efficient leafy harvests grow pechay in water.
If you want to dial in your setup specifically for kinchay (water spinach), the growth method is similar but you will focus more on fast, leafy regrowth and consistent moisture how to grow kinchay in water.
FAQ
Can I grow taro directly in the pond sediment instead of using a container?
In many areas it is risky because taro can escape into surrounding wetlands, especially along the Gulf Coast. If you are in a region where escape is a concern, use a pond basket or container even if the plant is set at the right depth. Containers also let you refresh soil after harvest and reduce disease carryover.
How do I know the crown is at the correct height, not too deep?
Aim for the crown to sit at the waterline, or slightly above it. A practical check is to look for where new shoots emerge, that area should not be continuously underwater. If you see the shoots darken, soften, or the stem base stays saturated, you are likely too deep and should raise the container or shelf.
What water movement is enough for preventing rot, and how much is too much?
Gentle circulation is the goal, enough to avoid stagnant, oxygen-poor pockets near the crown and roots. A small fountain or low-flow pump works well. Avoid aggressive flow that constantly slaps leaves and uproots the plant, since that can stress foliage and promote blight.
My taro grows lots of leaves but the corms stay small, what’s wrong?
Most often it is insufficient light, like less than about 4 hours of direct sun. Another common cause is fertilizer balance, too much nitrogen for too long, or fertilizer that leaks into the water and triggers algae instead of feeding the roots. Try moving to a sunnier pond edge and reduce nitrogen after leaf mass is established.
Do I need to worry about pH if my pond water is naturally alkaline?
Taro does fine slightly acidic, roughly pH 5.5 to 7.0. If your water is much more alkaline, nutrient uptake can slow and leaf growth may stall even when you fertilize. If you cannot adjust pond pH easily, use the container approach and feed in the planting soil so the root zone stays closer to your target.
How often should I fertilize taro in a pond, and what if there are fish?
Use slow-release fertilizer tablets or spikes placed in the container soil, not in the open water. Apply at planting and again mid-season, then reassess based on leaf color and growth rate. If you run fish, their waste often supplies nitrogen, so you may need less supplemental feeding to avoid algae and to prevent overly leafy, under-corm growth.
Can taro survive winter in a cold climate, and what should I do in fall?
If water temperatures drop below about 15°C (59°F), growth slows and frost can damage the tops and harm corms. In colder zones, lift containers before freezing, keep them indoors above about 10°C, and replant after your last frost when water temps stabilize above roughly 18°C.
What are early signs of crown or corm rot, and how do I respond?
Early cues include softening at the crown base, browning that progresses from the stem base upward, and corms that feel mushy when you eventually lift the container. The immediate fix is to correct depth and improve circulation, then avoid overwatering beyond the 0 to 12 inches range. If rot is severe, remove affected parts and replant only firm cormels.
How much space should I give each taro plant in a pond basket?
Provide about 2 to 3 feet between plants, because large leaves shade nearby growth and crowding creates humid, stagnant microclimates. If your pond shelf is narrow, start with one plant per shelf position for the first cycle so you can judge light and water movement before adding more.
When is the best time to harvest, and how do I avoid damaging corms?
Harvest when leaves yellow and die back naturally, and when you can see a noticeable swelling at the base just below the waterline or soil surface. Lift the whole container and tip it out so you can dig carefully without striking corms against hard pond surfaces. Separate the main corm from side cormels and replant the healthiest cormels immediately.
Should I reuse the same aquatic soil after harvest?
It is better not to. Refresh the container with new aquatic or heavy planting soil each cycle, since old substrate can be nutrient-depleted and may carry pathogens from the previous season. If you reuse soil, your next crop is more likely to repeat rot or weak growth problems.