You can grow pechay in water at home using a simple hydroponic setup, and you can have your first harvest in as little as 3 to 4 weeks. The key is giving the roots oxygen, feeding the water with a proper nutrient solution, and keeping pH between 5. 5 and 6. 5.
How to Grow Pechay in Water: Hydroponic Guide for Beginners

Marcus Holloway
7 May 2026
Plain water alone will not grow a full plant, it will sprout seeds but stall quickly without nutrients and aeration. Get those two things right and pechay is one of the easiest and fastest leafy greens you can grow this way.
Gotu kola can be grown in water too, but you will still need proper oxygenation, nutrients, and stable pH to keep it from stalling pechay is one of the easiest and fastest leafy greens you can grow this way.
What pechay is and what 'growing in water' actually means
Pechay is the Filipino name for bok choy (Brassica rapa subsp. chinensis), a fast-growing leafy brassica with crisp white stalks and dark green leaves. It's popular in Southeast Asian cooking, grows quickly in warm conditions, and happens to do exceptionally well in hydroponic systems. When people search for 'growing pechay in water,' they usually mean one of two things.
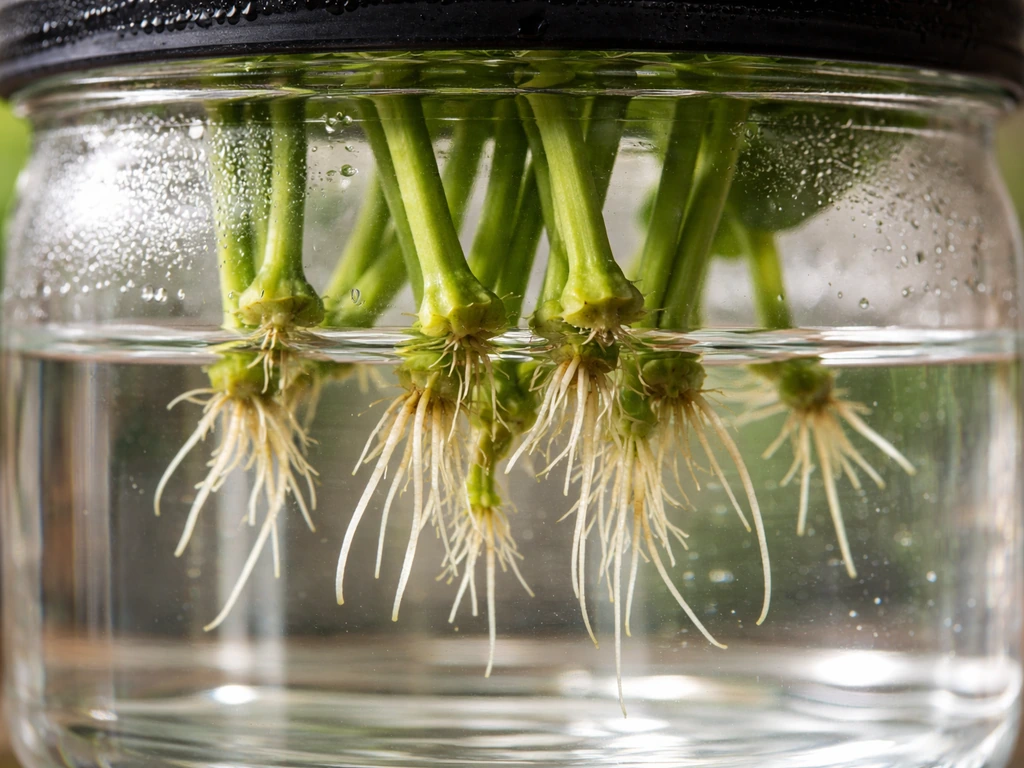
The first is true hydroponics: plant roots grow directly in a nutrient-enriched water solution, sometimes with aeration, and you grow the plant all the way through to full harvest. This is the approach that actually feeds your family. The second is water sprouting, where you place seeds or a cut base in plain water to germinate or regrow shoots. Water sprouting works for a quick handful of baby greens or to regrow a stump for a few days, but it hits a hard wall without dissolved nutrients. The plant exhausts what's stored in the seed or the cut base and then stalls or yellows.
This guide focuses on true hydroponics because that's what gets you a real, repeatable harvest. If you want the quick water-sprouting regrow trick, it works for a week or so, just cut the base of a pechay head, place it in 2 to 3 cm of water on a windowsill, and refresh the water daily. But for a full crop, keep reading.
Best setup for pechay in water
Pechay is forgiving about the container you use, which is part of why it's great for beginners. The non-negotiables are: something to hold the nutrient solution, net pots or another way to suspend the plant above the water, and a way to get oxygen into the root zone. Here's how to think about your options.
Container options: from jars to proper DWC buckets
| Setup | Best For | Aeration Method | Plants Per Unit | Cost |
|---|---|---|---|---|
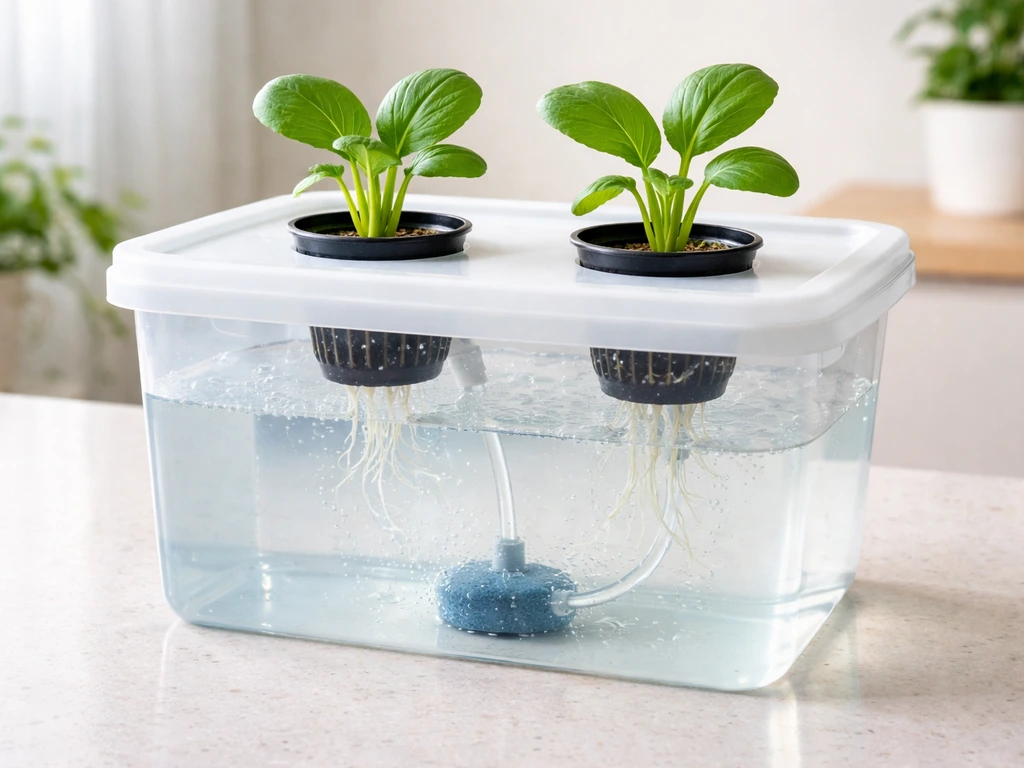
| Mason jar or yogurt tub (Kratky) | Absolute beginners, 1–2 plants | Passive air gap (no pump) | 1 | Very low |
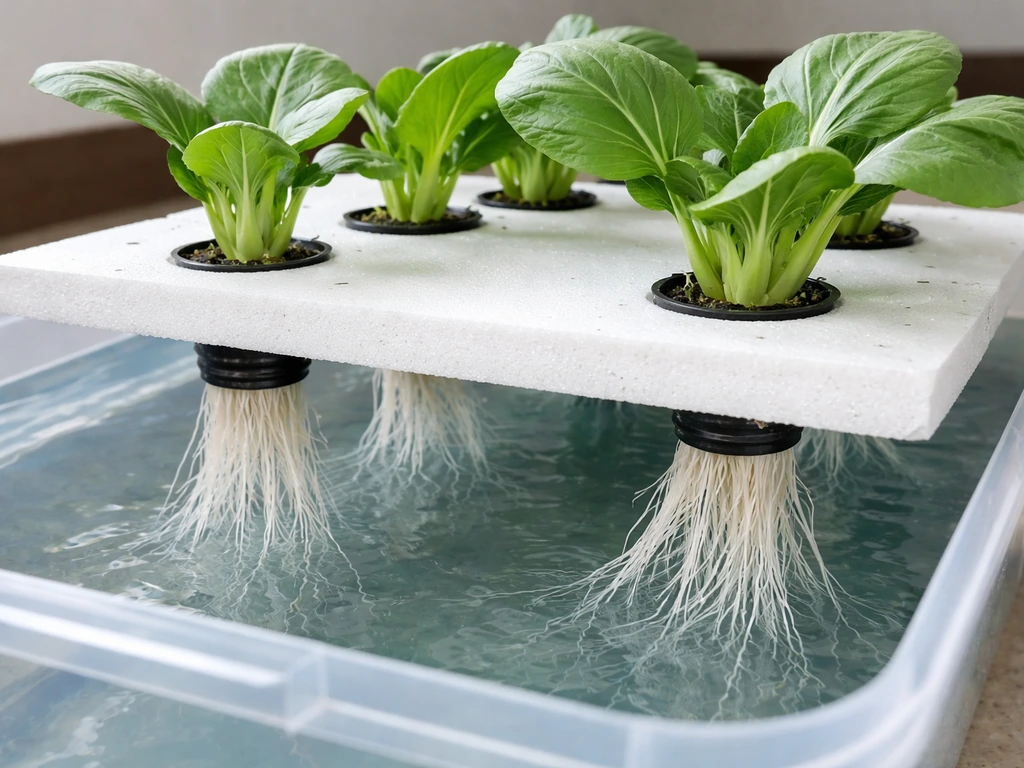
| Foam/styrofoam board float on tote | Batch growing, 4–12 plants | Aquarium air pump + airstone | 4–12 | Low |
| 5-gallon bucket DWC | Serious home growers | Aquarium air pump + airstone | 1–2 | Low–medium |
| PVC pipe NFT channel | Continuous production | Pump + gravity flow | 6–20+ | Medium |
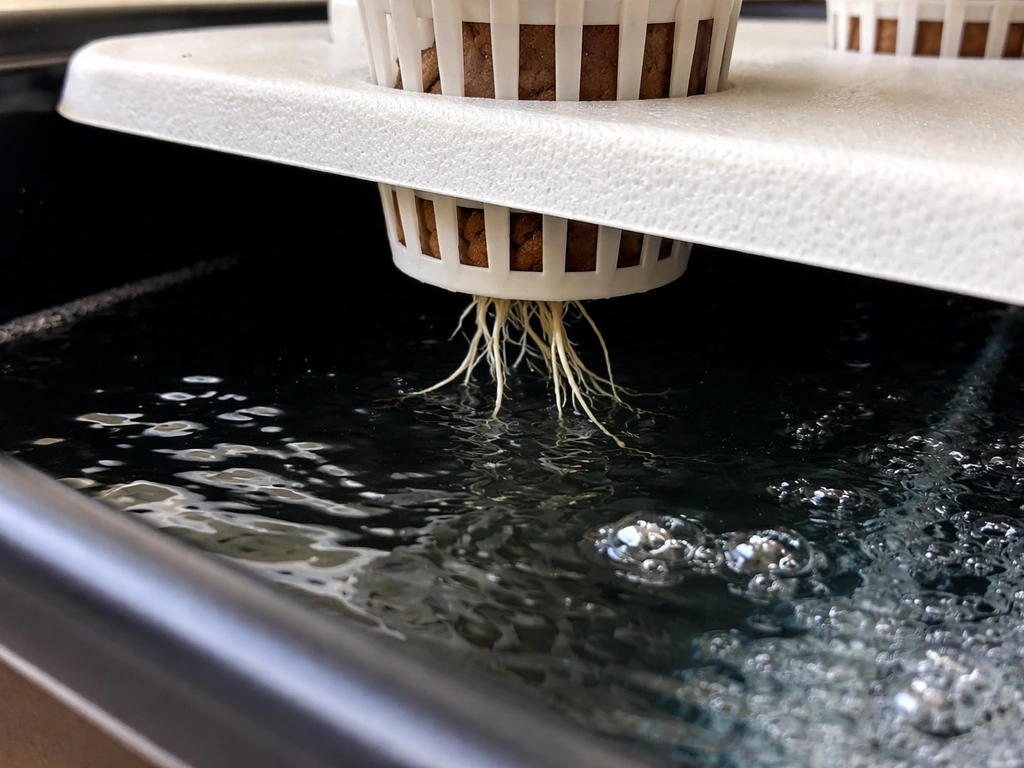
For most beginners, a styrofoam raft system on a plastic storage tote is the sweet spot. Cut holes for 5 cm (2-inch) net pots, float the foam on your nutrient solution, and drop an aquarium air pump with an airstone into the reservoir. It's cheap, scalable, and the continuous bubbling keeps roots oxygenated. I've killed plants in static jars by forgetting to leave an air gap, roots sitting in fully submerged, still water run out of oxygen fast and rot within days.
Water depth and the air gap rule
In an aerated system like DWC or a raft tote, keep the water level about 2 to 4 cm below the bottom of your net pots when seedlings are young, then let the level drop slightly as roots grow down. Roots need to reach into the solution while the upper portion stays in oxygenated air. In a Kratky (no-pump) setup, start with the water level just touching the bottom of the net pot and let the plant drink it down naturally, creating its own air gap. Never top off a Kratky system to the brim, that's the most common beginner mistake and it drowns the roots.
Net pots and growing medium
Use 5 cm net pots for pechay, they're the right size for one plant each. Fill them with a small amount of growing medium to anchor the seedling: hydroton (clay pebbles), rockwool, perlite, or even a pinch of coconut coir all work fine. You just need something to hold the stem upright while the roots find their way into the water below. Avoid using soil, it will cloud the water, create bacterial problems, and clog everything.
Step-by-step: seeds to harvest
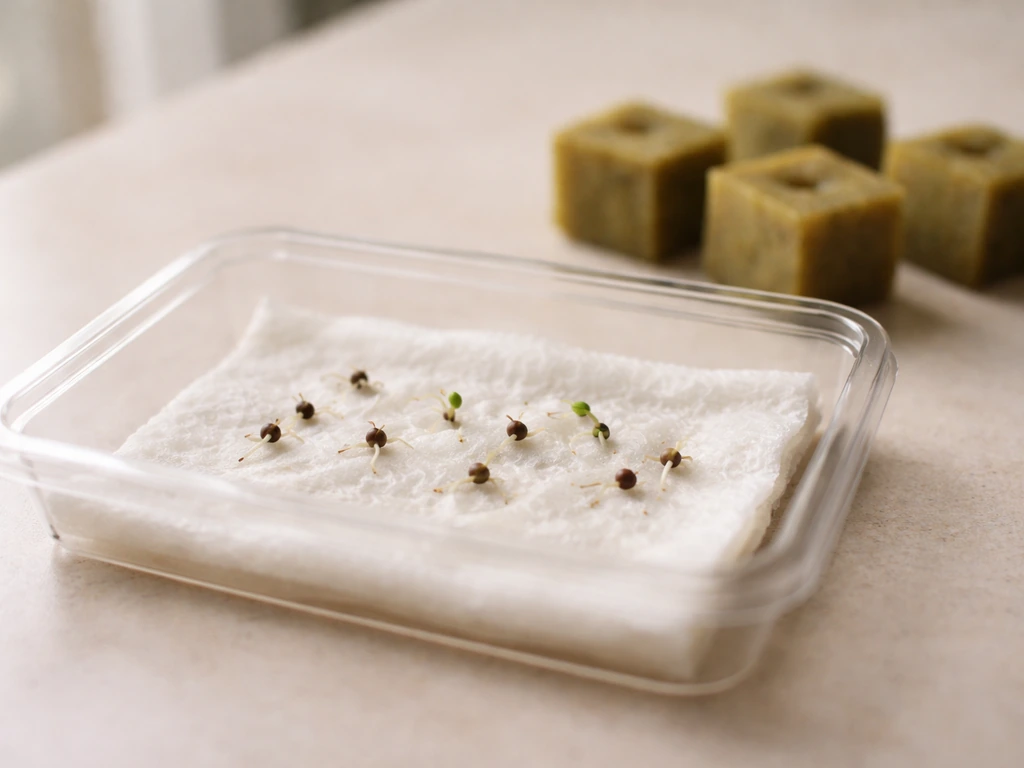
- Germinate seeds first. Place pechay seeds on a damp paper towel or in a small rockwool cube. Keep them moist and in a warm spot (25–28°C). Seeds sprout in 2 to 3 days. Do not drop ungerminated seeds directly into your hydroponic reservoir — they can fall through net pots, rot, and foul the water.
- Transfer sprouts to net pots. Once you see a small root tail (about 5 mm), gently place the sprout in the net pot with your chosen medium. Be careful not to damage the root tip.
- Set up your nutrient solution. Mix your hydroponic nutrient solution in the reservoir before you place the seedlings. Target pH 5.5 to 6.5 and an EC of 1.2 to 2.0 mS/cm for pechay (more on this below). Fill to within 2 to 4 cm of the bottom of your net pots.
- Switch on aeration. Run the airstone continuously — not on a timer. Roots need oxygen 24/7, especially when the plants are young and the root mass is small.
- Provide light. Position your light source 20 to 30 cm above the seedlings and run it for 14 to 16 hours per day. Pechay will stretch and go leggy with less than 12 hours.
- Top off or replace the reservoir as needed. Check the water level every 2 to 3 days. As plants grow, they drink more. Top off with plain pH-adjusted water between full reservoir changes. Replace the full nutrient solution every 1 to 2 weeks to prevent salt buildup and pathogen accumulation.
- Harvest at 3 to 5 weeks. Pechay grown hydroponically matures fast. Outer leaves can be picked from about day 21. Full heads are ready at 28 to 35 days depending on temperature and light.
Nutrients, pH, and EC: what your water actually needs
Plain water grows nothing past a sprout. Pechay needs nitrogen, phosphorus, potassium, calcium, magnesium, and a range of micronutrients, none of which tap water contains in usable quantities. The easiest path is a pre-formulated hydroponic nutrient concentrate. Products like General Hydroponics Flora Series, MaxiGro, or local equivalents made for leafy greens all work. Follow the label rate for leafy greens, then measure and adjust from there.
pH targets
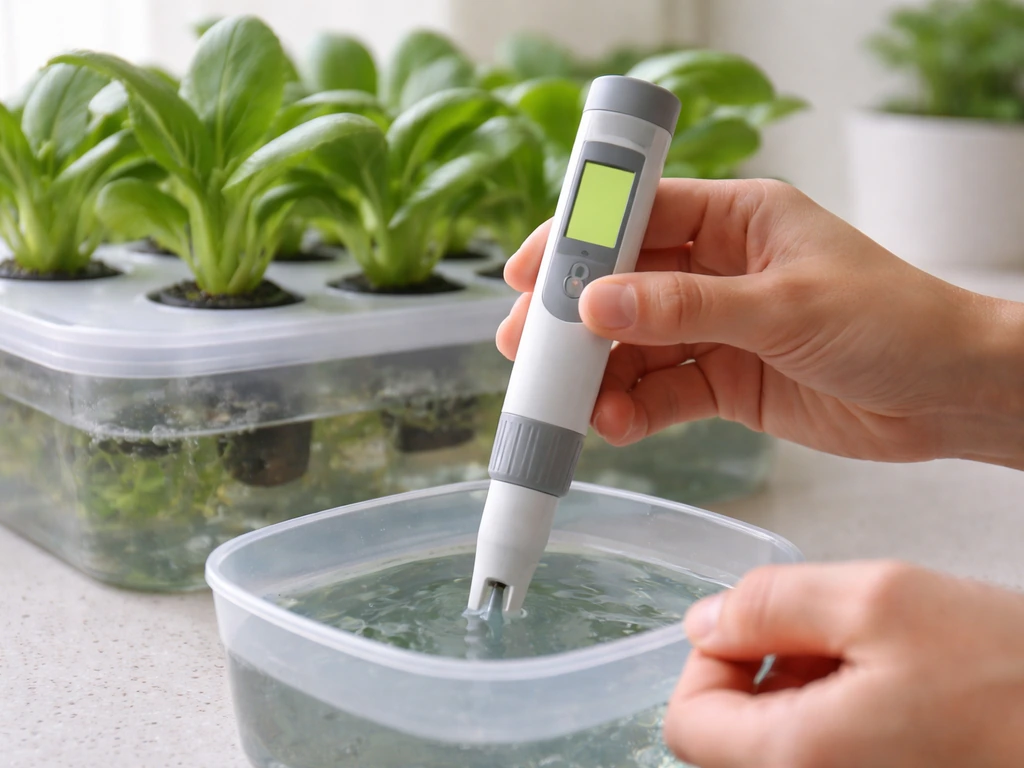
Keep your reservoir pH between 5.5 and 6.5. The sweet spot for pechay is around 6.0 to 6.2. Outside this range, the plant can't absorb nutrients even if they're dissolved in the water, this is called nutrient lockout, and it looks like deficiency even when your EC is fine. Use a digital pH pen (not strips, they're not accurate enough) and pH Up/pH Down solutions to adjust. Check pH every day when you're starting out, and every 2 to 3 days once you know how stable your system is.
EC targets
EC (electrical conductivity) measures how much nutrient salt is dissolved in your water. For pechay, start seedlings at 0.8 to 1.2 mS/cm, then raise to 1.5 to 2.0 mS/cm for mature plants. Going above 2.5 mS/cm can cause tip burn and stunted growth in leafy brassicas. A cheap EC pen from any hydroponics or aquarium shop is all you need. If EC climbs higher than your target between reservoir changes (because plants are drinking more water than nutrients), top off with plain pH-adjusted water, not more nutrient solution.
| Growth Stage | pH Target | EC Target (mS/cm) |
|---|---|---|
| Seedling (days 1–7) | 5.8–6.2 | 0.8–1.2 |
| Vegetative/growing (days 8–25) | 5.8–6.2 | 1.2–1.8 |
| Pre-harvest (days 26+) | 6.0–6.5 | 1.5–2.0 |
Lighting, temperature, and spacing
Light: hours and intensity
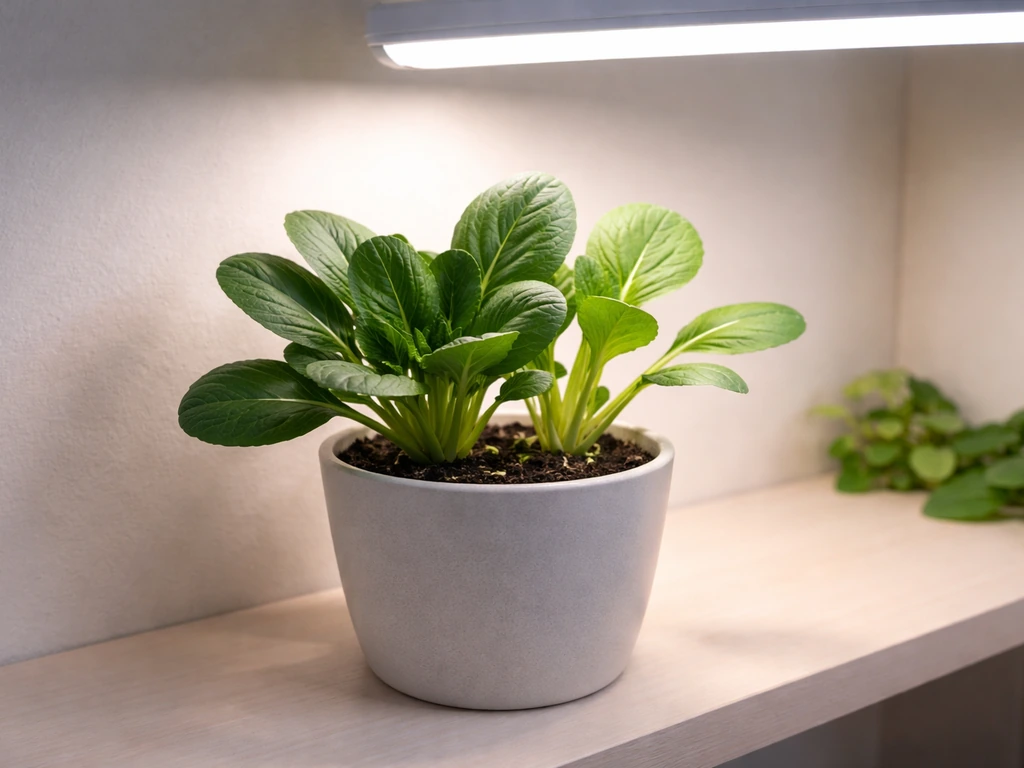
Pechay needs at least 12 hours of light per day to grow well indoors, and 14 to 16 hours is ideal for fast, compact growth. Leggy, pale plants with long petioles are almost always a light problem, either not enough hours or the fixture is too far away. For a small setup of 2 to 4 plants, a single full-spectrum LED grow light in the 20 to 40 watt range is plenty.
A 9-watt LED with a PPF around 16 µmol/s can support a 1 to 2 bucket beginner system, but if you're growing a tray of 8 to 12 plants you'll want more output. Keep the light 20 to 30 cm above the canopy and adjust as plants grow taller.
If you're growing near a bright south-facing window, you can supplement with natural light, but in most home environments, especially apartments, a dedicated grow light gives you much more reliable results than chasing sunlight.
Temperature and airflow
Pechay grows best at 18 to 28°C. It tolerates warm conditions better than most brassicas, which is one reason it's so popular in tropical climates. Above 30°C, growth slows and the plant can bolt (go to seed prematurely), which turns leaves bitter. Below 15°C, growth stalls significantly. Keep your reservoir temperature below 24°C if possible, warm water holds less dissolved oxygen and encourages root pathogens. A small fan blowing gently across the canopy (not directly at the roots) helps with airflow, prevents fungal issues, and actually strengthens stems.
Spacing
Give each pechay plant about 15 to 20 cm of space from its neighbors. Crowded plants compete for light, stay wet longer (raising disease risk), and produce smaller heads. If you're growing baby/micro pechay for salads, you can tighten spacing to 10 cm and harvest earlier at the leaf stage.
Harvesting and cut-and-come-again regrowth
Pechay grown hydroponically is ready for its first outer-leaf harvest around day 21. You can pick individual outer leaves as you need them and the plant keeps producing, this is the cut-and-come-again approach. Always leave the central growing tip intact. Take no more than one-third of the plant at one picking.
For full heads, wait until day 28 to 35, when the plant is compact and the inner leaves have filled out. Harvest the whole plant by cutting the stem just above the net pot. In DWC and raft systems, the root ball stays in the pot, you can often get a second flush of smaller leaves from the stump over the next 1 to 2 weeks, though this regrowth is smaller and less vigorous than the first head. After that second flush, pull the stump, clean the net pot, and replant a fresh seedling.
If you want a continuous harvest, stagger your plantings by starting new seeds every 1 to 2 weeks. With a tote holding 8 net pots, you could have two or three harvest rotations running simultaneously.
Troubleshooting: the most common problems and how to fix them
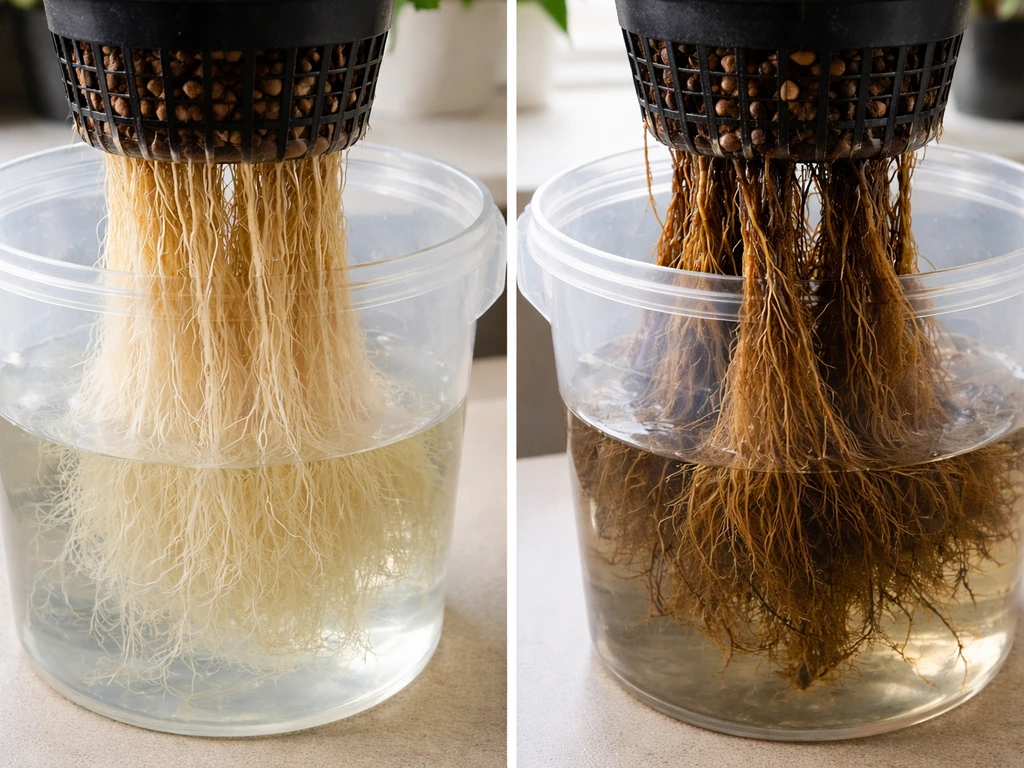
Root rot (brown, slimy roots)
Healthy roots are white or light tan. Brown, slimy, bad-smelling roots mean root rot, almost always caused by insufficient oxygen in the root zone, warm water, or dirty/old nutrient solution. Fix it by: (1) checking that your airstone is running and the airstone itself isn't clogged, (2) dropping reservoir temperature if possible, (3) doing a full reservoir flush and refill with fresh nutrient solution, and (4) trimming badly rotted roots with clean scissors before replanting. For reservoir maintenance, NoSoilSolutions recommends replacing the hydroponic solution every 1 to 2 weeks to stay balanced full reservoir flush and refill with fresh nutrient solution. Adding a beneficial bacteria product (like Hydroguard) to the reservoir helps prevent recurrence.
Algae growth
Green or brown algae on the reservoir walls and roots is a light-exposure problem. Algae needs light to grow, block all light from reaching your nutrient solution. Cover the reservoir with a dark lid, wrap the sides of transparent containers with black tape or foil, and make sure net pot holes are covered. Algae on roots clogs the fine root hairs and can block the small passages in more complex systems, reducing oxygenation. If you already have algae, drain and clean the reservoir, scrub with a dilute hydrogen peroxide solution (3%), rinse thoroughly, and reassemble with light blocked.
Yellowing leaves (nutrient issues)
Yellow leaves are the most common complaint and have a few different causes. Older (lower) leaves yellowing first usually means nitrogen deficiency, check your EC and nutrient mix. Yellowing between the leaf veins while veins stay green usually points to iron or magnesium deficiency caused by pH being too high (above 6.5), blocking absorption. Check pH first before adding more nutrients. If the whole plant looks pale and small but pH and EC are fine, the problem is usually not enough light. New growth yellowing while old growth is fine often signals iron deficiency, bring pH down toward 5.8 to 6.0 and it usually resolves within a few days.
Tip burn
Brown, crispy leaf edges (tip burn) in pechay is almost always caused by calcium deficiency at the leaf tip level, even when calcium is present in the water. It happens when transpiration is low (still air, high humidity) and calcium can't move fast enough through the plant. Fix it by improving airflow with a small fan, reducing EC slightly if it's above 2.0, and ensuring your nutrient formula contains adequate calcium. It's cosmetic and doesn't affect flavor, but severe cases can reduce yield.
Slow or stunted growth
If your plants are growing slowly, run through this checklist in order: light hours (are you hitting 14 to 16 hours?), pH (is it in range?), EC (is it above 1.2 for growing plants?), water temperature (is it above 28°C?), and aeration (is the pump running?). Most slow-growth problems in hydroponic pechay trace back to one of these five factors.
Pests and disease
Pechay in hydroponic systems is less vulnerable to soil-borne pests but can still get aphids, fungus gnats (if you use an organic growing medium), and whiteflies. Check the undersides of leaves regularly. A strong spray of water dislodges aphids. Sticky yellow traps near the system catch flying insects. For fungal issues like damping off in seedlings, ensure good airflow and avoid overwatering seedling media. Downy mildew can appear in humid, low-airflow environments, space plants properly and keep that fan running.
pH swings
pH in a small reservoir can swing quickly, especially as plants consume certain nutrients faster than others. Nitrogen uptake in particular drives pH upward. If your pH keeps drifting above 6.5, your plants are likely consuming a lot of nitrogen (a good sign, actually) and you need to adjust more frequently or do a reservoir change. Buffered hydroponic nutrients help stabilize pH drift. Check pH daily until you understand your system's rhythm, then adjust your schedule from there.
If you enjoy growing fast leafy crops in water, pechay is a natural gateway into a broader range of water-based cultivation. If you specifically want to grow taro in a pond, focus on keeping the water healthy and maintaining enough nutrients and oxygen for the corms broader range of water-based cultivation. Similar setups work well for other Asian greens and herbs, kinchay (Chinese celery), for example, can be grown using almost identical hydroponic methods.
The same principles around oxygen, pH, and EC apply across most leafy crops, so once you get pechay dialed in, you're well positioned to branch out. You can apply the same oxygen, pH, and EC principles to how to grow copper grass pilea seeds in water for healthy sprouts.
FAQ
Can I grow pechay in water in a jar without net pots or an air pump?
Use a net pot or suspended roots so only the lower roots sit in the nutrient water, while the plant stem stays above the solution. If the whole plant sits in water (or roots are in still, fully submerged water), pechay is much more likely to rot even if your pH and EC look correct.
Is it okay to sprout pechay in plain water first, then move it to hydroponics?
Yes, but it is easy to end up with a mismatch between what the seedling wants and what the water can deliver. For a true crop, start with an aerated reservoir, keep pH 5.5 to 6.5, and begin nutrient feeding once roots form. Plain-water germination is fine for 2 to 7 days, then switch to nutrient solution to avoid stalling.
Should I set pH only at the start, or adjust it throughout the grow?
Freshly mixed nutrients can be adjusted to target pH, then you must monitor because pH drifts as plants take up ions. Don’t adjust to the target only once, if your readings move outside 5.5 to 6.5 (especially above 6.5), pechay can yellow from nutrient lockout even when EC is on track.
What’s the best order for fixing problems, pH first or EC first?
If you add nutrients based on EC alone, pH can still wander and cause lockout. The practical approach is, measure pH first, correct pH into range, then adjust EC with nutrient concentrate if needed. If you add “more food” but pH is already high, the plant often gets worse rather than better.
How do I know if my aeration is actually working?
No, tapping the reservoir walls is not enough to prevent biofilm and algae, and roots can still lose oxygen in slow-flow conditions. For systems like raft tote/DWC, you want continuous aeration with a functioning airstone, and you should be able to see consistent bubbles throughout the reservoir.
My pechay has brown crispy tips, what should I adjust first?
If tip burn shows up while you are within the normal EC range, reduce EC slightly and focus on airflow and calcium availability in your nutrient formula. Calcium transport depends heavily on plant uptake conditions, so very still, humid environments often cause worse tip burn even if calcium is present.
What happens if my reservoir water gets too warm?
Aim for cool reservoir conditions and keep the air around the canopy moving. If you cannot reliably keep the reservoir below 24°C, expect slower growth and higher root-disease risk, and you may need more frequent reservoir refreshes and stricter sanitation.
How often should I change the nutrient solution for pechay?
Change the reservoir when EC and pH drift too far from target or when you see rising root issues, not just on a calendar. A useful rule is to refresh sooner if plants are larger and drinking faster, and to fully flush the system between crops to reset microbes and nutrient balance.
Can I use soil or compost instead of hydroponic media to grow pechay in water?
Do not use soil or potting mix in the net pot area. Media that holds fine particles can cloud water, create anaerobic zones near roots, and raise fungus problems. If you want a medium, choose an inert, fast-draining option like hydroton, rockwool, or perlite, and keep seedlings from sitting in soggy plugs.
What pests should I watch for in hydroponic pechay?
Check the undersides of leaves and use sticky traps for monitoring, then respond early. Aphids usually wipe off with a strong water spray, whiteflies can be reduced by airflow and traps, and fungus gnats are typically linked to overly wet organic media, not the water itself.
Why are my pechay plants leggy and pale even though my pH and EC are okay?
Track spacing and light together. If plants are crowded, leaves shade each other and airflow drops, which can lead to pale growth, weak stems, and earlier yellowing. For regular harvest heads, keep about 15 to 20 cm between plants, then harvest outer leaves rather than letting the stand become dense.
How much pechay should I harvest at each cut-and-come-again picking?
You can harvest in stages, but avoid stripping too much at once. Leave the growing tip intact, and take no more than about one-third of the plant at a time per picking. If you remove more than that, regrowth becomes slow and uneven.
My pechay roots look slimy, what is the fastest safe way to rescue the plants?
If roots are brown and slimy with a bad smell, assume oxygen failure and also check temperature and cleanliness. Turn the airstone on and confirm it is not clogged, then flush and refill with fresh nutrient solution, and trim only the clearly rotted parts with clean scissors before replanting.