You can germinate copper grass Pilea seeds in water, but you need to go in with the right expectations: Pilea cadierei is not an aquatic plant, so you're essentially using water as a controlled germination medium rather than a permanent home. Seeds placed on a wet surface or partially submerged in shallow water can sprout in 7 to 21 days under the right warmth and light, but the seedlings need to transition to a semi-hydroponic or moist soil setup fairly quickly once roots appear. If you want to grow pechay using a similar water-based approach, focus on steady water quality and consistent oxygen for the roots how to grow pechay in water. If you skip the transition or keep seeds fully submerged, rot wins almost every time.
How to Grow Copper Grass Pilea Seeds in Water

Marcus Holloway
13 May 2026
What copper grass (Pilea) is and how seeds behave in water

Copper grass commonly refers to Pilea cadierei, an evergreen tropical houseplant with upright, branching stems and silvery-green patterned leaves. It's sometimes called aluminum plant or watermelon pilea. The stems are slightly succulent when young, which means they hold moisture well but also rot quickly when conditions turn stagnant.
Here's the honest truth about Pilea cadierei seeds: in practice, blank" rel="noopener noreferrer">most growers propagate this plant from stem cuttings because it's faster, more reliable, and seeds can be genuinely hard to source. That said, germinating seeds in water is doable and a satisfying experiment when you have viable seed. The key word there is viable. Pilea seeds have a relatively short shelf life compared to many crops. If your seeds are more than a year old and weren't stored cool and dry (ideally around 42°F/5.6°C in low humidity), germination rates will drop noticeably. Most seeds stay viable for at least a year and many hold for two, but older or poorly stored Pilea seed will give you patchy results at best. HGTV notes that nearly all seeds remain blank" rel="noopener noreferrer">viable for at least a year and that most retain germinability for at least two years, though some crops have shorter or longer viability windows.
In water, seeds don't behave like they do in soil. There's no physical anchor holding them in position, moisture is constant rather than variable, and oxygen exchange around the seed coat is reduced. This means you're essentially asking the seed to germinate in a high-humidity environment with very shallow water contact rather than full submersion. Full submersion leads to anaerobic conditions around the seed coat, which causes the outer layer to break down before the embryo can emerge. Water-based germination for Pilea works best as a surface float or wet-medium method, not a deep soak.
Supplies and setup for water-based seed germination
You don't need much to get started, but the details of your container and water quality matter more here than in soil germination because you have fewer buffers against rot and algae. Here's what to gather before you sow a single seed.
- A shallow, clear or opaque container with a lid or plastic wrap for humidity retention (a repurposed takeout container, seedling tray with dome, or small glass dish all work)
- Distilled or filtered water — tap water with chlorine can inhibit germination; if you only have tap, let it sit uncovered for 24 hours to off-gas
- A fine-mesh germination medium for the seeds to rest on: either a folded damp paper towel, a thin layer of perlite sitting in a few millimeters of water, or a piece of horticultural rockwool
- Pilea cadierei seeds — fresh, from a reputable source; test viability before committing to a full batch
- A small spray bottle for misting and topping up water without disturbing seeds
- A thermometer to verify ambient temperature in the germination zone
- Optional: a small aquarium air stone and micro pump if you want gentle aeration to reduce stagnation in the water layer under your medium
- Opaque black tape or a sleeve to wrap the lower half of a clear container if algae becomes a concern later
Water pH matters here more than most people expect. Aim for a pH between 6.0 and 7.0 for the germination water. Below 6.0 and you risk inhibiting early root enzyme activity; above 7.5 and nutrient uptake becomes less efficient once seedlings start feeding. A basic pH test strip or a digital pen is worth having. Water temperature at the surface should sit between 68 and 77°F (20 to 25°C). Colder water slows germination dramatically; warmer than 80°F and you start encouraging bacterial and fungal growth.
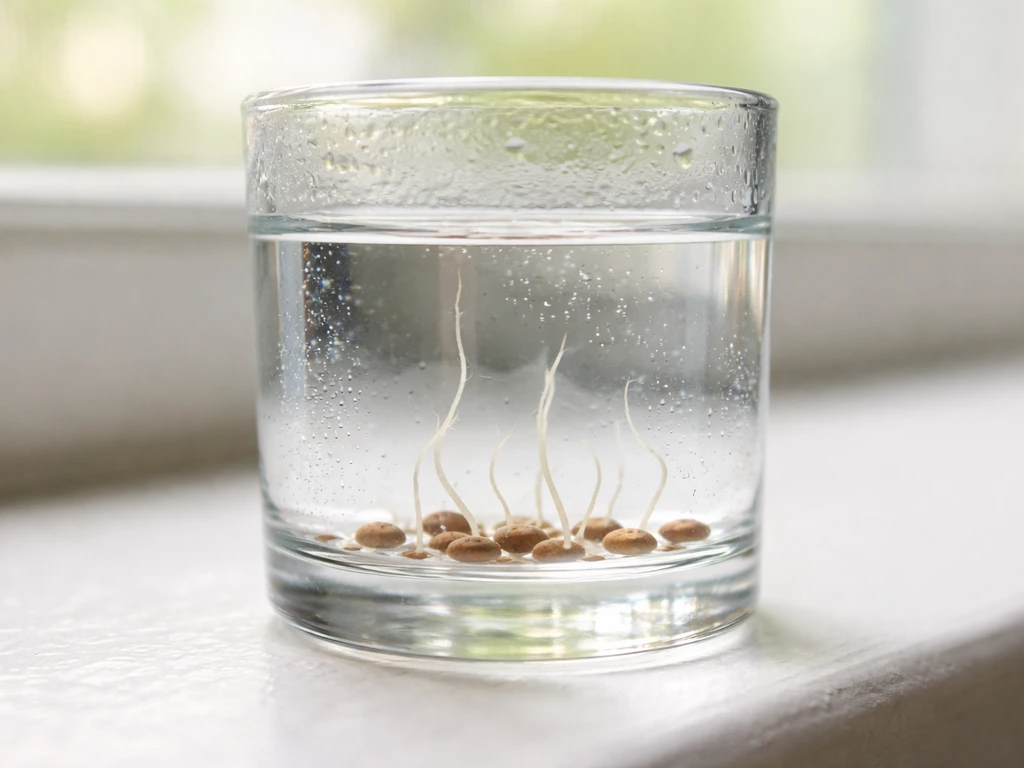
Step-by-step: germinating copper grass Pilea seeds in water
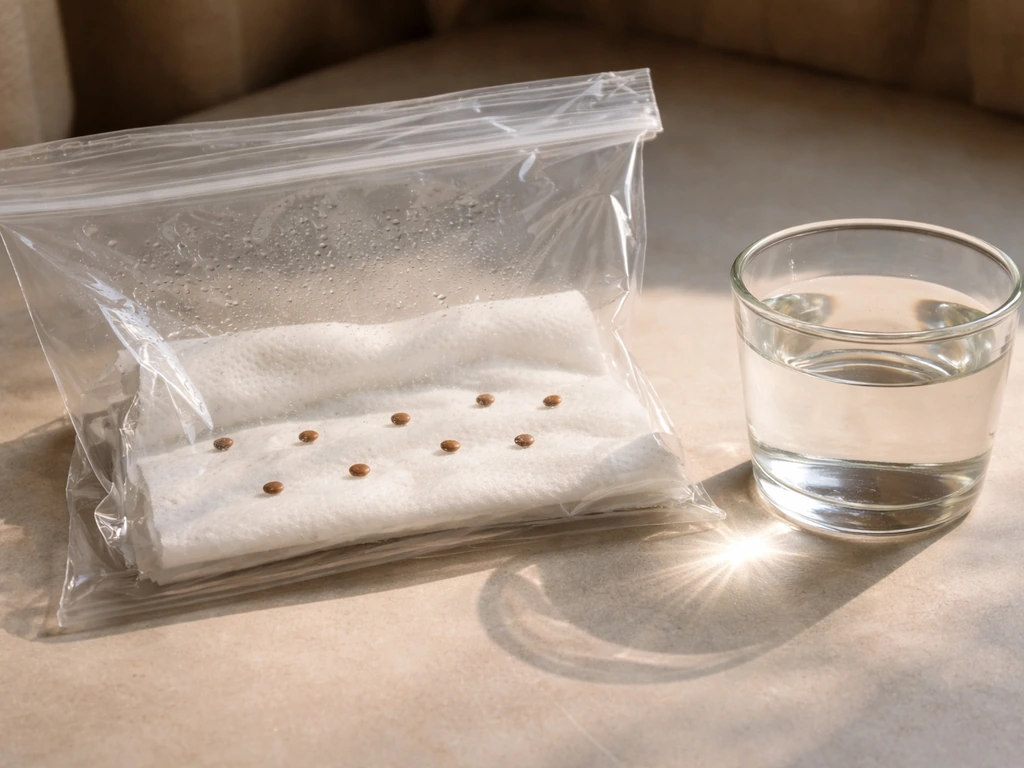
Before committing your best seeds to the main setup, run a quick viability test. Place 10 seeds between two damp paper towels, fold them up, and keep the packet in a warm spot (around 72°F). Check daily for 10 to 14 days. If fewer than 8 out of 10 germinate, sow more densely in your main setup to account for lower viability. If fewer than 5 sprout, the seed batch has poor germination potential and you'll want a fresher source.
- Rinse your container with diluted white vinegar, then rinse thoroughly with clean water to remove any residue. Sterilization here prevents early mold and bacterial films from forming.
- Lay your germination medium in the base of the container. If using a paper towel, fold it to 4 to 6 layers and saturate it with your pH-adjusted filtered water, then press out excess so it's damp but not dripping. If using perlite, fill the base about 1 cm deep and add water until the perlite is just moist at the surface.
- Space seeds on the surface of the medium about 1 to 2 cm apart. Don't press them in or submerge them — surface contact with moisture is enough. Pilea seeds are small, so use tweezers for placement.
- Cover the container with its lid or stretch plastic wrap over the top to trap humidity. Leave a small gap for gas exchange — fully sealed containers trap CO2 and encourage rot.
- Place the setup in a warm spot out of direct sunlight. A warm shelf, the top of a refrigerator, or a heat mat set to 72 to 77°F works well. You want consistent bottom warmth more than you need light at this stage.
- Check daily. Mist lightly with your spray bottle if the medium surface starts to dry. Remove the cover briefly each day for 5 to 10 minutes for fresh air exchange. Look for any white fuzz (fungal) on seeds and remove affected seeds immediately with tweezers.
- Expect the first signs of germination — a tiny white radicle (root tip) emerging from the seed — between day 7 and day 21. Some seeds may pop in as few as 5 days under ideal warmth; others are slow. Don't give up before the 21-day mark.
- Once you see a radicle of 3 to 5 mm, the seed is germinating successfully. At this stage, very gently increase light exposure by moving the container near a bright window (indirect light only).
Light, temperature, and water conditions to keep seedlings growing
Once seedlings have a visible radicle and the first tiny seed leaves (cotyledons) are unfurling, your job shifts from passive waiting to active management. Pilea cadierei is a tropical plant that likes warmth, bright indirect light, and humidity, which actually aligns well with a water-based setup as long as you control stagnation.
| Parameter | Target Range | Notes |
|---|---|---|
| Water temperature | 68 to 77°F (20 to 25°C) | Use a heat mat or warm room; avoid drops below 60°F |
| Air temperature | 65 to 75°F (18 to 24°C) | Consistent warmth matters more than hitting the exact number |
| Light (photoperiod) | 12 to 14 hours indirect light per day | Bright window or grow light; no direct sun on seedlings |
| Light intensity | Medium indirect (1000 to 2500 lux) | Direct sun burns seedling leaves and heats water too fast |
| Water pH | 6.0 to 7.0 | Test weekly and adjust with pH up/down if needed |
| Water refresh schedule | Every 2 to 3 days | Fresh water prevents bacterial buildup and stagnation |
| Humidity around seedlings | 60 to 80% | Keep a partial cover or humidity dome until leaves harden off |
One thing I learned the hard way: placing a water germination setup on a bright south-facing windowsill looks like a great idea until the water temperature spikes past 82°F on a sunny afternoon and you come back to a container full of cloudy water and rotted seedling bases. Bright indirect light from an east or north-facing window, or a grow light positioned 6 to 8 inches above the seedlings, gives you control without heat spikes.
For water changes, don't pour old water out dramatically, use a small syringe or turkey baster to remove 80% of the old water from below the medium, then refill gently. This keeps the seedlings undisturbed and avoids shocking tender roots with a sudden temperature change. Always use water that's been sitting at room temperature, not cold water straight from the tap.
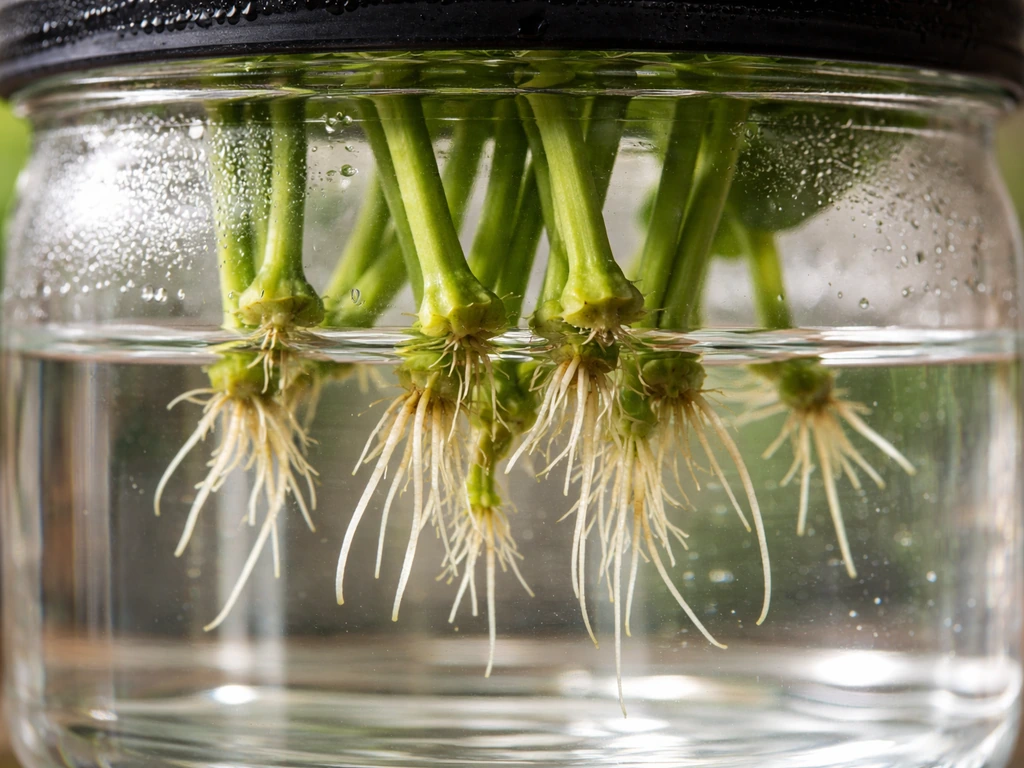
Transferring seedlings to longer-term water vs semi-hydroponic care
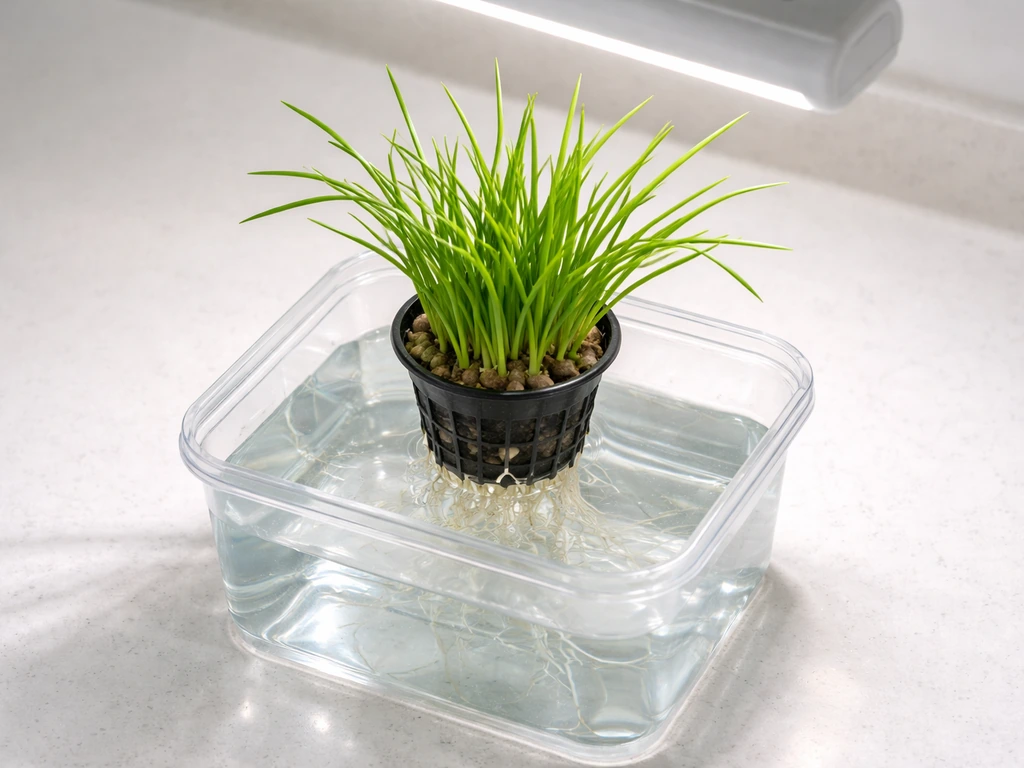
This is the decision point most growers hit around week 3 to 5, once seedlings have their first true leaves and roots of 1 to 2 cm. The honest answer is that Pilea cadierei does not support full, permanent immersion in water. If you want details, follow the steps in this guide for water-based germination and how to move seedlings into a semi-hydroponic setup. If you want a true answer to how to grow kinchay in water, plan for a transition to semi-hydroponics rather than keeping roots submerged long-term. It's not an aquatic plant and keeping roots submerged long-term invites stem rot, especially at the base where the slightly succulent tissue meets the waterline. Your two realistic paths are semi-hydroponic (LECA or perlite with a passive water reservoir) or a well-draining moist potting mix. A true water-only long-term setup is not recommended for this species.
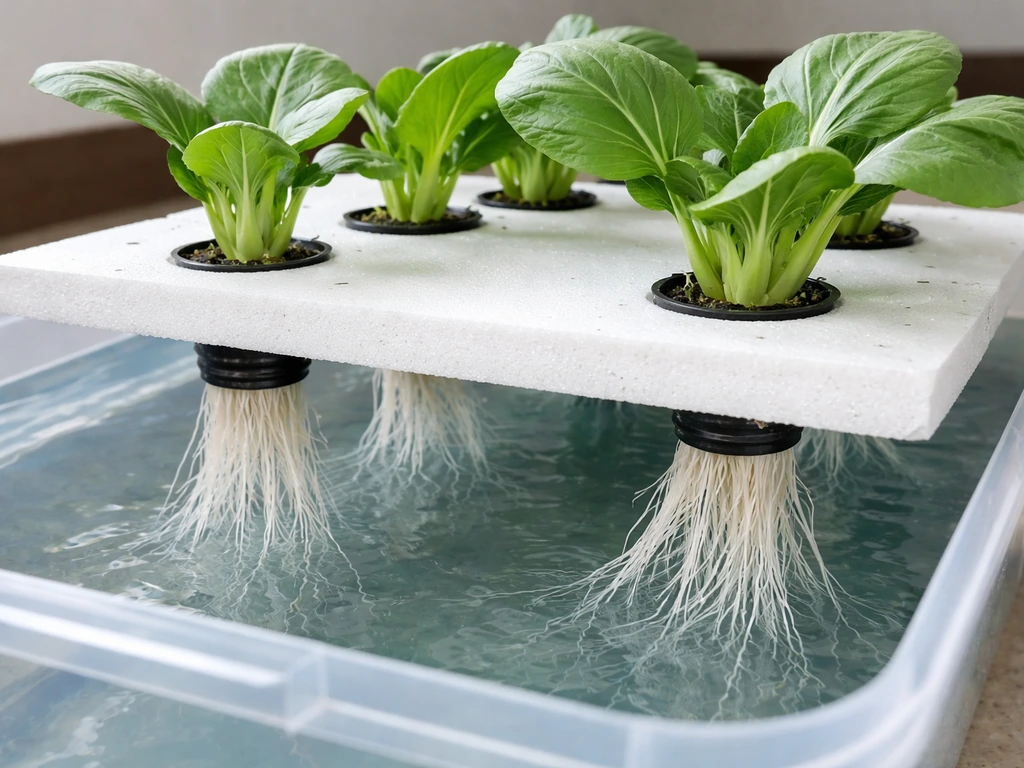
Semi-hydroponic setup (the better water-based option)
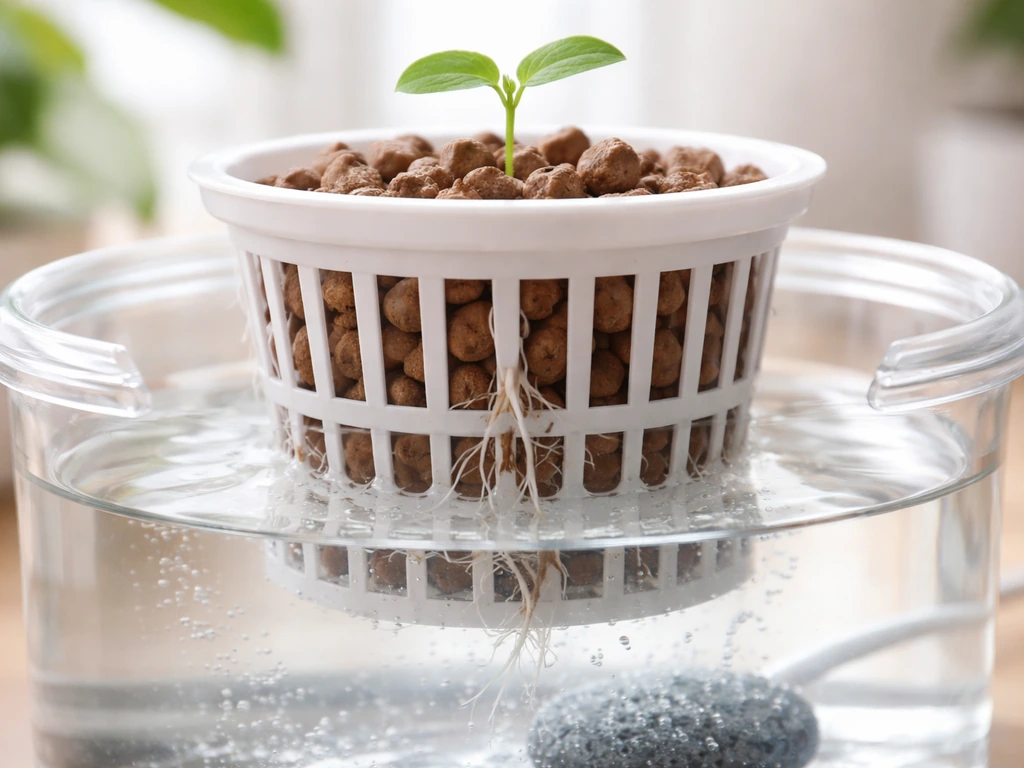
Semi-hydroponics keeps you in the aquatic cultivation space while respecting the plant's biology. Fill a net pot or small nursery container with rinsed LECA (lightweight expanded clay aggregate) or coarse perlite. Place this inside a slightly larger outer container that holds about 2 to 3 cm of water at the base, the LECA wicks moisture up to the roots without submerging the crown or stem. Add a diluted liquid fertilizer to the reservoir at about 1/4 strength once seedlings have 2 to 3 true leaves.
To transfer seedlings from your paper towel or perlite germination tray, handle them by the root or seed leaf (cotyledon), never the stem. Gently nestle the root into the LECA, positioning the seedling so the stem base sits just at or above the medium surface. Let the reservoir dry almost completely between refills (leave about 1 cm of water) rather than keeping it constantly full. This wet-dry cycle encourages roots to grow downward seeking moisture, which produces a stronger root system.
Transitioning to moist potting mix (if you want faster growth)
If you want the plant to reach full size faster, a loose, well-draining potting mix (something like a coco coir and perlite blend at 2:1) gives roots the oxygen and physical structure they prefer. Ease the seedling out of the water medium, let the roots air-dry for 20 minutes (no more), and plant shallowly into barely moist mix. Keep the mix lightly moist (not wet) for the first 2 weeks while the roots adjust. Wilting in the first 48 hours is normal, it's transplant stress, not a death sentence.
Troubleshooting common problems
Seeds not germinating after 3 weeks
First suspect: seed viability. If you skipped the paper towel test before sowing, there's no way to know whether the seeds were viable to begin with. Old seeds stored in warm, humid conditions lose viability fast. Second suspect: temperature. Germination stalls below 65°F almost completely. Check that your germination zone is consistently warm, not just warm during the day. Third suspect: the medium drying out between checks. Pilea seeds need constant surface moisture, even a few hours of dryness can abort germination mid-process.
Seeds or seedling bases rotting
Rot is almost always caused by too much standing water, too little air exchange, or both. If seeds are sitting in a puddle rather than on a damp surface, pull them out, rinse with clean water, and reset on a properly wrung-out medium. Add a daily 10-minute lid-off ventilation session. If seedling bases are rotting after germination, your waterline is too high and touching the stem. Lower the water level so only the root tip is in contact with moisture, not the stem itself.
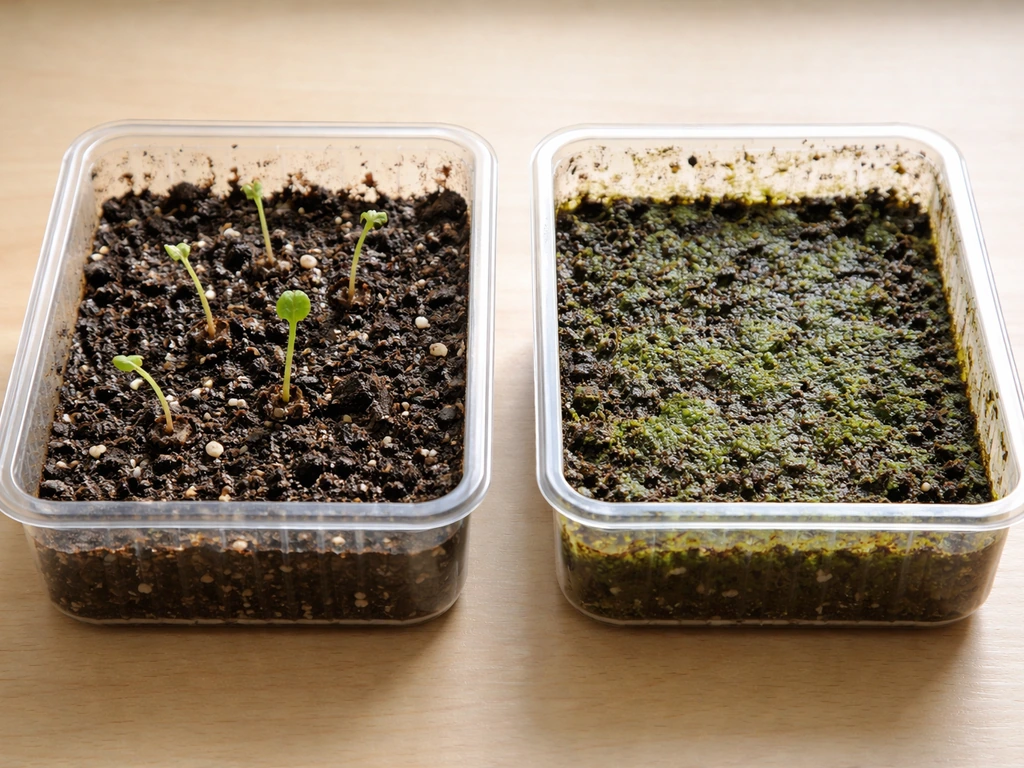
Algae blooms in the container
Green algae on the sides of your container or medium surface means you have light, nutrients, and water together for too long without a refresh. Block light from hitting the water directly by wrapping the lower container in black tape or foil, algae needs light to grow and removing that light source stops new growth quickly. Change your water more frequently (every 2 days instead of 3) and keep the container away from direct sun. A small air stone adding gentle circulation also disrupts the still-water conditions algae prefer.
Weak, leggy seedlings or pale leaves
Leggy (tall and thin) seedlings are almost always a light problem. Move them closer to your light source or increase your grow light hours to 14 per day. Pale or yellowing leaves on seedlings that have been in water for more than 3 weeks usually indicate nitrogen deficiency, water alone provides no nutrients, so add a very dilute liquid fertilizer (1/4 of the recommended dose) to your water once true leaves have appeared.
Poor or stubby root formation
Roots that stay short and stubby rather than growing long and branching are often a sign of pH being off, water temperature being too cold, or the medium being too wet with no air pockets. Check your pH (target 6.0 to 7.0), make sure your medium has some texture for air pockets (perlite is better than a solid paper towel for this reason), and raise the ambient temperature if it's below 68°F. Roots grow toward moisture gradients, a medium that's uniformly saturated gives them no reason to grow further.
How long it takes and what to expect on the way to mature plants
Here's a realistic timeline from seed to mature plant so you know what's normal and what's a sign something's off.
| Stage | Timeframe | What to look for |
|---|---|---|
| Germination (radicle emergence) | Day 7 to 21 | Tiny white root tip emerging from seed coat |
| Cotyledons (seed leaves) open | Day 10 to 25 | Two small oval leaves appear; seedling stands upright |
| First true leaves | Week 3 to 5 | Pilea's characteristic patterned leaves begin to form |
| Seedling ready for transfer | Week 4 to 6 | Roots 1 to 2 cm long; 2 to 3 true leaves present |
| Established in semi-hydroponic setup | Week 6 to 10 | Active new leaf production; roots visible through container |
| Compact, bushy juvenile plant | Month 3 to 5 | Multiple branching stems; plant 8 to 15 cm tall |
| Mature plant | Month 6 to 12 | Full leaf pattern expressed; plant reaches 20 to 30 cm |
Once your Pilea is established in a semi-hydroponic setup and actively producing new leaves, the main care routine is simple: refresh the reservoir every 5 to 7 days with pH-adjusted water and diluted liquid fertilizer, maintain consistent warmth (don't let it drop below 60°F), and keep it in bright indirect light. Rotate the container a quarter turn each week so all sides get even light exposure and the plant grows symmetrically rather than leaning.
One thing worth noting: if you enjoy growing other plants through water-based methods, the same core principles around water pH, temperature management, and preventing root rot apply across many species. If you are also wondering how to grow taro in pond conditions, use similar thinking about oxygen, water level, and keeping the root zone healthy water pH, temperature management, and preventing root rot. The approach you build here with Pilea transfers well to growing other semi-aquatic or hydroponic-friendly plants, and the troubleshooting instincts you develop (reading root color, catching algae early, managing water refresh cycles) are genuinely useful across the hobby.
Be patient with the seed-to-mature-plant timeline. Pilea grown from seed takes noticeably longer than plants propagated from cuttings, but there's something satisfying about getting to the finished plant knowing you started it from scratch. If you hit persistent problems with seed germination rates, it may honestly be worth trying a cutting propagation approach alongside your seed experiment, that way you get a head start on a mature plant while your seeds are still working through the process.
FAQ
Do I need to fully submerge copper grass (Pilea cadierei) seeds in water to germinate them?
Aim for a surface-wet setup, not full immersion. In practice, keep the seed coat in contact with moisture while avoiding a constantly flooded environment, because oxygen exchange around the seed is limited and stagnant water encourages seed-base rot.
What lighting should I use when I’m trying to germinate Pilea cadierei seeds in water?
Yes, but only during germination. Use the minimum light needed to support sprouting, bright indirect light or a low-intensity grow light, then increase light after cotyledons appear. Too much direct sun early can spike water temperature and rapidly turn water cloudy.
When is the right time to move seedlings out of the initial water germination container?
You can start with water for germination, but after radicles form you should plan a transition. A good rule is to move once you see clear roots and cotyledons are unfurling, because keeping the crown at the waterline for long periods increases stem rot risk.
Should I use tap water straight from the faucet, or is there a better water source for Pilea seed germination?
Don’t rely on room-temperature tap water alone if your tap is highly chlorinated or chemically treated. Let water sit to reach room temperature, then if you notice consistent cloudy water or weak seedlings, consider using filtered water to reduce additives that can stress tender root tissue.
My seedlings sprouted but are rotting at the stem base, what should I fix first?
If your seedlings grow but then collapse at the base, the most likely causes are waterline too high (touching the stem) or insufficient air exchange. Lower the water so only root tips contact moisture, and manage changes more frequently, especially if you see rotting or a foul smell.
How do I stop algae from taking over my Pilea seed or water reservoir?
If algae shows up, reduce light reaching the water and refresh more often. Wrap the reservoir area so no light hits the lower container, keep it away from direct sun, and consider adding gentle circulation (not strong bubbles) to disrupt still-water conditions algae prefer.
Is it worth doing a seed viability test, and how do I decide what to do with the results?
Test viability only for a short, controlled window. If fewer than about 8 out of 10 sprout in the paper towel test, sow more densely in your germination setup. If fewer than about 5 sprout, start over with fresher seed rather than expecting the batch to catch up later.
When should I add fertilizer when growing copper grass seedlings in water, and how strong should it be?
Once you start adding fertilizer, dilute it and only after true leaves appear. Before that, the seed energy carries the seedling, and added nutrients can accelerate rot and algae. Use about one-quarter strength and refresh with pH-adjusted water regularly.
My seeds are taking a long time to sprout, how can I tell if temperature is the problem?
Yes, and it’s a common mistake. Germination stalls below roughly 65°F, and it’s the sustained warmth at the seed, not just daytime warmth, that matters. If your setup sits near a cold window at night, use a small heat mat or move it to a consistently warm location.
What’s the best way to keep the germination medium consistently moist without drowning the seeds?
Try to avoid constant “wet paper” conditions. Pilea seeds need consistent surface moisture, but brief drying can abort the process. If your germination medium dries quickly, increase humidity (cover loosely) or switch from paper towels to a textured wet medium like perlite so moisture stays evenly available.
After I transition my seedlings, should I keep the reservoir or potting mix constantly wet?
It depends on how you’re growing. In semi-hydroponics, use a moist-wet reservoir cycle rather than a permanently full tank, leaving a small amount of water so the roots can breathe between refills. In pots, keep the mix lightly moist for the first couple of weeks, then allow normal drying in between.
What do short, stubby roots mean in a Pilea water-to-semi-hydroponic setup?
Roots that look short and stubby can come from low oxygen or off conditions, often too much water saturation or slightly off pH. Verify pH is near 6.0 to 7.0, check water temperature is not cold, and ensure your medium has air pockets (perlite or LECA), not a fully saturated solid layer.