Water Sprite (Ceratopteris thalictroides) is one of the easiest aquatic ferns you can grow, and it thrives whether you float it loose at the surface or root it into the substrate. Give it a temperature between 18 and 28 °C (64–82 °F), a pH of 5.5–7.5, moderate light in the 30–80 µmol·m⁻²·s⁻¹ PAR range, and a photoperiod of 8–10 hours, and it will reward you with fast, lush growth within a couple of weeks. The rest of this guide walks you through every detail, from picking your system to diagnosing a yellowing frond.
How to Grow Water Sprite: Complete Guide for Aquariums
Marcus Holloway
21 Jul 2026
What Water Sprite Actually Is (and What It's Not)
The accepted scientific name is Ceratopteris thalictroides (L.) Brongn. blank" rel="noopener noreferrer">Ceratopteris thalictroides (L.) Brongn. | Plants of the World Online | Kew Science treats Ceratopteris thalictroides (L.) Brongn. as the accepted name and lists historical synonyms (e.g., Pteris thalictroides). , recognized in blank" rel="noopener noreferrer">Plants of the World Online (RBG Kew). You will also see it sold under the common names Water Fern, Indian Fern, and Sumatran Fern. In the aquarium hobby, 'Water Sprite' is the dominant trade name. The plant is a true aquatic fern: it produces two morphologically distinct frond types. Sterile fronds are broad and pinnately divided, giving the plant that soft, ferny look you see in most aquarium photos. Fertile fronds are erect, more deeply divided, and carry sporangia along the veins beneath reflexed frond margins, they look almost skeletal compared to the sterile growth.
One thing worth knowing before you buy: taxonomic research published as early as 2008 confirmed that 'Ceratopteris thalictroides' as sold in the hobby likely contains multiple cryptic lineages and possibly tetraploid forms. In practice this rarely matters for cultivation, but it does explain why plants from different suppliers can look slightly different even under identical conditions. What you buy as Water Sprite is almost certainly a Ceratopteris, and the care requirements are functionally the same across forms.
Common name confusion is real with this plant. Waterleaf refers to terrestrial herbs in the genus Hydrophyllum, an entirely different plant with no aquatic growing requirements. Madre de agua is a fast-growing aquatic or semi-aquatic shrub (Montanoa species or Tithonia-related plants depending on region) grown for livestock fodder, not for aquariums. Betel leaf comes from Piper betle, a tropical vine that can be grown in water but is not an aquatic fern. For instructions, see a guide on how to grow betel leaf in water. If you have come to this article looking for any of those plants, the growing guides for waterleaf, madre de agua, and betel leaf in water cover them specifically. Water Sprite is its own thing entirely.
Floating vs. Rooted: Which One Should You Choose?
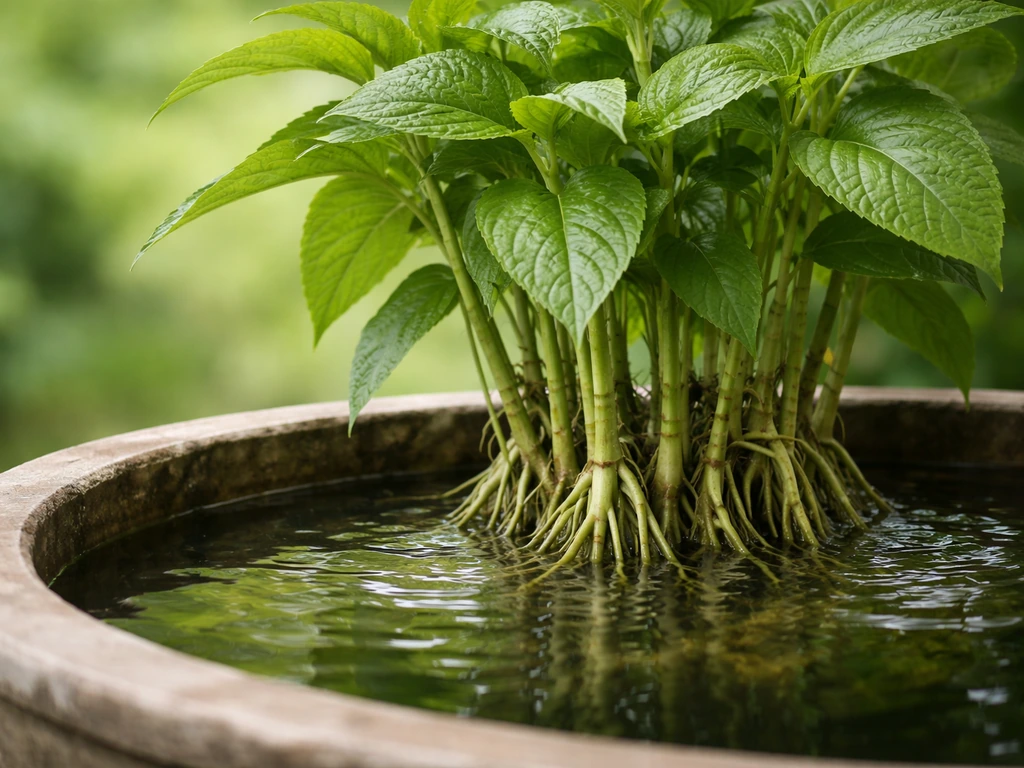
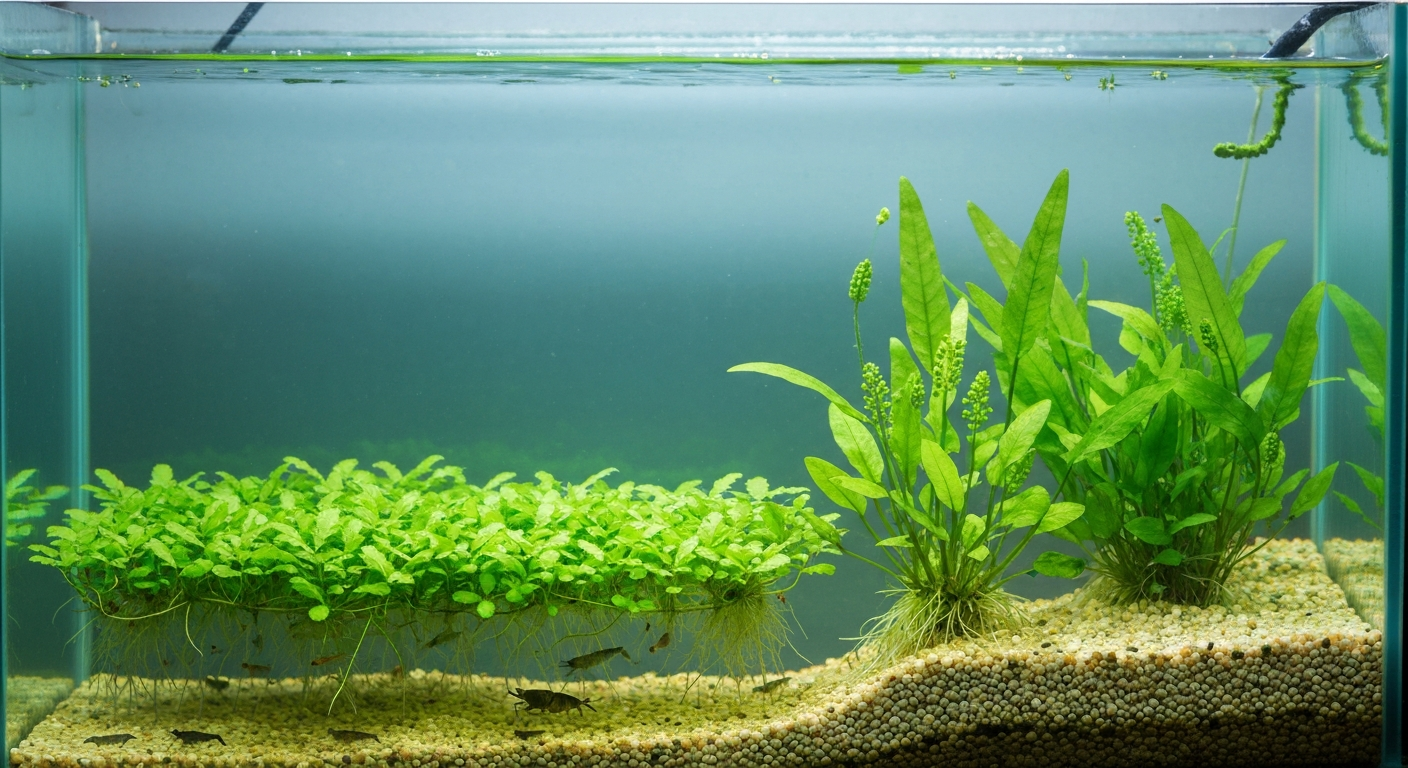
This is genuinely the first decision to make, because it affects everything downstream: substrate choice, lighting angle, flow settings, and how you fertilize. Both methods work well, and the plant itself is flexible, in the wild, Ceratopteris thalictroides grows loosely rooted in mud, emergent from shallow water, or entirely free-floating depending on conditions. In the aquarium, each approach has real tradeoffs.
Floating Growth
Floating Water Sprite grows fast, draws nutrients directly from the water column through its roots, and provides dense surface cover that shades out algae and shelters fry and shrimp. In a breeding tank, I find floating sprite almost irreplaceable for this reason alone. The downside is that a thick mat can block surface gas exchange and shade out anything below, so you need to thin regularly. Flow also matters: strong surface agitation will batter floating fronds and push the plants to one end of the tank.
Rooted Growth
Planted Water Sprite stays put and creates a tall background or midground feature. The submerged morphology looks different from floating growth, leaves tend to be more finely divided and the internodes stretch more under low light. The main frustration with rooted planting is buoyancy: the stems want to float, and new plants will pop right out of soft substrates if you do not anchor them properly. Once established with a good root system, they stay put reliably, but the first two weeks require patience.
| Factor | Floating | Rooted |
|---|---|---|
| Setup effort | Very low — just place on surface | Moderate — requires anchoring |
| Nutrient uptake | Fast, from water column | From substrate and water column |
| Growth rate | Very fast | Fast once established |
| Shading lower plants | High risk if unthinned | Minimal |
| Fry/shrimp shelter | Excellent | Good |
| Flow sensitivity | High — fronds tear in turbulence | Lower once rooted |
| Best for | Breeding tanks, nutrient export, beginners | Aquascaping, paludariums, structured tanks |
| Main challenge | Needs frequent thinning | Buoyancy during establishment |
My recommendation: if you are just starting out or running a breeding setup, float it. If you want a planted aquascape or a paludarium, root it. There is no wrong answer, and you can always run both in the same tank, I often keep a rooted background plant and let a few clippings float near the surface simultaneously.
Choosing the Right System for Your Goals
Water Sprite is remarkably flexible across system types, but each environment has specific requirements you should plan for before you buy anything.
Home Aquarium
This is the most common setup and the easiest to get right. Any tank from about 20 liters (5 gallons) upward works. A 40–75 liter (10–20 gallon) tank gives you enough water volume to stabilize chemistry and enough vertical space (at least 30 cm / 12 inches of water depth) for rooted plants to develop. Standard hang-on-back or canister filtration with gentle output works well. Avoid powerheads or high-turnover circulation pumps aimed at the water surface, more on flow settings in the environmental targets section.
Paludarium
A paludarium is a partially aquatic, partially terrestrial enclosure, and Water Sprite thrives in the emersed (above-water) zone as well as the submerged zone. Emersed growth looks noticeably different: fronds are broader and more robust, and the plant may eventually produce fertile fronds with visible sporangia. Humidity above 70% in the emersed zone keeps fronds from drying out. A paludarium of 40 liters or larger gives you a stable aquatic base; smaller setups can work but water chemistry swings more easily.
Terrarium (Wet Terrarium / Vivarium)
Water Sprite can be grown in a high-humidity closed or semi-closed terrarium as an emersed plant with its roots in saturated substrate or shallow standing water. This works particularly well in frog or dart frog vivariums. The plant will not submerge here, so you are essentially growing the emersed form. Keep the substrate consistently moist to wet and maintain high ambient humidity. Growth is slower than in an aquarium but the plant becomes sturdier and can produce spores.
Water Culture and Simple Hydroponic Trays
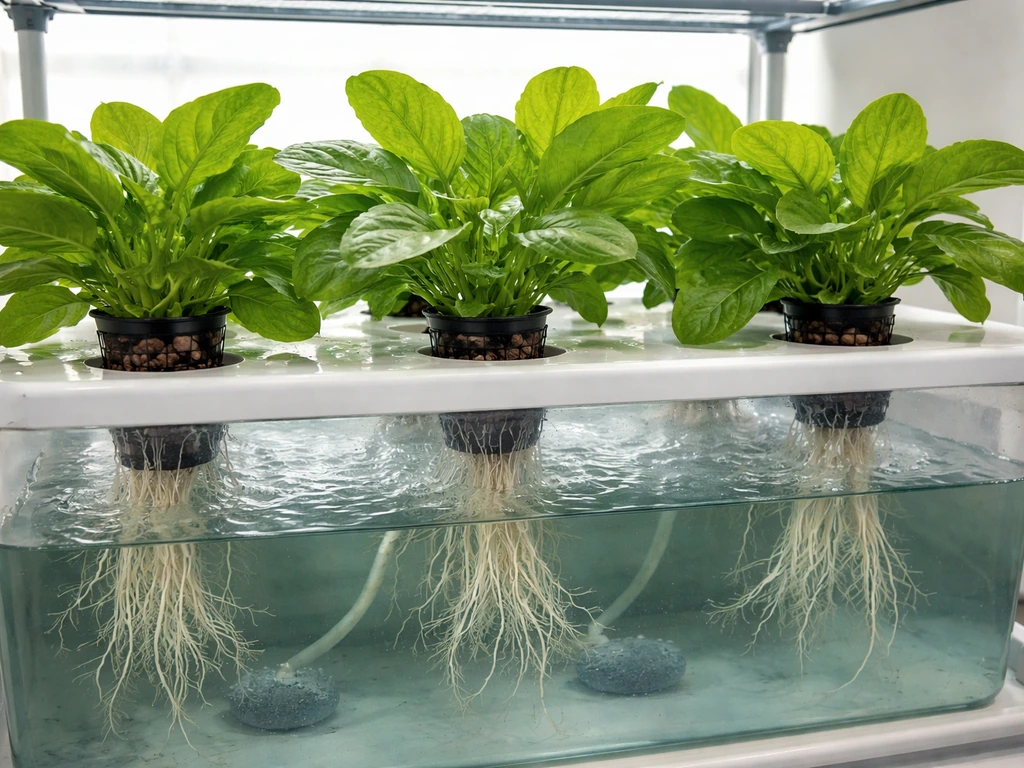
Water Sprite grows surprisingly well in simple water culture setups, a tray or container of nutrient-enriched water with the roots submerged and the fronds above. This approach is popular for small-scale nutrient export experiments and for propagating stock quickly. A basic Deep Water Culture (DWC) tray works fine. Keep water temperatures in range (18–28 °C), use a dilute aquatic plant fertilizer solution, and provide overhead lighting. No aeration is required but light water movement prevents stagnation and fungal issues at the root crown.
| System | Min. Size | Growth Form | Pros | Cons |
|---|---|---|---|---|
| Aquarium | 20 L / 5 gal | Floating or rooted | Easy chemistry control, widely documented | Needs filtration and lighting investment |
| Paludarium | 40 L / 10 gal | Emersed or submerged | Dramatic emersed growth, can produce spores | Higher humidity maintenance needed |
| Terrarium | Any size | Emersed only | Low tech, works in vivarium setups | Slower growth, no submerged form |
| Water culture / DWC tray | Any container | Floating/emersed | Fast propagation, low cost, easy harvest | Requires nutrient management, no fish benefit |
Exact Environmental Targets
These are the numbers I come back to every time. Get these dialed in and Water Sprite basically grows itself.
| Parameter | Target Range | Notes |
|---|---|---|
| Temperature | 18–28 °C (64–82 °F) | Optimal growth around 22–26 °C; below 18 °C growth stalls |
| pH | 5.5–7.5 | Tolerates a broad range; 6.5–7.0 is the sweet spot for mixed community tanks |
| General Hardness (GH) | 2–15 dGH | Soft to moderately hard; very hard water above 15 dGH can inhibit iron uptake |
| Carbonate Hardness (KH) | 1–8 dKH | Low KH tanks need monitoring for pH swings, especially with CO2 injection |
| Light intensity (PAR) | 30–80 µmol·m⁻²·s⁻¹ | Low end (30–50) for floating; medium (50–80) for rooted submerged growth |
| Photoperiod | 8–10 hours/day | Start at 8 h; extend to 10 h if growth seems slow; avoid 12+ h to limit algae |
| Water flow | Gentle, <0.2 m/s | Low-turnover filter output; avoid direct surface turbulence on floating plants |
On light: PAR of 30–80 µmol·m⁻²·s⁻¹ covers the practical range for this plant. Floating plants intercept light first, so if you have rooted plants below a floating mat, measure PAR at substrate level, not at the surface. I use a PAR meter clipped to a stick to get a reading right at the plant canopy, it makes a genuine difference when diagnosing leggy or stunted growth. If you do not own a PAR meter, check your fixture's published PAR charts and position accordingly.
On flow: the 'gentle' recommendation comes from ecological research on slow-water macrophytes, which shows that even moderate current velocities above roughly 0.2 m/s can damage soft-stemmed plants. For aquariums, this means using a filter with a low-flow output nozzle or a spray bar pointed toward the back glass, not directly at the plant surface. A filter rated at 4–6 times tank volume per hour is plenty for a planted Water Sprite tank.
Substrate and Anchoring Options for Rooted Plants
The substrate you choose affects both rooting success and nutrient availability. Here is what works and when to use each option.
- Fine gravel (1–3 mm): Good general-purpose choice. Provides mechanical grip without compacting. Works well with liquid fertilizer dosing since it holds little nutrition on its own. Minimum 5 cm (2 inches) depth for rooting.
- Coarse sand: Acceptable but anchoring is weaker than gravel. Plants pop out more easily. Best used in combination with plant weights or planting mesh. Depth of at least 5 cm recommended.
- Nutrient-rich aquarium soil (e.g., ADA Aqua Soil, Fluval Stratum): Excellent for long-term rooted growth. Contains cation exchange sites that hold nutrients. Water Sprite roots into it well and you need less liquid fertilizer initially. Downside: soft substrate makes replanting messier.
- Mesh / planting baskets: Insert a cutting into a mesh basket filled with gravel or mineral wool, then bury the basket in the substrate. This is my go-to method for cuttings that keep floating free — the added weight holds them while roots develop.
- Plant weights (lead-free): Wrap the stem base loosely with a lead-free weight and push it into substrate. Works for temporary anchoring but should be removed once the plant is established to avoid stem constriction.
- Bare bottom tanks: Rooting is not possible. Float-only approach required. Some shrimp breeders prefer bare bottom with floating Water Sprite for easy cleaning.
One honest note from experience: I spent two frustrating weeks trying to plant Water Sprite cuttings in plain coarse sand without weights. They kept floating up overnight. Switching to fine gravel with mesh baskets solved the problem completely. If you are starting with sand, use weights or baskets from day one.
Step-by-Step Planting Instructions
Floating Water Sprite (All Systems)
- Rinse the plant gently in dechlorinated water to remove any debris, snail eggs, or pests from the nursery.
- Check the fronds for any yellowing, rot, or melted tissue and trim those off before placing in your tank.
- Place the plant roots-down on the water surface. The roots will hang below the waterline naturally; you do not need to do anything to encourage this.
- Keep surface flow minimal in the first week. Let the plant orient itself and produce a few new root hairs before increasing any circulation.
- Within 7–14 days you should see new frond growth, confirming the plant has acclimated. If new growth is small and pale, increase fertilizer dosing or light duration slightly.
Rooted Planting in an Aquarium
- Prepare your substrate to a minimum depth of 5 cm. Fine gravel or aquarium soil works best.
- Trim any dead or decaying roots from the cutting, leaving healthy white or light brown roots intact.
- If using a mesh basket, insert the stem base into the basket packed with gravel. If planting directly, push the stem 2–3 cm into the substrate — deep enough to hold but not so deep that the rhizome (the base where roots meet stem) is buried.
- Add a lead-free plant weight loosely around the stem base if planting in sand or soft substrate.
- For the first two weeks, check daily and replant any that have floated free. Most plants will anchor themselves with new root growth by day 14–21.
- Once established, remove plant weights if used. The plant will stand on its own root system from this point.
Rooted Planting in a Paludarium or Terrarium
- Use a saturated substrate mix: aquarium soil or a blend of coconut coir and fine gravel works well. The substrate should hold moisture but not become waterlogged and anaerobic.
- Plant the rhizome at substrate level — do not bury it. Press the roots into the substrate and firm gently around them.
- Mist the fronds and substrate daily until the plant establishes. High humidity (above 70%) is essential to prevent desiccation of emersed fronds.
- New emersed growth will appear within 2–3 weeks under good humidity and light. Fronds in this form are broader and more robust than submerged forms.
Water Culture / Hydroponic Tray Planting
- Fill a shallow tray or container with dechlorinated water supplemented with a dilute aquatic plant fertilizer solution (more detail in the fertilizer section below).
- Place plants on the water surface or support the stem base with a mesh insert so roots are submerged and fronds are above water.
- Position under a grow light at 30–50 µmol·m⁻²·s⁻¹ PAR and run a photoperiod of 8–10 hours.
- Change 25–30% of the water weekly and redose nutrients to maintain target levels. Monitor pH every few days as nutrient solutions can drift.
Propagation: The Three Methods
Water Sprite is one of the most self-propagating plants in the aquarium hobby. Under good conditions you will have more plants than you know what to do with. Here are the three propagation pathways.
Cuttings and Fragmentation (Primary Method)
This is the most reliable and fastest method for the hobby. Water Sprite produces adventitious plantlets directly on its fronds, small daughter plants that sprout from the leaf margins. You will notice them as tiny rosettes appearing along older fronds. Once a plantlet has developed three or more fronds and visible roots (usually within 2–4 weeks of appearing), simply detach it by hand or with scissors and either float it or plant it as described above. It requires no special treatment and will grow immediately.
- Identify plantlets on mature fronds — look for small rosette shapes with visible root development along the frond margins.
- Once plantlets have at least 3 fronds and roots of 1 cm or longer, pinch them off gently at the attachment point.
- Float or plant the detached plantlet using the methods described in the planting section.
- The parent frond is still viable after removing plantlets — leave it in the tank to produce more.
Division and Runners
Established, rooted Water Sprite plants develop a short rhizome that can be divided. If your plant has multiple crowns growing from a central rhizome, carefully separate them with a clean razor blade or scissors, ensuring each division has roots attached. Replant each division immediately. This method works best with plants that have been established for at least 2–3 months. It is slower than plantlet propagation but useful when you want to split a large specimen without waiting for daughter fronds.
Spores (Why Most Hobbyists Skip This)
Fertile fronds on emersed or paludarium plants produce sporangia along the reflexed frond margins. Spore propagation is technically possible but rarely done in the hobby for good reason: it requires consistently high humidity, sterile or near-sterile conditions to prevent mold outcompeting the sporelings, and patience measured in months rather than weeks. Adventitious plantlets give you identical results in a fraction of the time. I mention spores here for completeness and for paludarium growers who notice fertile fronds and wonder what they are, they are not a problem, just a sign of a healthy, mature plant.
Fertilizer and Nutrient Dosing
Water Sprite is a heavy feeder relative to many aquarium plants, particularly when grown as a floating plant with a fast turnover rate. Getting nutrients right makes the difference between a lush, deep-green plant and a pale, stunted one.
Target Macronutrient Ranges
| Nutrient | Target Range (water column) | Role in Water Sprite Growth |
|---|---|---|
| Nitrogen (NO3) | 10–25 mg/L (ppm) | Core building block for frond and root growth; most critical macronutrient |
| Phosphorus (PO4) | 0.5–2.0 mg/L (ppm) | Cell division and energy transfer; deficiency causes stunted new growth |
| Potassium (K) | 5–20 mg/L (ppm) | Supports enzyme function and water regulation; often depleted fast in high-growth tanks |
| Iron (Fe) | 0.1–0.5 mg/L (ppm) | Chelated iron is essential for chlorophyll; first sign of shortage is yellowing new fronds |
Liquid Dosing: Timing and Amounts
For most aquariums, a weekly all-in-one liquid fertilizer dose after each water change is sufficient for moderate Water Sprite growth. If you are growing a dense floating mat or running a high-light setup, split the weekly dose into smaller daily doses to prevent nutrient swings. A practical starting point for a 40-liter (10-gallon) tank: use an all-in-one fertilizer (like Seachem Flourish Comprehensive or Easy Green by Aquarium Co-Op) dosed at the manufacturer's recommended rate, and test nitrate and phosphate fortnightly to adjust. In heavily planted tanks where the fish load is low, nitrate may fall below 5 ppm and you will need to supplement with a dedicated nitrogen source.
- Weekly dosing after a water change: best for beginner and low-to-medium light setups
- Small daily doses (1/7 of weekly total): better for high-growth or high-light tanks to prevent swings
- Iron: dose separately with a chelated iron supplement if your all-in-one does not maintain 0.1–0.5 ppm; test with a dedicated iron test kit
- In shrimp tanks, choose fertilizers with low or zero copper content — copper is toxic to invertebrates even at low concentrations
Signs of Under- and Overdosing
- Nitrogen deficiency: uniform yellowing starting from older fronds, slow growth, thin stems — increase nitrogen source
- Iron deficiency: yellowing of new fronds only (interveinal chlorosis), while older fronds remain green — dose chelated iron
- Phosphorus deficiency: stunted new growth, small fronds, sometimes purple tinging on stems — add phosphate supplement
- Potassium deficiency: pinhole damage on leaves, frond edges looking ragged — add potassium supplement
- Overdosing nitrogen: algae bloom, particularly green water or green spot algae on glass — reduce dosing and increase water change frequency
- Overdosing phosphate: similar algae response, particularly hair algae — test levels and cut back
CO2 and Filtration: When They Help and When to Skip Them
Water Sprite does not require CO2 injection and grows perfectly well without it under moderate light and good nutrient levels. That said, CO2 does produce visibly faster and denser growth, I have run the same tank with and without injection and the difference is real. If you inject CO2, target 20–30 mg/L (ppm) as measured by a drop checker. Keep KH above 2 dKH to maintain pH stability when dosing CO2. Never run CO2 at night, turn it off when the lights go out to avoid a pH crash.
For filtration, a hang-on-back or sponge filter is ideal for most Water Sprite setups. Sponge filters are particularly good for shrimp and fry tanks because they provide gentle flow, cannot trap small animals, and the sponge surface hosts beneficial bacteria. For a planted tank with rooted Water Sprite, a canister filter with a spray bar directed along the back glass provides circulation without disturbing the surface or tearing fronds. Avoid powerheads and high-velocity output nozzles aimed at the water surface, this is the single most common mistake I see in planted Water Sprite tanks. Target a filter turnover rate of 4–6 times tank volume per hour for planted setups, lower end if you are growing a dense floating mat.
Maintenance Routine and Schedule
Water Sprite grows fast enough that neglecting maintenance leads to problems quickly, overcrowded floating mats block all light, and overgrown rooted plants shade out everything below them. Here is a practical maintenance rhythm.
| Frequency | Task |
|---|---|
| Daily | Check floating mat density — if surface coverage exceeds 50–60%, thin immediately |
| Weekly | Trim oldest/largest fronds from rooted plants; remove any yellowing or damaged fronds; dose liquid fertilizer after water change |
| Weekly | Perform a 25–30% water change; re-anchor any rooted plants that have come loose |
| Fortnightly | Test water parameters: nitrate, phosphate, iron, pH, GH/KH; adjust dosing based on results |
| Monthly | Deep clean substrate surface (gentle vacuum around plant bases); inspect rooted plants for crowding and divide if needed |
| As needed | Harvest floating plantlets for propagation; remove any plants showing rot or persistent yellowing |
Pruning tip: always remove entire fronds rather than cutting them in half. Half-cut fronds tend to die back to the cut point anyway, leaving a decaying stump. Grab the frond at its base and pull or snip it there, clean removal, no dead material left behind.
Compatibility with Fish and Invertebrates
Water Sprite is compatible with the vast majority of community fish. Its main value in a community tank is as a surface cover and nitrate export plant. However, a few species will shred or eat it, which is worth knowing before you invest.
Compatible Species
- Betta fish: excellent companion — bettas love the surface cover and the shelter it provides for resting near the waterline
- Tetras, rasboras, danios: no plant interaction beyond using floating plants as shelter
- Corydoras and small loaches: bottom dwellers that ignore Water Sprite entirely
- Dwarf shrimp (Neocaridina and Caridina species): Water Sprite is one of the best plants for shrimp tanks — biofilm colonizes the fronds and roots, providing constant grazing material
- Mystery snails and nerite snails: generally ignore Water Sprite; their grazing focuses on algae and detritus
- Small live-bearing fish (guppies, endlers, mollies): benefit greatly from floating Water Sprite as a fry refuge
Species to Avoid or Watch Closely
- Goldfish: will eat Water Sprite aggressively — not a suitable pairing
- Cichlids (most species): many dig up rooted plants and some eat soft-leaved ferns; use floating-only approach if keeping cichlids
- Large plecos (e.g., common pleco): will rasp fronds; smaller plecos like Otocinclus are fine
- Apple snails (Pomacea species): will consume Water Sprite; stick with nerites or mystery snails
- Silver dollars and similar plant-eating characins: not compatible with any planted tank setup
For shrimp tanks specifically, use fertilizers certified as copper-free or very low in copper (under 0.01 mg/L). Even trace copper at levels harmless to fish can kill shrimp and snails. Check the product label before dosing.
Common Problems: Diagnosis and Fixes
Melting After Introduction
Melting, where fronds soften, turn translucent, and disintegrate, is the most common complaint from new growers. It almost always happens in the first 1–2 weeks after introducing a plant that was grown emersed (above water) in a nursery. The plant is shedding its emersed fronds and transitioning to submerged growth. This is normal. Do not remove the plant. Trim the melting fronds, leave the healthy growing tip, and wait. New submerged-form fronds will emerge within 7–14 days if conditions are right. If melting continues past 3 weeks, check temperature (too cold?), pH (outside 5.5–7.5?), and nutrient levels.
Yellowing Fronds
Yellowing old fronds first points to nitrogen deficiency. Yellowing new fronds with green veins (interveinal chlorosis) points to iron deficiency. Uniform pale yellowing across the whole plant can indicate insufficient light. Test nitrate first, if it is below 10 ppm, that is your problem. Add a nitrogen source. If nitrate is fine but new fronds are still yellow, test iron and dose chelated iron.
Leggy or Etiolated Growth
Long stems with widely spaced, small fronds mean the plant is stretching for light. Increase PAR at plant level to at least 30 µmol·m⁻²·s⁻¹ for submerged plants. If you are running a thick floating mat on the surface, the mat itself may be starving the lower plants of light, thin the floating layer first before adjusting your lighting fixture.
Algae Growing on Fronds
Green spot algae or thread algae on Water Sprite fronds usually signals an imbalance between light and nutrients, or a photoperiod that is too long. Start by reducing the photoperiod to 8 hours and checking phosphate levels. If algae persists, reduce light intensity slightly. Adding Amano shrimp or Otocinclus catfish to graze on algae helps in community tanks. Avoid algaecides, most are harmful to ferns and invertebrates.
Rot at the Crown or Stem Base
Rot at the stem base is almost always caused by planting too deep (the rhizome is buried), poor flow allowing dead zones in the substrate, or overcrowding with debris accumulation. Trim the rotted section back to healthy tissue, replant at the correct depth (rhizome at substrate level, not below), and improve circulation slightly around the base. In paludariums and terrariums, ensure the substrate is moist but not waterlogged.
Pests
- Hydra: tiny stalked creatures that hitch in on new plants; treat with a commercially available hydra treatment safe for plants, or raise temperature briefly to 30 °C for 48 hours (with care for fish and shrimp temperature tolerance)
- Ramshorn snails: generally beneficial for cleanup but can multiply fast; manual removal or adding assassin snails controls populations
- Planaria: white flatworms that are harmless to plants but a pest risk to shrimp; use planaria traps and treat with fenbendazole if needed — this drug is safe for most plants at recommended doses
- Aphids (in emersed/paludarium settings): spray emersed fronds with a weak neem oil solution or remove by hand; do not allow any pesticide to enter the aquatic zone
Equipment Checklist
| Item | Aquarium | Paludarium | Terrarium | Water Culture / DWC |
|---|---|---|---|---|
| Tank or container | Essential | Essential | Essential | Essential |
| Aquarium LED light (PAR-rated) | Essential | Essential | Essential | Essential |
| Timer for lights | Essential | Essential | Essential | Essential |
| Thermometer | Essential | Essential | Essential | Essential |
| Heater | Essential if temp below 18 °C | Essential if temp below 18 °C | Optional (ambient warmth) | Essential if temp below 18 °C |
| Sponge filter or hang-on-back filter | Essential | Essential (aquatic zone) | Not needed | Optional (small air pump) |
| Fine gravel or aquarium soil | Essential (rooted) | Essential | Essential | Not needed |
| Plant weights / mesh baskets | Recommended (rooted) | Optional | Not needed | Not needed |
| Liquid all-in-one fertilizer | Essential | Essential | Recommended | Essential |
| Chelated iron supplement | Recommended | Recommended | Optional | Recommended |
| pH test kit | Essential | Essential | Recommended | Essential |
| Nitrate/phosphate test kit | Recommended | Recommended | Optional | Essential |
| CO2 system (DIY or pressurized) | Optional | Optional | Not applicable | Not applicable |
| Drop checker (CO2) | Optional (if using CO2) | Optional | Not applicable | Not applicable |
| PAR meter | Optional but very useful | Optional | Optional | Optional |
| Scissors or aquascaping trimmer | Essential | Essential | Essential | Essential |
| Hygrometer (humidity monitor) | Not needed | Essential | Essential | Not needed |
Quick-Start Timeline: Week by Week
This timeline assumes a 40-liter aquarium with floating Water Sprite and one rooted background plant, moderate light (50 µmol·m⁻²·s⁻¹), 8-hour photoperiod, no CO2 injection, and a light fish stocking. Adjust expectations if your setup differs significantly.
| Week | What to Do | What to Expect |
|---|---|---|
| Week 1 | Set up tank; cycle water if new setup; introduce Water Sprite (float and/or plant); dose first fertilizer after water change | Floating plants may look unchanged or show minor melting of old emersed fronds; rooted plants may float free — replant as needed |
| Week 2 | Replant any loose rooted plants; check parameters (pH, nitrate, temperature); trim any melting fronds | New submerged fronds should start emerging; roots on floating plant should lengthen; rooted plant may still be loose |
| Week 3 | Continue weekly fertilizer dose; thin floating mat if coverage exceeds 50% of surface; check rooted plant anchoring | Rooted plant should be establishing; visible new growth on both floating and rooted plants; plantlets may begin forming on fronds |
| Week 4 | First optional harvest: remove oldest fronds from rooted plant; collect any mature plantlets for propagation or sharing | Fast visible growth expected; color should be mid-to-deep green throughout; floating mat requires regular thinning from this point on |
| Week 5–8 | Establish weekly maintenance rhythm: trim, thin, dose, water change; test parameters fortnightly | Self-sustaining growth cycle; plantlets forming continuously; harvest and propagate as needed; monitor for any yellowing or algae |
Suggested Images for This Guide
The following image types will make this guide significantly more useful for visual learners and help readers diagnose problems quickly. All Ceratopteris thalictroides images on Wikimedia Commons are available under free licenses and make an excellent starting point for building your shot list.
- Plant ID close-up: side-by-side of a sterile frond (broad, pinnately divided) and a fertile frond (erect, deeply divided with sporangia visible on frond margins) — useful for ID and for explaining the spore propagation section
- Whole plant habit: floating mat from above showing root spread below the waterline, and a rooted plant photographed from the front of the tank showing full height
- Emersed vs. submerged frond comparison: side-by-side of the same plant type in a terrarium/paludarium setting (broad, robust emersed frond) versus a submerged aquarium specimen (finely divided, delicate frond)
- Step-by-step planting sequence: photos of the anchoring/mesh basket method, correct planting depth (rhizome at substrate level), and a newly planted specimen versus the same plant 3 weeks later
- Propagation stages: a mature frond showing adventitious plantlets at different development stages (early rosette, roots visible, ready-to-detach size)
- Common problems gallery: yellowing from nitrogen deficiency (old fronds); interveinal chlorosis from iron deficiency (new fronds); leggy growth; algae on fronds; rot at stem base — each with a brief caption noting the cause
Recommended Articles to Explore Next
If this guide has you thinking about building out a full planted tank system rather than just adding a single plant, a complete aquarium setup guide will walk you through cycling, filtration sizing, and substrate layering in detail. For everything related to nutrients, a dedicated guide on liquid fertilizers for planted tanks covers dosing schedules, product comparisons, and how to read a deficiency chart. And if you are stocking your Water Sprite tank with shrimp or fish, a shrimp and fish compatibility guide will help you put together a community that works without destroying your plants. Growing other aquatic or semi-aquatic leafy plants alongside Water Sprite? The guides on growing waterleaf and growing madre de agua are worth reading for comparison, both cover fast-growing plants with overlapping care principles in wet and semi-aquatic environments.
FAQ
What are the core taxonomy and identification research questions and data points needed?
- Confirm accepted scientific name and synonyms (authority citations, e.g., Ceratopteris thalictroides (L.) Brongn.) from authoritative taxonomic databases (POWO, IPNI, World Flora Online). - Collect diagnostic morphological characters (rhizome form, sterile vs. fertile fronds, pinnule shape, sporangia placement) from flora treatments and monographs. - Document cryptic-species literature and known intraspecific variation (ploidy/lineages) to flag ID limits and when molecular confirmation is needed. - Compile a curated image set (habitus, sterile frond close-up, fertile frond/sporangia, rhizome/roots, herbarium sheet) with provenance and licenses. - Crosswalk common and vernacular names (English, Spanish, other regional names) and note similarly named but unrelated plants (e.g., “waterleaf,” “madre de agua,” betel leaf) to avoid hobby confusion.
Which source categories should be used for ID and why?
- Tier‑1 taxonomy databases: POWO, IPNI, World Flora Online (nomenclatural authority). - Peer‑reviewed taxonomic papers (cryptic species, phylogenetics) for limits and caveats. - Regional floras/keys (PlantNET, regional herbarium treatments) for local diagnostic characters. - High‑quality institutional herbarium images and vetted field photos (Kew, GBIF, ColPlanta) for figure provenance. - Freely licensed media (Wikimedia Commons) only when licensing and ID are verified.
What habitat and growth‑form data are required to describe floating vs rooted culture?
- Field habitat descriptions (aquatic vs emergent, substrate types) from flora and ecology sources. - Observational hobby records documenting morphology under floating, submerged and emersed states (leaf size, internode length). - Quantitative distinctions: typical root length, rhizome size, buoyancy traits. - Pros/cons evidence: nutrient uptake rates for floating plants (literature or hobby testing), light shading effects, surface coverage metrics, tendency to uproot.
What exact water‑chemistry targets and how should they be supported?
- Numerical targets with acceptable ranges and sources: temperature (°C/°F), pH, general hardness (dGH) and carbonate hardness (KH). - Source consensus and variability across literature and hobby guides; note local tap water testing necessity. - Methods for measuring (digital thermometer, calibrated pH meter, GH/KH test kits) and frequency of checks during establishment and maintenance.
What lighting and photoperiod data are needed, and how to express them reproducibly?
- PAR targets at plant level in µmol·m⁻²·s⁻¹ for low→medium growth and a recommended experimental range. - Recommended photoperiod (hours/day) and a test protocol (e.g., start 8 h and record growth metrics). - Measurement methods: handheld PAR meter use, or manufacturer PAR charts with distance & spectrum notes. - Notes on emersed vs submerged light needs and how leaf morphology changes with intensity.
What flow/circulation data and guidelines should be included?
- Recommended qualitative flow (gentle→moderate) and measurable analogues where possible (e.g., approximate surface velocities or turnover rates). - Cite ecological studies showing macrophyte sensitivity to flow and hobby pump/head curves to choose low‑shear circulation. - Placement guidance to avoid frond tearing and to maintain detritus suspension for planted roots.