Yes, you can grow aquatic plants from seeds, and it's genuinely rewarding when it works. But it's also the trickiest propagation method in the aquatic hobby, mostly because the seeds are unforgiving about storage, timing, and environmental cues. The good news: once you understand what each type of seed actually needs to wake up and grow, the process becomes a lot more predictable. This guide walks you through every step, from picking viable seeds to moving seedlings into your aquarium, pond, or water-based grow system.
How to Grow Aquatic Plants From Seeds: Step by Step

Marcus Holloway
12 Apr 2026
Choosing the right aquatic plant seeds
Not every aquatic plant is worth starting from seed as a hobbyist. Some species propagate much more reliably from cuttings, rhizome divisions, or runners. But plenty of emergent, marginal, and submerged species are very achievable from seed if you start with fresh, viable stock and match the germination conditions to the species.
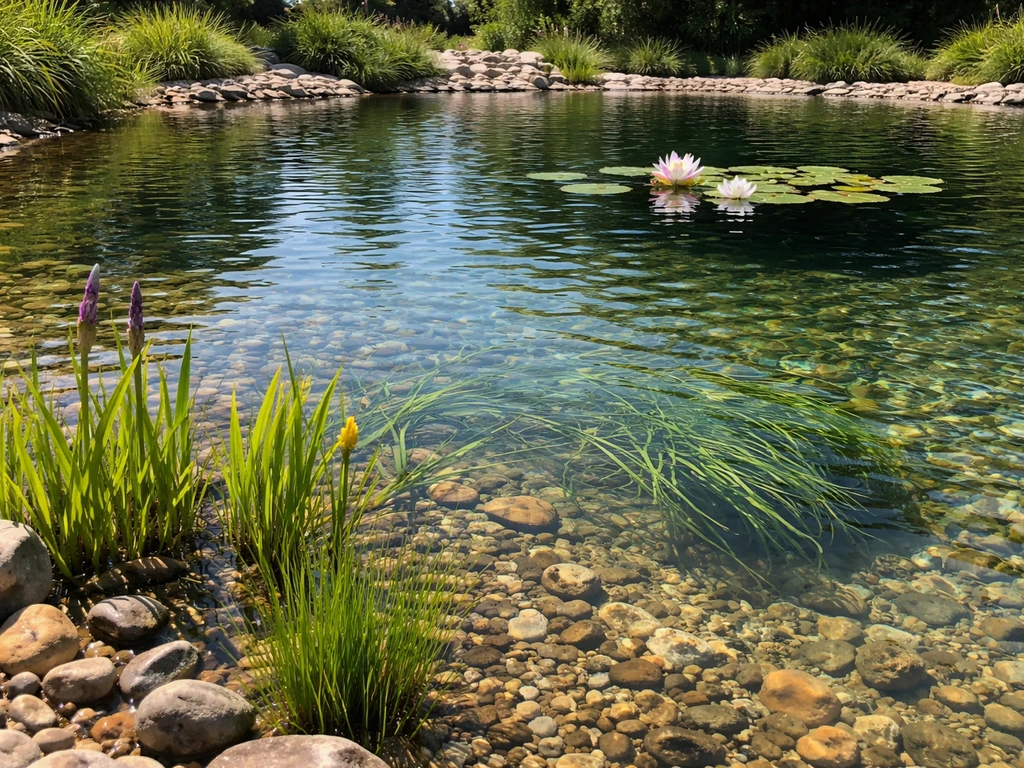
Realistic candidates for home seed starting include lotus (Nelumbo spp.), water lilies (Nymphaea spp.), Sagittaria species, marginal rushes and sedges like Carex spp., reed grasses, and many emergent wetland species. If you're curious about a specific semi-aquatic grass, the approach in this guide applies well to species covered in guides like how to grow aquatic grass, where seed or vegetative propagation are both on the table.
The single biggest issue with aquatic seeds is viability. Many aquatic species have what researchers call 'short-lived seed bank behavior,' meaning their seeds lose the ability to germinate quickly after harvest, especially if stored improperly. Seed longevity depends heavily on moisture content and storage temperature. Seeds kept too warm or too dry can drop to near-zero viability within weeks. Some aquatic plants even produce recalcitrant seeds, which cannot tolerate drying or cooling the way standard garden seeds can, making commercial storage genuinely difficult.
One archival study found that storing aquatic seeds in water just above freezing gave the best germination results across multiple species, while seeds stored dry or at room temperature in water often failed entirely. That's a dramatically different storage requirement from most garden seeds, and it explains why a packet of aquatic seeds sitting on a shelf for a year can look fine but produce zero sprouts.
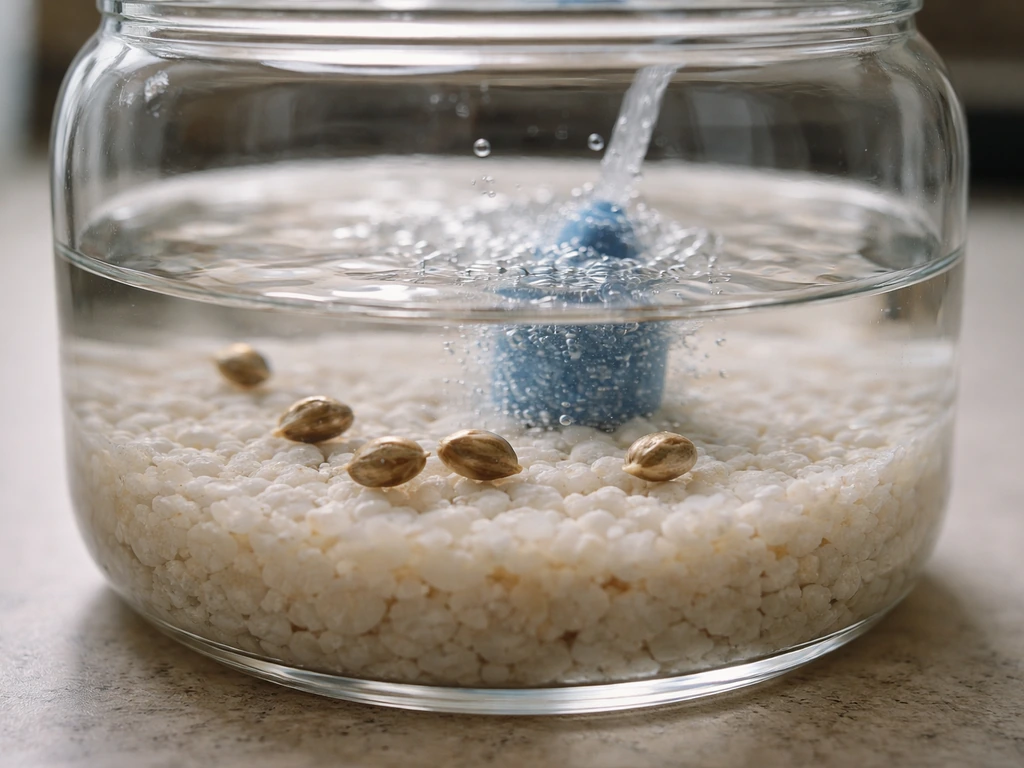
When sourcing seeds, prioritize suppliers who harvest and ship quickly, and ask about harvest dates if you can. For lotus and other hard-seeded species, look for seeds with a firm, dark coat. For lily-type species and soft-coated aquatic seeds, use them within the same season if at all possible. Before sowing a full batch, run a quick float test: drop seeds in water and discard any that float after 10 to 15 minutes (floating often signals hollow, non-viable seeds). Then count germination rate from a small sample before committing your whole setup.
Submerged germinators vs. air and light germinators
This is the key distinction most beginners miss. Not all aquatic plant seeds germinate the same way, and planting a light-requiring emergent seed under 6 inches of water is a reliable way to get zero results.
| Category | Examples | Germination style | Light needed? | Temperature cue |
|---|---|---|---|---|
| Hard-coated / lotus type | Nelumbo spp. | Shallow water after scarification | Yes, indirect | Warm: 24–30°C |
| Soft emergent / marginal | Sagittaria spp., Carex spp. | Moist surface or very shallow water | Yes, exposed to light | Warm with diurnal cycling |
| Submerged ornamentals | Some Nymphaea, Aponogeton | Under water, shallow submersion | Species-dependent | Species-dependent |
| Semi-aquatic grasses/rushes | Phalaris, Juncus, reed types | Moist media surface, not flooded | Yes | Warm, 18–25°C |
| Cold-stratification types | Many native wetland species | Requires cold period first | Yes, after stratification | Cold then warm transition |
Sagittaria, for example, is strongly influenced by light intensity, water temperature, seed burial depth, and seed dormancy state. Sagittaria seed bank ecology studies report that germination and seed bank persistence are influenced by environmental factors such as light intensity, water temperature, seed burial depth, and seed dormancy. Burying those seeds under substrate or deep water significantly cuts germination. Carex species (sedges) are even more sensitive: research on wetland sedge germination shows that even brief light exposure of just seconds can be enough to stimulate germination, but covering seeds with dark media eliminates that cue entirely. Meanwhile, a species like Aponogeton crispus is more tolerant of submersion and lower light during germination. Know your species before you set up your system.
Preparing the system: water, containers, substrate, and lighting
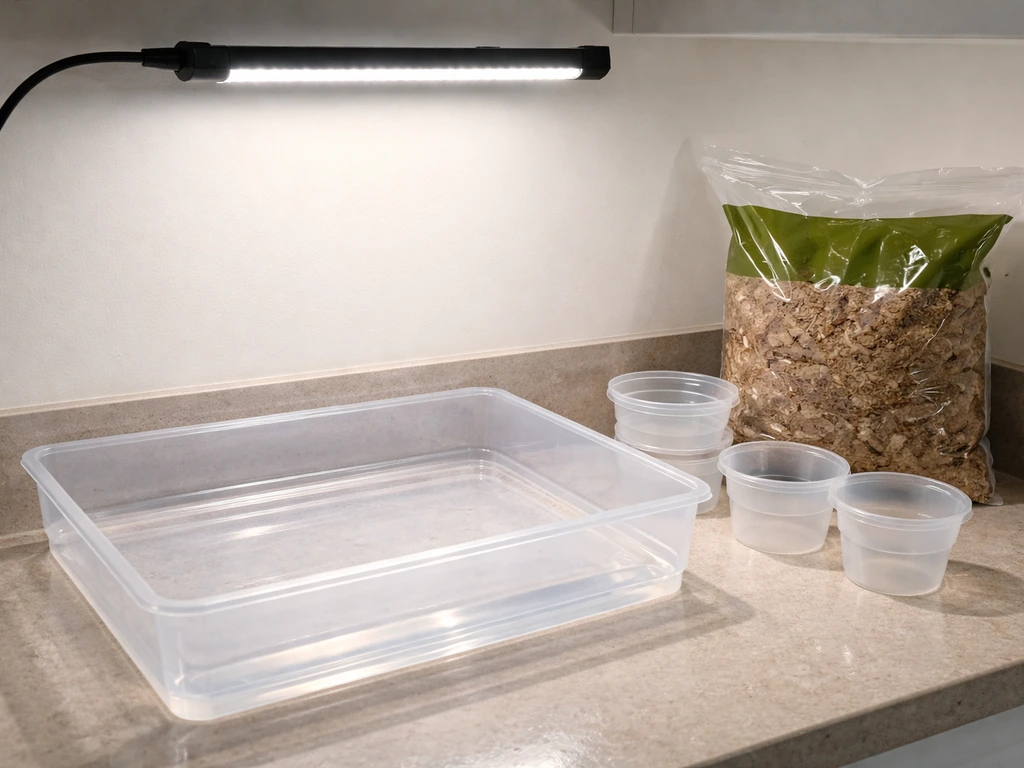
Your seed-starting system doesn't need to be elaborate, but it does need to be clean, controllable, and appropriately sized. I've had great results with simple plastic storage containers and basic aquarium equipment, and I've also wasted seeds in expensive setups because I overlooked oxygen or temperature. Keep it simple and get the parameters right.
Containers and water depth
For most emergent and marginal species, shallow trays or small containers work best during germination. USDA NRCS propagation tank guidance recommends starting seeds submerged under just 6.4 to 12.7 mm (about 1/4 to 1/2 inch) of water. That's much shallower than most people assume. Deeper water reduces light penetration to the seed, cuts oxygen at the seed surface, and increases the risk of rot. Once seedlings establish, you gradually raise water depth.
For submerged ornamentals and water lily types, a larger, deeper container, roughly 20 to 30 cm deep, gives more flexibility, but still start with seeds near the surface or on a substrate shelf near the waterline.
Substrate choices
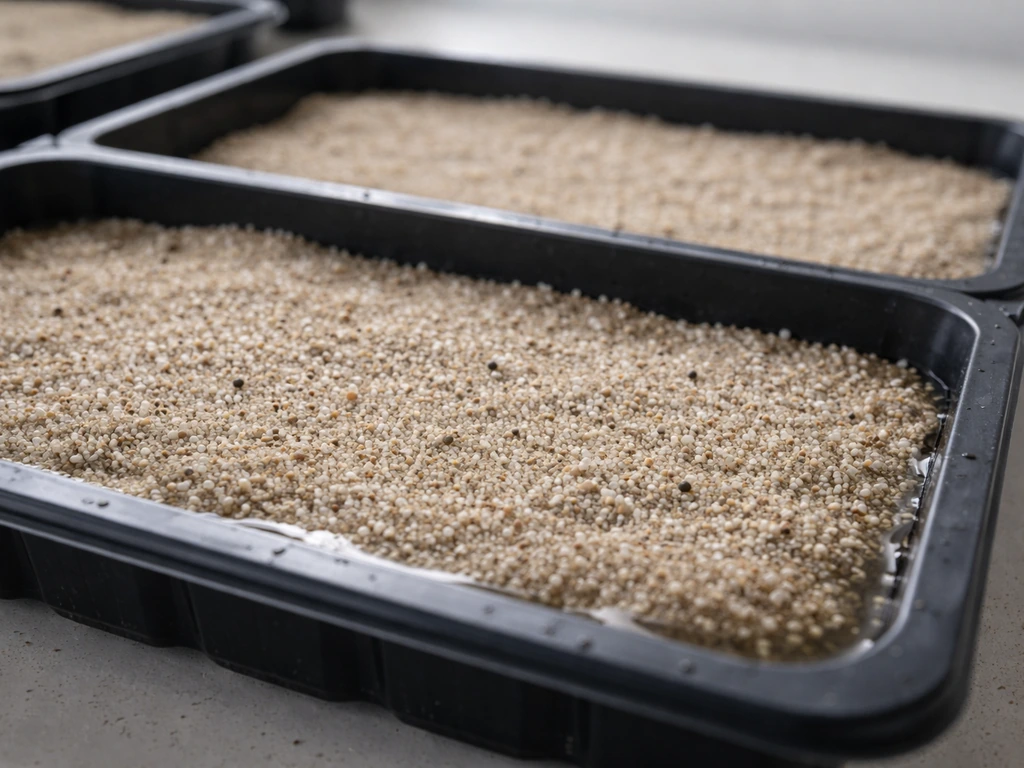
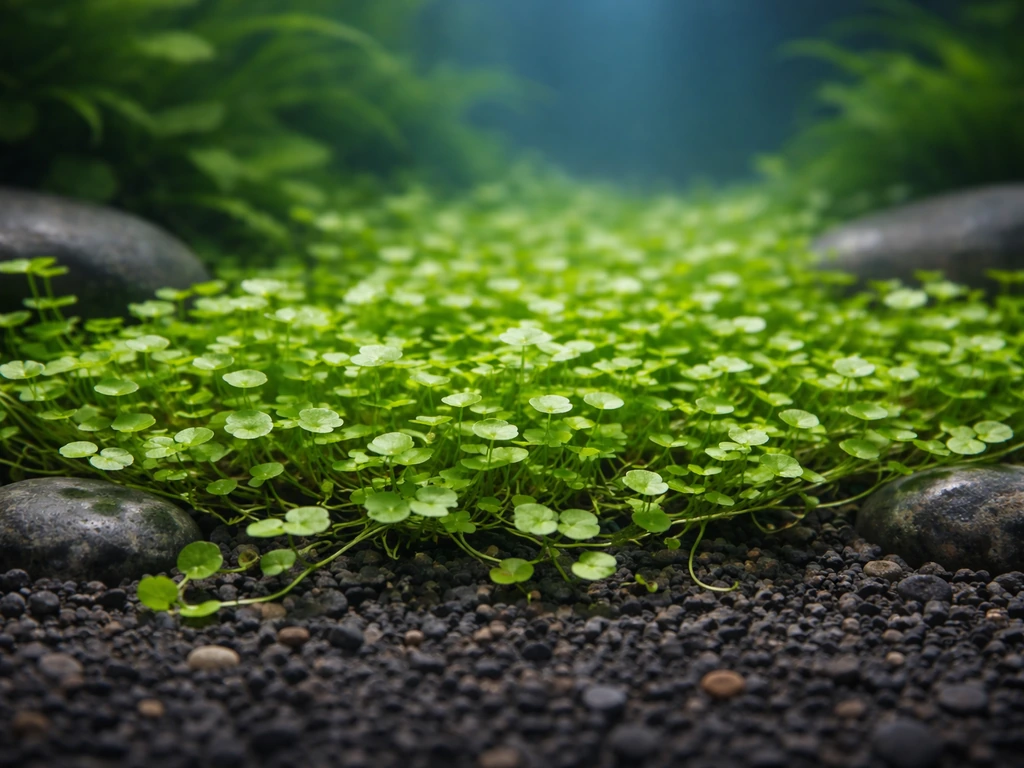
Many emergent aquatic seeds germinate best on or just at the surface of fine-grained, nutrient-poor substrate. Heavy potting mix is usually a mistake because it compacts, goes anaerobic quickly, and promotes rot. Good options include aquatic planting soil (low-nutrient clay-based mixes), fine sand, or a thin layer of inert aquarium substrate. For species that need light to germinate (most emergent types), don't cover seeds at all: just press them gently onto the moist surface. For species that benefit from slight burial, 2 to 3 mm is usually enough.
Water chemistry basics
Use dechlorinated tap water or reverse osmosis water. A neutral to slightly acidic pH (6.5 to 7.2) suits most aquatic species during germination. Avoid nutrient-rich fertilized water at the seed stage: it fuels algae before seedlings can compete. Soft to moderately hard water (50 to 150 ppm TDS) is fine for most species. Temperature control matters more than chemistry at this stage.
Temperature targets
Most aquatic and emergent species germinate best between 20°C and 30°C, with warm-season species preferring the upper end. Seeds will not germinate if temperatures fall outside their viable range, and pushing seeds above their ceiling causes stress and rot just as reliably as cold temperatures. Alternating day and night temperatures, for example 28°C during the day and 22°C at night, can noticeably improve germination percentage and speed for species like Sagittaria compared to constant temperature. A simple aquarium heater in your seed-start container handles this easily.
Lighting
For most emergent aquatic seeds, 12 to 14 hours of light per day at low to moderate intensity (roughly 20 to 50 µmol photons m⁻² s⁻¹ at the seed surface) is a solid starting point. Research on species like Lilium pensylvanicum shows that photoperiod affects germination timing directly: seeds under 12 hours of light germinated faster than those in continuous darkness. A cheap LED grow light or a basic aquarium light on a timer is all you need. Keep the light close enough to reach the seeds but avoid bleaching or overheating the shallow water.
Oxygenation
This is the one most beginners skip, and it's a common cause of seed rot. Water films around seeds restrict oxygen diffusion to the embryo, and in a stagnant, shallow container this gets bad quickly, especially in warm water where dissolved oxygen drops naturally as temperature rises. A small air stone connected to a cheap pump, or even gentle surface movement from a tiny powerhead, makes a significant difference. This also reduces CO2 buildup, which can otherwise accumulate in still water and stress young seedlings. Think of it as the aquatic equivalent of good soil aeration in a standard seed tray.
Seed starting methods: direct sowing vs. starting off-site
You have two main approaches: sow directly into your target system (pond, established aquarium, grow tank) or start seeds in a separate, controlled environment and transplant later. Both work, but they suit different situations.
Direct sowing
Direct sowing into a pond or large established system works well for emergent and marginal species when timing aligns with natural warming in spring (or when your system is already at target temperature). The risk is low control: algae, fish, disturbance, and variable water depth can all sabotage germination before seedlings establish. If you're setting up a pond system and want to integrate plants from the start, reading up on how to grow pond plants alongside this guide will help you plan which species to direct sow versus transplant as established plugs.
For direct sowing to work, the pond or system needs stable temperature, very shallow margins (seed-accessible zones at 1 to 5 cm depth), and no competing established plants or algae mats. Scatter seeds onto moist, bare substrate and keep that zone undisturbed. Works best with tough, fast-germinating species.
Off-site starting (recommended for most situations)

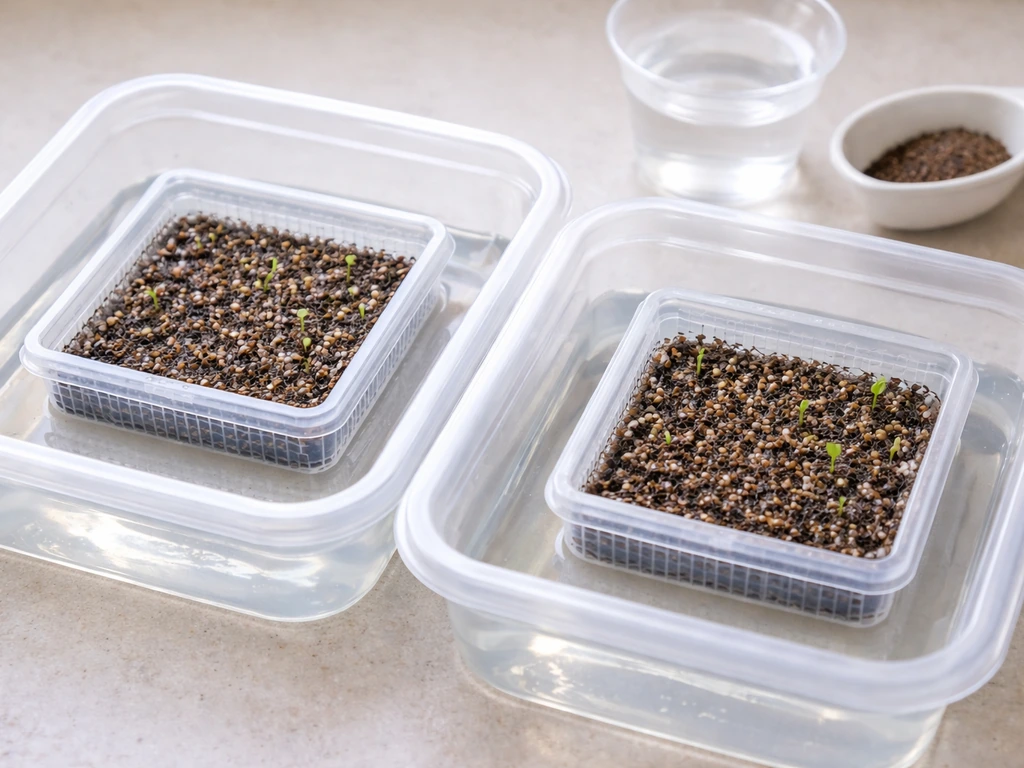
Starting seeds in a separate container gives you control over every variable that matters: temperature, light, water depth, oxygen, and algae pressure. This is especially important for slow or finicky germinators, expensive seeds, or species that need stratification or scarification before they'll break dormancy. I always start off-site now. blank" rel="noopener noreferrer">Losing a batch of lotus seeds to a sudden algae bloom in a pond taught me that lesson fast.
The off-site setup is simple: a plastic tub, small aquarium, or even a seed tray inside a humidity dome, depending on whether you need submersion. You control temperature with a heater or by placing the container in a warm space, light with a grow light on a timer, and oxygen with a small air stone. Once seeds germinate and seedlings reach a manageable size (usually 3 to 6 cm of growth), you transplant to the final system.
Stratification and scarification: when you need them
Some aquatic seeds won't germinate no matter what you do with light and temperature, because they have physical or physiological dormancy that needs to be broken first. Stratification mimics winter conditions: you chill the seeds (usually in moist paper or moist sand in a refrigerator at 2 to 5°C) for 4 to 12 weeks, then bring them back to warm conditions to trigger germination. Many native wetland species need this cue.
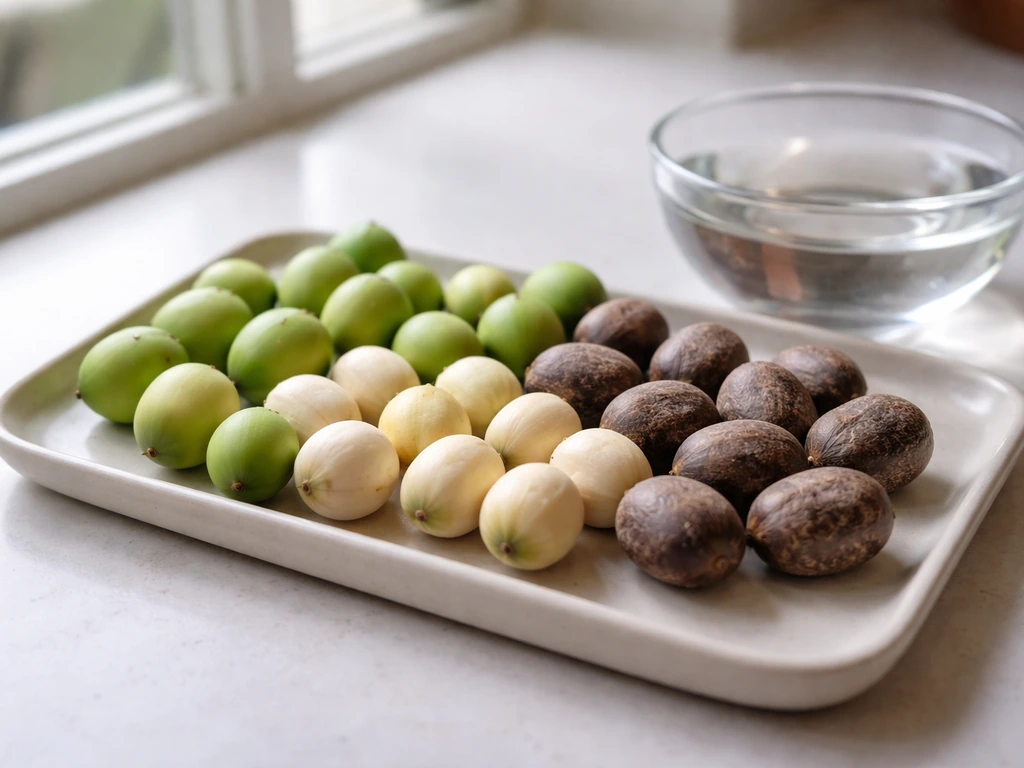
Scarification is for hard-coated seeds like lotus. The seed coat is so tough that water can't penetrate it without help. Mechanical scarification means nicking or sanding the seed coat lightly (not through the seed, just breaking the outer layer). Hot water scarification, pouring near-boiling water over seeds and letting them soak as it cools, can improve germination significantly: one documented example shows germination rates jumping from 30% to 64% with this method for hard-seeded species. An ORNL technique for rapid establishment of American lotus in remediation describes scarification and germination in heated water as part of propagation approaches for lotus. For lotus specifically, many growers nick the pointed end with a nail file until a slightly lighter spot appears, then soak in warm water for 24 to 48 hours before sowing.
Germination setup and troubleshooting
Once your seeds are prepared and your system is running, germination timelines vary widely. Lotus can sprout within 3 to 5 days under warm conditions. Sagittaria might take 1 to 3 weeks. Some native wetland Carex species need 3 to 6 weeks or more after stratification. Expect variation and don't abandon seeds too soon.
Common failures and how to fix them
- Seeds rotting before germination: Usually caused by low oxygen, stagnant warm water, or a dirty/contaminated container. Sterilize your containers with diluted bleach (rinse thoroughly), add an air stone, and lower water depth to the minimum needed. Pathogens thrive in hypoxic zones, so aeration is your first fix.
- Seeds not germinating at all: Check viability first (float test, try a small batch). Then check whether this species needs scarification or stratification you haven't provided. If dormancy is the issue, no amount of warmth and light will help. Also verify temperature is actually in range, not just ambient room temperature.
- Algae takeover: Algae loves the same light and warmth you're providing for seeds. Keep initial light intensity moderate, do small partial water changes every few days to reduce nutrients, and avoid fertilizing the water at the seed stage. A light-blocking cover (dark cloth) on the sides of the container (not the top) can reduce sidewall algae without blocking light from above.
- Poor or patchy sprouting: Often a sign of uneven temperature distribution, variable water depth, or mixed-viability seeds. Thin out obviously dead seeds (soft, discolored, mushy) and consolidate remaining seeds to the warmest part of the container.
- Weak, leggy seedlings after germination: Usually a light problem. Increase light intensity or reduce the distance between the light source and seedlings. Submerged seedlings can also suffer from CO2 limitation as they grow, so gentle aeration and surface agitation help.
- Sudden seedling failure after doing well: Can be a temperature spike (warm water holds less dissolved oxygen, increasing decomposition and stress), a light intensity shock, or the beginning of a nutrient deficiency once the seed's reserves are depleted. At this point, a very dilute liquid fertilizer dose is appropriate.
One thing worth remembering: what looks like a germination failure is sometimes actually an environmental cue problem. If all other conditions look right, ask whether this species might just need longer, or a slightly different temperature regime, before writing off the batch.
Transplanting seedlings and early growth care
Seedlings are ready to transplant when they have developed their first true leaves (not just the initial cotyledon or sprout) and roots are visible and firm, usually 2 to 4 weeks after germination depending on species. At this stage they're past their most fragile phase but still need careful handling.
How to transplant without causing setback
- Match water temperature between seed-start container and the destination system before you move anything. Even a 3 to 4°C difference can stall seedlings for days.
- Lift seedlings by the root mass or substrate, not the stem. Aquatic seedling stems are often fragile and tear easily.
- Transfer a small amount of the seed-start water with each seedling to reduce chemistry shock.
- Plant into the final substrate at the same depth the seedling was sitting in the seed-start setup. Going significantly deeper buries the growing tip and slows recovery.
- Keep lighting moderate for the first week after transplant. Don't immediately blast new transplants with high-intensity light; they need time to acclimate.
Spacing
Aquatic plant seedlings need space to avoid competing for light, especially in early growth stages. For most emergent species, 10 to 15 cm between seedlings is a reasonable starting point. Smaller foreground aquarium species can be planted more densely (5 to 8 cm apart), while large marginal plants like Sagittaria or lotus benefit from 20 to 30 cm spacing or individual planting containers within the pond.
Early growth care
During the first two to four weeks after transplant, keep water changes gentle and consistent (10 to 20% every few days for aquarium setups, maintain water level in pond setups). Introduce a dilute aquatic plant fertilizer once seedlings show active growth: too early and you feed algae, too late and seedlings run out of reserves. Liquid aquatic fertilizers at quarter-strength are a safe starting dose. Monitor for algae on leaves, which can smother seedlings before they establish, and remove it manually if it appears.
If you're growing inside an aquarium, the full picture of ongoing care, CO2 supplementation, and light management for established plants is covered in depth in a dedicated guide on how to grow aquatic plants in aquarium, which picks up right where this transplant stage leaves off.
Hardening off and moving to aquariums, ponds, or grow systems
If your seedlings were started in a controlled indoor setup and are heading into an outdoor pond, hardening off is essential. The concept is identical to hardening off vegetable transplants: you gradually expose seedlings to outdoor conditions over 7 to 14 days rather than moving them in one step.
Start by placing the seed-start container outside in a sheltered, partially shaded spot for 2 to 3 hours per day, then bring it back inside. Over the following week, extend outdoor time and gradually expose seedlings to more sun and wind. By day 10 to 14, they should be spending full days outside and are ready to go into the pond or outdoor grow system permanently. Water temperature in the outdoor system should be stable and within a few degrees of the seed-start temperature before you make the final move.
For indoor aquarium transplants, hardening off is less of a concern, but acclimation to different lighting, flow, and water chemistry still matters. Float the planting container in the aquarium for 20 to 30 minutes before planting to equalize temperature, the same logic as fish acclimation.
Once your seedlings are established in the final system, your focus shifts to sustained growth conditions rather than germination conditions. If you want to push faster development after transplant, the practical techniques in how to grow aquatic plants fast are worth reading at this stage, covering CO2, lighting optimization, and fertilizer routines that make a real difference once plants are past the seedling phase.
Moving seedlings into water-based and hydroponic grow systems
Aquatic plant seedlings can also be moved into hydroponic or recirculating water-based setups, which suits hobbyists growing edible aquatics or doing high-density plant production. In these systems, roots are often partially or fully submerged in nutrient solution rather than anchored in substrate. At transplant, support the seedling with an inert media (lava rock, clay pebbles, or rock wool) inside a mesh pot, and position it so the root zone reaches the water surface or sits slightly above the waterline initially. Let roots find the water rather than drowning the crown from day one. The full range of approaches for how to grow aquatic plants at home, including container and system options, is a useful companion resource as you plan your final grow setup.
Species-specific notes worth knowing
A few species come up repeatedly in beginner questions, so here's a quick-reference summary:
| Species | Scarification needed? | Stratification needed? | Water depth at germination | Light requirement | Notes |
|---|---|---|---|---|---|
| Lotus (Nelumbo) | Yes, nick or sand coat | No | 2–5 cm, warm | Indirect, warm room | Fast sprouter once scarified; 24–48 hr pre-soak |
| Water lily (Nymphaea) | No | Some species yes | Surface to 2 cm | Yes, moderate | Soft-coated; use fresh seed; stratify cold-region species |
| Sagittaria spp. | No | Sometimes | Surface or very shallow | Yes, essential | Diurnal temp cycling improves germination |
| Carex / sedge types | No | Often yes | Moist surface, not flooded | Brief exposure enough | Cover lightly or not at all; brief light cue is sufficient |
| Phalaris / reed grasses | No | Sometimes | Moist, not submerged | Yes | Semi-aquatic; treat closer to standard grass seed starting |
| Aponogeton spp. | No | No | 5–15 cm submersion | Low to moderate | Needs cooler temps (18–22°C); sensitive to heat |
If you're specifically working with Phalaris aquatica or similar semi-aquatic grass species, the care nuances around germination and establishment are covered in detail in the guide on how to grow phalaris aquatica, which includes propagation timing and water management that applies directly to seed starting.
And if you're drawn toward ornamental tree species that thrive near water, like Pachira aquatica (the money tree), note that its propagation is quite different from true aquatic seed starting: it's covered separately in the guide on how to grow pachira aquatica, which handles its specific soil, moisture, and lighting needs.
Your next steps checklist
Here's what to do today, in order, to set yourself up for a successful first grow from seed:
- Identify your target species and confirm it's realistic to grow from seed (not just from division or cuttings).
- Source the freshest seeds possible. Ask for harvest dates and check reviews. For recalcitrant or soft-coated species, sow within weeks of receipt.
- Run a float test and germination test on a small sample before setting up a full system.
- Prepare your seed-start container: clean thoroughly, add a thin layer of appropriate substrate, set up a small heater to hit your species' target temperature, and add a small air stone.
- Assess whether your species needs scarification (nick or hot water soak for hard-coated seeds) or stratification (cold period in the fridge first for dormancy-dependent species).
- Sow seeds at the correct depth (surface for most light-requiring species, 2 to 3 mm max for those tolerating slight burial), then cover with just 6 to 13 mm of water.
- Set your grow light for 12 to 14 hours per day at low to moderate intensity.
- Monitor daily for temperature, algae, and any signs of rot. Do small partial water changes every 3 to 4 days.
- Once true leaves appear and roots are firm, begin matching water temperature to your final system and transplant when seedlings are 3 to 6 cm tall.
- Harden off over 7 to 14 days if moving to an outdoor pond. Acclimate for 20 to 30 minutes if moving into an established aquarium.
- After transplant, introduce dilute liquid fertilizer at quarter-strength once active growth resumes, then gradually increase as plants establish.
That's the full workflow. It's more involved than pressing seeds into garden soil, but aquatic seeds respond to the right environment in ways that are genuinely satisfying to watch. Get the basics right, be patient with dormancy, don't skip oxygenation, and use fresh seed, and you'll have a much higher success rate than most beginners expect.
FAQ
My aquatic seeds look fine in the packet, how can I tell if they are still viable?
Most aquatic seeds are short-lived, so treat the “best before” date on the packet as unreliable. If you cannot confirm harvest timing, do a float test first (discard seeds that float after 10 to 15 minutes), then run a small germination trial for 5 to 10 seeds before sowing the rest. If your sample shows poor or delayed germination, do not assume the method failed, increase dormancy-breaking steps (scarification or stratification) only after you confirm light, depth, temperature, and oxygen are already correct.
Can I germinate aquatic seeds directly under deeper water to save time?
Yes, but only within a narrow window. For many emergent species, germination needs surface light, so deep water early commonly prevents sprouting. A practical rule is to start seeds at about 1/4 to 1/2 inch (6 to 12 mm) deep for germination setups, then gradually increase depth after seedlings form roots and true leaves.
What should I do if I’m getting algae but no seedlings?
Light is not always “more is better.” If you see algae or biofilm forming, reduce the light intensity or shorten photoperiod, keep nutrients out of the seed stage, and increase oxygenation (air stone or gentle flow). For light-dependent seeds, continuous darkness can slow germination, but if your container is getting heavy algae growth, it can become a net negative even if the light is technically sufficient.
How do I prevent seed rot in still or low-oxygen water?
Give seeds the right amount of aeration rather than trying to “soak them fresh” continuously. In still water, oxygen diffusion to the seed surface can drop quickly, especially warm setups, leading to rot. Use a small air stone, gentle surface movement, and avoid over-handling (stirring repeatedly can knock seeds off the exact surface position some species require).
What is the right substrate thickness for aquatic seed germination?
For many emergent seeds, do not cover them at all if the species is light-triggered. If the species tolerates slight burial, keep it minimal, about 2 to 3 mm, and use inert, fine media so you do not create compacted anaerobic zones. If you accidentally cover a light-requiring seed, you can sometimes fix it by moving the sowing media outward and re-sowing, but do not bury deeper “to try again” the same batch without confirming the species’ light response.
How strict is temperature control for germinating aquatic plant seeds?
If you are starting in an aquarium, a heater is usually best, but temperature should match the seed’s viable range for that species. For many aquarium-friendly candidates, 20°C to 30°C works, and alternating day and night temperatures can improve speed and percentage for some types. Sudden swings can delay germination more than constant “slightly wrong” temperature, so change temperatures gradually if you need to adjust.
I don’t see germination, when should I suspect dormancy rather than the environment is wrong?
Not necessarily. Germination timing varies, and “failure” is sometimes a dormancy cue issue. First confirm light (surface versus darkness), depth (too deep is a common killer), and oxygen (stagnant warm water causes rot). Then only after you have verified those basics, apply the correct dormancy break: stratification for many native wetland species, scarification for hard-coated types like lotus.
When is the best time to move aquatic seedlings into the final aquarium or pond?
A common mistake is transplanting too early based on sprout appearance. Wait until you have first true leaves, roots are visible and firm, and seedlings are large enough to handle without shredding. For many species this is often 2 to 4 weeks after germination, but slow species can be longer after dormancy breaks, so use root and leaf development as your readiness check.
Is direct sowing into a pond safer than starting in a separate container?
In a pond or outdoor system, even “direct sowing” works best if you choose a seed-accessible zone (shallow margins, minimal algae mats, and stable temperatures). If established plants shade or physically compete, seedlings can fail even if they germinate. For finicky or expensive seeds, start off-site in a controlled container to protect against algae, fish disturbance, and fluctuating water depth.
When should I start fertilizing aquatic seedlings after transplant?
After transplant, you generally want dilute feeding only once seedlings show active growth, not immediately. If you fertilize too early, algae can outcompete the seedlings. A safe approach is to start at quarter-strength aquatic fertilizer, then increase only if seedlings stay green and show new growth while algae remains controlled.
How should I harden off seedlings before moving them outdoors?
Hardening off is essential when moving from an indoor seed setup to an outdoor pond, but it does not mean “more sun immediately.” Increase outdoor exposure gradually over 7 to 14 days, starting with partial shade and short sessions, and ensure the pond water temperature is within a few degrees of the seed-start temperature before the final move. This reduces shock from light intensity, wind, and temperature swings.
How do I transplant aquatic seedlings into a hydroponic style setup without damaging them?
Yes, but the goal is to avoid burying or crushing the crown. In hydroponic or recirculating setups, use an inert support in a mesh pot so roots reach the water surface or nutrient zone while the crown stays above it initially. Let roots grow into the water rather than submerging the crown on day one, which can increase rot risk.