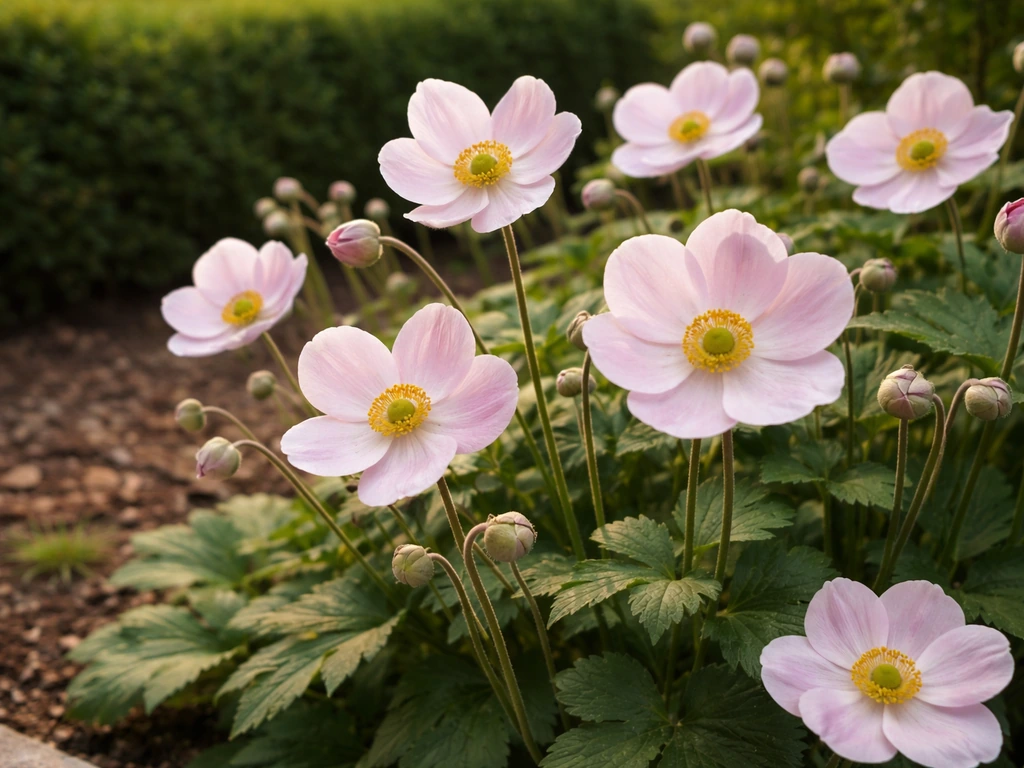
Japanese anemones are one of the most rewarding perennials you can grow, but they do have a handful of non-negotiable requirements. Get the site conditions right, plant at the right time, and keep them consistently watered through that first season, and they will reward you with clouds of pink or white flowers every autumn for years. Skip any of those steps and you will likely spend two seasons wondering why nothing is happening. This guide walks you through every stage, from choosing your spot to winter cleanup, so you can skip the trial-and-error phase entirely.
How to Grow Japanese Anemones: Step by Step Care Guide

Marcus Holloway
10 Apr 2026
What Japanese anemones actually need to thrive
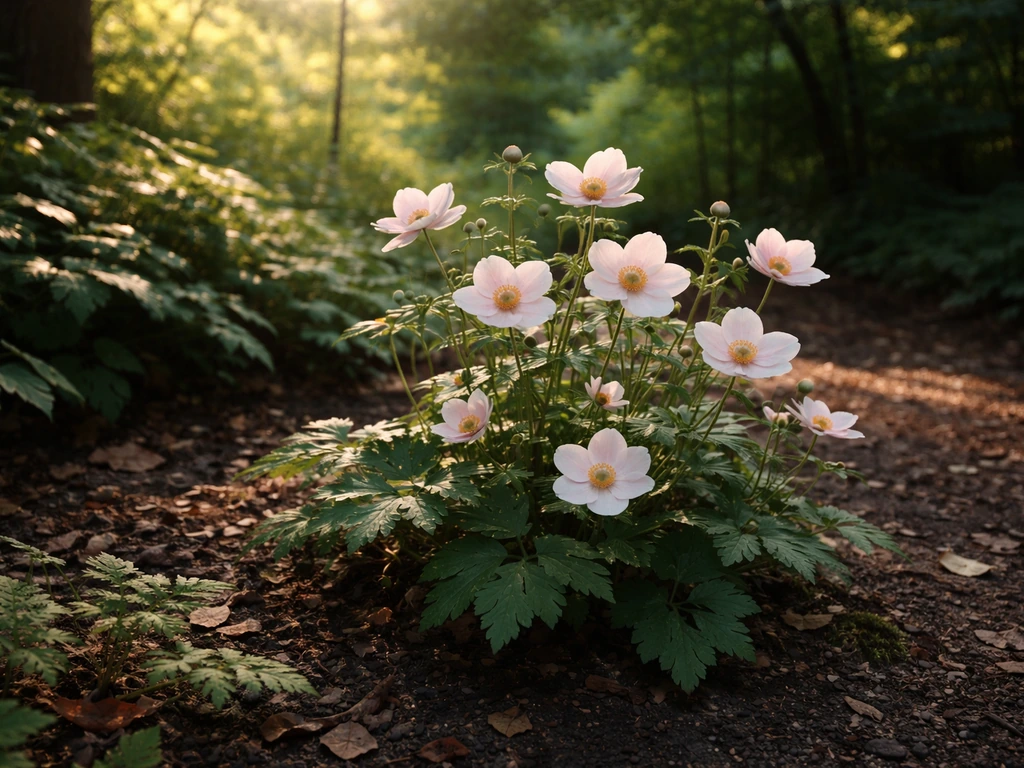
Before you dig a single hole, it is worth understanding what this plant is asking for. Japanese anemones are woodland-edge plants by nature, and their preferences reflect that origin. They want dappled or partial shade, consistent moisture without waterlogging, and rich soil. Most cultivars are hardy through USDA Zones 4 to 7, so if you are in a hot Zone 8 or above, you will need to manage afternoon shade carefully or you will end up with scorched, stressed plants that barely bloom.
Light is probably the most misunderstood factor. Full sun is fine in cooler climates, but in areas with hot summers, Japanese anemones need protection from the harsh afternoon rays. Morning sun with afternoon shade is the sweet spot in warmer regions. Too much shade, on the other hand, and you get lush foliage but weak flowering.
Soil matters just as much. The target is moist, well-drained, humus-rich, and fertile. They will tolerate clay soil if drainage is genuinely good, but what they absolutely cannot handle is sitting in waterlogged ground over winter. That is the fastest way to lose a plant. Amend your soil generously with compost before planting, especially if you are working with heavy clay or very sandy ground.
| Condition | What Japanese Anemones Need | What to Avoid |
|---|---|---|
| Light | Part shade to full sun (cooler climates) | Hot afternoon sun in warm-summer areas |
| Soil type | Humus-rich, fertile, well-drained | Waterlogged or very compacted soil |
| Moisture | Consistently moist, especially in Year 1 | Drought stress or excessive winter wet |
| Climate | USDA Zones 4 to 7 (most cultivars) | Extreme heat without shade protection |
| Soil drainage | Good drainage essential year-round | Boggy or pooling winter conditions |
Picking your planting material and getting the timing right
You have three practical options for getting Japanese anemones into your garden: potted nursery plants, bare-root or plug plants, or divisions from an established clump. Each has its own timing logic.
Potted plants from a nursery are the simplest starting point. You can plant them out in spring or early autumn, but spring planting is the better call. Because Japanese anemones bloom in autumn, giving them a full growing season to settle in first means you are much more likely to get flowers that same year or the next. A plant stuck in the ground in September has almost no time to establish before dormancy kicks in.
Bare-root or plug plants need a different approach. Do not rush these straight into the border. Pot them up first, keep them somewhere sheltered, and grow them on until they are a decent size with a healthy root system. Only then should you move them to their permanent spot. This is genuinely the easiest way to establish a new plant without the heartbreak of watching a small, struggling plug fail over winter.
Division is the most economical method if you or a neighbor already has an established clump. Japanese anemones spread via stolons and rhizome-like growth once settled, so dividing is straightforward. Early spring is the preferred time, right as new growth emerges from the ground. You can also divide in autumn, but replant immediately either way and water in thoroughly. One important caveat: Japanese anemones genuinely dislike being moved around. Once you find their permanent home, commit to it. Every time you shift them, you are resetting the establishment clock.
How to plant them properly
Site preparation
Dig the planting area thoroughly and work in a generous amount of garden compost or well-rotted organic matter. If your soil drains poorly, consider raising the bed slightly or adding grit to improve drainage at the root zone. The goal is soil that holds moisture but never stays soggy. On the flip side, if your soil is very free-draining and sandy, the extra organic matter will help it retain moisture for longer between waterings.
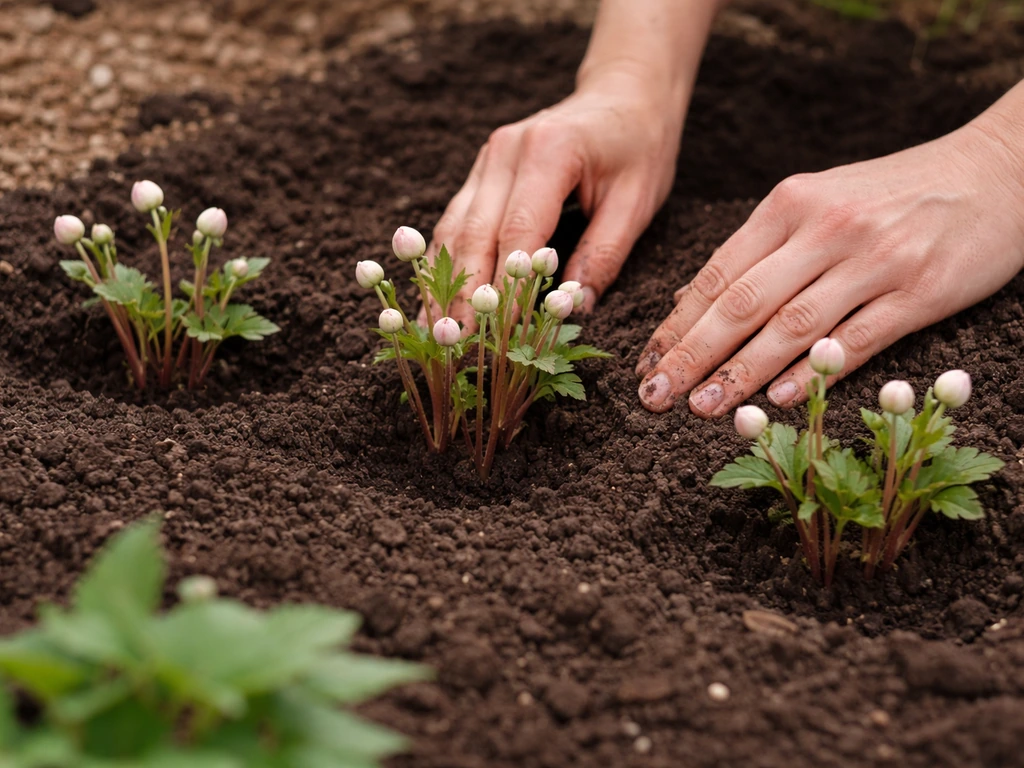
Spacing and planting depth
Japanese anemones spread over time, so give them room. Space plants roughly 45 to 60 cm (18 to 24 inches) apart. Plant at the same depth they were growing in their container, backfill, and firm the soil gently around the root zone. There is no need to go deep here. Once planted, water in well and do not let the soil dry out for the rest of that first season.
Initial care after planting
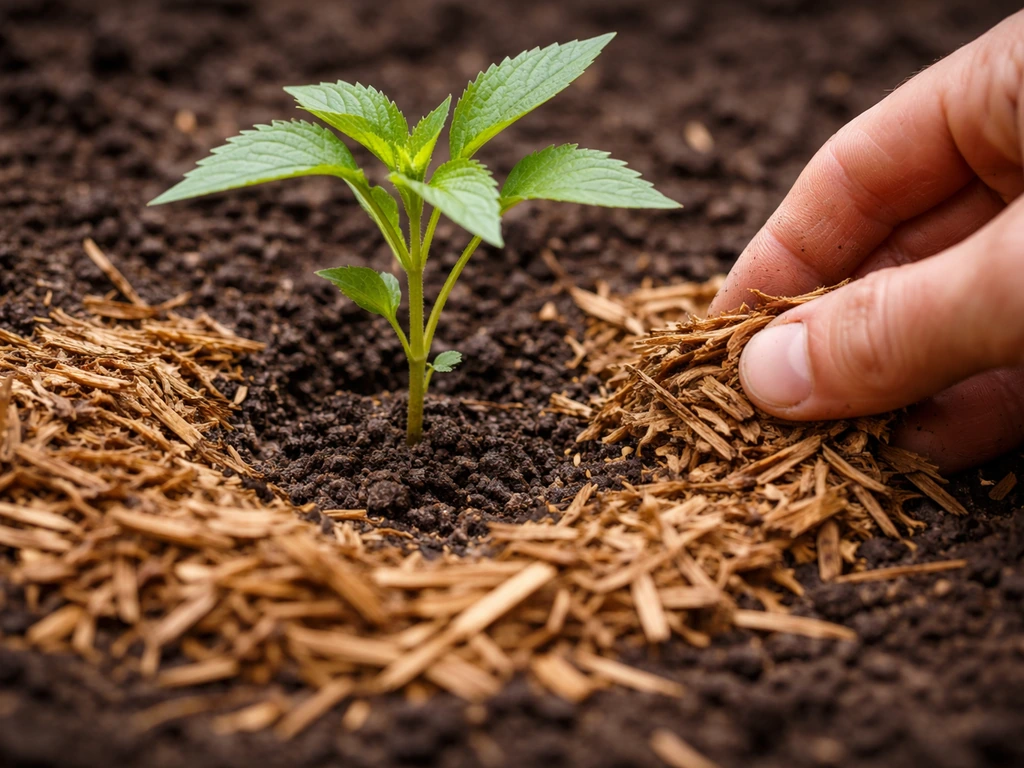
Apply a layer of organic mulch around the base of the plant straight after planting. Keep it a few centimetres away from the crown to avoid rot. This mulch layer does two important jobs in year one: it helps retain moisture (critical for establishment) and suppresses weeds while the plant is still small and vulnerable. Then just keep the soil consistently moist and be patient. First-year blooms may be minimal or even absent. That is completely normal. The plant is investing in roots, not flowers.
Watering, feeding, mulching, and general upkeep
Watering is the single most important thing you can do in year one. Japanese anemones need consistent moisture through at least the first full summer after planting. Once established, they are more drought tolerant, but during that initial period, letting the soil dry out significantly is the most common reason plants fail to bloom reliably the following season. I have made this mistake myself, letting a newly planted clump go too dry during a hot August, and the plant sulked for the rest of the year and barely flowered.
Feeding does not need to be complicated. The main focus is an annual application of organic matter, such as garden compost, applied as a mulch over the soil each spring. This feeds the plant slowly and improves soil structure at the same time. You do not need to pile on granular fertilizer. If your soil is genuinely poor, a balanced slow-release feed in spring will help, but most established Japanese anemones in reasonably good soil are happy with just the spring compost mulch and nothing else.
Mulching deserves a dedicated mention because it does several jobs at once. A thin, even layer of organic mulch applied each spring retains soil moisture, feeds the soil as it breaks down, suppresses weeds, and in colder climates, provides a degree of insulation for the root zone. In areas with severe winters, add a heavier mulch layer in autumn as well. Keep the mulch layer consistent but not excessive, and always keep it away from direct contact with the plant crown.
Weed control in the early months is mostly about staying on top of things while the plant is establishing. Once Japanese anemones are well settled, they spread readily and can actually crowd out weeds themselves. But in year one, a clean, mulched bed is your best tool.
Deadheading during the flowering season can extend and boost flowering, so it is worth doing if you want the longest possible display. However, resist the urge to cut everything back hard in autumn. Leaving the old stems and faded foliage standing over winter provides valuable shelter for insects and other small creatures. It is a small thing, but it matters for garden ecology.
Season-by-season care calendar
Spring
Japanese anemones die back in winter and re-sprout in late spring, so do not panic when nothing appears in early spring. Once you see new growth emerging, snip out any dead foliage and old flower stems right at the base. This clean-up removes any potential disease material and lets the new growth come through unobstructed. Follow up immediately with your annual application of organic compost mulch over the surrounding soil. If you are planning to divide plants, this is the best window to do it.
Summer
Summer is mostly about keeping plants well watered, especially in the first year, and staying on top of weeds. Established plants will grow steadily and start setting up their flowering buds. In hot-summer regions, make sure afternoon shade is doing its job. If the foliage starts to look stressed or bleached, that is usually a sign of too much direct sun or moisture stress. Taller cultivars may need light staking if they are in an exposed spot, though many varieties are sturdy enough to stand on their own.
Autumn
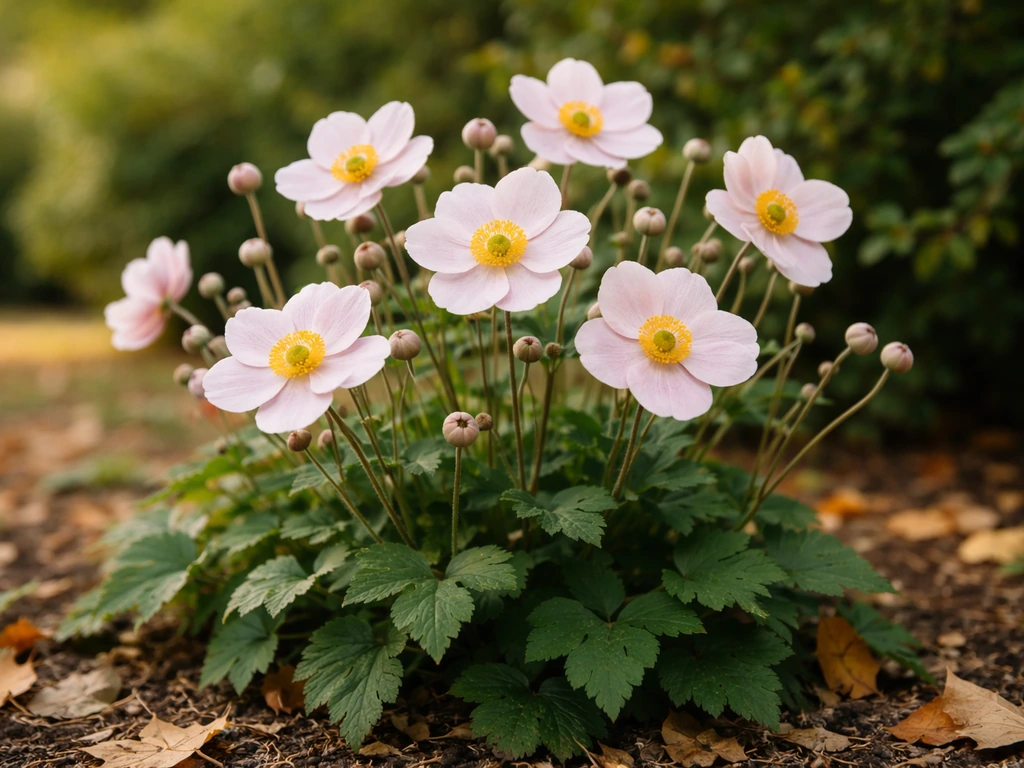
This is the payoff. Japanese anemones bloom from late summer into autumn, and a well-established plant in good conditions is genuinely spectacular. Deadhead regularly during the blooming period to keep flowers coming. When flowering winds down, leave the remaining stems and foliage in place rather than cutting everything to the ground. This standing structure provides winter habitat and also marks where the plant is, which prevents you accidentally digging through it in spring. In colder climates (Zone 4 or 5), apply a heavier mulch layer around the root zone before the first hard frost.
Winter
The main concern in winter is drainage. Excessive winter wet is one of the two biggest risks to Japanese anemones (the other being relocation). If your site tends to pool water in winter, consider improving drainage before planting, because this is much harder to fix after the fact. The plants are dormant and do not need attention beyond making sure the mulch layer is intact, especially in colder zones. Avoid the temptation to tidy up the dead stems until early spring.
Pests, diseases, and fixing common problems
Japanese anemones are not particularly troubled by pests, but there are a few things worth knowing about.
Slugs and snails
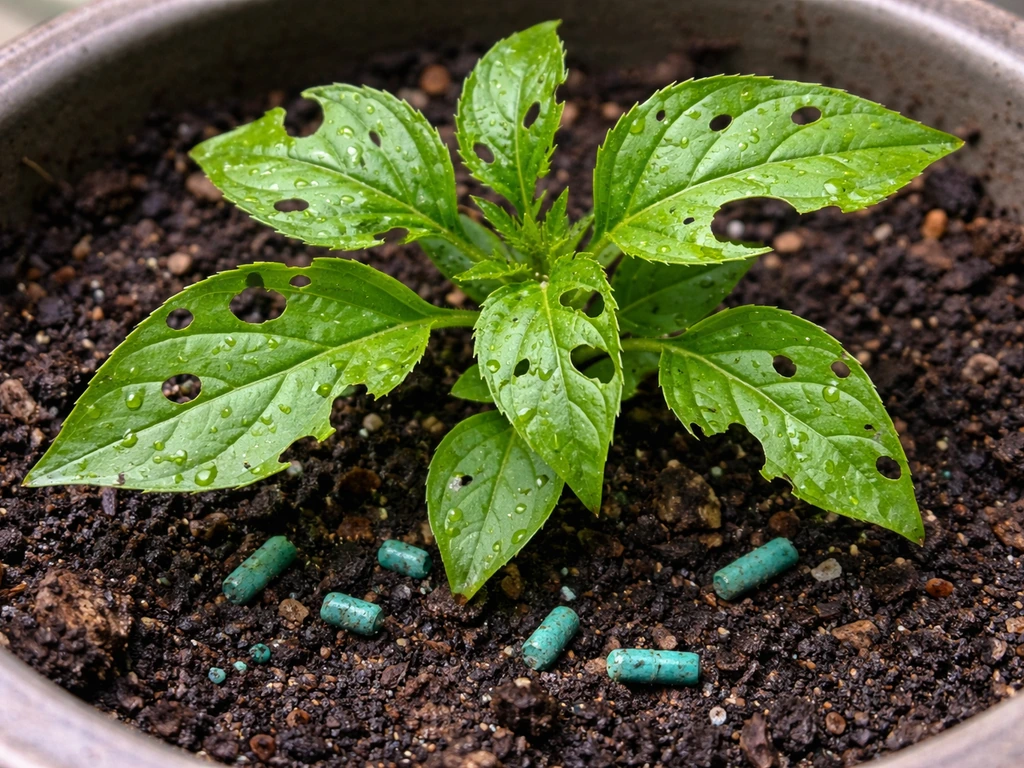
Young growth emerging in spring is the most vulnerable period. Slugs and snails can shred newly sprouting leaves overnight. Iron phosphate-based products like Sluggo are effective and considered safer around wildlife and pets than older metaldehyde baits. Sodium ferric EDTA products are another option. Scatter bait around the base of plants as soon as you see new growth appearing. There is also ongoing research into pathogenic nematodes as a biological control for slugs, though this approach is still developing in terms of availability and consistent results.
Powdery mildew
Powdery mildew shows up as a white, dusty coating on leaves, usually in late summer. It is more of a cosmetic issue than a fatal one, but it can weaken the plant if severe. The key is to catch it early. Once it is widespread, control is much harder. Good air circulation around plants helps prevent it from taking hold. If you do need to treat, sulfur-based fungicides or oil-based sprays (such as neem oil) are the standard approach, applied as soon as you spot the first signs.
Root, crown, and stem rots
Crown rot is the disease most likely to kill a Japanese anemone outright. It is caused by fungal pathogens including Fusarium, Pythium, Phytophthora, and Rhizoctonia, and all of them thrive in wet conditions. If you notice wilting, dieback, or a plant that simply collapses despite adequate watering, crown rot is the likely culprit. The best prevention is excellent drainage. If a plant is affected, remove it, including surrounding soil, and do not replant the same species in that spot. There is no reliable cure once a plant is badly infected.
Common growth problems and quick fixes
- No flowers in year one: Almost always normal. Japanese anemones invest in root growth first and typically establish and flower reliably over a couple of years. Keep watering and be patient.
- Wilting despite moist soil: Check for crown rot. Inspect the base of the plant for soft, discolored tissue. Improve drainage as a first step.
- Sparse, weak growth: Usually caused by too much shade, poor soil, or drought stress. Reassess the site conditions and amend soil if needed.
- Leaves scorched or bleached: Too much direct sun, especially afternoon sun in warm climates. Add shade or relocate in spring if truly necessary (remembering they dislike being moved).
- Plant not spreading or establishing: Sometimes caused by planting bare-root material too early without potting up first, or planting in autumn without enough lead time before dormancy.
Your simple success checklist and next steps
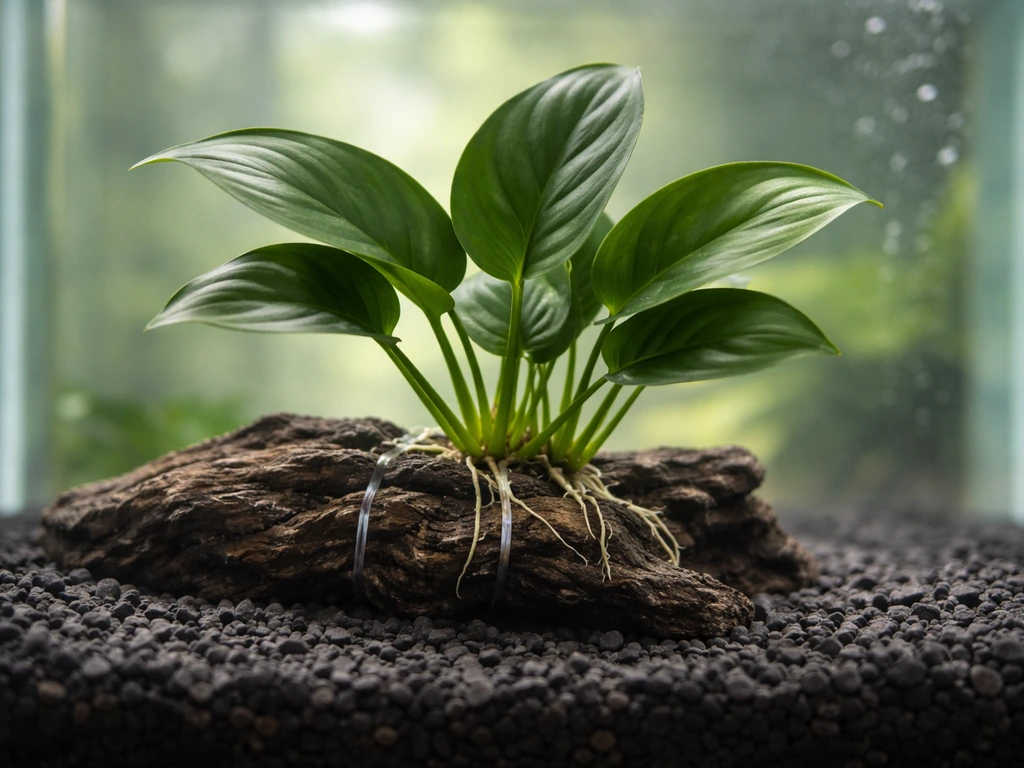
Japanese anemones take a season or two to hit their stride, but once they are established, they are genuinely low-maintenance and spectacular in autumn. The principles here are not complicated, but they do need to be followed consistently, especially in year one. If you are also growing other plants in your water garden or aquatic setup, it is worth knowing that the same patience-and-conditions logic applies to aquatic species too. For example, how to grow anubias follows a similar pattern of getting the environment right first and then waiting for the plant to settle before expecting strong growth.
- Choose a site with part shade to morning sun, especially in warm-summer areas
- Amend soil with generous organic matter before planting to achieve moist, well-drained, humus-rich conditions
- Plant potted specimens in spring to give roots a full season to establish before autumn flowering
- If using plug or bare-root plants, pot up and grow on first rather than planting direct into the border
- Space plants 45 to 60 cm apart and plant at the same depth as the container
- Mulch immediately after planting with a thin layer of compost, keeping it away from the crown
- Water consistently through the entire first summer without letting the soil dry out significantly
- Apply a fresh layer of organic compost mulch every spring as the primary feeding method
- Deadhead during the flowering season to extend and boost the display
- Leave old stems standing over winter for wildlife shelter, then cut back to the base in early spring
- In colder climates (Zones 4 to 5), apply a heavier mulch layer before first frost
- Ensure drainage is excellent year-round, especially in winter, to prevent crown rot
- Do not move or divide plants unnecessarily, as they strongly dislike relocation
One honest note on expectations: do not judge your Japanese anemones by their first-year performance. A plant that produces almost nothing in its first season but has been kept well-watered, mulched, and in good conditions is not failing. It is building the root system that will carry it for a decade or more. If you want to apply similar disciplined cultivation habits to microalgae, see our guide on how to grow nannochloropsis. The real test is season two onward, and by that point a well-established clump is one of the most satisfying plants in the autumn garden.
If you enjoy growing ornamental plants alongside aquatic species, it is also worth exploring how similar care discipline translates underwater. The patience required to establish Japanese anemones is not unlike what you need when learning how to grow anubias fast in an aquarium setting, where rushing the process almost always backfires.
For those curious about actual aquatic anemone species, the growing requirements are entirely different from their terrestrial namesakes. If you want to understand those differences, a good starting point is reading about how to grow sea anemone in a reef tank environment, which covers the marine-specific parameters that apply there.
Saltwater reef growers who keep coral alongside anemones may also find it useful to look at how to grow acropora fast, since SPS coral and anemones share some overlapping water quality requirements in a reef setup. And if you are managing nuisance species in your tank, understanding how to grow aiptasia actually helps you recognize and remove it before it becomes a problem. For aquaculture producers interested in cultivating phytoplankton alongside their aquatic gardens, the guide on how to grow nannochloropsis covers that microalgae species in practical detail.
FAQ
How do I know if my Japanese anemones are getting too much sun or too little?
Check the balance. If leaves look scorched, bleached, or the plant wilts during hot afternoons, it is usually too much direct sun or not enough consistent moisture. If you get thick foliage but few buds, especially in autumn, the site is often too shady. Aim for morning sun with afternoon shade in warm climates, and avoid deep, continuous shade.
My Japanese anemones are not blooming. What are the most common reasons?
The top causes are insufficient establishment time, inconsistent watering in year one, and a site that is either too sunny (in hot regions) or too shady. Also confirm you are not planting too late, because a September planting often cannot settle before dormancy. Finally, too much nitrogen from heavy feeding can increase leaves but reduce flowering.
Can I grow Japanese anemones in containers?
Yes, but choose a large pot with excellent drainage, because waterlogging is the quickest way to fail. Use a humus-rich potting mix and keep moisture steady through the first summer. For winter, protect the roots from prolonged saturation, while still leaving the plant dormant, by keeping the pot from standing in rainwater.
How often should I water Japanese anemones in the first season?
Water deeply often enough to keep the root zone consistently moist, not soggy. In hot weather, that can mean checking every few days rather than watering on a fixed schedule. The simple test is the top few centimeters of soil, if it dries out significantly, the plant is likely not getting the consistent moisture it needs for reliable next-year buds.
What mulch is best, and how thick should it be?
Organic mulch works best, such as composted leaf mold or fine bark, but avoid materials that mat down and trap excess moisture. Apply a moderate layer in spring, and if winters are harsh add extra in autumn. Keep the mulch a few centimeters away from the crown so it does not rot.
Should I cut Japanese anemones back after blooming in fall?
It is better to leave the stems and foliage in place through winter. They help mark the plant location, provide shelter for small beneficial insects, and reduce the risk of damaging new growth later. Do your spring cleanup by trimming dead material at the base once you see new shoots emerging.
Is it a problem if my plant looks dead in early spring?
Not necessarily. Japanese anemones re-sprout late spring, so bare ground is common. Only start removing dead foliage after you confirm new growth is emerging, then cut the dead material right at the base.
My plant collapsed suddenly. How can I tell if it is crown rot?
Crown rot often looks like dieback or total collapse even though the soil was watered correctly, and it is strongly linked to winter wet or persistently soggy conditions. If you suspect it, remove the entire plant and discard surrounding soil if possible, and do not replant Japanese anemones in that spot right away.
Can I divide or transplant Japanese anemones if I already established them?
You can divide early spring when new shoots appear, but expect some stress. Transplanting is more damaging than dividing in place, because they dislike frequent relocation. If you must move them, do it during the preferred window and keep watering consistent afterward, but plan to avoid repeated moves.
What should I do about slugs and snails on new growth?
Start monitoring when shoots emerge, because feeding damage can happen overnight. Iron phosphate baits work well when applied around the base at first sign of activity. Place bait where it targets the plants and avoid piling mulch directly against the crown, which can create hiding spots.
Can powdery mildew spread and kill Japanese anemones?
It is usually more of a cosmetic weakening issue than a quick killer, but severe outbreaks can reduce vigor and flowering. Treat early, improve airflow by not overcrowding, and use an appropriate early intervention such as sulfur-based or oil-based options when the first dusting appears.
How do I improve drainage if my garden pools water in winter?
Fix drainage before planting. If the area stays wet or puddles, consider raising the bed and incorporating compost plus coarse amendments at the root zone. If you amend only the surface, the crown can still sit in winter water. In extreme wet sites, relocating to a naturally higher, well-drained area is the most reliable option.