Growing aquarium plants successfully comes down to getting three things right from the start: light, nutrients, and a substrate that actually supports roots. Get those three dialed in, match them to the right plant species for your experience level, and you will have a lush, healthy planted tank. Get them out of balance and you will deal with melting plants, algae explosions, and frustration. This guide walks you through every step, from choosing plants to propagating them outside the tank.
How to Grow Aquarium Plants: Step-by-Step Guide
Marcus Holloway
2 Apr 2026
Choosing the right plants for your tank
The single biggest mistake beginners make is buying plants that look beautiful at the store without checking whether those plants can actually survive in their tank conditions. Start with plants that forgive beginner mistakes and still look great.
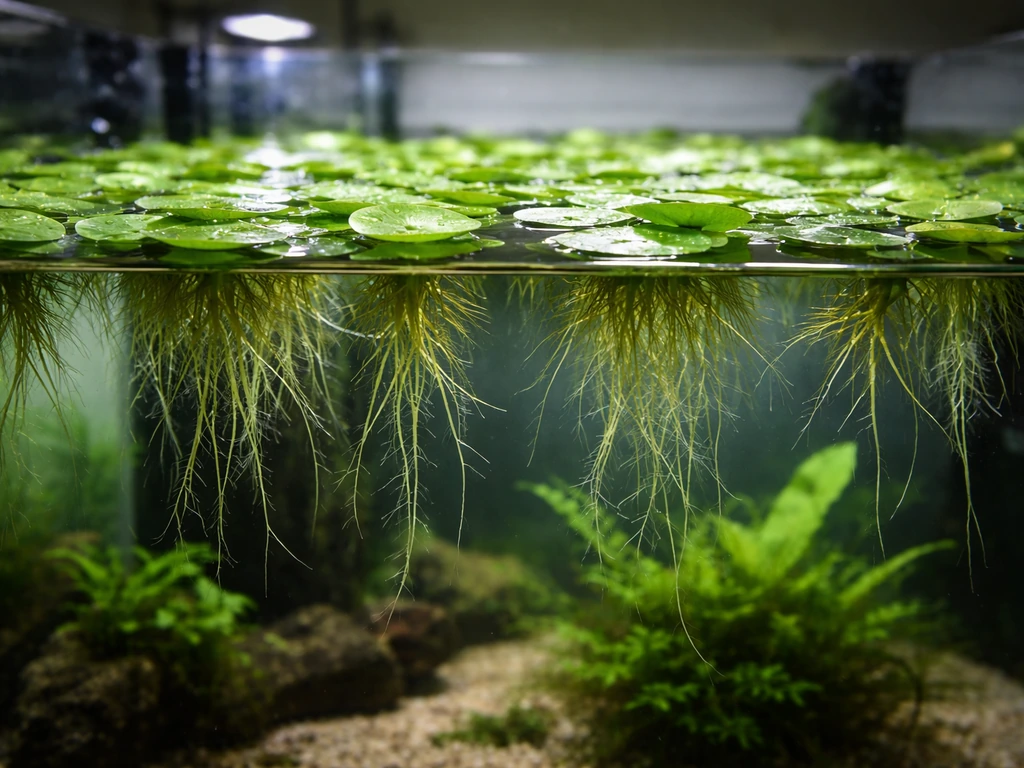
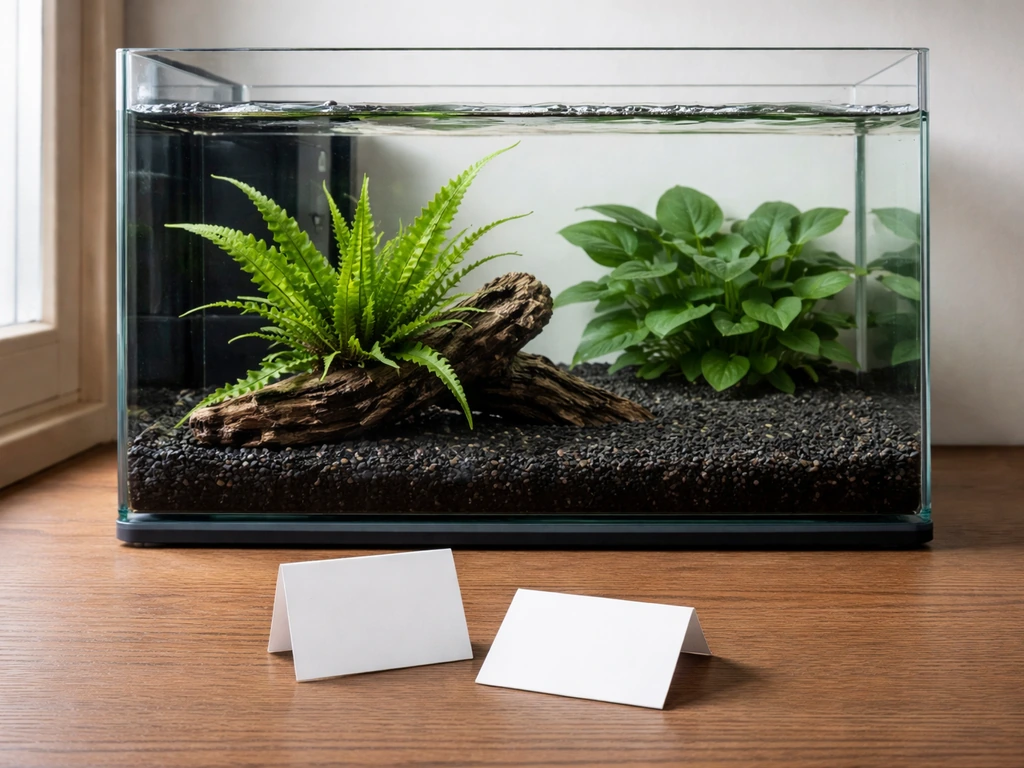
Java fern (Microsorum pteropus) is genuinely undemanding. It does not need extra nutrients or injected CO2, tolerates a wide pH range (roughly 6.0 to 9.0), and grows happily in lower light. Anubias is similarly forgiving, thriving at temperatures of about 22 to 28°C and water hardness of 2 to 6 dGH. Both are epiphytes, meaning they anchor to hardscape like rocks and driftwood rather than rooting into substrate, which makes them nearly impossible to mess up. Crypts, mosses, and most stem plants round out a solid beginner collection.
One critical rule for epiphytes: never bury the rhizome or crown in the substrate. Only the roots go in or near the substrate. Burying the rhizome causes rot and kills the plant within weeks. Tie or glue Java fern and Anubias to hardscape instead and let the roots drape naturally.
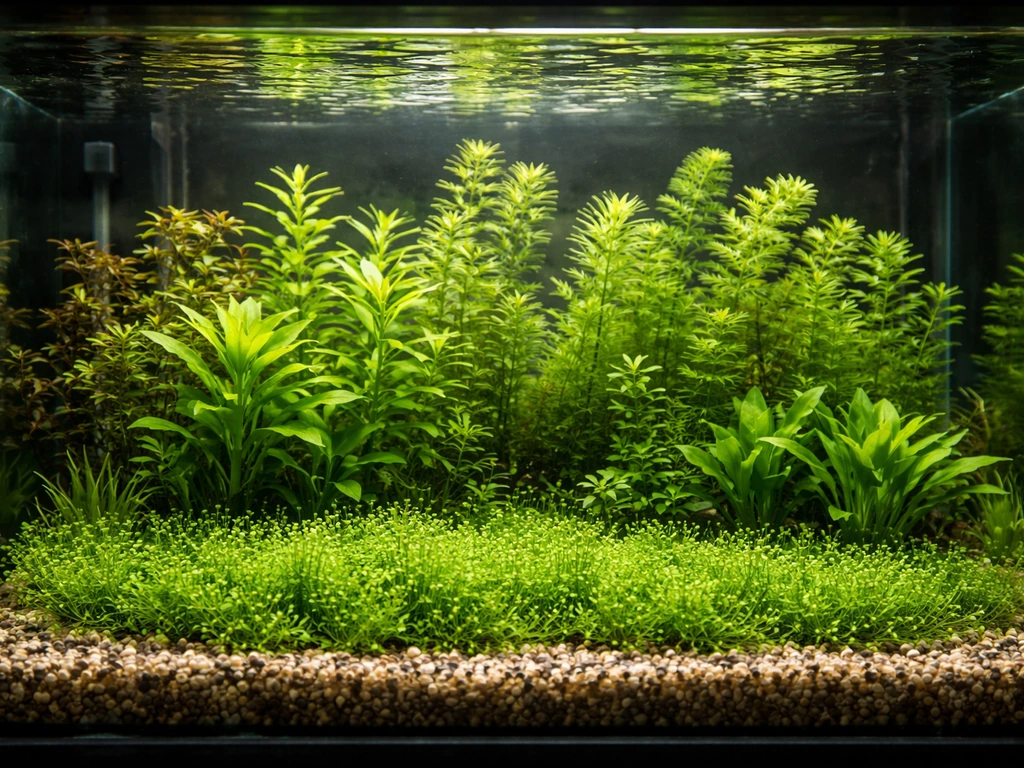
Once you have the basics down, you can explore more demanding categories. If you want a lush foreground, growing aquarium carpet plants is the logical next step, though they do require stronger light and often CO2. Midground and background columns are where stem plants shine, and if you want to fill in those zones fast, understanding how to grow stem plants in an aquarium will save you a lot of trial and error.
Tank setup and substrate for successful growth
Your substrate is essentially your plant's foundation. Get this wrong and even great lighting and fertilizers will not save you. There are two broad categories: active (nutrient-rich) substrates and inert substrates like gravel or plain sand.
Active plant substrates, like aquasoil products, absorb nutrients and make them available directly to roots. They also naturally lower carbonate hardness (KH) and stabilize pH toward the slightly acidic range that most stem plants and carpeting species prefer. This is a real advantage when you are starting fresh because you get root nutrition built in from day one. The tradeoff is cost and the fact that active substrates exhaust over time, typically after one to three years depending on the brand and tank stocking.
If you are using an inert substrate (gravel or coarse sand), you will need to supplement root nutrition from the start. Root fertilizer tabs or capsules inserted deep into the substrate directly at the base of your plants do the job well. A practical schedule is to refresh those tabs roughly every 6 to 12 months, depending on your plant mass and how aggressively you are growing. Dennerle-style fertilizer capsules pushed down to root depth work well for heavy root-feeders like swords and crypts.
For substrate depth, aim for at least 2 to 3 inches (5 to 7 cm) for rooting plants. A shallower layer will not give roots enough room to anchor and feed. For tanks that use a layered approach, a thin concentrated nutrient layer underneath a capping layer of inert substrate is a proven method that keeps the water column clean while still feeding roots.
Light, nutrients, and CO2: controlling the big 3
These three inputs drive plant growth. The key insight most beginners miss is that they have to be balanced with each other. More light without more CO2 and nutrients does not produce faster growth. It produces algae.
Getting lighting right
Think in PAR (photosynthetically active radiation) rather than watts, because watt ratings are meaningless across different fixture technologies. A good starting point for a planted tank with moderate demands is 40 to 60 PAR at substrate level. Carpeting species specifically need PAR above about 50 µmol/m²/s at the substrate to grow in properly. Low-light plants like Anubias and Java fern are fine with 20 to 30 PAR.
Run your photoperiod for 8 to 10 hours per day. If you are battling algae, try a split photoperiod (sometimes called a siesta), where you run lights for a few hours in the morning, turn them off midday, then run them again in the afternoon. This approach can reduce algae pressure while CO2 levels stabilize across the day, and it is especially useful in the first weeks of a new tank when the system is not yet balanced.
CO2: when you need it and how to dose it
Low-tech tanks with low-light plants like Java fern can skip CO2 injection entirely. But if you want faster growth, carpeting plants, or demanding species, injected CO2 is a game changer. The target range to aim for is 15 to 35 mg/L dissolved CO2 in the water. Going above 35 mg/L risks stressing fish.
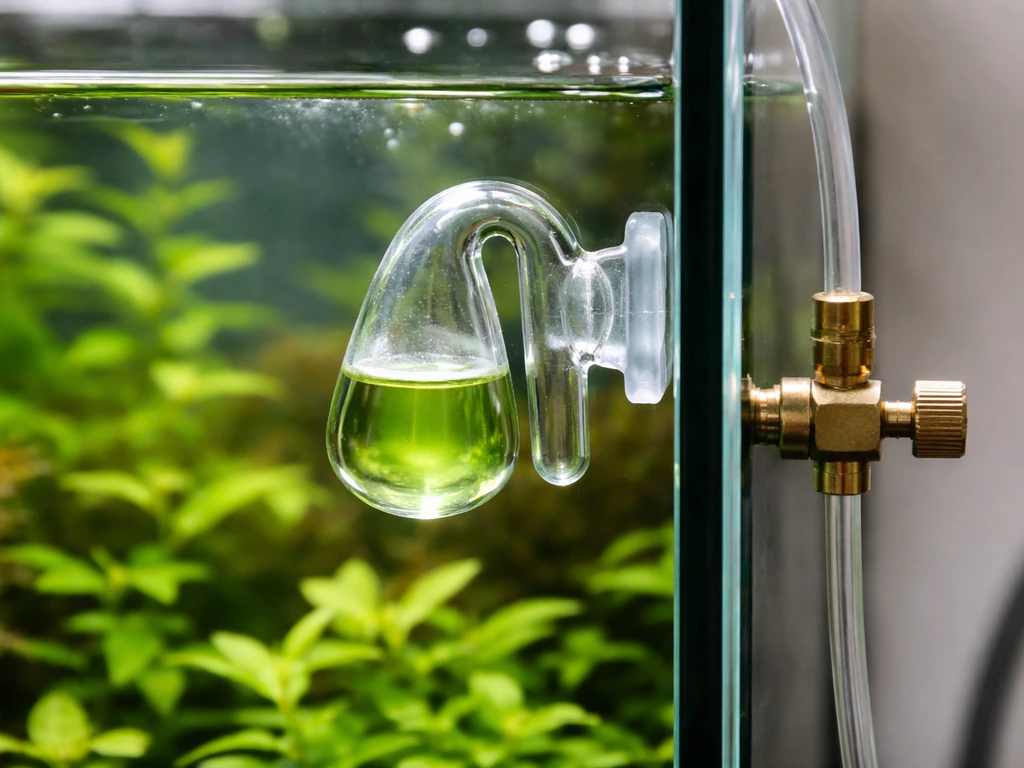
A drop checker is the most practical way to monitor CO2 without constant testing. Use one filled with a standard 4 dKH reference solution. When the indicator fluid turns green, you are in the sweet spot of roughly 30 ppm dissolved CO2. Yellow means too much; blue means too little. The advantage of a drop checker is that it exchanges CO2 through a gas interface rather than direct contact with tank water, which means aquarium by-products do not skew your readings and you get consistent, reliable feedback.
A useful calibration method ties your CO2 tuning to pH: measure your tank's degassed pH (a sample left out overnight), compare it to the in-tank pH, and use the known relationship between pH, KH, and CO2 to estimate your dissolved CO2 concentration. This is sometimes called the relative pH drop method and gives you a second data point beyond the drop checker alone.
Start CO2 injection from day one on a new planted tank. Waiting until plants are established invites algae because your plants are already demanding carbon they cannot get. Tropica's recommendation backs this up: get CO2 going at setup, not as an afterthought.
Fertilizers and nutrient dosing
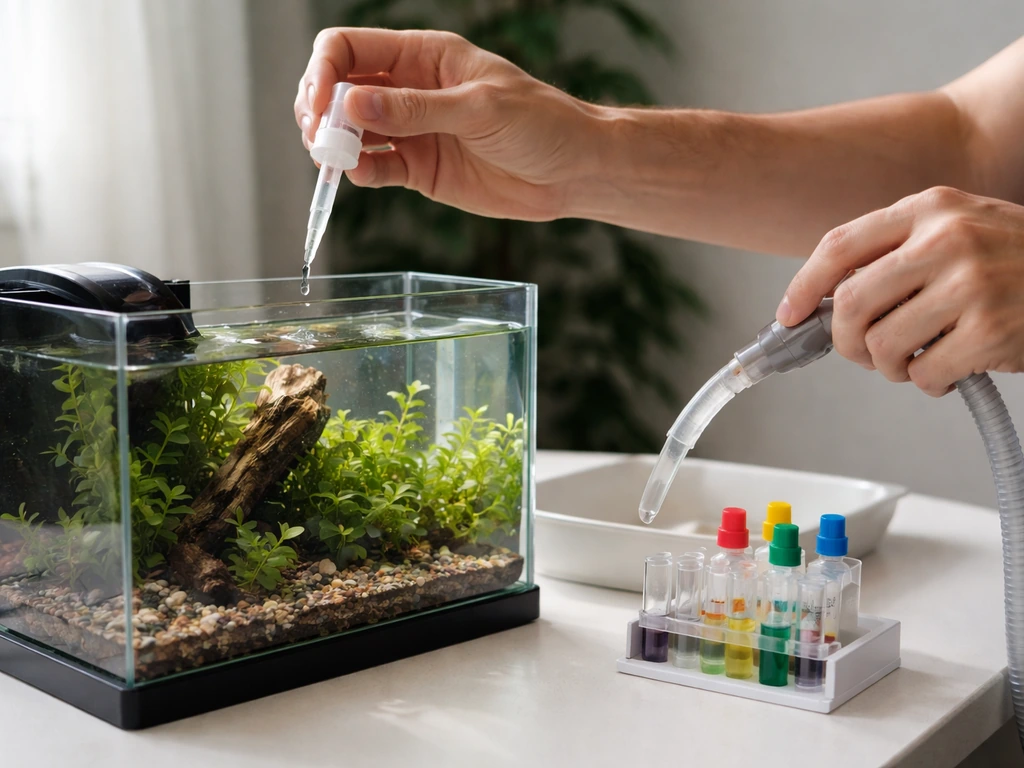
Plants need macronutrients (nitrogen, phosphorus, potassium) and micronutrients (iron and trace elements). A practical target for nitrate in the water column is 10 to 20 mg/L for plant maintenance. Dropping below that range leads to nitrogen deficiency, which triggers yellowing leaves and can actually increase algae risk because imbalanced nutrients (phosphate and potassium build up when nitrogen is absent) destabilize the system.
For iron, maintain a concentration of roughly 0.05 to 0.2 mg/L. One caveat: many test kits read lower than the actual iron level in your tank, so if your plants are showing deficiency signs (yellowing new growth) but your test reads fine, consider dosing slightly more than the test suggests.
There are two main dosing philosophies to choose from. The Estimative Index (EI) method doses to non-limiting concentrations, meaning you deliberately overshoot slightly to ensure no single nutrient becomes the bottleneck that causes deficiencies and algae. You reset weekly with a 50% water change. EI works well for high-light CO2-injected tanks. PPS-Pro, by contrast, doses precisely to what plants are actually consuming each day, keeping water column nutrients lean. Both approaches work. EI is more forgiving for beginners because it removes the guesswork of hitting exact targets.
A simpler approach for beginners: use an all-in-one liquid fertilizer and monitor nitrate with a test kit. Dose according to the product directions, test nitrate weekly, and aim to keep it in the 10 to 25 ppm range. If nitrate climbs above 25 to 50 ppm, do a water change to bring it down before dosing again. Adjust your dose frequency up or down as your plant and fish biomass changes.
Water parameters and filtration that keep plants healthy
Most freshwater aquarium plants are flexible, but they do have a comfort zone. For a planted tank that covers the widest range of species, target the following parameters.
| Parameter | Target Range | Notes |
|---|---|---|
| Temperature | 22 to 26°C (72 to 79°F) | Most species thrive here; crypts and Anubias tolerate slightly wider range |
| pH | 6.5 to 7.5 | Slightly acidic favors nutrient availability and CO2 dissolution |
| KH (carbonate hardness) | 3 to 8 dKH | Needed for CO2 stability; active substrates naturally lower KH |
| GH (general hardness) | 4 to 12 dGH | Provides calcium and magnesium for plant cell function |
| Nitrate | 10 to 20 mg/L | Below 5 ppm causes nitrogen deficiency |
| Iron | 0.05 to 0.2 mg/L | Supports chlorophyll and new growth |
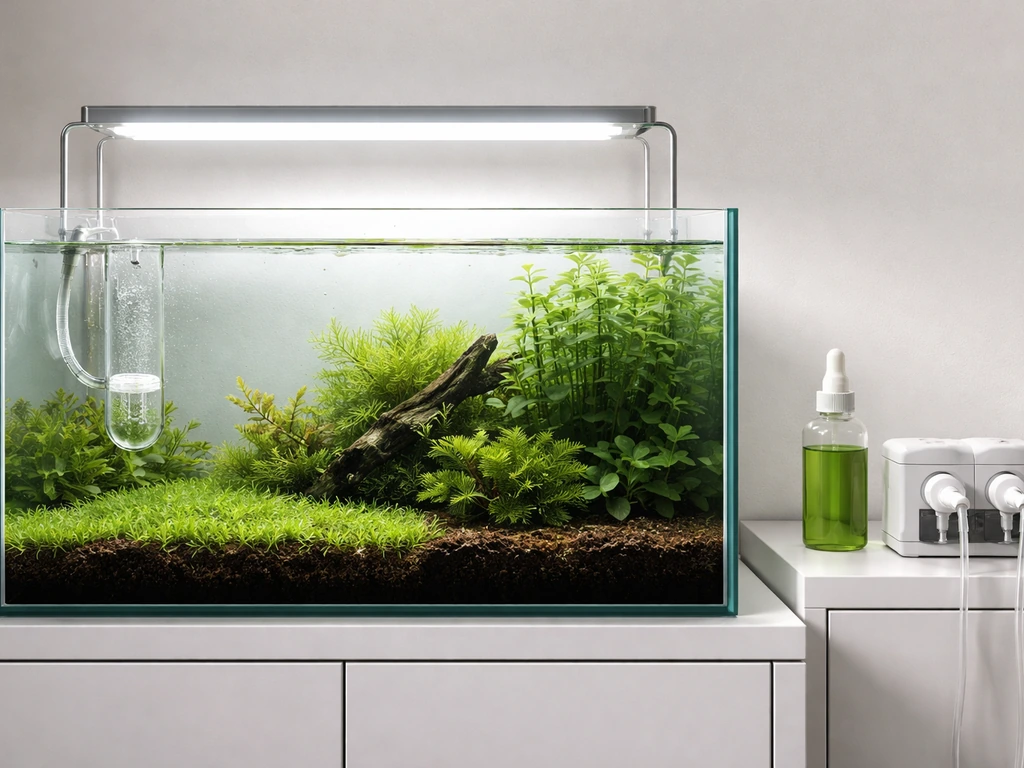
Filtration matters more than most beginners realize. A good filter provides surface agitation for gas exchange, keeps water moving through plants (delivering CO2 and nutrients to leaves), and removes particulates that cloud the water and block light. For planted tanks, avoid excessive surface agitation that off-gasses your injected CO2 faster than you can replace it. A spray bar pointed just below the surface or along the back wall keeps circulation strong without churning the surface.
Canister filters are the standard recommendation for planted tanks because they offer high flow rates, flexible outlet options, and minimal surface disturbance. HOB (hang-on-back) filters work fine for smaller or lower-tech setups. Filter media should include mechanical filtration (sponge or foam) and biological media. Skip chemical media like activated carbon in planted tanks because it can strip out iron and trace nutrients you are working to maintain.
Planting, dosing, and maintenance: a step-by-step routine
Here is the practical setup and ongoing maintenance routine that actually produces results. Follow this sequence for a new tank and adapt it as your tank matures.
- Fill and cycle your tank before adding plants if possible, or use a plant-forward approach where plants help establish the cycle. Add substrate, hardscape, and fill with dechlorinated water.
- Plant stem plants and rooted species first by pushing stems 2 to 3 cm into substrate. Attach epiphytes (Java fern, Anubias, mosses) to hardscape with thread or gel super glue. For carpeting plants, push small portions into substrate in a grid pattern about 2 to 3 cm apart.
- Start CO2 injection on day one if you are using it. Set the drop checker and adjust flow over the first several days until the indicator reads green during the second half of your photoperiod.
- Begin fertilizing at startup. Use a root tab in the substrate near heavy root-feeders. Start water column dosing at half the recommended dose for the first two weeks while plants are establishing.
- For the first 3 to 4 weeks, do water changes of 25 to 50% two to three times per week. This clears out excess organics, stabilizes parameters, and prevents algae from getting a foothold while plants are still transitioning.
- After week 4, shift to a standard maintenance schedule: one 30 to 50% weekly water change, weekly nutrient dose, and monthly root tab refresh check (replace tabs every 6 to 12 months depending on brand).
- Test nitrate weekly at first. Adjust fertilizer dose up if nitrate stays below 10 ppm and plants show slow growth; adjust down or increase water change frequency if nitrate climbs above 25 to 50 ppm.
- Trim stem plants when they reach the surface by cutting the top 10 to 15 cm and replanting the cuttings. Remove any yellowing or rotting leaves promptly to prevent nutrient leaching and bacterial issues.
Troubleshooting melting, algae, and slow growth
Most problems with aquarium plants trace back to an imbalance in the big 3: light, CO2, or nutrients. Here is how to diagnose and fix the most common issues.
Plant melting
If you buy plants from a local fish store and they start dissolving within a week or two, do not panic. Most commercially sold plants are grown emersed (above water) in nursery conditions. When you place them underwater, they have to shed their terrestrial leaves and grow new submerged leaves adapted to pulling CO2 and nutrients from water. This transition process looks like melting but is actually normal. Trim the melting tissue, keep your parameters stable, and wait. New submerged growth will emerge from the crown or rhizome within two to four weeks. If growing natural plants in your aquarium straight from wild or nursery stock, this transition phase is almost guaranteed.
One way to skip the melting phase entirely is to buy tissue culture plants. These are grown fully submerged in sterile lab conditions and arrive already in their aquatic form. They still need time to establish, but the dramatic melt-off does not happen. If you want to understand the advantages and quirks of that approach, learning how to grow tissue culture aquarium plants is worth your time.
Algae outbreaks
Algae does not appear because you have too many nutrients. It appears because your nutrients are out of balance relative to your light and CO2. The most common culprits are: too much light without enough CO2 or plant mass to consume it; inconsistent CO2 (fish get stressed when CO2 spikes; plants get out-competed when it drops); and nitrogen deficiency causing phosphate to build up and feed algae. Fix the imbalance rather than trying to starve the tank.
- Green spot algae on glass and slow-growing leaves: usually a phosphate or CO2 deficiency. Increase CO2 slightly and check your phosphate levels.
- Green water (cloudy green bloom): almost always caused by excess light hitting a tank with insufficient plant mass. Reduce photoperiod and do large water changes.
- Black beard algae (BBA): a classic sign of CO2 fluctuations. Make sure your CO2 is running consistently throughout the photoperiod and not spiking or crashing.
- Hair algae: typically caused by high light and insufficient nutrients (especially CO2 or nitrogen). Increase fertilization and CO2 together.
- Brown diatoms in new tanks: normal in the first few weeks while the tank cycles. They self-resolve as the tank matures and plant mass increases.
Slow growth and deficiency signs
Slow growth usually means insufficient light, low CO2, or a specific nutrient deficiency. Yellowing old leaves with healthy new growth points to nitrogen deficiency (mobile nutrient moving from old to new growth). Yellowing new leaves with green older leaves suggests iron or micronutrient deficiency (immobile nutrients cannot move to new tissue). Holes in leaves or curling edges often indicate calcium or potassium issues. Use these visual cues to guide targeted dosing rather than throwing everything at the problem at once.
Growing plants out of the tank: emergent growth and the dry start method
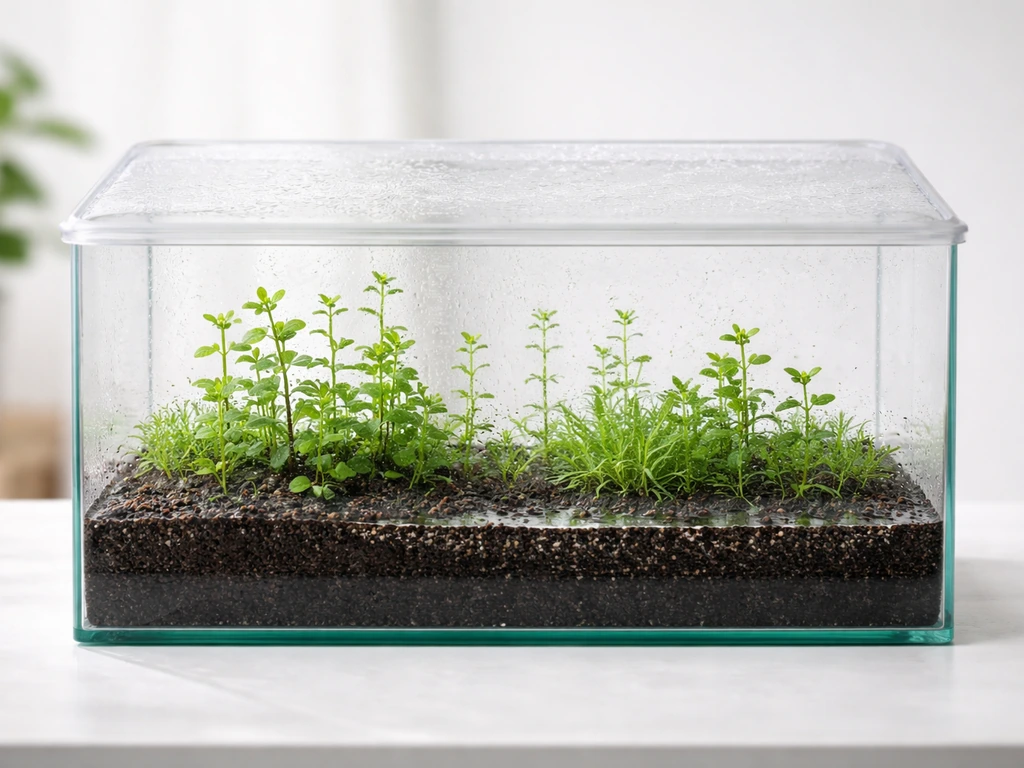
Not all aquarium plants have to be grown underwater all the time. Many species grow beautifully in an emergent form (leaves and stems above the waterline) and can actually be easier to establish this way. The dry start method (DSM) takes this further by setting up your entire planted tank without any water initially, then flooding it once the plants are established.
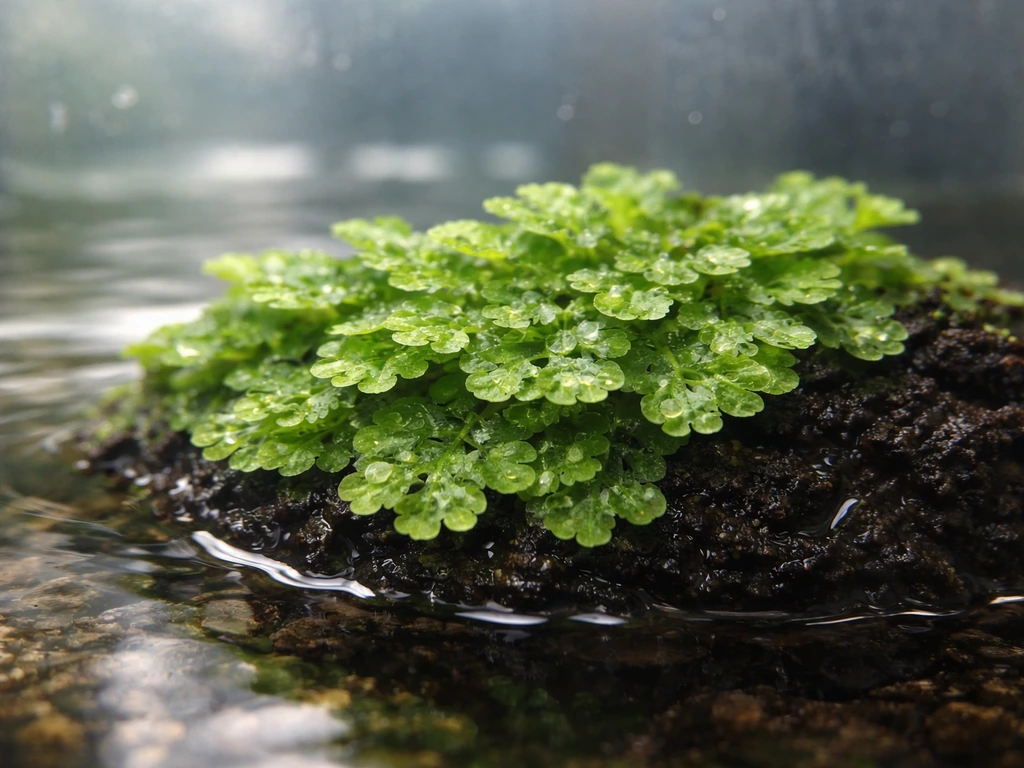
The dry start method works especially well for carpeting plants like Hemianthus callitrichoides (HC Cuba) and Monte Carlo, which are notoriously difficult to establish underwater from scratch. Here is how to do it:
- Set up your substrate as normal in the tank. Mist thoroughly with dechlorinated water until the substrate is saturated but not flooded.
- Plant your carpeting or foreground plants into the moist substrate, pressing them in firmly. Add hardscape as desired.
- Seal or cover the top of the tank with plastic wrap or a glass lid to trap humidity. You want humidity near 100% inside the tank to prevent the plants from drying out.
- Place the tank under appropriate lighting (40 to 60 PAR works well) and run the photoperiod for 8 to 10 hours daily.
- Mist daily to keep the substrate moist. Watch for mold and remove any affected plant material immediately.
- After 4 to 8 weeks, the plants should have carpeted the substrate with a healthy root system. At this point, begin slowly flooding the tank by adding small amounts of water daily over one to two weeks rather than flooding all at once.
- Once fully flooded, begin your normal water column fertilization and CO2 routine.
High humidity during the dry phase is the single most important variable. If the humidity drops too low, plants will dry out and the method fails. Sealed setups with periodic misting maintain the moisture plants need to transition to their aquatic form smoothly after flooding.
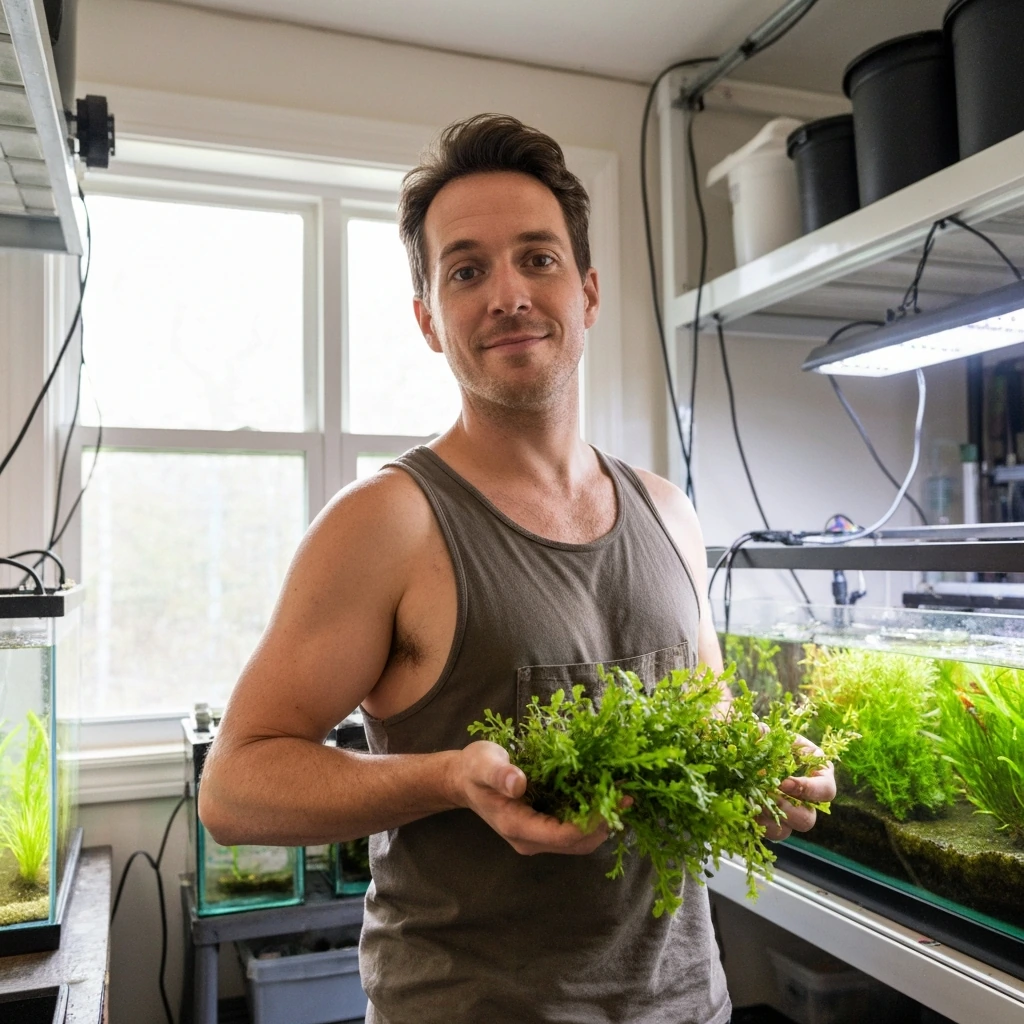
You can also grow aquarium plants emersed long-term outside the tank entirely, which is useful for propagating stock, conditioning new plants before introducing them, or experimenting with new species. Set up a shallow tray or container with moist substrate, keep it in a humid environment (a greenhouse tent works well), and grow your plants above water. Emersed growth is often faster and more robust because plants can access CO2 directly from the air. When you are ready to bring them into the aquarium, trim the emersed leaves, replant the crowns or cuttings, and expect the same brief melting and transition period described above before new submerged leaves emerge.
Whether you go the dry start route or grow emersed stock to fill in your aquascape faster, the payoff is the same: plants arrive in your tank with strong root systems and established crowns, which means faster establishment and less early algae pressure than starting entirely from scratch underwater.
FAQ
How long does it usually take to see new growth after I plant my aquarium?
In most tanks, you should expect some signs of new submerged growth within 2 to 4 weeks, especially if you bought plants that were already adapted to aquatic conditions. If your tank is very young or CO2 is inconsistent, early growth can lag while plants complete the underwater transition, but roots should still start anchoring in that window.
Can I add plants before my tank is fully cycled?
You can plant early, but keep expectations realistic. A new tank often has unstable ammonia and nutrient cycling, which can stress fish and indirectly affect plant balance. If you do plant during setup, focus on stable light, start CO2 promptly, and avoid heavy nutrient dosing until nitrates are measurable and filtration is functioning reliably.
What’s the easiest way to prevent algae when I’m learning how to grow aquarium plants?
Algae control is easiest when you adjust one limiting factor at a time rather than chasing symptoms. Start with moderate light, ensure CO2 is actually reaching the plants (not just injected), and keep nitrate from dropping too low. Then, if algae appears, reduce light intensity or shorten the photoperiod for a week while you verify CO2 stability.
My plants are melting, but CO2, light, and nutrients seem fine. What else could be causing it?
Check handling and placement details. For example, epiphytes often melt when the crown or rhizome gets buried, and stem plants can rot if cuttings are planted too deep without enough stem exposed at the right intervals. Also verify that hardscape attachments are secure and that roots are not constantly being knocked loose during maintenance.
Should I dose fertilizers even if I don’t test often?
If you cannot test at least nitrate weekly, choose a conservative routine. Overdosing iron or phosphates without feedback can make algae worse in some setups, while underdosing leaves deficiencies that look similar to algae-friendly imbalance. A practical middle ground is using a complete all-in-one at the lower end of the label and adjusting based on nitrate and plant appearance over time.
How do I know whether my problem is a light issue or a CO2 issue?
Use behavior and timing cues. If you see algae flare shortly after lights come on, it often suggests carbon limitation (CO2 too low or not reaching plants) relative to light. If plants slow down as a whole but algae is minimal, CO2 might be adequate and light or a specific nutrient could be limiting instead.
What PAR target should I use if I have mixed plants, like Java fern plus stem plants?
In mixed tanks, aim for a level that supports your most demanding plants without crushing the low-light species. A common approach is targeting the midrange, then placing Java fern and anubias in lower-shadow zones (near the substrate edges or behind taller plants) while keeping stem plants higher under the brightest area.
How do I choose between root tabs and fertilizing the water column?
Use root tabs when the plant is a heavy-root feeder and you’re using inert substrate (gravel or plain sand). Use water-column nutrients to support overall plant health, especially for plants that take a meaningful share from the water. If you have active substrate, you can usually start with lighter tab use because roots already access stored nutrients.
How many plants should I add at the start?
Avoid going either extreme. Adding too few plants can let excess light and CO2 go underutilized, increasing early algae risk. Adding too many at once can stress roots if you disrupt them during planting. A practical approach is to stock enough biomass to “consume” what you plan to supply, then scale up with additional cuttings after you see stable growth for a couple of weeks.
What filter settings are best for a planted tank with injected CO2?
Minimize unnecessary surface disturbance. Strong spray bars and canister flow are good for circulation, but avoid churning the surface or aggressive ripple patterns that off-gas CO2. If you use a canister with multiple outlets, keep outputs aimed to move water through the plant zone while maintaining a calm, smooth surface.
How do I stabilize CO2 if my diffuser or reactor isn’t working well?
First check distribution, not just injection volume. CO2 that bubbles up quickly without spreading across plant leaves may read “on target” at the drop checker while plants still experience limitation. Verify that CO2 flows evenly through the tank, adjust diffuser placement, and ensure the return flow does not immediately drive injected gas straight to the surface.
Is a drop checker always enough, or should I also use pH estimation?
A drop checker is a great practical tool, but it can lag during changes and depends on your reference KH solution. Using the relative pH drop method gives you a second data point, which is especially helpful when you are diagnosing fish stress, inconsistent injection, or when the tank’s buffering changes over time.
Can I run a split photoperiod long-term, or is it only for new tanks?
It can be used long-term, but you should still adjust to plant response. Split lighting is most helpful during early stabilization because CO2 is often still settling. If your plants are stable and algae is under control, you can gradually return to a single block photoperiod to simplify your routine.
Why are my new leaves yellow but older leaves look okay, and what should I change first?
Yellowing pattern matters. If new growth is yellowing while older leaves remain greener, that often points toward iron or another immobile micronutrient limitation. Before increasing everything, confirm you’re not burying crowns or rhizomes (for epiphytes), then adjust micronutrient dosing slightly and re-check after about one to two weeks.
Can I grow aquarium plants without CO2 injection?
Yes, but your plant choices and lighting strategy must fit low-tech growth. Choose forgiving low-light species and keep light moderate so plants can consume available nutrients and carbon without constantly triggering algae. If you want faster establishment or demanding species like many carpets, CO2 injection typically makes the difference.
What’s the most common mistake people make with dry start method (DSM)?
The biggest failure point is insufficient humidity during the dry phase. If the setup dries out, plants cannot transition smoothly after flooding, and they may brown or die before they ever root underwater. Use a sealed container or greenhouse-style humidity control, then mist consistently so the plants stay actively hydrated.
Once plants are established, do I still need to run fertilization and CO2 the same way?
Usually not. As plant mass increases, demand rises, and as the substrate ages (especially active substrates), nutrient availability can drop. Reassess every few weeks by watching plant growth rate, checking nitrate trends, and confirming CO2 consistency, then fine-tune dosing and light rather than locking the original amounts forever.